Mom, I made you a mocha this morning…
Wish you were here to drink it with me. But that’s not really possible with you at home 180 miles away. We could talk and laugh till our sides hurt about the adventure it is to be a mom, even though we’re at different stages. Since I became a mom, sometimes I think back to when I was growing up and am awed at the patience you had! Always calm and taking things in stride. For example, remember that goat we had? I could go on and on about memories, like the creative way you gave me a life-sized doll for my 6th birthday, the fun we had having our own little garden plots out of your big garden, jumping in the car to go see the ‘billowing smoke’ that turned out to be a cloud, how I openly told my teenage girlfriends that you are my best friend, etc., but since this is a cooking blog, I’ll stick with stuff in the kitchen.
Thanks for teaching me how to cook and bake. Not every 12-year old can make pie crusts, but you taught me young. And I’m sure that in my young days, you thought about how it would’ve been easier to just make things yourself instead of dealing with stuff like batter splattered on the ceiling or having to throw the whole batch away because I got ‘teaspoons’ and ‘cups’ mixed around when I was putting the salt in. But the thing I remember the most is: “An ounce of prevention is worth a pound of cure.” That was said when I’d start peeling eggs or potatoes or making some other mess right on the counter instead of putting down a paper towel or plate first. After awhile, it got to the place where you’d only have to say, “An ounce of prevention…”. Not sure why that was so hard for me to learn, but I did learn… I don’t do that anymore.
Here is a picture of my mom and my mother-in-law… another mom who’s had an impact on my life. She’s done alot of babysitting since we live in the same area and she’s like a walking medical book when one of us has a problem. Very handy and helpful! Each of the moms had 6 children… I’m second to the oldest of 3 boys and 3 girls, Shannon is the oldest of 6 boys. On the picture, they are with my youngest daughter Tiffany, who was 5 days old. She’s surrounded by grandma love.
My mom is the one in the purple holding the baby and my mom-in-law is in the black. I can’t tell you both how much you mean to me and how much I love you and how thankful I am that you love your granchildren so much! I know how blessed I am to still have my moms, and I especially think of it every Mother’s Day. Other things I especially think about on Mother’s Day are the 3 babies I lost via miscarriage, those of you who don’t have your moms anymore, and those of you who are a mom only in your dreams. I’ll breathe prayers especially for you throughout the day.
——————————————–
And now, here’s the mocha recipe that I’m still sipping. Shannon is sipping black coffee because it goes better with the raspberry cream cheese cinnamon rolls that were eating. HE thinks it goes better with it anyway. I can’t handle black coffee. He usually uses cream and sugar, but not when he’s eating something sweet. How do you drink your coffee? I’d LOVE to know! And do you like it black too when you’re eating a sweet roll with it?
Mocha, but don’t think Starbucks!
1/2 cup chocolate chips
4 cups hot brewed coffee
1/4 cup half-and half cream
2 to 4 Tbsp. sugar
Whipped cream
Melt the chocolate chips and put in a plastic bag. Snip of a tiny piece of the corner and pipe “MOM” onto plastic wrap.
Put in the freezer until hard (at least 10 minutes). Stir the coffee and rest of the chocolate together.
Add the half-and-half and sugar.
Serve in mugs with whipped cream and “MOM” garnishes. Yield: 4 sevings.
Ummm, the mocha stuff looks good. I’m gonna have to try it. ~I just started drinking coffee and I need a lot of cream with mine yet. Maybe one day I’ll be one of those all time coffee drinkers that can down a whole cup of black.
Monica on May 12th, 2008 7:24 am
Looks good!! But, I still like my black coffee the best!! Definitely black coffee with something sweet!
I agree with you that you have two wonderful moms. And the raspberry cream cheese cinnamon rolls are wonderful with BLACK coffee.
Berneice on May 12th, 2008 11:31 am
Thanks for the recipe. I would love to know how to make lots of flavored coffees. I like my PLAIN BLACK coffee the best, but on cold winter days I need something all day long:)
This is one of those things that you CAN’T do last minute because it takes the crockpot, yet it doesn’t take much of your time and you CAN do it on a busy day. Or on a day where you’ll be gone all day… say, if you’d go scrapbooking about every Tuesday or something. And it would also work great for a crowd. And they are just tops!
Hey! Wait! Did someone say scrapbooking? How about we skip the beef sandwiches and just talk about scrapbooking. I love scrapbooking! And someday, I’m going to start putting scrapbooking on here now and then. Scrapbooking recipes, that is. This is, after all, Kitchen Scrapbook. To me, the definition of Kitchen Scrapbook is: The best of both worlds. I have done a few recipes and it’s actually a bit harder than scrapbooking people because there isn’t alot of personality going on, but it’s still a load of fun. But, since I wasn’t actually serious about skipping the beef sandwiches and talking about scrapbooking instead, let’s get on with them…
There is no recipe, but the ingredients are:
Beef roast
About 1/2 cup of water
Salt & pepper Chef Paul Prudhomme’s Meat Magic seasoning (or seasoning of your choice)
2 bay leaves
Half of an onion, sliced
Barbeque sauce
Hamburger buns
Shredded cheese
Here’s what I did for a 6:00 supper. Around noon, I put the roast, water, seasonings, onions, and bay leaves in the crockpot and turned it on High. It wasn’t frozen. If you’re using a frozen roast, you may want to start it a couple hours earlier. It was also only about a pound of meat. We have my husband, a 5-yr-old, a 2-yr-old, and me, around here for diners and since I don’t like leftovers, I usually cook small.
Let it go all afternoon and around 5:00, take the bay leaves out, trim off the fat, and shred the beef. As you shed it, most of the liquid will ‘disappear’.
This is how much barbeque sauce I used. I dumped it in, then put a little water in to rinse out the bottle (I know, so thrifty… I’ll bet I kept from throwing away a whole Tablespoon of sauce!) and dumped that in too. A little more barbeque sauce and a little less water would’ve been ideal for more flavor, but I guess that’s the thing of always just doing it without a recipe… it’ll always get a little different. Plus, to do that, I’d have had to break open a new bottle of sauce, just to get a little more. Oh, what a bother.
Cover and turn the crockpot to Low.
Around 5:50, toast the buns (I used the toaster). I did not take a bit out of that one piece, part of it stayed with the bun beside it in the bag.
Oh, now would be a good time to turn the broiler on High.
Top bun halves with some beef.
Then the cheese.
Then put them on the top oven rack under the broiler (which has already been turned on High). Let them in there for 1 minute and 20 seconds, then take them out.
Perfection! Now eat them with a fork.
You could also top it with another toasted bun half if you’d prefer a regular sandwich, as opposed to open-faced. These are really good and very little effort! And it’s a hit around here… both with the cook and the diners.
Comments
5 Responses to “Beef Open-Faced Sandwiches – use your crockpot, then your broiler”
Monica on May 10th, 2008 8:34 am
I love BBQ beef sandwiches!! I can chunk beef in pints and it’s quick and easy to open up a can and mix in seasonings and BBQ sauce and bake for awhile. I never thought of eating them “open-face” with cheese. I have to try that next time!
Preston Martin on May 10th, 2008 12:15 pm
WOW that looks good! My stomach started growling and i had to go eat something after I look at the post. The beef I get here taste like it was bad and then was microwaved.
(for those who don’t know me I am in Iraq as a firefighter)
An easy yummy-sounding recipe showed up in my email Inbox on Tuesday. It was from my cousin-in-law, Sharon. Is cousin-in-law a proper term? I don’t know, it sounds strange. Anyway, she’s married to my cousin. Not like you need to know that or anything. Thanks for the recipe, Sharon. They were easy and fast and delicious. And I had fun playing around with them too… bonus pictures at the end.
It only takes 4 ingredients. I like recipes like that because there’s more of a chance that I’ll have everything on hand! Although, yesterday, I wanted to make potato salad (way more than 4 ingredients) and I had everything except milk! Really, who runs out of milk?! I did have chocolate milk, but I didn’t think that would work too good. Anyway, that has gotta be one of my biggest cooking pet peeves… going to make something and not having all the stuff. That’s why I need to live nextdoor to the grocery store.
So, here’s our easy 4-ingredient recipe.
Cherry Cheese Danish
1 tube (8 oz) refrigerated crescent rolls
4 Tbsp. cream cheese, softened
1 cup cherry pie filling (or your choice) I used strawberry. 1/2 cup vanilla frosting
Separate crescent dough into four rectangles. Place on an ungreased baking sheet; seal perforations.
Spread 1 tablespoon cream cheese onto each rectangle.
Top each with 1/4 c. pie filling.
Bake at 375 for 10-12 minutes or until edges are golden brown. Cool for 5 minutes. Place frosting in a microwave-safe bowl; heat on high for 15-20 seconds. Drizzle over warm pastries. I didn’t have frosting, so I mixed 2 Tbsp butter, about 2 Tbsp. milk, about 1 1/4 cups powdered sugar, and a bit of vanilla. That made about exactly 1/2 cup!
Serve warm. Refrigerate leftovers (if there are any ). Yield: 4 servings. I think I should’ve let them cool a bit more before glazing. It all ran together and you can’t see the striping anymore.
Here’s a note that Sharon wrote at the end: I don’t usually have vanilla frosting on hand, so I make my own powdered sugar glaze. I add almond extract for cherry pie filling, a little cinnamon for apple, lemon for blueberry, nutmeg for peach, etc. Don’t you just love that sentence? She’s such a good creative cook! Wish I’d think of stuff like that!They’re quick and perfect for a special Sunday morning breakfast, or for company, or for just anyhow with coffee. And they’re even good made light, which I usually do (reduced fat crescent rolls and cream cheese).
Bonus:
I decided to play with them a bit…
We have a regular flat one, a pinwheel, a turnover, and a spiral. The spiral turned out to have way too much filling in it and made a mess when I rolled it up (like a little jelly roll). The turnover and spiral should’ve been baked a few minutes longer.
The pinwheel was my favorite (not for taste… they all tasted the same). It was easy to do and looked a bit fancier. Next time, I think I could make them neater, too. It was Tiffany’s favorite too. She said, “I want dat one” about 10 times while I was taking the pictures and her little pointer finger kept coming into view in my camera window whenever she’d say it.
These pastries are so good! Perfect with a cup of coffee! I just made them for the girls and I, and since the girls eat about as much as a chickadee does, there was actually some left over. The next morning, I ate another one and instead of warming it up, I ate it refrigerator cold and it was really good that way too!
Try them! Try them! Try them!
Comments
7 Responses to “Make these danish pastries for breakfast tomorrow morning!”
Sharon on May 8th, 2008 5:14 pm
awwww, kay, you didn’t have to mention me…now I feel like a celebrity or something. ???? I think YOU’RE the one that’s creative–like I’ve never thought of all the different things you could do with ’em. Love that spiral too, think I’ll do that sometime!
Freida on May 8th, 2008 5:26 pm
Try them I will!!!!
JoAnn on May 8th, 2008 6:10 pm
Sounds perfectly delicious–and I have everything on hand! Sounds like a good bedtime snack!
Those look really good! I think Elvie would like them too. I have cream cheese, blueberry pie filling and apple pie filling on hand but no cresent rolls. Maybe I should head over to JoAnn’s for a quick bedtime snack.=)
Quote from my last Out of My Comfort Zone post: “Up next week on Out of My Comfort Zone cooking… Baked Apples and Cheese. Yes, they are mixed together in the same dish, and yes, that would be cheddar cheese, not cream cheese. No, I didn’t make it yet. But I’m looking forward to it.”
Well, here it is, in all its syrup-y goodness:
I was expecting rave reviews, but well, um, didn’t get any. Not even from myself. It was good, but not exceptional. While I was eating my portion, I kept thinking I should try it sometime without the cheese… the rest of it was so scrumptious and that toasted pecan streusel topping on it was to die for, I could’ve eaten that stuff plain! You know, skim along the top with my spoon when nobody was looking.
I took it to a family supper and asked for feedback on it. The feedback was that the cheese was too chewy and that apples don’t go with cheese. They said it was good though, just not ‘make again’ quality. My MIL liked it the best, although what she raved about mostly was the toasted pecans. They really were good, but then most things are good if they’re tossed with melted butter and toasted in the oven!
So, here’s the recipe and then we’ll talk about cheese problems at the end. This recipe is taken from the Famous Daves Backroads and Sidestreets cookbook. That in itself is another reason I thought this recipe would be a keeper… that cookbook is loaded with keepers!
Baked Apples and Cheese
1 cup packed light brown sugar
1 tsp. cinnamon
2 Tbsp. butter
4 cups sliced peeled Granny Smith apples
3/4 cup flour
1/4 cup freshly grated Parmesan cheese
1 1/2 cups sharp cheddar cheese, cut into 1/2-inch cubes
Mix brown sugar and cinnamon in a bowl. Cut in butter until crumbly. Stir in apples. Mix flour and Parmesan cheese in a bowl. Add sharp Cheddar cheese, tossing to coat.
Add to apple mixture and mix well. Preheat the oven to 350 degrees. Spoon the apple mixture into a buttered 9×13″ baking dish.
Bake for 20 minutes.
Lightly stir.
Sprinkle with Pecan Streusel Topping.
Bake 10 minutes more. Yield: 5 – 6 servings.
Pecan Streusel Topping:
1/2 cup chopped pecans
1 tsp. melted unsalted butter
2/3 cup flour
1/2 cup packed light brown sugar
1 tsp. cinnamon
1/8 tsp. ground nutmeg
1/2 cup unsalted butter
Toss the pecans with 1 tsp. butter in a bowl. Spread in a round baking dish. Preheat the oven to 350 degrees. Bake for 13 minutes or until lightly toasted, then cool.
Combine flour, brown sugar, cinnamon, and nutmeg in a food processor container. Pulse in short bursts to mix. Add 1/2 cup butter. Pulse in short bursts until the mixture resembles coarse crumbs the size of peas. Stir in the pecans. Store, covered, in the refrigerator. Yield: 2 cups. This topping can be used for other stuff too… layered in the middle of coffee cakes or topping for crisps and cobblers.
Now, about the cheese… the problem was that you’d hit a patch of chewy cheese, which is a good thing on a pizza or in a grilled cheese sandwich, but it tasted a little weird surrounded by sweetness.
Here are my ideas:
—maybe shredded cheese or smaller chunks would work better
—maybe a more ‘melty’ cheese, like American, would blend in better
—maybe I should’ve served it piping hot
—maybe this recipe would be THE best apple crisp recipe after omitting the cheese completely
I want to try this on my mom sometime and see what she thinks. She loves ‘out of her comfort zone’ stuff and trying new things. I could make half a pan with no cheese and the other half with cheese, using some modification ideas that I had… or modification ideas that you might have.
Not sure what next week’s “Out of My Comfort Zone’ food will be. I haven’t had any inspirations yet.
Comments
9 Responses to “Baked Apples and Cheese – Out of My Comfort Zone Cooking #2”
amy on May 7th, 2008 4:26 am
I agree with family. Cheese and apples don’t belong.:) My mom likes a chunk of cheese and a raw apple together…but baked… The recipe sounds like it would be scrumptious-minus cheese:) especially the topping. Your family must love the good food you so faithfully make.
Freida on May 7th, 2008 6:17 am
You were brave to take it to a family supper. I would not have had the nerve. I can not seem to put the taste of apples and cheese together. :/
Cheddar and apples are a classic combo — but I think the cheese is traditionally baked into the crust of an apple pie. So it doesn’t get chewy or anything, it just gives a nice flavor.
If you love streusel toppings, I have a recipe you might like for sweet potatoes w/ pecan streusel.
Sorry, I agree with the other comments. I just can’t wrap my mind around the melted sharp cheddar with cooked apples! The pecans sound yummy!
Jo on May 7th, 2008 2:35 pm
I wonder if shredded cheese wouldn’t work better…and maybe putting it (in a lesser amount) in the topping instead of baking it right w/ the apples? I dunno…just what I was thinking. The apple pie we baked in home ec years ago had shredded cheddar cheese in the crust, and it was delish.
I think you’re brave, too! At least it wasn’t terrible…just…weird.
I think maybe shredded cheese, and not sharp, but mild. I think apples and cheese can go together if done right. Do you know what snitz pies are? Like turnovers with dried apple fillin. Well anyway, I think those are good eaten with a piece of cheese. haven’t had any for a while, so I don’t remember what kind of cheese is best with them!
lisa on May 8th, 2008 1:35 pm
i love sliced apples and cheese together, but haven’t ever tried them baked together.
do you have a good spaghetti recipe? i just use sauce from the store, cook some noodles, brown some burger, stir it all together…marc loves spaghetti, so i’d love to learn to make it better than boring.
Lisa, I don’t have a good speghetti recipe… I buy Ragu pasta sauce (the kind that says ‘Mushroom’ on it), and use bought frozen meatballs and serve that over speghetti. I usually sprinkle some Italian seasoning into the sauce too. We really like it, but yeah, mine could definitely be improved on too! My favorite thing when we have it is Lexi calling it ’skabetti’.
Today is Cinco de Mayo. I’m not going to go into that and show my ignorance in history. I do, however, know that it’s not Mexico’s independence day… For a long time, I thought it was because ours is “Fourth of July” and I thought maybe that’s the format for independence holidays, using the date and putting the number first. Ok, now I’m showing some ignorance! Let’s get to the food.
One of the lines often used to describe Mexican food is ‘south of the border’. We live about as far north as you can get without being a Canadian, so around here if you use that term, you’d be most likely referring to the Canadian border, not the Mexican border. So, I’ll stay away from using that line.
The first recipe today comes from a Country Woman magazine, the Jan/Feb 2007 issue, to be exact. I was glad to see a couple of the things at the end of the recipe having ‘optional’ at the end. Guacomole: I’ve tried it, with an open mind, and I just cannot eat the stuff. Avacados are the same way. I got a Cobb salad one time and ended up picking out all the avacado and setting it aside. Black olives: they’re ok, I don’t mind them in stuff, but I don’t eat them on purpose.
Don’t be expecting Mexican crusine here… I don’t eat REAL Mexican food except at restaurants. I love Mexican food! I get cravings for it, so it’s unfortunate that we live 1 1/2 hours away from a Mexican restaurant, not counting the fast food ones like Taco Johns. Closest I come to making Mexican in my own kitchen is Wet Burritos, Steak Fajitas, Nachos, and now today:
Mexican Lasagna
1 1/4 lbs ground beef
1 medium onion, chopped
4 garlic cloves, minced (I used the stuff from a jar, featured at the end of this crabmeat post)
2 cups salsa
1 can (16 oz) refried beans
1 can 15 oz) black beans, rinsed and drained
1 can (10 oz) enchilada sauce (I stared and stared at the shelves at the store till I finally found enchilada sauce!) 1 can (4 oz) chopped green chilies
1 envelope taco seasoning
1/4 tsp. pepper
6 flour tortillas
3 cups (12 oz) shredded mexican cheese blend, divided (I unded up using a bit more, maybe 4 cups or so) 2 cups broken tortilla chips
Sour cream, sliced ripe olives, guacomole, and chopped tomatoes, optional
In a large skillet, cook beef, onion, and garlic over medium heat until meat is no longer pink; drain. Stir in salsa, beans, enchilada sauce, chilies, taco seasoning, and pepper; heat through. Here’s a picture before it got stirred. The hamburger is almost covered, but you should be able to see all the different ingredients so far, except the onion and garlic that’s already fried w the hamburger.
And here it is all mixed together. Looked like a tremendous amount of meat mixture for only 6 tortillas!
Spread 1 cup sauce in a greased 9×13 baking pan. Huh? Sauce? What sauce? There was no sauce in the ingredient list that doesn’t get mixed in and it calls the meat stuff ‘meat mixture’. But, I assumed it meant the meat mixture for the sauce anyway. Layer with 2 tortillas,
a third of the meat mixture,
and 1 cup of cheese.
Repeat layers. Top with remaining tortillas and meat mixture. The pan will be FULL.
Cover and bake at 375 for 30 minutes.
Uncover; sprinkle with remaining cheese and top with tortilla chips. Bake 10-15 minutes more or until cheese is melted. Let stand 10 minutes before serving. I always like when recipes say that… gives me time to take pictures.
Garnish with sour cream, olives, guacamole, and tomatoes if desired. Yield: 12 servings.
I was a bit leary about this stuff because of all the ingredients in the meat mixture, but it was really good! I’d make it again. Also, I think I’ll try tweaking the Wet Burrito recipe to incorporate some of the ingredients that are in this meat mixture. The chips on top added a nice crunch. We also ate it with chips and Lexi thought it was funny that our chips were our forks, then we’d ‘eat our forks along with the bite’. It’s got some kick to it… made our noses run. It’s very filling for no more than you eat.
And for dessert, we had:
Mexican Fried Ice Cream
1 pt. vanilla ice cream
1/2 cup crushed Corn Flakes
1 tsp. cinnamon
2 tsp. sugar
1 egg
Oil for deep frying
Honey
Whipped cream
Scoop out 4 balls of ice cream.
Return to freezer. Mix crumbs, cinnamon, and sugar. Roll frozen balls in crumb mixture and return to freezer.
Beat egg and dip frozen balls in egg, then roll again in crumbs. (I had to make more of the crumb mixture, most of it was used up the first time I coated the balls.)
Freeze until ready to use. For thicker coating, repeat dipping in egg and rolling in crumbs. I did the extra coat. When ready to serve, heat oil to 350. Place 1 ball in oil. Fry for 1 minute. They floated, so I turned them with a fork a few times.
Remove from oil and place on dessert plate. I set it on a paper towel first to soak up some of the oil. Drizzle with honey and top with a dab of whipped cream. Fry remaining balls one at a time. Balls will be crunchy on the outside and just beginning to melt on the inside. Yield: 4 servings.
I couldn’t help but put chocolate on a couple of them instead of honey. Crazy thing was, chocolate lover that I am, the ones with honey were much better!
As Dora the Explorer would say, “Yum, yum, yum, yum, yum, delicioso!”
This was fun to make and of course tasted great, but I don’t know that I’d go to the bother of making it again. It was kind of time consuming for only 4. It did settle my curiosity though that yes, you can put ice cream in hot oil for a whole minute, with only an 1/8″ wall of crust between the ice cream and oil, and not end up with a big melty oily mess. We were all pretty amazed.
Well, I need to go clean my kitchen and empty my sink. I mean, sinko. Oops, I mean, cinco.
Comments
5 Responses to “Let’s make it Mexican!”
Andrea on May 5th, 2008 9:56 am
Yum, yum, would love to eat some of that fried ice cream again! But I just don’t want to bother with all the preparing! I will have to try that lasagna! Sounds good!
Freida on May 5th, 2008 10:51 am
You’ve got a friend on the guacamole and black olives. We are big huge fans of Mexican food, but the real stuff always tastes better. The lasagna looks good though. Did you ever make the fried ice cream dessert?? It tastes the same and it is so much easier!
Ummm. Sounds wonderful. For awhile Eric thought he moved to mexico I made so much mexican food. I tried to cut back on it, but this stuff looks good so I might have to try it. I always wondered about the fried icecream. Good to know.
I make my own enchilada sauce. Like it much better then the canned stuff and it’s fairly easy. I use it when I make regular enchilada’s.
Kay, a week or two ago I was looking for a Rainbow Ribbon Jello Salad . . . (I thought you had put one on your blog a long while ago and) So I came here to look for it . . . Anyway I couldn’t find it . . .could you email it to me?
Aimee
amy on May 7th, 2008 4:23 am
That fried icecream looks like a picture out of Taste of Home or something. I am sure if I tried it they wouldn’t be round balls and the icecream would be melting all over. Okay, I am a pestimist.
Two of my favorite foods in the summer… BLT sandwiches and sliced fresh strawberries with sugar.
You know those hot days when you still need to eat, but just the thought of sitting down to a cooked meal makes you sweat. BLTs fit the bill like nothing else does… it’s substantial, but not hot. And the fresh strawberries, you can’t get much more summer-y than that. Unless you eat watermelon, out in the yard, with juice dripping off of your elbows. Oh, and don’t forget about fruit pizza… that’s gotta be the ultimate summertime dessert! Makes me hungry for some now.
But, so far, I can only dream of summer… while eating my BLT and fresh sliced sugared strawberries in the house. Looking outside at the lawn that is varigated green and brown, lightly coated with snow from last night. Sighing at the thermometer that has a hard time pushing up past 55. Trying to picture the bare trees with green leaves on them again. Bending over my flower bed, looking for a sign of life from the bare spot where my tulips usually eventually show up. Telling my girls that yes, don’t you remember, it does get warm enough to run outside barefoot and with no jacket.
Here in northern WI, we’re always chompin’ on the bit for Summer to get here, but it pretty much always comes at the same time… that last snow in May (I doubt the one last night was the last), gardens being planted the end of May, several frost scares. But when our summers get here, they are BEAUTIFUL! Just perfect. That’s why we brave the ice and snow and sub-zero weather for months, just so we can get those 3 months of summer. It’s all worth it. And if you ever want to come see for yourself, don’t forget your boat… we’ve got lots of lakes around here!
Back to those BLTs…
Shannon and I were talking about BLTs several days ago and I got such a craving for them and couldn’t get them out of my mind until I made one. Yeah, cravings like that can come when you’re not pg!
So here it is.
Nothing fancy. And they’re quite easy to make. Bacon, lettuce, and tomato layered between 2 pieces of toast with mayo on them. Now did YOU get a craving for one? 🙂
And the fresh strawberries, they’re going on sale pretty often at Marketplace, so I can’t resist keeping them around.
I wash and cap them (or it it uncap? decap? decapitate? whatever, take the stems and caps off), and then slice them with an egg slicer. Works great!
Then, sprinkle them generously with sugar, stir them, let them sit for at least 5 minutes, stir them again, and eat. Ok, I know you didn’t need those instructions.
Speaking of cravings that you can’t ignore… I saw these on Cookie Madness on Friday and HAD to make them. Here they are.
Try them! They are SO good! They’re called ‘Marbled Peanut Butter Brownies’ (that’s a link to the recipe). And her pictures are awesome… they make you feel like you could pick the cookies right off the computer screen. These bars taste like a candy bar. Peanut butter and chocolate. Don’t let the multiple steps scare you off. The directions are easy to follow. And they’re well worth the effort! Mmmmmmm!!! I found Cookie Madness just recently. You will be glad to have the link. It’s a goldmine of all kinds of cookie/brownie/bar recipes, plus some other recipes and tidbits too.
Have a good weekend! And look for a couple Mexican recipes coming up on Monday… Cinco de Mayo.
11 Responses to “BLTs, Fresh Strawberries, Marbled Brownies, and Summer!”
Denise on May 3rd, 2008 12:52 pm
Looks so good. I also got so hungry for a BLT that I bought stuff for it too. As far as the strawberries. The local strawberries from Lousianna (hardly anyone grows them around here, apparently they do not grow well) are already over for the year. Was so good a couple of weeks ago to have fresh strawberry pie, shortcake and just simply crushed strawberries with sugar over ice cream. And fresh local tomatoes probably will soon be in although mine in the garden just have 1 or 2 blossoms on. And you say you get hot in the summer. I say you don’t know what hot really is till you live down South I’d love your summers but I like our longer fall and spring. Can’t have it all, so guess I’ll be content where God has me placed.
amy on May 3rd, 2008 12:56 pm
Those brownies sound wonderful except I made chocolate crinkle cookies today and my stomache aches from all I ate! I can’t wait for tomatoes and strawberries. NO snow here,but plenty of wind.
Monica on May 3rd, 2008 1:28 pm
Mmmmm, I love BLT’s!!! Sadly, tho, I have to eat them by myself because my husband hates tomatoes!! He’s not a big meat eater and I don’t think he’d be too fond of a Bacon and Lettuce sandwich either!! I was trying to come up with some kind of sweet thing to make for this weekend and those Peanut Butter Brownies look like just the thing!! I think I’ll try them!! Can’t wait for those Mexican recipes!!
Hi! I just had to give a shout out to a fellow Menno! I’ve been lurking your blog for some time now and just right now realized you are Mennonite! Me too!
I actually don’t ever remember having a BLT sandwich. Add a hamburger to the mixture and I am pretty sure I had that. I guess I must really be from the back sticks. I am glad you clarified that about the cravings.=) The bars look good too. I’ll have to check them out. Off to wondering how BLT’s do taste…
My girls would have fun making the fruit pizza with me. It’s so beautiful and colorful. We just had BLTs for lunch on Friday – for the first time since last summer.
Freida on May 4th, 2008 2:30 pm
Oh wow, that all looks so good. My husband is not a huge fan of BLT’s, so I hardly ever make them. But I do love them. Our strawberries are looking good now, so I’m excited about eating them fresh from our garden in a month or so. I imagine your summers are well-looked forward to and appreciated a lot, but I too am glad we have our spring and fall. Sorry, but I think Ohio is better.
Where did you get such healthy looking tomatoes? Way too early in MI to find yummy tomatoes…but you’ve triggered fond childhood summer memories of these two-fisted sandwiches. And the aroma of bacon frying makes me levitate. Then add a touch of Miracle Whip to the trio and I’m a happy girl (ok ol’ girl).
You know what? Tomato season or not your pictures have talked me into it–tonight is officially BLT night.
Ok now you have me craving a BLT (hold the T for me please). Those P-Nut Butter brownies are a must make. If I didn’t already have my Mothers Day menu planned for next weekend, I would be making those….oh well there is always the next weekend.
This week’s cooking adventure is… Flaky Crabmeat Bundles. I’d love to know, does that sound like something you’d just up and make without thinking twice?
My husband, Shannon, reads my blog… ok, yeah, I guess you’d know that since I told you he’s my tech support and the one that got it up on the web and customized it for me. Anyway, last night, I said, “You know the thing about cooking something once a week that’s out of my comfort zone?” He said, “Yeah, I saw it in your last post.” I said, “Well, first up is Flaky Crabmeat Bundles”. He was in the next room and after a slight pause, he appeared in the doorway and said, “HUH?!” I think he was afraid he had heard me right.
Well, I made them…
First, while thinking about making them, I had to get over the ‘crab’ thing. Ewwwww! And then it didn’t help matters when I opened the can. Flaky describes it for sure.
Next, there was the thing of phyllo dough. I had bought some awhile ago because it kind of intrigued me, but never got the nerve to try it. I was looking forward to that part, though.
This recipe comes from a Pampered Chef Stoneware Sensations cookbook. Since I only have one piece of stoneware, when I use that cookbook, I start by looking in the Stoneware Index (which is categorized by the different stoneware pieces used) instead of the Recipe Index. And, no, I don’t really want to own more than one piece… I should say that quietly because I know there are some die-hard stoneware fans out there. I am, however, a big fan of Pampered Chef and have LOTS of things and there are still more in that catalog that I think I can’t live without. Well, anyway, we can talk about Pampered Chef some other time, let’s get on with these crab things…
Flaky Crabmeat Bundles
2 cans (6 oz. each) lump crabmeat, drained (I couldn’t find anything that said ‘lump’ on it. Mine ended up looking more grated.) 1 container (8 oz) chive and onion soft cream cheese
2/3 cup fresh pea pods or sugar-snap peas, coarsely chopped
1/4 tsp. salt
1 medium carrot, shredded (1/2 cup)
2 garlic cloves, pressed (don’t miss the lazy man’s tip for this at the end of the post)
6 sheets frozen phyllo pastry, thawed
2 Tbsp. vegetable oil
Sauce:
1/2 cup light soy sauce
1/4 cup balsamic or white wine vinegar
2 tsp. peeled fresh ginger root (I used about 1/3 tsp ground ginger… I found online that 1 tsp. ground ginger is equal to 2 Tbsp. fresh ginger root, although not as good. I looked for ginger root for quite awhile in the produce section at the grocery store, but couldn’t find it. We live in a little town.) 2 tsp. sesame oil (couldn’t find that either, I used olive oil)
Preheat oven to 375. For bundles, combine crabmeat, cream cheese, pea pods, and salt in a bowl. Shred carrot.
Add carrot and garlic to crabmeat mixture; mix well.
Unfold one phyllo sheet onto an 18″ long piece of parchment paper. (Keep remaining sheets covered with plastic wrap.) They’re not kidding about that! Those sheets are paper thin and dry out SO fast. And after they dry, they break instead of bend. Using Kitchen Spritzer filled with vegetable oil, generously spray phyllo sheet. I don’t have a Kitchen Spritzer, so I used a pastry brush. Worked ok, but a sprayer would’ve been much better. Top with second phyllo sheet; spray with oil. Repeat with 3rd sheet of phyllo and oil. Trim phyllo sheets to a 16″ x 12″ rectangle. Cut thro’ all layers of phyllo to make 4″ squares. My sheets were smaller, so I only got 6 squares out of each batch.
Using small Stainless Steel Scoop, drop rounded scoops of crabmeat mixture onto center of each square.
For each bundle, bring 4 corners together at top; pinch. Place bundles on flat Baking Stone.
Bake 15 minutes or until edges are golden brown. Remove from oven and place on nonstick cooling rack. Repeat with remaining phyllo sheets and crabmeat mixture to make 24 bundles. I just made a half batch for us.
For sauce, combine all ingredients in small bowl; mix well. Serve warm bundles with sauce. I warmed up the sauce, too. Yield: 24 bundles, 3/4 cup sauce
They were good! Shannon liked them even better than I did. I liked them better with the sauce. With or without the sauce was a toss-up for Shannon. It was definitely a different taste than what we’re used to.
They’d be great to serve at a ladies’ afternoon tea party or as appetizers for a formal meal.
Back to the phyllo dough… I have over 3/4 of the pack left. I’m looking forward to using the rest. Maybe next time it’ll be for a dessert.
Just a quick tip for garlic cloves… I’ve never bought a garlic clove or used a garlic press. I use this:
It’s fresh minced garlic, found in the spice aisle, and you refrigerate it after opening. On the side of the jar, it says, “1 tsp = 1 average fresh garlic clove”. I should compare this stuff side by side with a freshly pressed garlic clove and see if I can tell a difference.
Up next week on Out of My Comfort Zone cooking… Baked Apples and Cheese. Yes, they are mixed together in the same dish, and yes, that would be cheddar cheese, not cream cheese. No, I didn’t make it yet. But I’m looking forward to it.
Comments
21 Responses to “Flaky Crabmeat Bundles – Out of My Comfort Zone Cooking #1”
Jessica on May 1st, 2008 9:24 pm
The bundles look good. I am coming over for supper the night you have Apples and Cheese…
Twila on May 1st, 2008 9:31 pm
So much to comment on…speaking of Pampered Chef, I love my garlic press! I know beyond the shadow of a doubt that I would love these crab bundles. Now I just want to know how they’d bake up on a regular baking sheet as I own no baking stones and don’t wish to. As for apples and cheese, have you ever had an Apple Grande at Taco John’s? If your Baked Apples and Cheese is anything like that, it will be scrumptious!
lisa on May 1st, 2008 10:11 pm
we LOVE an appetizer that must be just like these. i’ll have to try these out once i go grocery shopping. IF there’s anything left to spend after buying milk, eggs, butter, diapers…
Jo on May 1st, 2008 10:33 pm
P.C. stoneware is great. Took me a long time to convert, but I’m a fan now.
Way back in high school Home Ec class, we made a Dairy State Apple Pie that had cheddar cheese in it…we all thought that it would be so gross but we were in for a surprise! It was YUMMY.
I love trying different things…when I have time…and extra grocery money (what a joke!). These crab bundles look great, but I’m too tired to be tempted right now.
esther on May 1st, 2008 11:06 pm
I love crab so the appetizers sound good to me. And my husband likes cheddar cheese with his apple pie. So we might do okay with your OOMCZone food. =)
Mary Faith on May 1st, 2008 11:26 pm
I have to agree with Jo on the stoneware. I love it but it took me awhile to get used to it, too. But, as a (used-to-be) PC consultant, I better love it. The garlic press is awesome too. And that recipe… I never tried it but am sure it is wonderful. This gives me the urge to try it soon. Course I’ve never had a PC recipe that I didn’t like, no matter how weird it sounded. ???? I’m impressed with your bravery.
barb on May 2nd, 2008 4:39 am
O.k. at what section of the grocery store do you find phyllo dough/sheets or whatever its called?
They look wonderful, and they look similar to crab rangoon that you can get on a buffet at a chinese restaurant. We LOVE those. My husband would be happy if I could figure out a way to make them at home. If I can find the phyllo ????….
barb on May 2nd, 2008 4:42 am
By the way, Kay…
I can’t get enough of your website. It is the best cooking/baking blog that I have found, and I’ve been all around and seen lots of them.
You do an awesome job. Thanks for sharing, I love it.
Barb
Freida on May 2nd, 2008 6:48 am
These remind me of something very similar I’ve had at a Chinese Restaurant a few times. If its anything like those, they are good! Cheers for cooking out of your comfort zone.
Evidently the people who are thinking , “gross,” aren’t commenting today. This looks like the kind of thing I’d love if someone else would make so I could try it. I love eating something a little more exotic, but don’t like buying all the ingredients when it’s not something I’d normally buy. The dough reminds me of wonton wrappers. Is it similar? Michelle makes some killer sausage wontons using those.
Hummm, something I might eat, but I doubt my family would. I don’t like cooking OOMYCzone but maybe I should more often cause we just eat the same things all the time.
Katie Mast on May 2nd, 2008 7:56 am
O how lovely. I have that cookbook and I have not tryed them yet!!! Well i better make them this week or maybe i will make them at my next show. I dont really care for sea food but i love the crab rangoons at the chinese resturants. Someone was wondering where to get the phyllo dough, you can find it in the frozen section where they would have bread dough. Now, for the garlic i never liked garlic, cuz i would buy that stuff in the jar. But wants i got a PC garlic press i couldnt believe the difference. The aroma is enough to get your taste buds watering. You will need to get one at your next show. OR become a consultant like me and get it with your kit. HUM!!!! sounds like we have a few PC lovers on here. I love my stoneware as well, once you use it for a while, that is all you want to use. I love mine, i have bought 2 pieces at yard sales, yeah!! i was so excited. Thanks for sharing all your great ideas. I love your website.
Kay on May 2nd, 2008 8:09 am
I’m glad for the positive comments on the apples and cheese stuff! I still can’t imagine that going together, but now I’m REALLY anxious to try it.
Christy, I’ve never used wonton wrappers, but it seems like they’d be a bit thicker than phyllo. Seriously, I couldn’t believe how thin the stuff was… literally at least as thin as a piece of lightweight paper, only more delicate.
Barb, I got my phyllo dough at Walmart by the frozen pie crusts. Not sure what else is around there… oh, yeah, probably bread dough, like Katie said above.
I just found your website via Jadens Steamy Kitchen and I had to tell you I’m having a blast checking things out. So many great recipes. I have 2 boys and 2 hubby so easy and simple always works for me. I bookmarked you so I will be visiting often! Come check out my site too!
You can come here to the Outer Banks and fix those things any time you want! And we’ll make sure your crab meat is not only lump, but right out of the crab.
OH, those look so yummy! I just wish someone would make them for me to try… I’m not hearing any volunteers.
Arla on May 2nd, 2008 8:28 pm
Hi Kay, Maybe you all knew the correct pronunciation of phyllo. I didn’t. The packaging that I had when I used it had (fillo) written on it or something like that right beside the phyllo word. So I was pronouncing it “fillo”. My friend Susan who knows these things laughed at me and said, “Don’t you know? It’s Fi- (long I)lo Dough.” I argued that with my own theory, and ended by looking it up. Friends,it is FEELOH dough. So, now you know.
Kay on May 2nd, 2008 9:00 pm
Thanks, Arla! I didn’t know how to pronounce it. In my mind, I say Fi(long i)lo. Glad to know now… it may become a more common part of my cooking/baking, once I get past the thing of being a bit intimidated by it. Now, if I can just get my brain to switch to a long E!
Sharon on May 6th, 2008 7:28 am
These look good, but yeah, I’d have to get a few things I haven’t ever used–although phyllo has always intrigued me. Had to comment on the garlic. I always minced fresh garlic, then found out about the jarred stuff and decided it would be much better and quicker. Well, it wasn’t for me–the fresh has just much better flavor, I think. But really, it’s probably just what you’re used to!
Wendy on April 15th, 2009 8:15 pm
I just read this post and thought I should tell you to try the sauce with the sesame oil. It will totally add a new flavor. You should be able to find this in the Asian section at your grocery store.
Whenever Saturday evening rolls around, my cooking brain always automatically thinks pizza-crust-pepperoni-cheese thoughts. Maybe it’s because I was raised with pizza every Saturday night. So, whether it’s pulling a frozen pizza out of the freezer or calling 1-800-WE-NEED-SOME-PIZZA-DELIVERED or going out for pizza with friends or whipping up something from scratch, we somehow usually end up with pizza of some sort on any given Saturday night. If it’s a pizza from scratch night, it might be Real Stromboli (pizza variation instructions at the end of the recipe), Quick Stromboli, Saturday Night Pizza, or Redneck Double Pizza (honestly, we only made this once!).
Sometimes I feel in a rut with my cooking. Like right now. And I don’t mean just with the Saturday night pizza thing. I mean with all my cooking. Whether it’s Sunday-lunch-pot-roast or fried chicken breasts (which we have at least once a week and I really should feature sometime), it seems I kind of make the same type of things way too often.
I automatically skip over recipes that I’m not used to the ingredient combinations or that take ingredients that I’d need a dictionary for. Dishes like: Dark Chocolate and Pine Nut Crostata, Hawaiian Seafood Chowder, Rhubarb Chili Cubano, Artichokes with Tarragon Butter. I mean, really, wouldn’t you skip over the Rhubarb Chili Cubano, thinking “How could rhubarb and chili ever belong in the same dish?!”? That recipe, by the way, comes from the latest Country Woman magazine and from reading over the recipe, I saw that it is in fact regular chili with rhubarb in it!
So, anyway, I’m going to get out of my comfort zone and make myself try one recipe every week that gives me some apprehension and raised eyebrows. Who knows, I may discover that apples baked with cheese is good or that I really do like fruit in my lettuce salads.
But for today, I’ll stay in my comfort zone. Surrounded by the ingredients we know and love.
This is actually an experiment of rolled pizza… a variation in looks of regular flat pizza and quick stromboli. We had this last Saturday night. I’m quite sure I won’t make it again because it didn’t turn out as beautifully swirled as I thought it would. So, why am I featuring it then? Mainly so you know that things flop in my kitchen and because I still think it’s a neat idea and maybe you can offer suggestions to make them more attractive… there will be some troubleshooting going on at the end of the recipe.
Starting at a long side, roll up like a jelly roll.
Spray a bit of cooking spray on a sharp knife and cut the roll into 1″ thick pieces. Lay cut side down on baking sheet.
They looked pretty messy, so I gave up on the swirl effect and sprinkled some cheese on top.
Bake at 400 for 15 – 20 min or until browned.
Now, what to do different… I still think they could be an attractive thing to serve, esp for an evening snack when you have company or something. They, of course, tasted really good, but the appearance had much to be desired.
What should’ve I done different?
— Were the toppings too thick?
— Would’ve a stiffer dough done better (like frozen bread dough thawed)?
— Should’ve I skipped the extra cheese on top? Would’ve the swirls looked less messy after baking?
— Are you rolling your eyes, thinking ‘Just make regular pizza, for crying out loud!’?
— Would cutting it with a string (instead of a knife) make them look neater?
Ok, now I need to start looking for an out-of-my-comfort zone recipe… I don’t think I’ll have to look too far. I’ve got that Country Woman magazine sitting here on my computer desk.
Comments
7 Responses to “Same pizza ingredients, different look”
I think they look wonderful, as in yummy!! ???? I wonder what would happen if you baked them on a lower temperature? I know my oven seems to be extra hot and I aften bake at a lower temp than called for. Have a good one! BTW, I’m enjoying your website! ~Lavonne
I love pizza any way you slice it, but I wonder if you baked it first as in a stromboli – only rolled- then slice it after it cools for just a second. They would still be spiral looking. And I liked your idea of adding more cheese – maybe after baking, slicing then add cheese like you did and pop back in the oven til melted???? Hope YOU try it again and let us know lol
I think this is worth working out the wrinkles. They would be a hit party food, for sure. Looks like you have some good suggestions already. ^^^
And way to go on trying new things. I love trying new recipes, but I often get scared of strange sounding combinations as well. I’m finding out it’s worth it though. Who would have thought strawberry spinach salad would be good??? But it’s delicious! I would have never thought a peach or mango salsa could be good, but it has a nice…sweet/tangy flavor.
I make something similar, only I use frozen bread dough, and I slice it after baking. Also no sauce, we just dip it when we eat it, like we do stromboli.
And hopefully you’ll come up with some interesting new recipes for us! I made a coleslaw this week that had grapes and apples in it. It was pretty good, but of course next time I’d tweak it a bit.
Lori on May 5th, 2008 7:18 am
I think they look great as is- I like food that’s a bit “rustic” looking. No need for it to look absolutely perfect. And I’ll bet they tasted great!:-)
Ok, here we go again. The break is over. I had enough Tasty-Kakes and Starbucks to last me for awhile now.
I wish Tasty-Kakes would come to WI. Well, they do come to WI… but only when we bring them here from PA or FL. A couple years ago, I ordered a bunch and they were shipped UPS. For awhile, every time after that, when we’d see a UPS truck, Lexi (who was 3 at the time) would say, “Mom, let’s ask him for some Tasty-Kakes!” I guess she thought those trucks had a never-ending supply of Tasty-Kakes in them. Kind of like ice cream and a Schwans truck. Would be nice to be able to just flag one down a UPS truck whenever the Tasty-Kake urge strikes.
And since we live up in the boondocks here, our closest Starbucks is 1 1/2 hours away, so we don’t get there often. But along the turnpike, going across IN, OH, and PA, there was often a Starbucks at the travel plazas. Very nice! I tried a couple different things, plus my favorite: a caramel frappucino.
Now, back to the kitchen, new recipes, and all…
This one isn’t really a new recipe. To me anyway. You’d know that if you’d see my recipe card… it’s bent a little, it has a bit of sugar stuck to it, and it has a blue star (written by me) up by the recipe name. What first caught my eye when I was flipping thro’ the cards was the word “Irresistible”. Yeah, that wasn’t me putting that word in the title, that’s the name of the recipe: Irresistible Peanut Butter Cookies. So, I decided to try them. They were wonderful, and I’ve been making them for the last couple years. The recipe is from an Easy-to-Bake-Easy-to-Make recipe card.
One thing that was interesting is that it calls for Crisco (w the logo) shortening and for awhile, that exact recipe was on the Crisco cans. I don’t know why I had never noticed the word “Irresistible” on my Crisco can before. Now, the recipe on there is “Ultimate Chocolate Chip Cookies”. I wonder how often they change the recipes on their labels.
One other thing, I always wonder how peanut butter cookies got that trademark crisscross pattern in them. I don’t think any other kind of cookie has that and you can always tell a peanut butter cookie by it. I Googled it and there were answers like “To tell them apart from other cookies”, “They don’t taste as good without that”, “They don’t flatten by themselves in the oven”, “They did it in the 1930s and it stuck”.
Irresistible Peanut Butter Cookies
1 1/4 cups firmly packed light brown sugar
3/4 cup creamy peanut butter
1/2 cup Crisco shortening
3 Tbsp. milk
1 Tbsp. vanilla
1 egg
1 3/4 cups flour
3/4 tsp. baking soda
3/4 tsp. salt
Heat oven to 375. Place sheets of foil on countertop for cooling cookies. Combine brown sugar, peanut butter, shortening, milk, and vanilla in large bowl. Beat at medium speed w electric mixer until well blended. Add egg. Beat just until blended. Combine flour, baking soda, and salt. Add to creamed mixture at low speed. Mix just until blended. Drop rounded tablespoonfuls of dough 2″ apart on ungreased baking sheet. Flatten slightly in crisscross pattern with tines of fork.
Bake one baking sheet at a time at 375 for 7-8 minutes, or until set and just beginning to brown. Do not overbake. Cool 2 minutes on baking sheet.
Remove cookies to foil to cool completely.
Makes about 3 dozen cookies.
Soft and chewy… just like a cookie oughta be! Wish I could give you one. Oh yeah, that’s right… there are none left to give.
Comments
10 Responses to “Irresistible Peanut Butter Cookies”
barb on April 28th, 2008 5:34 pm
Those cookies look great. I’m going to try them.
When I grew up, my parents had a bakery (still do)
When we made peanut butter cookies we used a hand-held meat tenderizer to make the pattern in the top. It looks a little different than fork marks but a lot faster. Also, I have a recipe for peanut butter cookies that has a peanut butter filling between two of the cookies. They’re called nutter butters. I make them often and have shared the recipe MANY times. I will leave the filling recipe here. You could use it with any p.b. cookie recipe, but if anyone would like the recipe that goes with this filling, I will share that too.
Nutter Butter Filling:
1/2 c. peanut butter
1/4 c. butter (softened)
1/4 c. milk
2 c. powdered sugar
Beat butter and p.b. together, then add powdered sugar and milk. beat till smooth. If it is too thin you may need to add more powdered sugar so it will “stay” between the two cookies.
Kay on April 28th, 2008 5:53 pm
Sounds good, Barb! Thanks! I’ll have to try that next time I make p.b. cookies. Looks pretty easy.
Freida on April 28th, 2008 6:23 pm
I LOVE peanut butter cookies. Next best thing to monster cookies. I shall try this recipe.
Missed you and I’m glad you’re back. Your playhouses look too cool. My Maintenance Man, as I like to call him, loves peanut butter cookies. I don’t make them too often because we certainly don’t need them. He says he eats best when we’re having company lol.
Esther on April 30th, 2008 10:42 am
I love your site. I get some many ideas of things to make for meals. I was wondering though i wanted to make the raspberry cream cheese rolls you posted about awhile ago and cant find the donought mix. The store i shope at has a bulk food section and they didnt have it their either. Where can i find it. I’m dying to try the rolls. Thanks
Kay on April 30th, 2008 11:02 am
Esther,
I had the same problem. Couldn’t find it around here either, so I asked a friend from OH to ship me some because she said they have it at a bulk foods store near her. Got any friends from OH? Or PA? You could also Google it and order it online or you could try something different, like roll mix. I’ve never tried it with anything other than donut mix, but finding donut mix is a VERY common problem with me and other readers on here!
Esther on April 30th, 2008 2:09 pm
I’m from Pa actually Lancaster area to be exact so I guess i’ll just have to check at more bulk food stores in the area. Thanks for your help.
I think I’d like your cookies better than the ones I made today. That is, the Magnolia Bakery Copy Cats. Yours are more traditional and I like when peanut butter cookies have shortening in them rather than all butter. The shortening gives them a better texture.
Thanks for stopping by my blog, Cookie Madness! I am looking forward to reading yours too :).
Actually a long ‘coffee break’. I went on a business trip with Shannon this week. We’re in Lancaster, PA right now with the truck and trailer loading up playhouses and some other stuff.
Here’s our load:
Heading back to WI tomorrow. I should be back in my kitchen on Saturday. Meanwhile, I’m enjoying eating other people’s cooking! Have a good week!
I tried the corn chip salad over the weekend. Thanks for the recipe, Barb!
Barb posted it in the comment section of this post. She didn’t leave a link, so I can’t refer you to her site if she has one. The salad is very easy to make (no veggies to chunk up) and has a nice crunch to it. I liked the combo of salty (corn chips) and sweet (dressing).
Usually, when I think of salad, I think ‘diet’. This is not by any means a ‘diet’ salad! The only thing diet in there is the lettuce. Everthing else is laden with calories and fat. No wonder the salad is so good, huh?!
Barb was right though… leftovers are not good! I made 1/4 batch just for us and we didn’t eat it all, so I put it back in the fridge. The next day, it was soggy and the lettuce was wilted.
I’d say a whole batch would be about right for 18-20 people, unless you’re making it to go along with a big meal, then it would feed more people, maybe more like 25. Ok, hopefully that guess isn’t too far off for those of you who have it in a cookbook if it says how many servings it is! I could not find a corn chip salad recipe in any of my cookbooks.
Corn Chip Salad
1 head lettuce
6-8 hard boiled eggs
1 pound bacon, fried and crumbled
1/2 pound shredded colby or cheddar cheese
4-6 cups corn chips, crushed (the more-the better)
Dressing: 1 cup miracle whip
2 Tbsp. red wine vinegar (can use apple cider vinegar)
1/4 cup milk
1/4 cup sugar
1/4 cup brown sugar
Toss lettuce, eggs, bacon, and cheese. Add chips and dressing just before serving.
…Lettuce
…Eggs
…Bacon and cheese
Toss it.
Add dressing and corn chips.
I just put all the dressing ingredients in a bowl and beat it with a wire whisk. Forgot to get a picture of it.
Toss it all together.
Sounds like some of you have made this, but if you haven’t, I’d highly recommend it. The corn chips in there is what makes it so good (and the bacon helps too!). Plus, I’ve always liked salads that are tossed with dressing.
Comments
9 Responses to “Corn Chip Salad – Crunchy and delicious!”
Monica on April 21st, 2008 11:21 am
I love this salad, too!!! I think it’s especially good made with the Chili-Cheese Fritos!!!
I make it without eggs and bacon and add pinto beans and this dressing:
2 c. mayo
1 c. sugar
1/3 c. ketchup
1/3 c. oil
1/2 tsp. salt
2 Tbl. honey mustard
1/2 tsp. paprika
1/2 tsp. worcestershire sauce
1/2 tsp. garlic powder
1/2 tsp. red pepper
Or, you can just use French dressing. It tastes more like a taco salad.
Congratulations!!! You have been nominated for a 2007 Best Of Blog Award!! To find out more about how your site has a chance to become one of this year’s Best Of’s and how to nominate other bloggers, visit us at http://www.thebestofblogs.com. Remember voting begins May 5th so make sure you pass the word to your friends, family, and faithful followers.
THANKS! I’ve been reading your blog for a couple of weeks (I think I found it via Nate’s Conf. of CF) and have tried several recipes….I needed to come up w/ a good salad, for an event our Women’s Ministry is having on Friday-this sounds easy enough! (Except for hard boiling eggs and making the bacon….LOL!)
Blessings!
Nancy on April 26th, 2008 5:28 am
Last evening we had a family gathering and I took the Corn Chip Salad. It was SOOOO good. I will be making that again. Thanks for sharing your recipes. I have been enjoying them.
Roxanna on April 28th, 2008 9:29 pm
Thanks to Barb and you for the wonderful cornchip salad recipe! My daughter Makenzie (8) just loves it! I really like your website and I can’t wait to try the pb cookies. I have a hard time getting them chewy so am anxious to try! God bless!
These are the only kind of bars that last more than a couple days around here. It’s not because they’re not tempting, it’s because they’re so RICH and you can’t eat more than a couple at a time. One glance at the list of ingredients and I think you’d agree. They are oh-so-good though!
I’m sure this recipe is in quite a few cookbooks, but the one I used is from the Derstine cookbook.
Seven-layer bars
1/2 cup butter or margarine
1 cup graham cracker crumbs
1 cup coconut
1 cup chocolate chips
1 pkg. butterscotch chips
1 can Eagle Brand condensed milk
1 cup chopped nuts
Melt butter or margarine in 9×13 pan. Sprinkle over top graham cracker crumbs, coconut, chocolate chips, and butterscotch chips. Drizzle milk over top. Add 1 cup nuts. Bake at 350 for 25 to 30 min. Cool and cut.
Layer #1: butter.
The dark that you see under the pan is just a hot pad… the pan was hot from melting the butter in the oven.
Layer #2: graham cracker crumbs
Layer #3: coconut
My Grandma made Lexi’s apron for her (the one that makes the brown sugar pie). Grandma wears that kind of apron all the time and she sewed a few miniature ones for the great-grand-daughters. They were really cute even though they look a bit old-fashioned.
Layer #4: chocolate chips
I like chocolate chips way better than butterscotch chips, so I always trade quantities and put in the whole pkg of the chocolate and only 1 cup of the butterscotch.
Layer #5: butterscotch chips
Layer #6: sweetened condensed milk
Layer #7: chopped nuts (I used pecans.)
Just came out of the oven. Slightly browned around the edges.
Mmmmmm! Just delicious!
Comments
9 Responses to “Rich and chocolatey, 7-layer bars”
Hi, thanks so much for visiting and leaving a comment at my blog. I haven’t made a seven layer bar in years but I have to say reading the recipe and looking at the pictures has my mouth watering for one…just one, yes, they are so rich!
amy on April 19th, 2008 1:20 pm
I can eat more than one of those. No wonder I struggle so!!
My grandmother used to make them for church functions because the ingredients were usually always in her cupboards. Delicious!
I found your blog by way of The Pioneer Woman and must tell you that I am totally hooked on it now. I’ll happily continue to read it over the next few days. What fun!
“It’s not because they’re not tempting, it’s because they’re so RICH and you can’t eat more than a couple at a time.”
That’s why I eat dark chocolate. Milk chocolate is designed to be so bland you can eat forever and never be satisfied. But one little piece of 85% cocao Lindt and a small glass of milk and I’m set.
It works for other foods too. Real butter, heavy cream, bacon … yum.
Hi! My name is Al Malekovic and an owner of a very small company “Country Bobs Inc”. We make the world’s greatest sauce. I would like to send you a bottle to try and maybe comment on your blog about it. Someone said bloging is a way to let people know about Country Bobs. So if you would like please email me your address after you look at our web site. Thanks for your time. Al Malekovic
…start it with raspberry cream cheese rolls and coffee!
Sometimes I wonder if I should try a post that’s in poem format. This would be a good one to do that on because the title rhymes… and that just happened, didn’t even try it. The best poems are ones that flow, that you can’t tell the poet was working hard to get it to rhyme. An example of working too hard to rhyme would be like this: My friend and I met
this morning at eight.
Our coffee we drank
and our donuts we ate. You just don’t say “our coffee we drank” and “our donuts we ate” in regular conversation, you say “we drank our coffee” and “we ate our donuts”. That is one of my pet peeves in poetry. I know it’s ‘legal’, but it just makes it sound so much more formal. It would be much better to say, Coffee and donuts
and a friendly chat,
Breakfasts don’t get
much better than that.
I used to get a kick out of writing poems in my adolescent years. My favorite has always been a 6-line style where lines 1& 2 rhyme, 3&6 rhyme, and 4&5 rhyme. I don’t know what it’s called, kind of like a limerick, but not quite. Around 16, I wrote a whole poem consisting of about 10 stanzas in that style. The first stanza was: In August we moved
To what actually proved
To be home at Valley View Orchard.
At first, work was fun,
But before all was done,
We thought we were seriously tortured. …and so on it went, about life on our orchard.
My dad was/is great with poems. I still remember when I we were growing up, Dad would start making up a poem about this or that and just kept going and going for quite awhile, not having to pause to think of a rhyming word. It was amazing to me even at a young age how he could do that. Of course, the bar was pretty low because we were just kids and were thrilled with anything that rhymed.
Anyway, when I started this post, I had no clue I’d get into poems! So, instead of erasing the poem parts, I went up and added “(and other rhymes)” into the title. I was just posting to tell you that I made raspberry cream cheese rolls this morning AND that I finally have a new FAVORITE coffee mug once again! Here are both:
My friend, Shannon, from OH, sent me that coffee mug. It’s perfect. The ‘walls’ are thick, just how I like them. It’s heavy and solid. And the design is great. And she said that they’re hard to break… which is good! Did you know that I break more dishes than my 2 children do?! Sometimes I wonder if I’m clumsy. Anyway, it’s a Longaberger mug, if you’re interested in getting one. She tells me Longaberger mugs are the best. And I think I’m convinced.
And those raspberry cream cheese rolls (here is the link to the recipe), they are just the best! Seriously, try them! I just thought of it now, I got the recipe for these rolls from Shannon, too (same one that just gave me the mug). These rolls are easier than they look and the dough is SO nice to work with because it doesn’t stick to anything… not to the rolling pin, not to the counter, not to your hands. The raspberry filling is just regular pie filling from the grocery store (I put it into a plastic storage bag, cut a corner off, and pipe it on). It doesn’t have to be raspberry, in fact, this time I used strawberry. I put it in the food processor so there wouldn’t be big chunks. The cream cheese filling is from a bulk foods store in plastic bag tubes. BUT, Barb, if you’re reading this, you had asked a question about the cr. ch. filling if you don’t have a bulk foods store around. I made it from scratch this time just to experiment and it turned out great! I edited the post that the rolls are featured on and added that filling recipe.
So, now everyone, tell me what you had for breakfast in a comment! You can make it in poem form if you want to.
Here I’ll start: My roll was first-rate
My coffee was great
And Shannon confirmed that when he ate his.
You may have guessed
These are the best
And I don’t care who your grandmother is!
Comments
19 Responses to “Ahhhh, this is the way to start a day! (and other rhymes)”
Arla on
April 18th, 2008 11:22 am
Kay dear, I am one of those old-fashioned cooks that doen’t know much about things like doughnut mixes. I found quite a few bags of last sumemer’s blackberries in my freezer this morning and was just wondering what to make with them. Your raspberries rolls look wonderful, and I can figure out how to make pie filing of my fresh frozen wild berries, but I am lost about the doughnut mix. Are these rolls cakey or bready? if you know what I mean? What shall use in place of the mix? I love your website BTW.
Kay on
April 18th, 2008 11:40 am
Arla, don’t even try to look for donut mix around here. I looked everywhere from Duluth to Eau Claire and couldn’t find it in the big grocery stores and Pine Knoll bulk food store doesn’t have it either. You could try hot roll mix… the rolls are bready like regular cinnamon rolls, not cakey (it’s raised donut mix). My friend from Ohio (Shannon, who’s mentioned above) sent me some donut mix from a bulk food store near her.
There are a few rolls left… if you’re going to town today, stop in and I’ll give them to you. Seriously.
Sharon on
April 18th, 2008 12:50 pm
Hey, Arla & Kay, they have donut mix at Weaver’s Store here 10 minutes out from Eau Claire. It’s “my” bulk food store. If you want me to bring you some sometime, holler. I betcha these rolls would work with another cinnamon roll dough, but I personally love how fast the mix make them.
I had an extra, extra big mug of coffee with splenda and cinnamon vanilla creamer.
Monica on
April 18th, 2008 3:00 pm
Gotta love the Longaberger mug!! Looks just mine! Couldn’t come up with anything to rhyme with my boring breakfast of Multi-Grain Cheerios!! Those rolls look and sound delicious!! Monica
barb on
April 18th, 2008 3:33 pm
First of all, I don’t have a rhyme. I would have to think to hard and I’m sorta in a hurry. But…
after thinking a while I finally remembered what I had for breakfast (yes, it’s been a long day)
I had a homemade cinnamon roll. I’ll tell you why I just happen to have homemade cinnamon rolls around, because that don’t happen around here very often. A couple of days ago, I was making french bread and had some extra dough. I thought I would rather have cinnamon rolls than extra french bread, so I just rolled it out, spread some butter on, sprinkled on cinnamon and sugar, rolled ’em up and Wow, easy cinnamon rolls(at least if you are making bread dough anyway:)
I guess you didn’t ask for us to write a book about our breakfast but it just kind of happened.
The only poem of any significance that I ever wrote was for my sister when her baby died at birth. It was inspired by God, because I can not write poems like that, but I really do like to read poetry.
I guess you won’t be getting a poem from me. I don’t like writing them and don’t make a practice of reading them. (I had to read yours to see what you wrote.)=) I just had cereal for breakfast but yesterday for brunch I was able to sample some of the delicious rolls.=)
Arla on
April 19th, 2008 9:46 am
Thanks Kay, So I guess I’ll just use Melinda Kulp’s Cinnamon Roll recipe that’s in the Dirstine Cookbook and go from there. I couldn’t believe all my typos in what I’d written before. I write to communicate, mostly, not to inspire, thus no poetry from me, either, but it’s an eighth wonder you could even follow my hasty question there, sorry about that.
rosa on
April 19th, 2008 1:13 pm
I love your mug. I was actually gonna post and tell you my favorite mug is the exaxt same one but I never got around to it. I have 2 of them and I always claim them!
amy on
April 19th, 2008 1:27 pm
Your rolls look great,
But I’m watching my weight,
You never could see
By looking at me.
Sweet things like your rolls,
Make me lose all control,
So I’ll make them not,
And stick with celery and carrots.
Okay that was lame, but very fun.
amy on
April 19th, 2008 1:28 pm
Oh and I’ll probably end up making them too. I just needed things to rhyme:)
I MUST stop reading this site for the next several months. This morning, I had Special K protein cereal and tomorrow morning I am planning to have whole wheat pumpkin pancakes with sugar-free maple syrup. They’re both what I would call edible, but not what I would call a wonderful way to start a day!
Katie Mast on
April 20th, 2008 2:48 pm
Well I am with the post just above me, I may need to stop reading your delightful post as well, my stomach is churning so bad. I am really really trying to watch my food intake this week, just eating salad’s and veggies. For breakfast I am having protein drinks, yikes!!! Those rolls really look good, i have been wanting to try them. Just waiting for company so i dont eat them all cuz bread is my weekness. I love your site. I get all excited when i see you featuring pampered chef items. Now i know your not paid to cook with those items, but I love all my PC products.
Protein, grain and fat
Just a little not too much
Energy stays strong.
Egg, toast and butter
I enjoy it every day
Perfect start of day.
I think a Haiku is a poem of sorts. Haiku is groups of words making a statement with 5 syllables, 7 syllables and 5 syllables. I’m new at this, but I need the practice lol. I start my day with a scrambled egg and toast every day. It gives me a strong start and holds me til I get around to eating again, be it 4 hours or 7 hours. I’ve tried changing to others things, but too much carbs makes me starved in less than an hour. And sugar – forget it I’m ready for a nap in less time than that.
Your friend is right about the Longaberger mugs. We own the exact same mug (except ours are green) and I’ve dropped them many times. They are very durable.
It appears that the cook around here is on strike, doesn’t it? I think it’s more a thing of needing to hire a scribe because I currently have pictures for 4 posts. I’ve made supper the last 2 evenings, and for some crazy reason, I can’t remember back farther than that. Probably several snacky fend-for-yourself meals in there somewhere. Yeah, we do have those weekly, and then some more on the weekend… that’s why I try to keep frozen pizzas, hot dogs, nacho stuff, cheese & pretzels, and cold cereal on hand. Anyway, the last 2 evenings, we’ve had grilled chicken salad and wet burritos, respectively. I like the grilled chicken salad because all I have to do is throw a couple salads together and possibly pop some refrigerated Pillsbury breadsticks in the oven… the rest is on the grill, which, if you’ve been reading Kitchen Scrapbook for any length of time, you’ll know I don’t touch the grill. I have the 4 plates of salad sitting out on the counter and Shannon brings the chicken in AND cuts it up and puts it on top of the salads. On the wet burritos, I read my post on that last night and thought it was strange that I served crescent rolls and salad with it. Huh? That sounds more like lasagna sides! I don’t even remember serving that with it; now I serve tortilla chips salsa with it. And sometimes applesauce, just because I have a thing aboout that there’s gotta be at least 3 different things on the table, not counting condiments, otherwise it looks skimpy.
I finally made my salad that I’d been craving a couple weeks ago. So, what does the word ‘colorific’ mean? I decided it must be a made up combo, merging colorful and terrific. And that would fit this salad. I got this recipe from Jolene. Thanks, Jolene, it’s a keeper! Connie, thanks for your recipe too, I’d like to try it sometime… I don’t go for feta cheese, but I’ll bet that could be substituted for mozzarella.
Colorific Salad 1 c. craisins 1 c. red peppers 1 c. honey roasted sesame sticks 1 c. pecans 2 c. shredded cheese 1/2 of a purple onion 1 head of romaine lettuce
Nobody likes to spend alot of time in the middle of the day making lunch, right? Well, actually I’d love to if I didn’t have a never-ending “to do” list hovering over me, following me around everywhere, making me fight off the guilt it gives me when I decide to throw responsibility to the wind and relax in my kitchen, cooking and baking to my heart’s content more food than we could ever eat.
Plus, it doesn’t seem worth it to make something ‘nice’ just for the girls and I. Especially since I never know when they’re gonna eat alot or when they’re gonna take 2 bites and say “Mom, I’m full”. If I spent only 10 minutes making lunch, I don’t feel as compelled to yell say, “Honey, I just spent 2 hours making this food!”
So, here are some ideas to keep on hand for quick lunches. And, no, ‘leftovers’ are not on the list! That’s not something we need to note to keep on hand on purpose. Leftovers just kind of happen automatically. They can make nice lunches too, though, depending what it is. But, just for the record, I don’t like when a meal has leftovers.
Only two ingredients and 12 minutes of baking time! These are a real hit with kids (and grown-ups too). If you aren’t sure how to do them, the recipe name in red is a link to go to the post where they’re featured.
2.Cheese Quesadillas
Only 3 ingredients and about 1 minute in the microwave. Lay 1 tortilla out flat and sprinkle shredded cheese on half.
Sprinkle some Italian seasoning over it.
Fold tortilla over cheese and wet edges with a bit of water and press together. Put it in the microwave for about half a minute, then check it by pressing down on the tortilla. If the cheese feels soft and melted, get it out. If not, let it in for a bit more.
Cut into fourths with a pizza cutter. Good with sour cream and salsa, but my girls eat them plain as a finger food. These could be jazzed up alot more or fried instead of microwaved, but that’s is the quickest way to do them.
Tomato soup from a can is what I use. And yes, I do cheese sandwiches directly on my smooth top stove. What about you?
—————————————————————————————————————————
4.Open-faced meat and cheese sandwich Only 3 ingredients and and a couple minutes under the broiler. And if you use a piece of tin foil, you don’t even dirty a pan!
First, a piece of toast.
Then some deli meat.
Then the cheese. Turn the broiler on High and put sandwich on a rack in the highest position. It takes a couple minutes, but check it now and then anyway. This is just delicious, especially with the cheese browned a little!
———————————————————————————————————————–
5.Peanut butter and jelly sandwiches Here’s our peanut butter and jelly sandwich making pro. She’s quite a pro at making a huge mess too. A couple days ago, I came into the kitchen and there was jelly on the floor. I asked what happened and she nonchalantly said, “Oh, the bread slipped off the counter.” You know, no big deal, just spread more jelly on and the mess will take care of itself. It always does. I have tried having her clean up her own messes, but while the first mess may sort of get cleaned up, the process usually makes another whole mess of its own.
This may look vaguely familiar if you’ve been on this site recently!
7. Ravioli
This came in handy for me one day last week. I had some morning guests and I wasn’t sure how long they were planning to stay, but I had a few lunch options around so I was able to say, “I’ll make a quick lunch if you have time for it”. We had ravioli, French bread, cheese slices, applesauce, and cookies. The cookies I baked that morning while we were hanging around in the kitchen, chatting and looking thro’ cookbooks.
——————————————————————————–
8.English muffin pizzas Split apart English muffins and toast them. Arrange them on a baking sheet and spread with pizza sauce, some cheese, 3 or 4 slices of pepperoni, some mushrooms if desired, and then some more cheese. Bake at 400 for about 15 minutes or till they’re browned to your liking.
9. Good ol’ frozen pizza You’re probably all familiar with this. If not, you either need to get out more or lower your standard of eating when in a hurry. The thin ones aren’t as good, but they sure bake faster!
10.Hot dogs Throw them in a frying pan (fast), or under the broiler (faster), or in the microwave (fastest). Or charcoal grill (SLOW).
11.Nachos w\ salsa and sour cream
These have only 2 ingredients with an optional 3rd or 4th and take 7-10 minutes in the oven. Or, we’ve already done them in the microwave too, but the cheese doesn’t get brown and crispy then.
12. Throw a salad together.
Instead of starting with a head of lettuce, a big time-saver is starting with this:
13. Now, for #13, here are some side dish ideas to go with the main course… —applesauce or other fruit, like apple slices, canned peaches, etc.
—carrots
—cheese slices
—yogurt
—potato chips, pretzels, or other salties
—jelly bread
Desserts
—cookies or cake
—ice cream bars, sandwiches, or plain
—and this: A quick single serving dessert I was inspired with one day…
Dump about 2 Tbsp. of cracker crumbs into a bowl. Top with 1/4 banana sliced. Mix up a box of instant pudding and put 1/2 cup of it on bananas. Slice another 1/4 banana on top of pudding and sprinkle another Tbsp. of graham crackers on top.
This is actually really good! And the neat thing is that you can make exactly how many servings you need and exactly the size of servings you need instead of making a big bowlful and having some left over. We’ve been in a streak of having it pretty often around here!
We make the little pizza’s as well but I use biscuits.
And peanut butter and jelly sandwiches ROCK at my house. I have one boy that is a VERY picky eater and that is what he gets in his lunch.
You know I’ve had a busy day when we have soup and grilled cheese for supper lol After reading you list, I am officially hungry! Happy T13!
Monica on
April 17th, 2008 6:44 am
Great ideas!! My husband works here at home, so I always have to have something for lunch!! I don’t like to spend alot of time on it in the middle of the day, so these ideas will come in handy. Especially the English Muffin Pizzas!! I also do Omelets and Egg Sandwiches when I need something really quick and don’t have leftovers!!
Sharon on
April 17th, 2008 7:32 am
liked the list. One extra we do with the quesadillas is smear a little refried beans & salso on, too. Doesn’t take much time and is delish! Interesting about your take on leftovers–I usually TRY to have leftovers each night so I don’t have to worry about food the next day for lunch! Guess we’re all different…
What mom doesn’t want a list like this. I think I need, not want the salad for lunch today.
Heidi on
April 17th, 2008 8:14 am
great list! i think the kids would really like the quesidias (sp) and they look really easy. also the english muffin pizzas i have been wanting to try those but never have. i think ill get some muffins at the store next time i go. thanks for all the ideas its so fun to visit your site and see your “delicious” pictures =)
I need a reminder of easy things and this is definitely it. Thanks. But I sure am hungry now.
Freida on
April 17th, 2008 9:50 am
A wonderful list! I’m one who enjoys leftovers, too, just because its the fastest thing to get ready. But I have made all the above sometime or other. Oh except for the open faced sandwiches. I might have to try that one today.
Great list ideas! Thanks for the reminder of open faced sand., i haven’t done that for a while. And the banana/pudding dessert, we used to do that at home. (top with a ‘squirt’ of redi whip for something extra good.)
amy on
April 17th, 2008 1:46 pm
yummy yummy Why do I have to be so attrached to food?
My favorite quick lunch is the bagged salad…topped with tysons frozen (pre-cooked) teriyaki chicken thighs. Add a few almonds or sunflower seeds and some ranch dressing…delish!
LOVE LOVE LOVE this post! thanks for some inspiration!
lisa on
April 18th, 2008 11:28 am
another twist to pigs in a blanket-cut hotdogs or brats in half or thirds, flatten a pillsbury biscut, wrap it around the meat and bake. my daycare kids and marc love these. i like it because it makes not such a big quantity as an entire pack of crescent rolls, cut into pieces.
did you make all this food especially to take pictures for the post?
Beth on
April 30th, 2008 12:49 pm
I really like the open faced meat/cheese sandwich, closed face! It’s really good if you do it on the George Foreman Grill. MMMMM to the max!
Beth on
June 2nd, 2008 11:29 am
LOVE THIS POST! IT REALLY HEPLS WHEN I’M IN THE MOOD FOR SOMETHING DIFFERENT.
ing.jpg” alt=”colorific-salad-before-mixing.jpg” /> Mmmmm… you know it’s gonna be a good salad when you have to say “Where’s the lettuce?” ????
Oh, one little tidbit… I took the idea from Connie’s recipe to saute the pecans… yum! I didn’t sugar them though.
Dressing: 1 T. mustard 1 c. sugar 1/2 c. oil 1/3 c. vinegar 1/4 c. water 1 tsp. salt 1 Tbls. minced onionBlend dressing in blender. I put this picture on here so you can see what color the dressing is… Toss with salad ingredients. I was taking this to a carry-in meal at church, so I took it in this big bowl with a lid (more room for tossing) and put the dressing in a separate container… you can see it all in the background here.
And then, instead of letting the kitchen help take care of tossing my salad, I went out when church was almost over to do it myself so I could get a ‘done’ picture. ????
Next up… Megan’s puppy birthday cake. How did my baby turn 1 already?!
And this afternoon, I’m planning to bake monster cookies. Yay! I just did last week, but who cares. In a perfect world, I’d bake ’em every week.
Comments
5 Responses to “Colorific Salad”
joe on June 17th, 2011 6:15 am
No comments?!?!……hmmmm….well I ain’t sayin a word! LOL
Kay on June 17th, 2011 8:18 am
Too late… you already gave your opinion on this AWESOME salad yesterday.:) You don’t know what you’re missing, especially with those nuts and craisins in there. Ha.
Liz on June 17th, 2011 5:23 pm
Monster cookies again? They are really good and the scales showed it. Oh, well, I’m dieting again anyway. Ha! Looks like a salad I would try. If someone else made it. I can’t see it going over real good in this household.
Connie Stoll on June 18th, 2011 9:24 pm
Yum, this does look good! I’m going to try this one, too.
Kim on June 25th, 2011 7:32 pm
Finally, something a dieter can eat! ???? It looks delicious. Gonna have to try it soon. …always fun to browse here!
We eat pancakes alot. I make a batch, then put whatever we don’t eat in the freezer for quick breakfasts, usually warmed in the microwave, but the toaster works great too.
When I was growing up, we had pancakes alot. We children had the recipe memorized, but I also remember what it looked like. It was in an old Betty Crocker cookbook located at the top left-hand corner of the page. There was some batter splatters and flour stuck to the page. And the sugar in the recipe had a line through it. I remember one time when I was making them, I was feeling a little daring and put the sugar in. At 9 or 10 years old, I didn’t think about it that a little sugar wouldn’t make a huge difference and I was surprised when the pancakes looked and tasted the same.
Mom also used to make syrup. She’d make it, then pour it into 2 glass ‘Aunt Jemima’ syrup bottles. I always liked it better the second time because it was thicker and not so warm and runny. I still like my syrup thick and I don’t warm it up in the microwave (even though our plastic syrup bottle has a thing on the front that says ‘HOT’ after it’s warmed) because it’s too runny.
We got to talking about pancakes recently in family emails and my brother said they got a good recipe out of a local newspaper awhile ago and he makes them pretty often. He copied the recipe in an email and since I usually use the recipe on the side of the Bisquick box, I knew any recipe would be an improvement! So, I made them this morning.
My brother is a great chef. He made grilled salmon one time for our whole family and does lots of other grilling too. And that’s not all. One time, we all got together for a meal and this trifle appeared. The layers were picture-perfect, not crooked or varied thicknesses. I was complimenting my sister-in-law on it because I knew they brought it and because she’s a pro at making things look nice and attractive. She said, “Oh, I didn’t make it. Bruce did.” I really wish I’d have taken a picture of it. Anyway, they’re both great cooks and I can’t understand why they’re still slim and don’t weigh 300 pounds!
Pancakes
2 cups flour
2 Tbsp. sugar
2 tsp. baking powder
1 tsp. soda
1/2 tsp. salt
2 eggs
2 cups buttermilk
1/4 cup butter (melted)
Mix first 5 ingredients together. Lightly beat eggs, buttermilk, and butter in a separate bowl.
Add milk mixture to flour mixture all at once and stir until just combined (should be a little lumpy and quite thick).
Can you hear the sizzle?
Yeah, I don’t use a measuring scoop to put the pancakes in the frying pan. I just pour, thus my pancakes are varied shapes and sizes, but we don’t mind.
Just look at the texture of these pancakes! They were so soft and fluffy and had visible air pockets. They tasted great too… probably partly because of the melted butter! Delicious! this recipe made 18 4″ pancakes (give or take an inch, depending which pancake you pick).
Now, for the fun part…
You may think I’m crazy, but this is what we do with pancakes around here. My girls haven’t eaten a normal round pancake for quite awhile.
Their plates.
My plate.
It really doesn’t take long at all to cut out shapes and it’s fun for them to eat and pick which shapes they want. And the scraps are kind of hard to spread peanut butter on, but they taste the same… believe me, I know!
P.S. Barb posted a Corn Chip Salad recipe that sounds wonderful in the comment section of the hard boiled egg post (Thanks, Barb!). Check it out! Who’s going to be the first to try it?
Comments
9 Responses to “Pancakes! Plus a bit of fun for the kids.”
Berneice on April 15th, 2008 11:59 am
My kids are not cracked over pancakes, might have to try the shapes to make it more fun.
Freida on April 15th, 2008 1:37 pm
We love pancakes, too. I make them often. Altho’ we need eggs with ours! My kids would love the shapes. Something I should maybe try, altho’ more time-consuming. :/
I haven’t ever made corn chip salad, but I had some for the first time the other week at somebody’s house. It was SOOOO yummy! I’m gonna write this recipe down.
I always put the metal cutters in the pan and pour the mix in there. It would stick and wouldn’t come out when I flipped them and on and on. This looks much easier!! Madison often asks for pancakes for supper!
Kay on April 15th, 2008 2:07 pm
Yeah, Shannon, I used to try that too with metal cutters. I could never get it to keep its shape… batter would seep out or the pancake would stick and rip some off. It was such a mess!
Jay on April 15th, 2008 2:15 pm
Is that peanut butter I see on some of those pancakes? And I thought my family were the only ones.
Maybe I will have to try this. What I use now is a mix that someone gave me and I am never real happy with the results.
Do L and T actually eat that many pancakes for breakfast or are they smaller than it appears? I do good just getting K to eat a small bowl of cereal or one egg most of the time.
barb on April 15th, 2008 2:51 pm
My hubby and children like pancakes a lot better than I do, but I’m going to have to make them soon, and I am definatly going to do the shape thing. I know my boys will LOOOVE it.
I had to laugh at the picture of your plate, Kay.
That is so typical for us mommy’s, but that’s O.K. it all taste the same;)
I’m so glad I found your site on the Mommy
Blogs! Your recipes look great and have inspired me to dust off my kitchen and use it for more than a place to dump the mail!
Karen on April 16th, 2008 9:24 am
We will definately have to try the pancakes! Our usual is the bisquick recipe and Hubby is the pancake maker. Certain members of this house think the only way to make pancakes is to sprinkle mini milk chocolate chips on one side when frying……
And we LOVE that cornchip salad. It has been a favorite for a long time!
I’m wondering if, from reading the title, you thought “Duh, everyone knows how to do that!” or if you were secretly happy to finally have directions to do it instead of just putting the eggs on the stove in water and kinda guessing from there.
I would be in the last category, until yesterday. You know, there are some things it seems like everyone evidently is just automatically born knowing… you just never see a recipe in a cookbook of how to make hard boiled eggs. Or how to make baked potatoes or grilled cheese sandwiches.
I so seldom make hard boiled eggs, maybe about once a year for a salad. A salad was actually the reason I made them yesterday. I used to not like eggs at all. It was actually more psychological than anything, I think, just picturing what the yolk could have become. Then I grew up. Now they’re fine if they’re scrambled or made into omelets or somehow fried solid with the yolk and white mixed, nothing over-easy! Hard boiled with salt is too dry. Deviled eggs are good too, but I haven’t made them in ages. I just eat the ones other people bring to church potlucks and picnics. So, that’s my opinion on eggs, for whatever it’s worth.
Anyway, we got together with family last night and I was in charge of bringing salad. Yesterday afternoon, I mused to Shannon, “I wonder what the proper way is to make hard boiled eggs”. He said, “Just boil ’em in water for awhile”. When I didn’t go with those directions, he switched to ‘Google knows everything’. By the way, did you know there are entire websites about cooking eggs?! To make a long story short, I followed some online directions and the eggs turned out PERFECT! So, I’m going to write them here so I have them for future reference (you know, for when I make hard boiled eggs next year). And if you flounder around and guess every time you make hard boiled eggs, then this is for you too. I also learned a tip to keep that greenish color from forming between the whites and yolks.
Put eggs in a pan and cover with cold water. Water should come an inch or so above the eggs.
Bring to a boil over high heat, then turn burner down to medium and cook for 10 minutes.
When the 10 minutes is up, immediately drain the hot water and put them in cold water or ice water. I kept them in the pan and just rinsed them in cold water a few times till the pan was cold, then filled it with cold water. Let them sit in there for a few minutes, then gently crack the shells and peel them.
Tips: —Getting them in cold water right away after they’re done cooking keeps the yolks a nice yellow and cooling them down quickly keeps that greenish color from forming.
—For deviled eggs, to get the yolks centered, lay the eggs on their sides for about 8 hours (in the fridge of course) before cooking them.
—Don’t use fresh eggs. They peel hard. Eggs should ideally be at least 2 weeks old when using them for hard boiled.
There is another way to hard boil eggs too. You can bring them to a boil, then take them off the burner and let them sit for 20 minutes. I actually made eggs twice yesterday because the first time didn’t work. The yolks weren’t quite done. I had used this method, but the directions said to let them sit only 10 min. There was another site that said 20 min, so I think that might be enough for the yolks to get done.
How do you hard boil eggs? Do you make them alot?
Comments
21 Responses to “How to Make a Hard Boiled Egg”
Sharon on April 14th, 2008 9:59 am
I actually have a cookbook with directions for hardboiled eggs, but I know they are kinda tricky. I think some of the greenish stuff is from overcooking, but I really don’t know. I always add a little vinegar to the water I boil ’em in, since that supposedly helps prevent them from cracking while they’re cooking and a little white leaking out. (and because my Mom always did that). I don’t usually completely cover the eggs with water (that wouldn’t work in the pan I do it in), and they turn out fine. You first method is basically how I do it, too, tho’ I start timing as soon as the water starts bubbling and do ’em 15 minutes at a slow boil. Definitely do the ice water right away.
I don’t make ’em as much as I used to, partly because of Sawyer’s egg allergy, and I don’t keep as many on hand. But the rest of us LOVE deviled eggs, and I love just plain hardboiled for a snack, so I do ’em occasionally.
I laughed over your take on eggs. Sounds similar to mine. When I was younger, just the thought of where they came from & what they might be (and I gathered eggs, and saw what’s on ’em sometimes, which didn’t help) was bad enough, and I didn’t like the over-easy part either. I still don’t like if they ooze, but will eat them otherwise. My family really does think I’ve grown up, though, to eat them at all, and even say they’re good!
I bring them to a boil then set them aside for 20 minutes with a lid on. When I put the cold water on them I bang them around a little to get them to crack. The theory is that the cold water will go under the peel and help to remove the shell. Don’t know if that works or not, but I still do it that way. Maybe your theory about the age of the egg is really what counts, but I get mine from the market so I don’t know how old they are.
Freida on April 14th, 2008 10:13 am
I boil eggs all the time. We LOVE them!…in lettuce salad, regular egg salad, and creamed eggs. I do it pretty much like you said. I’ve heard too that they peel easier if they are not fresh, but I buy brown eggs from our neighbors or church people, so I don’t know if they are fresh or not. Either way, we eat them.
My take on eggs???? I LOVE them! I can’t imagine not liking them. I laughed at yours. ????
amy on April 14th, 2008 11:02 am
I always wondered what was up with the green on the yolk part was all about. sometimes it’s there and sometimes not. I am anxious to try the cooling faster method.
Twila on April 14th, 2008 11:35 am
I love runny yolks! Several years ago our neighbor gave us a number of goose eggs and then I was in egg-yolk heaven, frying those for my breakfast (yeah, I figured that might gross you out, lol.) I boil eggs just like your first method, 10 minutes and then into ice water. Works every time.
Rosalyn on April 14th, 2008 11:56 am
I do quite a bit of hard boiled eggs. My girls love ’em! I like them for salads, and have to make a few extra for the daughter that wants the egg but no salad. They love deviled eggs, too. I usually boil mine your first method…for 10 minutes. Then I immediately put ice water on them. I try to peel them as soon as possible. I never know how old my eggs are, but sometimes I have such a problem peeling them, and the next time they peel just fine. I wish you’d have a method for no-fail peeling!! ???? (other than old eggs, I mean)
Oh, and I actually have 2 different cookbooks that tell me how to boil an egg–Better Homes & Garden Cookbook, and then Mennonite Country Style Recipes, by Esther Shank. Both of those are my “tell how to make anything” cookbooks!
Elaine on April 14th, 2008 1:17 pm
you can use fresh eggs, just get the water boiling first, holding the egg over the water drop them in the pan, they will hit the bottom of the pan and crack just a little. You might have some white strings in the water but they peel just fine. When I peel the eggs I have most of the shell cracked before I peel it off.
We have our own fresh eggs and eat boiled eggs fairly often.
Berneice on April 14th, 2008 3:22 pm
I have to admit I thought, who needs a recipe to boil eggs, but it was intresting to see all the tips!
We love hard boiled eggs! I have them on hand most of the time. I also use the 1st method you had. If the fridge is void of eggs,we have a problem. We find the nearest source and QUICK get some!
Ruthie on April 14th, 2008 5:24 pm
I used to do the first method, but kept forgetting that I had them on the stove and would overcook them. (I know; use a timer..duh! I keep thinking I will remember without the timer…) So the second one is my favorite method. And, if the eggs are fresh, add a TBSP or two of salt to the water. Tap the tip of the egg against the counter, just enough to hear it crack, but not enough to actually see the crack. The shell peels right off!
barb on April 14th, 2008 8:40 pm
I second what Ruthie said about the salt when boiling “fresh” eggs. It works!! I would say at least 2 Tbsp. salt.
I have a recipe for “Cornchip Salad” that has boiled eggs in it. It also has bacon, cheese, and of course lettuce and corn chips. The dressing is homemade and it is delicous. The recipe came out in one of our church (German Baptist) cookbooks a few years ago and it has become a famous German Baptist salad:) If anyone would like the recipe just comment here and I’ll gladly post it. It is a must have in your recipe collection.
Barb
Jo on April 14th, 2008 8:41 pm
I didn’t know how to hard-boil eggs when I got married. *blush* Esther Shank’s cookbook was my lifesaver there. When I’m doing deviled eggs, I cool them in water & then put them in the fridge for an hour or two; they peel effortlessly. I’ll have to remember your tip for centering the yolks, ’cause that’s a pet peeve of mine. Someone mentioned the age of store-bought eggs; I once heard that they are often a couple of weeks old already when we buy them. I’ve hard-boiled eggs that I just got from the store, and they worked great, so they’re obviously not very fresh.
We love eggs here—and all of us love runny yolks, except Kendric (we hope to convert him soon!)
Kay on April 14th, 2008 9:30 pm
Hey, Barb, I want that salad recipe! Sounds wonderful! You can just post it in another comment here.
Thanks to everyone for all your tips and how you do it! This is interesting. And I learned alot about eggs! Maybe I’ll start making them more often. I think I should edit the post now to add all your tips too.
barb on April 15th, 2008 7:20 am
Corn Chip Salad
1 head lettuce
6-8 hard boiled eggs (no problem, right?)
1 pound bacon, fried and crumbled
1/2 pound shredded colby or cheddar cheese
4-6 cups corn chips, crushed (the more-the better)
Dressing:
1 cup miracle whip
2 Tbsp. red wine vinegar (can use apple cider vinegar)
1/4 cup milk
1/4 cup sugar
1/4 cup brown sugar
Toss lettuce, eggs, bacon, and cheese. Add chips and dressing just before serving.
This is one of those salads that is not good leftover.(I guess I do know of a couple people that will actually eat it the next day. Yuck)
Anyway, try to remember that when you make it.
Hope you enjoy it:)
Berneice on April 15th, 2008 11:58 am
I also have this recipe. It is awesome. Everyone needs to try it.
I’ve also got a taco salad recipe you might like. (Hmm, going to have to write this one up on my blog.)
– 1 head lettuce
– 2 Roma tomatoes – drained, seeded and diced (just the meaty part)
– 1 small sweet onion, diced
– 1 cup shredded cheddar cheese
– 1 lb ground beef, cooked and seasoned (taco seasoning, chili powder, your choice) then cooled to room temperature
– 1 cup thousand island dressing
– 2 cups Fritos or other corn chips (the skinny kind)
Toss the lettuce, tomato, onion, cheese and dressing. Add the ground beef and corn chips and toss again.
If you’re taking this on a picnic — that’s how I remember having it, when my Aunt made it — you can mix everything except the corn chips and pack it in a zip-top bag. Add the chips and serve.
Leftovers are still good for two or three days in the fridge, as long as you add fresh corn chips when you serve.
I’m so w/ you on not liking eggs when I think too long about what they are. Aaaack!!! I went through a stage where I could hardly even eat baked things that tasted like eggs. (Still don’t really like it, but just try not to think about it.)
I also thought it was funny that boiled eggs are something you should just know. My grandma put her recipe in a cookbook, so now I can refer back if I forget. It’s the bring to boil, rest 20 min. version. I thought the green color was from overcooking. ??
Katie Mast on April 16th, 2008 3:21 pm
I admit when i first saw the title, I’m like people dont know how to boil eggs. But it was interesting to read comments about it. At our house when we are out of eggs we are in trouble. I can hard boil a dozen eggs and by the time i have them peeled they are gone. My husband just loves them and so do my 3 children. I heard a long time ago that if you take a thumb tack and prick a hole in the bottom of each egg before boiling, they will peel clean. That is the way i do all mine, even when they are fresh,(some made comments about cracking them a little) I think it does the same thing. I dont end up with half of my egg coming off with my peelings. If you got a Pampered Chef decorator you got to make deviled eggs they look so pretty when done. ALso we live in PA dutch contry and here we make red beet eggs. MMMM We eat 2 dozen eggs in one day made that way. I am with you on just eating plan eggs, i dont like them that way either, but hard boiled any which way I love them.
Katie Mast on April 16th, 2008 3:25 pm
I was also going to say that Esther Shank cookbook is the best. I have given that for gifts to so many people that were just learning how to can or newlyweds and it’s a big hit.
Gwen on April 17th, 2008 9:19 pm
When we were visiting our friends in the hospital in Colombus, OH, we were all eating in the cafeteria one day, and there, for sale in the cooler, a bowl of hard boiled eggs…$1.00 each. Kindof makes you want to start making and selling them!!
Kim Mast on April 19th, 2008 10:47 am
I bring my eggs to a boil over medium heat and boil for one minute. Remove from heat and let sit for 12 minutes. Then immediatly put in ice cold water. Mine always peel like a charm!
P.S. I also put salt in mine if I know they are fresh.
Oh well, there’s Pillsbury pizza dough in the fridge. I’ll try that.
And it worked!
It was 30 minutes till our normal supper time and I was leafing thro’ cookbooks. I went for the Quick Cooking cookbooks because there’s always a 30-minutes-till-mealtime section in those, and if that ever described where I was at, it was right then. But, the problem was always that my hamburger wasn’t already browned, my veggies weren’t already chopped, my eggs weren’t already beaten… I need a section titled I-just-walked-into-the-kitchen-and-did-no-prep-ahead-and-it’s-30-minutes-to-mealtime.
This stromboli (almost) would fit into that category. I timed myself this evening. It was 35 minutes from everything still in the fridge to eating. And I was even taking step-by-step pictures, which actually takes more time than you’d think. And the mushrooms weren’t washed or sliced ahead of time either.
My oven might preheat slower than most (it takes almost 10 minutes to go from 0 – 400), but the first thing I did was turn the oven on, then got the pizza dough, Parmesan cheese, pepperoni, mushrooms, and cheese out of the fridge and the Italian seasoning and the baking sheet out of the cupboard. And by the time the oven beeped that it’s up to temp, the stromboli was about ready to go in the oven. This stromboli is nothing fancy, no neat sealing it shut or hiding the seams or anything. Actually, maybe it’s even a slam to stromboli to call it that. Maybe it could even be called a calzone. What is the difference anyway?
Ok, I just stopped a bit and put ‘stromboli define’ into Google… the first 2 definitions were an active volcano on an island in southern Italy! Finally, I found the food variation. Then I looked up calzone. Seems like the main difference is the size… calzone is serving size and originated in Naples. Stromboli originated in Philadelphia. But, they’re both meat and cheese enclosed in dough. So, there’s your history lesson/cooking lesson for the day.
35 Minutes to Mealtime Stromboli
1 13.8 oz can Pillsbury refrigerated pizza dough
8 oz pepperoni
5 fresh mushrooms
3/4 cup pizza sauce
Italian seasoning
8 oz shredded cheese (ok, I actually used a little more… finished out a bag, plus the 8 oz bag, but who cares, there was actually no recipe, I’m just making up amounts here so it looks good and qualifies as a recipe)
Parmesan cheese
2 Tbsp. melted butter
Spread the pizza dough out in the pan. Sprinkle generously with Parmesan cheese.
Put pepperoni on one half, leaving about a 1/2″ space along the edge.
Wash and slice mushrooms and put over pepperoni.
Sprinkle on some Italian seasoning and spoon pizza sauce over.
Add the cheese.
Flip other half of dough over toppings and pinch edges together to seal.
Bake at 400 for 20 – 25 minutes, depending on how browned you like it. Brush melted butter on top right after it comes out of the oven
Sprinkle with some more Parmesan cheese.
And call everyone to the table.
Comments
18 Responses to “Stromboli tonight! But, oops, forgot to thaw bread dough.”
barb on April 12th, 2008 7:32 am
That stromboli/calzone looks wonderful, I am for sure going to try it, but I have a question. What did you serve with it. Thats where I’m always having trouble deciding. What to go with main course????
Oh, it looks divine and I could eat a couple helping right now. Maybe that’s what I’ll make for supper only I have no prefab dough, nothing frozen. Guess I’ll have to make my own. (Unless I can hint around long enough about going out to eat)
LaVonne on April 12th, 2008 9:27 am
wow, that looks delicous!! Will definatly have to try that! I enjoy reading all your diffrent recipes. Have a good weekend!
Audrey on April 12th, 2008 10:29 am
I was just going to tell you how much I love your web site. I usually check it out when I see through Xanga that you have added. I love the way you describe all of the steps and add your little comments in very every day terms, and how you make things work even if you don’t have all of the right ingredients. That stromboli looks VERY good…I think our family would like it. Anyway, just an encourageing note that I think you do a GREAT job with this web site.
Jo on April 12th, 2008 10:41 am
Saturday nights are usually pizza night for us, but that stromboli (or whatever it is) looks better than pizza. Only 3 problems: I have no dough, no white flour, no cheese, & no mushrooms. Oops, that’s 4 problems. Bummer. Oh, for a grocery store across the street…!
amy on April 12th, 2008 10:56 am
Yummy!! We love stromboli and I have kind of forgotten about it. Thanks for reminding me.
Kay on April 12th, 2008 10:58 am
Barb, that is one the reason why I don’t make all-in-one casserole type dishes very often… I like to have at least 3 different dishes on the table and I never know what to put with the all-in-ones either. I usually have one or 2 of these sides with stromboli: salad, breadsticks, or applesauce.
Elmina on April 12th, 2008 11:15 am
This looks absolutely wonderful!! I will have to try that using my pizza dough recipe. If I were serving this, I’d add a tossed salad and applesauce to the menu, and have ice cream for dessert. I really love your website, and all your great ideas.
I just read the other comments on here and had to chuckle. I have NO PROBLEM with one dish meals on the table! In fact, I love them! Reduces dishes and work so I can spend more time doing things I love, like playing games with my family. Hee-hee! Actually, forget “on the table.” I like one dish meals straight out of the pan on the stovetop. We dish the plates up and bring them to the table. It probably helps us not overeat, too, having to walk all the way into the kitchen for seconds. The only time we put food on the table is when we have company. However, we all eat together and do not watch TV at all. So long as we get in a meat, veggie, and starch I’m happy! Who cares if it’s all in one pan, so long as it tastes good!
I am not much for pizza, but I am saving this recipe, because my son and Hubby would love it! Enjoyed all your comments and pictures! The history lesson was perfect, because when I asked Hubby if he likes Stromboli, he asked, “What is that?” Haha!
Looks scrumptious! Definitely something we have not done in a long time. I would mention that a fun thing to do is make individual versions of these so everyone can have their favorite toppings inside. Salad, and my husband’s famous homemade garlic breadsticks are our usual sides when we have calazones.
Katie Mast on April 13th, 2008 9:36 am
THanks for another great recipe. I will need to try this one to. I just want to tell you I tryed your meatloaf one the other day and i got so many raves over it. My husband said “now that is a good meat loaf”. I knew when i read that “you finally found your best meatloaf” I had to try it. It was great, thanks. I replaced my old one with this.
I made this for supper tonight. It was delish! Thanks for sharing the idea!
Mary Faith on April 18th, 2008 8:38 pm
I made this tonight for my sis. and brother-in-law. He told me, “You can make this stuff many more times before you leave. It is awesome!” (I’m here helping them since my sister had her baby.) I actually made three of them and they were all devoured. lol That fed about 12 people. Next time they want me to make four of them. One thing I added was Canadian bacon and that was really good too! I loved how simple and quick it was, too. Thanks for the recipe.
My maintenance man (aka hubby) doesn’t like pizza and I love it. I’m going to try this and see what he thinks.
Kitsune on May 27th, 2011 4:44 am
I asked a chef at a local restaurant what the difference was and he said it’s close to the same, but the stromboli is supposed to be folded across the top(or bottom) and closer to in thirds, smaller, and with cheese. The Calzone has more “extra” bread and is generally the semi-circle shape, while Stromboli is rectangular.
Your Stromboli definitely looks rather yummy!
I would really do well to live beside a grocery store. Somewhere that you don’t have to even cross a street to walk to it. Then, I could nickel and dime my checking account to death instead of giving it heart attacks with big grocery bills every week. There are people who live in houses that close. I envy them and wonder if they just run over when they need something or if they plan ahead, keeping their cupboards stocked and keeping a perpertual grocery list on the fridge for a once a week run.
Our grocery store is at the end of Main Steet. It would also be close enough to live on Main Street, above one of the stores. I still remember when I first found out that people live up there. I was 9 or 10. Every time after that, when we’d drive down Main St, I’d be looking up, not around. And dreaming of living up there one day, preferably in the one above the fudge shop. I’d sit out on the deck and watch the world go by and nobody would know I’d be watching because who looks way up when you’re shopping on Main St?! To be honest, I still look up there when I’m on Main St. Not because it’s still my dream to live up there, just because it still kind of intrigues me, I guess. I even took a picture of it a couple months ago, since I was on Main St with my camera anyway…
The street is snow-covered because the Birkebeiner Ski Race was going on… that’s why I was on Main Street with my camera. Looks like someone is hosting a Birkie party on their deck up there.
Anyway, since I don’t live in town and don’t plan my menus in advance, my big laminated ‘Ingredient Substitution Chart’ comes in handy pretty often. This is one time when I won’t run out of ideas before getting to #13… I could easy do a Thursday Thirty-three today!
I’ve tried substitutions on my own. Some of them worked, like substituting blown up marshmallows for marshmallow creme in this dip recipe. Others failed, like the time when we were first married and my brothers were overnight guests. My oldest brother is diabetic and late that night, I suddenly thought about it that I have nothing in the house for breakfast for him… no bacon, no English muffins, no eggs to make eggs or pancakes with, only sweetened cold cereal. Then, I thought about it that I could make biscuits from scratch and sausage gravy. In the morning, to my dismay, the sausage I thought I had happened to be hamburger, so I decided to try to spice it up to make mock sausage. Fast-forward about 20 minutes… my brothers are in the kitchen eating and as I’m walking towards the kitchen, I hear my younger brother (who’s back is toward me) mutter, “This is gross.” as my other brother gave him a ‘shut up, she’s coming’ look. They never said anything to me about it… I guess they knew not to attack a new cook on her cooking. I don’t remember if I hadn’t test-tasted it first or what, but I did later and yeah, he was right, it was gross.
1. When you’re out of unsweetened chocolate, for every ounce or square that is called for, substitute 3 Tbsp. cocoa and 1 Tbsp. fat or oil.
2. When you’re out of cornstarch (for thickening), for every tablespoon that is called for, substitute 2 Tbsp. flour.
3. When you’re out of whipped cream, chill a 13 oz. can of evaporated milk for 12 hours, add 1 tsp. lemon juice, whip until stiff, and measure according to recipe.
4. When you’re out of eggs, for every egg called for, substitute 1/4 cup egg substitute OR 3 Tbsp. plus 1 tsp. thawed frozen egg OR 2 1/2 Tbsp. dry whole egg powder & 2 1/2 Tbsp. lukewarm water. Or, just make these cookies. ????
5. When you’re out of garlic cloves, for every clove called for, substitute 1/8 tsp. garlic powder.
6. When you’re out of flavored gelatin, for every 3-oz pkg called for, substitute 1 Tbsp. plain gelatin and 2 cups fruit juice (then omit the water you’d normally add to a 3-oz pkg).
7. When you’re out of fresh herbs, for every Tbsp. called for, substitute 1 tsp. dried.
8. When you’re out of lemon juice, for every tsp. called for, substitute 1/2 tsp. vinegar. But don’t do this for lemon meringue pie!
9. When you’re out of miniature marshmallows, for every cup called for, substitute 10 large marshmallows.
10. When you’re out of buttermilk, for every cup called for, substitute 1 cup plain yogurt OR 1 cup minus 1 Tbsp. milk and 1 Tbsp. lemon juice or vinegar and allow to stand 5 or 10 min OR 1 cup milk and 1 3/4 tsp. cream of tartar.
11. When you’re out of fresh onions, for every small onion called for, rehydrate 1 Tbsp. minced onion.
12. When you’re out of shortening (for use in baking), for every cup called for, substitute 1 1/8 cups butter or margarine and decrease salt in recipe by 1/2 tsp.
13. This last one, I just recently got from a friend… when you’re out of sour cream, combine 1/4 cup skim milk, 1 Tbsp. lemon juice, 8 oz. cottage cheese, and 1/4 tsp. salt. Blend all in blender. Makes 1 cup sour cream.
And if you’re out of the substitute items (for example, no cottage cheese on hand to make the sour cream that you’re out of), I don’t know what to do about that either. I guess make something else or go to the store.
Don’t forget to go visit other Thirteeners over at Thursday Thirteen!
Comments
15 Responses to “13 Ingredient Substitutions, Thurs 13 #3”
Wow. Those are some great substitutions. I knew some of them (like the buttermilk, onion and herb ones) but many of them I didn’t know. Thanks for stopping by my blog – I’m the one who won all the scrapbooking stuff. If you lived closer, we could get together and have a scrap date! I’d share! Honest, I would!
i needed this post tuesday. i was short on sour cream and didn’t know what to do. ended up adding some blueberry yogurt to top off the sour cream i did have. worked fine. i can taste it in the marble squares, but apparently it’s not too noticeable because marc hasn’t commented. i came on here to tell you-i made the meatloaf you posted a few thursdays ago for supper last night. marc’s brother brought his new girlfriend over. let’s just say, i’m BITTERLY disappointed there are no leftovers. mmmmm, i’m getting hungry just writing about it.
Thank you so much for visiting The Cafe today, I love finding other bloggers from WI. You live in a lovely area of the state too. I live near Oshkosh myself. Our main street is currently the set of a movie about John Dillinger, I shall not being going to see the madness now that the filming will be starting.
I am going to add you to my reader so I can check in regularly and what a wonderful & useful TT you have this week.
Great post. Good thing I only live about 7 miles from the store (only 1 from a party store)lol I didn’t have most of the “use this instead” stuff. The other day I got all the ingredients for your “Monster Cookies” and today I had to go back out because my Maintence Man ate most of the M&M’s. Can’t complain he brings in most of the money. Just can’t say “no” to that man. Happy TT
I just recently made taco soup. I’ve had it at other people’s places, but this was the first time I’ve had it from my own kitchen. The taco soup I made was really good, but I’ve had better, so I’ll keep trying some other recipes in my cookbooks.
Actually, now that I think of it, I might put that on hold for awhile… that sounds like a great winter project for next year. With the snow melting outside and the promise of Spring, who wants to be making taco soup or any soup?!
Unless it’s bread soup. Now THAT’s a summer soup! Did you ever have that? Rip up a piece of bread, put some fruit chunks in (bananas, fresh peaches, or fresh strawberries are best), sprinkle some sugar over it, then add milk. On a hot summer day, that is just a great lunch. So refreshing! And you don’t break out in a sweat while eating. Mom made that now and then when we were growing up. Another cold soup (that I don’t know if I’d ever have the nerve to try) is Cool Raspberry Soup. I see it in one of my cookbooks now and then and even though there’s a picture, I always flip past, knowing I’d never make it.
Anyway, back to the taco soup. It’s cold and damp and rainy outside, so I think it’s still ok to talk about and feature hot soups. This recipe comes from the Fix-It and Forget-It cookbook. I’ll bet alot of you have that cookbook. It seems pretty popular. One thing I think is so neat about it is that I know a couple people who submitted recipes and tips. I have a few cookbooks like that. Makes it feel like it’s just not some random cookbook compiled by some random unknown people. I even know someone in one of my Taste of Home’s Quick Cooking cookbooks!
Taco Soup with Pizza Sauce
2 lbs. ground beef, browned
1 small onion, chopped and sauteed in ground beef drippings
3/4 tsp. salt
1/2 tsp. pepper
1 1/2 pkgs. dry taco seasoning
1 qt. pizza sauce
1 qt. water
Tortilla chips
Shredded mozzarella cheese
Sour cream
Combine ground beef, onion, salt, pepper, taco seasoning, pizza sauce, and water in 5-qt, or larger, slow cooker. Cover. Cook on Low 3-4 hours. And there ya go, easy as that! Top individual servings with tortilla chips, cheese, and sour cream. Notice there IS soup under the toppings. Can almost see it.
Makes 8-10 servings.
At the bottom of the recipe, it says, “Variation: Add 15-oz can black beans and 4 oz. can chilis to mixture before cooking.” I thought that sounded good, so I added both.
The soup went perfect with cornbread muffins! About every time I post, I wish there’d be a way to give you a taste of whatever food I’m featuring. Technology and computers keep advancing, but I’m quite sure there will never be software to install for that feature. Oh well, you’ll just have to come visit sometime… or try the recipes yourself.
Comments
7 Responses to “I LOVE Taco Soup!”
barb on April 8th, 2008 7:41 am
I found thisrecipe for taco soup lately, but haven’t got a chance to try it yet, but it sounds better than any I’ve ever made. Yummy, you got me in the mood for taco soup.
This recipe came from the Duggar
Family website. They have 17 children so it is a huge batch but you can break it down. If you haven’t checked out their website, you should. http://www.duggarfamily.com
DUGGAR’S TACO SOUP
3 lbs ground turkey or beef
1 med. onion, chopped
3 (4oz.) cans green chilies, chopped
3 tsp. salt
1 1/2 tsp. pepper
3 pkg. taco seasoning
3 pkg. ranch or 1 c. liquid ranch dressing
3 cans hominy, undrained
9 (14 1/2 oz.) cans diced tomatoes, undrained
3 (15oz.) cans kidney beans, undrained
6 (15oz.) cans pinto beans, undrained
5 c. water
barb on April 8th, 2008 7:44 am
OOPS! I forgot to put the directions on with the recipe. Oh well, you are used to that from your horse and buggy cookbook, right?
Brown ground beef w/ onion. stir in remaining ingr. Bring to boil. Simmer 30 min. Serve w/ Tortilla chips, grated ched. cheese & sour cream.
Both taco soup recipes look a lot like my chili recipes lol. Then cover with cheese, chips or crackers and sour cream. Yum
Jo on April 8th, 2008 12:45 pm
Well, today is definitely NOT a soup day here (sunny & near 70!—yay!!!), but the forecast predicts rain/snow showers over the weekend. So I just might be pulling out this recipe for Sunday lunch! Thanks!
Did you find another coffee mug yet?
Kay on April 8th, 2008 2:29 pm
Thanks for the recipe, Barb! Ha, yeah, I’m used to that with the Horse and Buggy cookbook. Which reminds me, I want to scan a recipe in to have you all help me figure it out!
Jo, I didn’t find the perfect coffee mug yet. Still lookin’. It’s actually kinda fun. One of these days, I’m gonna stroll the shops on Main Street.
Berneice on April 9th, 2008 7:17 am
Loren loves the cold bread soup stuff. i on the other hand can not handle soggy bread, so i fix a little for him and we eat something else. We used to eat it when we were kids, but for some reason I can’t choke it down anymore.
Twila on April 9th, 2008 9:31 am
Ah, bread soup! That has to be an old Amish dish if anything is (same with tomato gravy). We had bread soup suppers on hot summer evenings when I was growing up. I came to dislike soggy bread…just give me the fruit, sweetener, and milk…but then it’s not bread soup anymore, and you’ve lost the uniqueness of it. A good memory nonetheless. I would like to know why you’ll never make the Cool Raspberry Soup? Because I love raspberries and would be interested in knowing what the recipe is.
I don’t know how many recipes are on here, but I have spent the last while going thro’ and picking out my favorites. Well, that’s not quite accurate… if they’d be my top favorites, they’d probably all come from the dessert or cookie category. Chocolate this, chocolate that. And your eyes would glaze over. So, instead, I went thro’ the categories and picked one from each of 13 categories… some categories were hard to choose from!
So, here are 13 of the recipes I’d recommend trying sometime (the recipe name is linked to the post that the recipe is featured on). Try something for supper tonight! If you have all the ingredients, that is. I often think it would be so handy to live nextdoor to the grocery store, what with my lack of planning ahead and all!
1. Monster cookies – from the Cookies and Bars category. This is the kind of cookie that I make the most often, even way more than regular chocolate chip cookies. I bake these probably about every 6 – 8 weeks… more often if I’m not on a diet. Speaking of which, yes, I do know the calorie count. It’s 175 calories per cookie if you get 7 dozen out of the batch.
2. Glazed Meatloaf– from the Beef category. After years of looking for the perfect meat loaf recipe, I finally found it. It is just incredible. And I don’t even put the shredded carrots in. That top ketchup part is great too! Mmmmm, now I’m getting hungry.
3. Red Lobster Biscuits – from the Breads, Biscuits, and Rolls category. Ever been to Red Lobster? These taste like the real thing! They are so soft and so good and very melt-in-your-mouth. Just delicious! And they’re fast and easy… except the part where you beat the dough with a wooden spoon for 30 seconds!
4. Raspberry Cream Cheese Rolls – from the Sweet rolls and Coffee cakes category.
I’ve gotten several recipe requests for these after people have tried them at my house. You start with donut mix instead of from scratch. I couldn’t find donut mix at any grocery stores around here, but found it then at a bulk foods store. That cream cheese filling in there is so good. You could also try other fruit filling instead of raspberry.
5. Fudge – from the Candy category.
I’m taken with this stuff! Fudge is probably the food that I have the hardest time resisting. We won’t go into detail about things like how much I’ve eaten in one sitting already. This is so easy to make with only 4 or 5 ingredients and you don’t need more than a microwave and something to stir with.
6. Easy Chocolate Lover’s Cheesecake – from the Desserts category.
Ok, you just KNOW you can’t go wrong here! Cheesecake, caramel, and chocolate… what a trio!
7. Steak & Cheese Stromboli– from the Main dishes category.
As good as it looks! I make the pizza variation quite a bit too. Sometimes, if I’m in a hurry, I use Pillsbury refrigerated pizza dough (from a pop-able can).
8. Brown Sugar Pie – from the Pies category.
I’ve loved this pie for as long as I can remember. My dad grew up with it and his dad grew up with it. If we have an extended family get-together and there’s not brown sugar pie there, there will be a complaint or 2. And don’t put Cool Whip on it! I thought it was weird that when I got married, my husband didn’t know what it was. Then, I found out that alot of people don’t know what it is. The recipe has good tips from Grandma… try it!
9. Open-faced Pork Chop Sandwich – from the Pork and Ham category.
Fire up the grill! My husband made up this sandwich. In fact, he wrote the post that the recipe is featured on. We have this sandwich pretty often and have made it for company. It’s great! Very basic ingredients. Perfect for those summer-time cookouts!
10. All-in-one Taco Salad – from the Salads category.
Delicious!!!! One handy thing about this salad is that it can be put together ahead of time, then tossed just before serving. One of the church ladies makes a huge bowl of it pretty often for potlucks and it gets licked clean about every time. It’s not spicy, but it’s got lots of flavor.
11. Twice-baked Potatoes – from the Side dishes category.
Company coming? These make a good impression! They’re very attractive, not to mention very good! This is actually something I serve quite a bit when we have company. Another nice thing is that they freeze well, so you can make them ahead of time or just keep them on hand in the freezer.
12. Layered Finger Jello– from the Snacks category
This is more in here for the fun it is than for the taste, although I still have enough kid in me to really like finger jello! The reason it’s fun is because you can make it fit to any occassion by using certain colors of jello (red and green for Christmas; red, white, & blue for 4th of July, etc.). I also tried a sugar-free version and it turned out great!
13. Iced Tea – from the Beverage category.
The Pampered Chef pitcher that I use to make this tea doesn’t really have a home in the cupboard. It’s better off in the fridge with iced tea in it. If you know what meadow tea is, it’s comparable to that. But this is a much handier and faster way to make it!
What a great TT idea! Yummy…and now I need a snack Thanks so much for stopping by my blog…and yes, you need to try the chicken cordon bleu…easy and very delish.
barb on April 3rd, 2008 11:52 am
I have already tried your glazed meatloaf recipe, but used half sausage/half hamburger.
My husband LOVED it. So, that is the meatloaf recipe I will use now. Thanks for sharing.
Of all the things I miss from growing up, the wonderful foods of the Mennonite community are the most memorable…and now you’ve made me hungry all over again! Great T-13!
Sharon on April 3rd, 2008 2:54 pm
This post reminded me again how grateful I am for your ‘teaching’ me about that good tea! Actually, now I’ve found one I like just as good or better–and it’s still easy. Get dried spearmint leaf tea from the bulk foods store (if you can) which works great in a coffee perk too, and I think tastes as close to meadow tea as “your” stuff…
We like your pork chop sandwich, too, ‘cept I do an open face grilled cheese and top it ( I think it’s easier than making toast, making the sauce hot and melting the cheese that way).
Anyway thanks for all your great recipes!! Keep them coming!!!
I love your T13. I’ve just started this thing and they are all sooooo different. Definitely adding you to my blog roll. Think I’ll be back often for more recipes. Thanks
These are sooo not on my eating plan, but they look wonderful! Especially the Strombolli!
Smiles,
Kay
Anonymous on April 18th, 2008 2:22 am
Melissa on April 18th, 2008 10:54 am
I love the tea! I gave some to my husband and didn’t tell him what it was. He was convinced it was garden tea. I think I’ve made it just about every day for the past week.
Before I had any children, I decided that I want to make them special birthday cakes. Some people look at it as a waste of time. I look at it as FUN! Fun without costing alot of money.
Tiffany just turned 2. I made her a doghouse birthday cake. I used a house-shaped pan that I bought at our local Michaels store. I use the term ‘local’ loosely… the closest Michaels is an hour and a half away. It’s good I live that far away from it, I’d spend alot of time (and money) there. I’ll bet I could spend all day there (if I didn’t have kids in tow, that is).
I started with a cake mix. Pillsbury Moist Supreme pudding-in-the-mix.
I always use this kind of cake mix for birthday cakes and it always gets rave reviews. So, I figure why make a cake from scratch?! I really don’t remember when the last time was that I made a cake from scratch. Oh, probably a red velvet cake last year sometime. I always make red velvet from scratch. But that’s the only kind I make from scratch.
When baked, the cake fills the pan up perfectly. Cut the rounded part off the top with a long-bladed knife.
Now comes the apprehensive part of flipping it out of the pan… will part of the cake stay with the pan? Will I have to dig around at it with a knife? Will it be so bad that I have to start over and go to the store for another cake mix? Before dumping the batter in, I sprayed the pan with PAM cooking spray. Here’s how it came out! Perfect!
I did not wipe any cake remnants out of the pan before taking this picture. I’d definitely recommend PAM if you ever make something that needs to be baked then flipped out of the pan!
We’ve got siding on the first side now.
I spread frosting on the cake first to make it flat because it had impressions on there for the windows for a regular house. Um, I don’t think I’ll have to wade thro’ calls from construction companies asking me to join their siding crew! It is pretty much seamless though, so that’s good.
Now all the siding is on, although you can’t really tell it.
And we have a roof.
A bit more trim and a name for the dog… SPOT, yeah, I know, so original. But, any other dog name (like Maxwell, which is what Lexi wants to name her first dog) would’ve been too long to write. Rex would’ve fit good, too. My first puppy was named Rusty. He was a pure-bred Collie. Ok, he wasn’t actually MY puppy… we had a pair of pure-bred Collies, (beautiful dogs!) and they had pups and so each of us children claimed one and named it. We had them until someone bought them. I had mine the longest and I was tickled when it was my uncle who got Rusty because I could still see him now and then. You don’t know how wonderful that was unless you know how nostalgic I am. My uncle named him Rex, so I really like that name for a dog, except he, of course, was always still Rusty to me.
That’s brownies under the cake (made with brownie mix, of course). I’m not a cake fan, but brownies I can’t leave alone, so that layer is for me. I realized I’m in the minority because the cake was pretty much licked clean and most of the brownie layer was left. Those brownies were just a 9×13 pan, then I cut irregular borders to add a casual look to the cake. The ‘cake board’ is my cutting board covered with tin foil and taped on the bottom. I just wrapped it up like you would a gift.
Here is a close-up of the grass. This was time-comsuming. And my hand got sore. But it looked pretty neat on there… made me anxious for Spring! It is, by the way, snowing outside right now. The grass alone took about a half hour. The entire cake took just under 3 hours.
Here are the tips I used. Started from the left: the tip for the grass, for the trim, for the little flowers in the yard which you’ll see on the finished cake below, for the roof, and the one for the siding. For the stuff that you’d think I used a round tip for, my round tip fell on the floor and got stepped on and smashed awhile ago, so instead of getting another one, I just put frosting in a sandwich bag and snip off a bit of the corner. Works great! And no tip to clean!
Here’s the finished cake…
Here’s the back of it…
And here’s the birthday girl!
This is Tiffany’s second birthday. For her first birthday cake, I made her Lego blocks, pictured below.
The house pan I used for Tiffany’s doghouse is the same pan I used for the house for Lexi’s 4th birthday, except for hers I put 2 together to make it a more realistic-shaped house. To see Lexi’s cakes: birthdays 1 – 4 and birthday 5.
If you ask any questions in the comments, please check back because I’ll reply in the comments. I’d also love to hear from you what birthday cakes you’ve made. And if you have some pictured on your blog, feel free to leave a link so we can go see it!
Comments
17 Responses to “Woof! Woof! It’s Tiffany’s birthday cake…”
Very, very cool. I think you could start a business! My girls are spazzing out. “Can you make me a cake like that? How do you make a cake like that? When can we have a cake like that???” My answer. “Um, probably never, your mom can’t do that.”
I think you have a knack for that kind of thing. I would probably have to read directions for what kind of tip to use for what. Even though I did take a basic cake decorating class. Maybe I just need a fancier decorting kit.
Heidi on March 31st, 2008 12:36 pm
soo cool you did a great job on it! how did you get it to stand up tho?
barb on March 31st, 2008 12:39 pm
How did you get that doghouse to stand up? It looks so narrow to stand up on its own.
That is a really cute cake. I have never even seen a tip like the one you used for the grass. I am going to have to get one of those. That grass was really neat.
Kay on March 31st, 2008 12:58 pm
To get the cake to stand up, when it was laying down (like the 1st siding picture), I cut the bottom at a 90 degree angle. I didn’t measure, I just cut till it looked straight. We were a bit worried about it though. But it survived carrying it out to the vehicle, driving 15 miles (slow around corners!) and carrying it into the house and then some moving it around in the house too. It’s made to be proportioned right to stand on its own, but yeah, still made me nervous!!!
Freida on March 31st, 2008 1:50 pm
Like usual, you flip me out. What can I say? You are a wonder woman! Cee–uute cake!!
I agree on your philosophy for making birthday cakes. Birthdays are something I want to make special every year as a way to celebrate not only the day, but the child as well! For the 2nd year cake, I’ve made it a tradition to make a cake of the child’s first real word. Since Julia’s first word was “hop”, she got a bunny cake, and since Elise’s was “woof”, she’ll be getting a dog cake (but that’s not until May, so I haven’t figured out details yet). I’ve also done a butterfly cake, Larry the Cucumber, and a small fish for a 1st birthday.
Denise on March 31st, 2008 8:44 pm
Wow!! I love that one. Wish I was as good as u r at decorating cakes. Our little guy loves our dog so it would be so neat to make a cake like that for him for his birthday.
Well done!!
Marilyn on April 1st, 2008 5:49 am
Wow!very cool cake! Great job, love all the ideas you come up with for birthday cakes. I always make cakes for my children’s birthdays too, it’s something special for them and it is fun
That cake is really cute!
I always made my kid’s special cakes for their birthdays too. I still make them although now that they’re older the girls get cakes with flowers. I made Tyler a cake with Garfield on it his last birthday. One year I was just to busy to make a cake for one of the girls so I decided I have to buy one. I thought it would be special, since they never had boughten birthday cakes, but oh my, that little girl was not happy. She wanted mom to make it!
barb on April 1st, 2008 7:58 am
I guess I am just plain stupid, but I still don’t understand how you got that thing to stand up. (You should have posted pictures of that:) If you can explain it any better I would love to know, because I might try making one for my son. Thanks, Barb
Kay on April 1st, 2008 8:22 am
Standing the doghouse up (better explanation): First of all, the dimensions are 3″ deep x 8″ wide x 8″ tall. The 5th picture (with all the siding on) shows the width better than any of the other pictures.
I baked the cake in the pan, then flipped it out, let it cool, then when I was ready to stand it up, I thought it looked slightly slanted on the bottom, so I trimmed off a little wedge to make to bottom look totally flat. Then (while it was still laying down, as in picture #4), I took a ‘pancake turner’ and put it under the top part of the house and lifted it (the top) up till it was in an upright position (as in picture #5). The worst part was getting it off of that little cutting board onto the brownie layer… I couldn’t touch the top or sides at all because it was all decorated, so I got 2 ‘pancake turners’ and put one under each side and lifted it over onto the brownie. Mine isn’t anchored to the brownie layer with any toothpicks or anything. We moved it around (carefully) quite a bit and it didn’t fall over.
You’re right, I should’ve had pictures of standing it up… nothing like a picture to help explain something. Let me know if you need more details or anything. Yeah you oughta try it! It was fun to make!
Wow, way to go on the cakes! You do quite an impressive job! I made a castle cake for my daughters 3rd birthday, and there are a few pics of it on my weblog…nothing that great, but thought you might like to check it out beings you’re interested in them. I always love to see new designs and get new ideas! http://weblog.xanga.com/valleygirlatheart
hey i was wondering where you get ideas for 1st birthday cakes…my daughter is turning 1 later on this month and i don’t know where to start looking..
Kay on April 1st, 2008 3:32 pm
I’d Google it, Sharla, and see if you come up with anything. For the 2 I made, the building blocks one was original, the Lego blocks one was one that my SIL saw online and told me about.
I always made special cakes for my kids when they were little too. At that time I’d taken a Wilton decorating class and bought a few of their pans. They had four mini pans that took one cake mix. I think there is a bear, train, dolly and don’t you know the last one is escaping me at this very moment. I had them all then when dolly came into mind it typed that and the other one left. lol. I used the train a few times because we have a train in our backyard (for real). Also did BigBird one time. That too took a lot of time making all the feather looking things. Fun Fun
Are you wondering if I’m serious? You’ll find out at the end.
I was paging through a cookbook one day last week while I was laid up with my sprained ankle. It was the same day and the same cookbook that I saw the Fudge Sundae pie in a few posts ago. Anyway, I saw a recipe titled ‘Oreo Cookies’. I read the directions and they do get flattened and I wondered if someone had actually figured out how to make them with that taste that only Oreos have and with the crunch, too. I had to try them. So, from the Cooking with the Horse and Buggy People cookbook…
Oreo Cookies
1 cake mix, white or chocolate (I used chocolate) 2 eggs
2 Tbsp. water
2 Tbsp. cooking oil
1/2 cup cocoa
Let stand 20 minutes. That’s the first directions given, but I took it to mean after everything was mixed together! Do not refrigerate.
Shape into balls. Flatten with bottom of glass greased once and dipped into Nestles Quik (I think it’s actually called ‘Nesquik’) for each cookie. Bake at 300 for 8 minutes.
Here are the cookies right out of the oven. Yeah, they pretty much look the same as when they went in. Maybe slightly fatter.
I think I went a bit overboard on the Nesquik with a few of them. Oh well. That might not be a bad thing.
Filling: 1 envelope Knox geletin
1/4 cup cold water
1 Tbsp. plus 1 cup powdered sugar (not sure why the 1 Tbsp!)
1 tsp. vanilla
1/2 cup Crisco
And that’s where the recipe ends, folks. No directions. This cookbook is kinda interesting that way. Sometime, I’m gonna scan in a recipe from it and see if you can help me figure it out. Usually, I can kinda go from past experience and know what to do, but there’s one recipe that sounds very yummy that has me clueless. Anyway, I mixed the filling up and spread it between 2 cookies.
I actually ended up making the filling twice. All I have is butter-flavored Crisco, which is yellow. It makes the filling a light yellow, which I didn’t think looked too good, so I made it again and used butter instead. It turned out fine. This recipe made 25 1/2 complete sandwich cookies (51 halves).
Now, our take on them: When my taste-testers (aka: my husband and girls) tested them, here were their responses: Husband, “They look like mini whoopie pies” then after tasting one, “They’re better than Oreos.” Lexi (5), “Oh, they’re so cute!” then a little later, “Mom, can I have another one?” and Tiffany (2), she didn’t say anything, she just pulled it apart, licked the frosting off, refused to eat the cookie part, and begged for another one.
They ARE cute. They were the size of Oreos, except fatter. And they sorta had the same taste. But they didn’t have the crunch, they were soft like regular cookies, which if you ask me, when it comes to cookies, ‘soft’ is better than ‘crunch’. Some things aren’t like that though. Like chips. These cookies were a bit time-consuming to make though, for no more than food than it ended up being. Maybe if I’d make them bigger it would help.
I doubt I’ll get the urge to make them again. Like I said, “Why make ’em when you can buy ’em?”
Or isn’t that what I said?
—————————————————-
Coming up next… the making of Tiffany’s birthday cake. So check back on Monday! It’ll be along the same lines as the other birthday cakes in the ‘Birthday Cake” category in the ‘categories’ section, so you can go look at those awhile if you want to.
Comments
7 Responses to “Oreo Cookies – Why Buy ’em when you can Make ’em?”
I loved Tiffany’s take on the cookies. Sounds like a regular 2 year old.=) I really should go get ready for church instead of reading your site though.
Charlene on March 30th, 2008 10:55 am
Did you ever have the soft oreo cookies?? My children love them ,these look almost the same.
I did a similar recipe to the one you did. Came out the same way. The only difference between the two; I used a stamp pad (don’t worry it was never used with ink prior to or afte making the cookies) to make a design on them.
This is my 1st Thursday Thirteen. Since this is a cooking blog, my Thirteens will mostly be about things that have to do with my kitchen. Yeah, I thought that made sense too. So, here we go…
I hope I can think of 13 good things so I don’t have to put things in like ‘Sweep the dirt under the rug instead of bothering to get out the dust pan’. Because we know that that actually doesn’t save time. And we know that it’s not a good enough excuse that your company is walking in the front door. Plus, we’d never think of doing that anyway. We just know people who do it.
1. Breakfast in a snap… mix up a big batch of pancakes and fry them all. When everyone is done eating, put the rest in serving sizes (2 or 3 pancakes)in Ziploc sandwich bags in the freezer. When you get them out of the freezer, put them in the microwave until they’re steaming and soft. They taste as good as they did the morning you fried them!
2. Twice the food, without twice the work… next time you make a casserole, like lasagna, make 2 pans instead of one. You’re frying hamburger and cooking noodles anyway, might as well throw more in. Put one pan in the oven for dinner, cover the other pan tightly and put it in the freezer. You’ll be SO glad for it next week on one of those harried days… you know the days I’m talking about.
3. Quick bread crumbs… the secret is they’re not actually bread crumbs. Keep Club crackers on hand and when a recipe calls for bread crumbs, simply crush the crackers. They taste better too, especially when tossed with melted butter and browned on top of a baked dish.
4. Fresh warm cookies every day… without baking them! Whether you get them out of the cookie jar or out of the freezer, throw them in the microwave for 10 or 20 seconds and you’ll have a warm cookie that tastes like it’s just out of the oven. Now, I want a cookie. And I do have some in the freezer…
5. Quick measuring… keep a measuring cup in the flour and sugar canisters. You don’t have to dirty a cup every time you measure and you don’t have the extra step of getting one out of the drawer.
6. Clean-up time… after a meal, do you always have scraps (fat cut off of chicken, food chunks or barbeque sauce left on plates, oil to scrape out of the skillet after frying, etc.)? Get a piece of tin foil and scrape everything onto it, then fold it all up and throw the whole works away. I like tin foil because if something is juicy, I can fold up the sides and it holds it all in.
7. Easy croutons… sprinkle Italian seasoning on bread, then butter it. Do it on both sides and put it in the toaster. Pop it up as soon as it browns. Cut the toast in squares with a pizza cutter. They taste great and they’re soft enough to poke with a fork.
8. Especially for kids… get a water dispenser (if you don’t have one in the door of your fridge). You can get them at Walmart or wherever. It’s a jug with a spout on it. Put it on a low shelf and the kids can get their own drinks. No heavy jug or pitcher to pour.
9. Bread in a hurry… want the bread dough to rise quicker? Warm a towel in the microwave, then wrap it around the bowl that the dough is in. You may have to re-warm it a few times till the bread finishes rising.
10. Bread in even more of a hurry… ah, these are my meal-savers! If you’ve been reading this site for awhile, you know I’m a fan of these… popable cans of crescent rolls, French bread, and dinner rolls. We have hot bread or rolls at almost every meal and this is just the fastest and easiest way to go! You think they don’t taste as good? Well, then you haven’t tasted my from-scratch yeast bread. I still have much to learn in that dept.
11. Cinnamon sugar… take an empty cinnamon bottle/can/container (whatever you call it?!) and fill it 1/4 of the way with cinnamon, then the rest of the way with sugar. Shake it and flip it till blended, and you’ve got a handy topping for toast or unsweetened applesauce. Oh, and take a marker and write ’sugar’ on the front beside ’cinnamon’.
12. Cut it up all at once… when you buy a head of broccoli or cauliflower for fresh eating, cut them up into florets and put them in plastic bags in the fridge. You’ll be more apt to eat them that way. And you don’t have to get a knife out every time you want some.
13. The shopping list… as you’re working in the kitchen and you see the shortening or dishsoap or whatever is getting low, write it on the shopping list (which is magnetic and stuck to your fridge). Your list is ready to go shopping when you are and fewer things are forgotten. Just remember the list! Does anyone else forget the list? Or is it just scatter-brained me? Too often, I find myself roaming the aisles, trying to picture my list and what was on it… while the girls are begging for Hi-C box drinks and throwing colored marshmallows in the cart.
Now, I want to learn from you… what shortcuts do you do in the kitchen?
Comments
13 Responses to “13 shortcuts in the kitchen, Thursday Thirteen #1”
I have to tell you, I am NOT much of a cook at all, so I was surprised to find that I do a lot of these already! My Mom will be SO proud! I still learned a few things from your list of great tips, though, so thanks!
Jan on March 27th, 2008 6:53 am
#1 I love to make a big batch of pancakes, in the evenings I get out the toaster and then the children pop them in there in the mornings when i’m busy w. the babies. #7 I am going to try the easy croutons sounds much quicker than the oven. #8 make sure the little spouty thing doesn’t get pressed by a fridge shelf when the door closes! not fun
I do a few of these things too, esp the pancakes. The girls love them and I love NOT making them. I like the clean up one. Gonna have to use that!
lisa on March 27th, 2008 9:29 am
if you use instant yeast, your dough only has to rise once. so you can mix, knead, and shape your bread,rolls, etc and THEN let them raise once. the first time i tried it since i heard that was last sunday morning with cinnamon rolls, and i couldn’t tell any difference.
Great list of ideas! Personally, I love my crockpot! Especially on Sundays. I can put our meal in before we head out the door to worship and it is ready when we get home. It cuts back on the urge to go out to dinner and spend money we really could use better elsewhere.
You are the first Mennonite blogger I have met! And, I’m pleased to meet you.
One of our family’s favorite cook books is the Mennonite cook book, More With Less, which I have used for 25 years.
Also, when our children were little, I used the Mennonite curriculum, Rod and Staff, to teach them, though we are reformed presbyterian Christians, not Mennonite.
Audrey on March 28th, 2008 7:07 am
Hey, I really enjoyed these tips. Some of them I already do and some of them would be good to get started with. I can’t think of any tips right off hand of my own, but I enjoyed reading yours. Thanks for all the work you put into this site…I’m a regular visitor.
Esther on March 28th, 2008 7:40 am
My husband LOVES cookies. Something I like to do is freeze cookie dough that I’ve shaped into balls. When he wants fresh cookies, he can pull out a dozen, thaw them, and bake! It’s great for when I’m at work.
I discovered your blog through my nephew’s blog (cfhusband.com) and I love to eat so naturally I ended up popping over to check out your blog. I’ll be back. I do 95% of the cooking in our home and really enjoy cooking.
Your tips were fantastic! I always end up dumping out half of my pancake batter once everyone is full. Thanks!
Ah, we used to chant that alot. Things were funnier back then.
I’m not screaming for ice cream, but I do feel like screaming, I especially felt like it last night! We were having what looked like a good ol’ fashioned WI blizzard out there… that’s when big snowflakes are flying horizontally past the window instead of falling vertically. I’ll bet the snowflakes going past our windows didn’t land till they got to Tims, a mile away. Thankfully, the snow didn’t amount to much, but really, it’s the end of March! And we just got dumped with snow last week.
And we still have plenty left.
And it’s snowing at the moment!
Anyway, what does that have to do with ice cream? Like the saying “When life gives you lemons, make lemonaide”, well, we got snow in March, we want to make snow ice cream.
Snow is one ingredient and I think milk of some sort too. But, I haven’t been able to find a recipe for it, so I’m wondering if any of you can help us out. I know, seems like kind of a funny recipe to have in a cookbook, but it seemed less weird all the time as I was finding recipes for suet balls for birds, playdough, laundry detergent, and dandelion gravy! I never did find a recipe for snow ice cream though.
So, do any of you have a recipe for snow ice cream? If so, and you have the time, you can leave it in a comment. Thank you!
Comments
14 Responses to “I Scream, You Scream, We all Scream for Ice Cream”
This is the recipe we used when our boys were little:
1 c. milk
1/2 c. sugar
1 beaten egg
1 tsp. vanilla
CLEAN snow to thicken.
Flavor to taste with chocolate, strawberries, etc.
If using a raw egg bothers you, leave it out. You could use richer milk too, if you like.
Jo on March 25th, 2008 10:17 am
My MIL used to make this for the grandchildren, but I don’t remember what all she put in it…I know that vanilla extract & sugar were 2 of the ingredients, and I think sometimes she used other extract flavors, too.
JoAnn on March 25th, 2008 10:25 am
Here’s a website I found with a couple of Snow Cream recipes:
Seems like something my girls would like too. Might have to try it, NEXT year!!!
Jessica on March 25th, 2008 12:00 pm
We never had a recipe. Just sugar and milk with snow to thicken and a bit of vanilla or hersheys syrup or strawberry syrup or nuts or sprinkles or whatever you liked. I think I need some ice cream…
Here is one I cut out of “The Budget” a couple of weeks ago.
Snow Cream
4 quarts snow, lightly packed
12 oz. can evaporated milk or 1 1/2 cup cream
1 cup sugar
1 1/2 cup powdered milk
1 package instant vanilla pudding
1 t. vanilla
dash salt
Place all ingredients in a large bowl and beat on high speed until fluffy. May be stored several months in the freezer. After freezing soften slightly and beat until fluffy before serving. It may crumble some but keep beating. Can also use different flavors of pudding for variation of flavors.
I’m anxious to try it as we always just used sugar, milk and vanilla before. But I shall have to wait until next year, I suppose…
barb on March 25th, 2008 12:18 pm
Something I tried this winter was snow cones, (in a glass). I used a packet of Kool-Aid, 1 cup of sugar, and approx. 2-3 cups of water. Pour this syrup over clean snow and enjoy. My boys liked it better than the snow ice cream we made.
I know the feeling! During our blizzard a few weeks ago here in Ohio, we made snow cream too. My husband’s recipe says:
2 cups milk
1/2 cup sugar
1/2 cup cream
1 egg, beaten
1 teaspoon vanilla
1/8 teaspoon salt
Mix together; chill. Add snow to desired consistency. Chocolate or strawberries may be added for flavor.
The snow cream is a family tradition on his side, on mine, when we get snow, we make “Wax on Snow”. Ever heard of that? It’s simply pure maple syrup boiled, then drizzled over snow. Dip a fork into the sticky drizzles and eat. (Comes from growing up in northern NY!)
The recipe from the “Budget” was sent in by my sister-in-law who passed away over 3 years ago. We did a double take when we saw her name in the current paper. Evidently she had sent it in and it laid around for several years before they used it … either that, or they reused it because of all the snow they have been having this year. I like to use sweetened condensed milk in my ice cream recipes. It seems to give a smoother texture. You can reduce the amount of sugar in the recipe since the milk is sweetened. I hope your foot is healing.
Posted on March 23, 2008
Filed Under Desserts, Pies
I’m featuring a fudge sundae pie today that is just tops. One glance at the ingredients and you’ll see why you can’t go wrong here. There are not alot of recipes that each separate ingredient would be good by itself. I am, in fact, eating a piece right now. I’ll be taking a bite every couple sentences. I don’t usually eat at the computer, but I make exceptions now and then.
I remember Mom making this when I was still at home. And I’ve seen this recipe now and then in different cookbooks. The cookbook I used for it this time is Cooking with the Horse and Buggy People. It says the recipes were shared by Amish ladies from Holmes County and Wayne County. So, you readers from there, here you go, a recipe from your neck of the woods…
Fudge Sundae Pie
1/4 cup corn syrup
2 Tbsp. brown sugar
3 Tbsp. oleo (oops, what I said about each ingredient tasting good by itself, I take that back here, forgot about the butter when I said that!) 2 1/2 cups Rice Krispies
Combine syrup, sugar, and oleo and cook over low heat until mixture begins to boil. *Another bite* Man, this stuff is good!!!
Remove from heat and add Rice Krispies. Press evenly in greased pie pan.
Mix:
1/4 cup peanut butter
1/4 cup fudge sauce
3 Tbsp. light Karo (I used the same stuff as the corn syrup above)
I actually didn’t know what they meant by fudge sauce, but I thought I couldn’t go wrong with this, so this is what I used.
Spread half of mixture over crust.
Spread 1 quart vanilla ice cream over mixture. Ok, I usually try to follow recipes exactly so I can feature them accurately, but once in awhile, I just can’t help but substitute, like now… Caramel Collision ice cream won over boring vanilla ice cream here.
Freeze. Before serving, warm remaining sauce and drizzle over the top. It didn’t exactly drizzle (and I warmed it till it was bubbling), so I put it into a baggie and snipped the corner off and piped it on. Maybe I used the wrong ‘fudge sauce’.
All I can say is YUM!!!
Comments
8 Responses to “Desserts just don’t get much better than this…”
I think I might try it and leave out half the chocolate. I know, call me crazy!
Sharon on March 23rd, 2008 9:29 pm
“and I’ll take a bite every couple sentences…” Do you have insurance to cover all the ruined keyboards from the drool? !! I even felt like licking the screen–don’t tempt me like that! ????
Yum, I love ice cream pie! I have one recipe that has a little peanut butter in the crust and in the fudge sauce. My mom sometimes makes it w/ out the chocolate and tops it w/ fruit. I prefer the chocolate, though.
Carol on March 24th, 2008 10:25 am
So perfect to have the empty plate by the keyboard at the end of the post!!!
Heidi on March 24th, 2008 9:15 pm
yumm this looks so good! where do you find oleo? is that with like the shortenings and stuff? can you get it at walmart?
Kay Martin on March 24th, 2008 9:20 pm
I actually substituted butter for the oleo. I should look and see if I can find oleo at the store. Hmmm, wonder what the difference is. Research project for me…
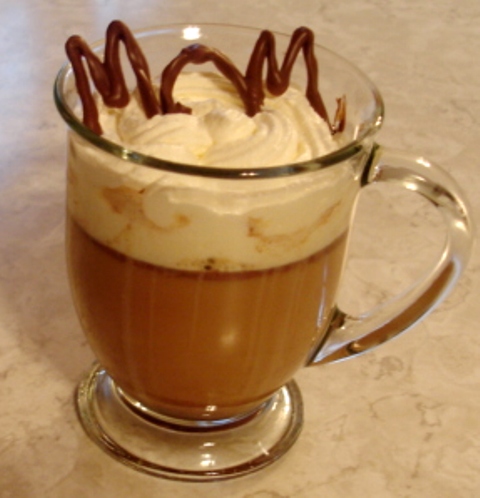
 I could go on and on about memories, like the creative way you gave me a life-sized doll for my 6th birthday, the fun we had having our own little garden plots out of your big garden, jumping in the car to go see the ‘billowing smoke’ that turned out to be a cloud, how I openly told my teenage girlfriends that you are my best friend, etc., but since this is a cooking blog, I’ll stick with stuff in the kitchen.

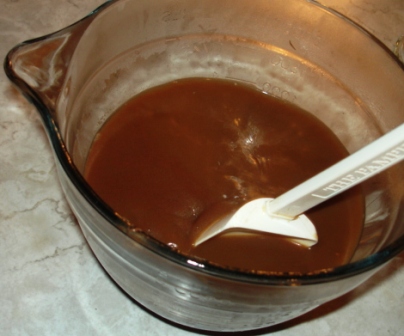
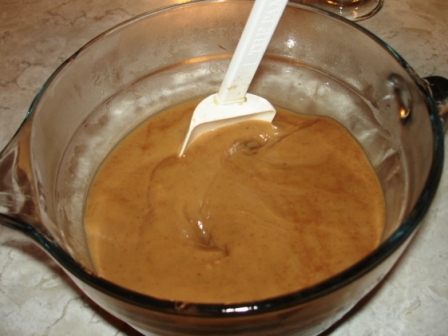

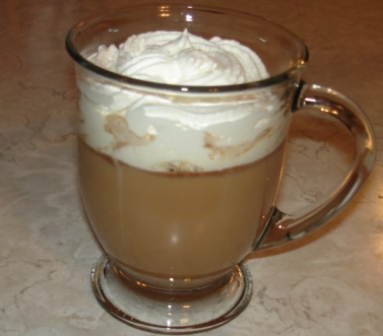
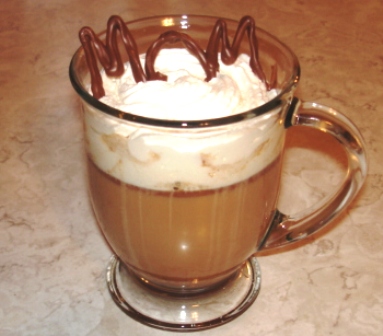

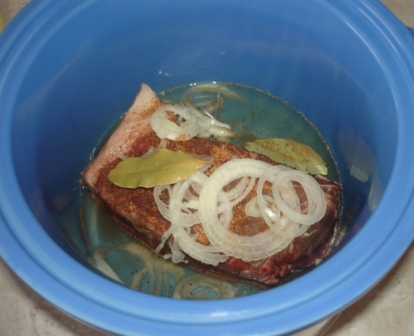
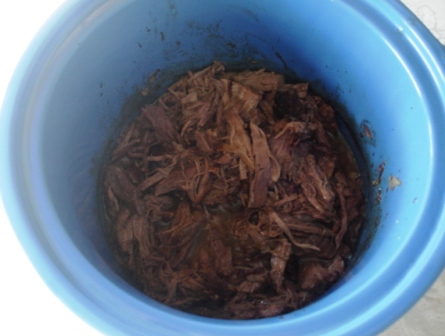
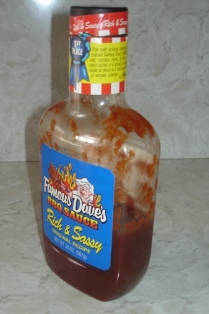 This is how much barbeque sauce I used. I dumped it in, then put a little water in to rinse out the bottle (I know, so thrifty… I’ll bet I kept from throwing away a whole Tablespoon of sauce!) and dumped that in too. A little more barbeque sauce and a little less water would’ve been ideal for more flavor, but I guess that’s the thing of always just doing it without a recipe… it’ll always get a little different. Plus, to do that, I’d have had to break open a new bottle of sauce, just to get a little more. Oh, what a bother.
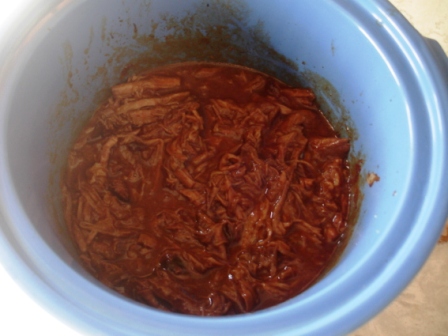
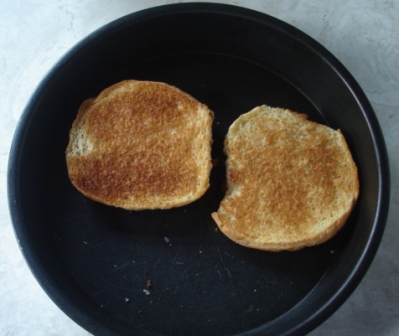
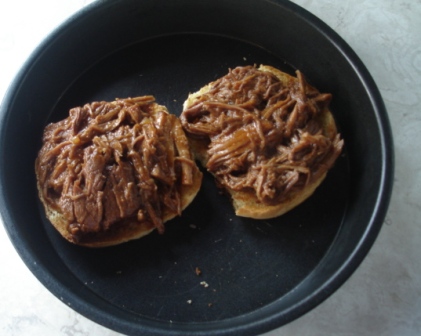
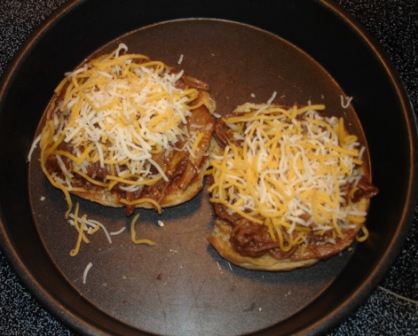
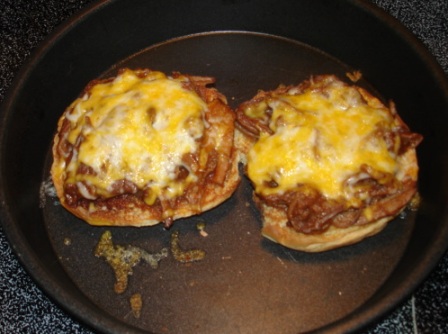
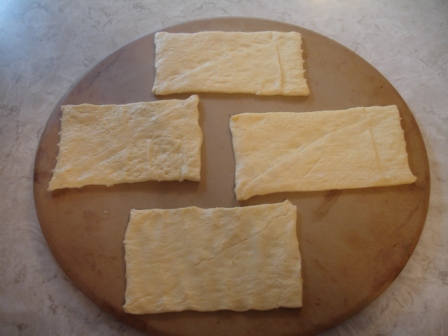
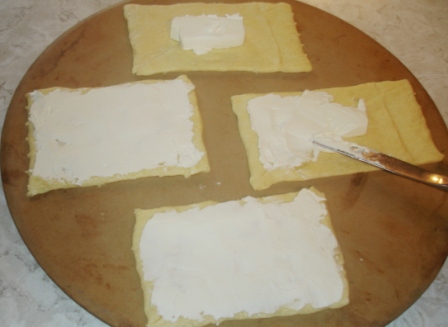
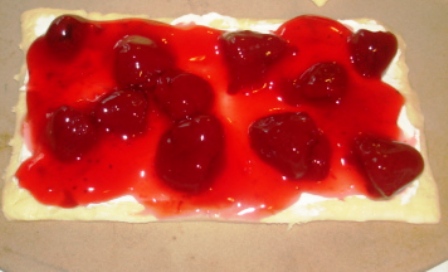
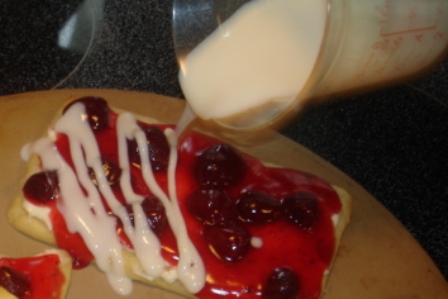
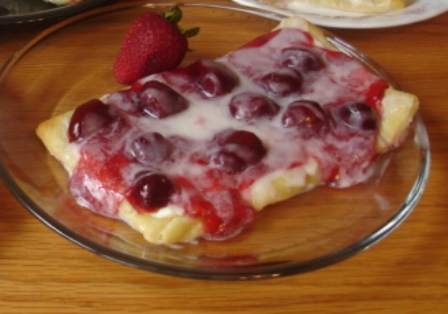
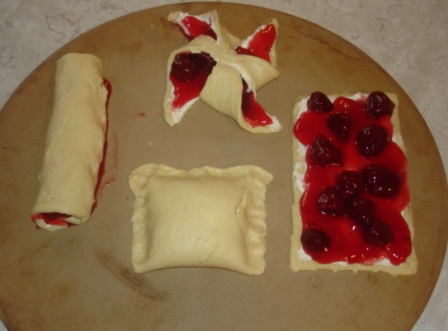


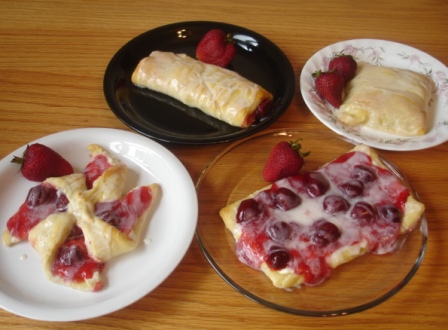
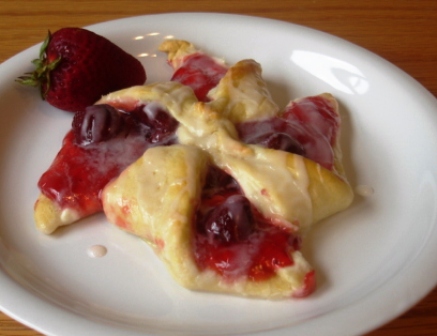
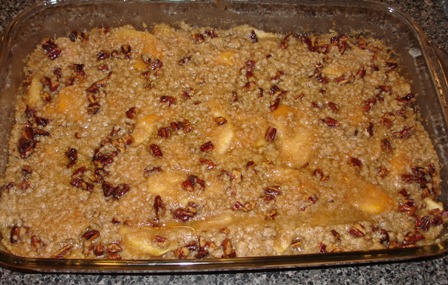

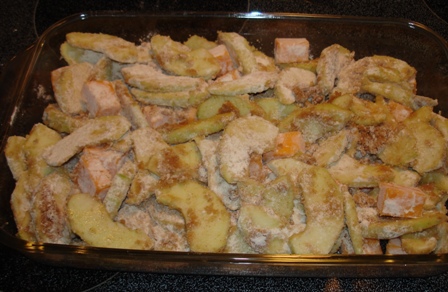
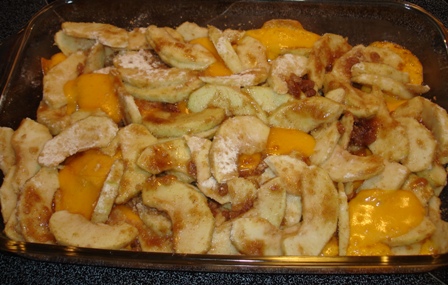
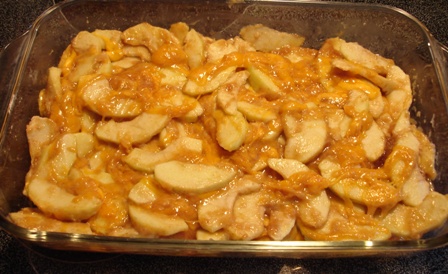
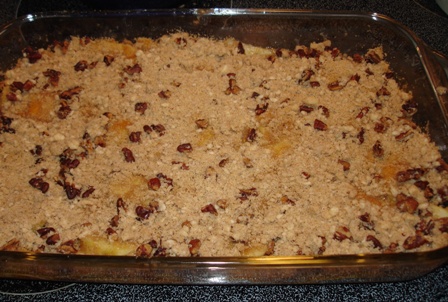
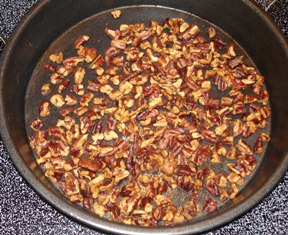 Spread in a round baking dish. Preheat the oven to 350 degrees. Bake for 13 minutes or until lightly toasted, then cool.
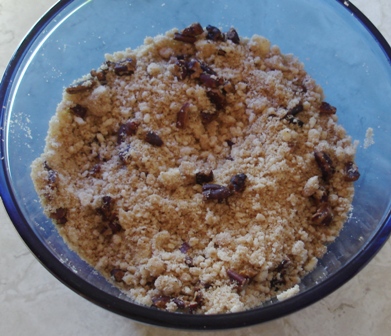
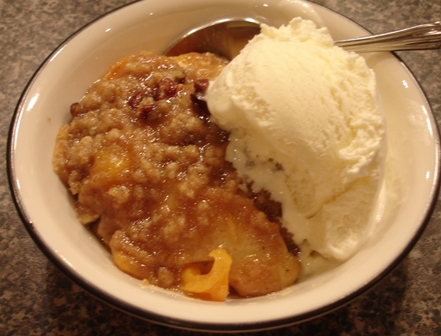
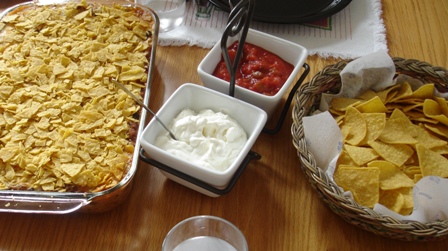
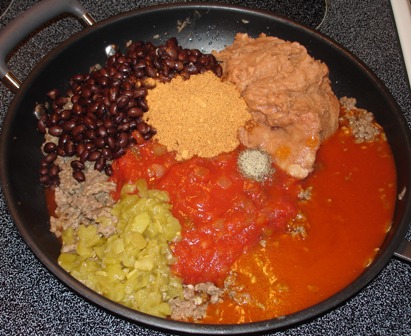
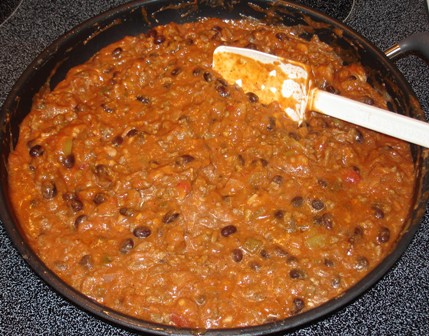
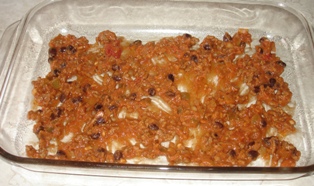 Spread 1 cup sauce in a greased 9×13 baking pan.
  Layer with 2 tortillas,
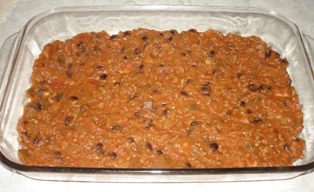 a third of the meat mixture,
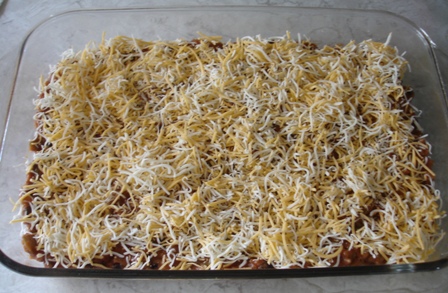
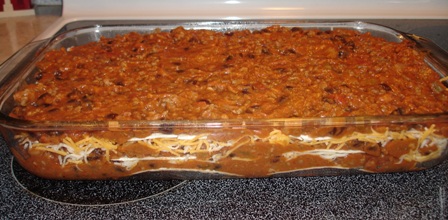
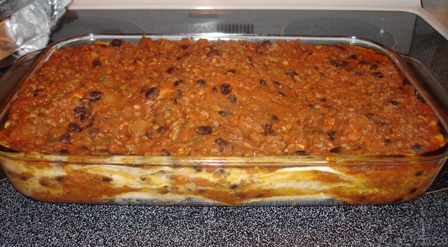

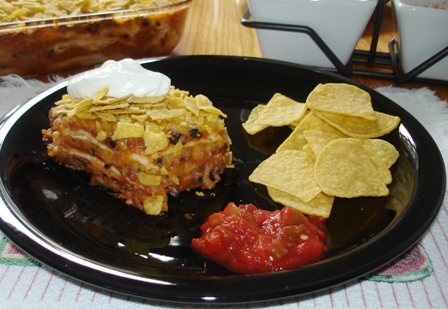
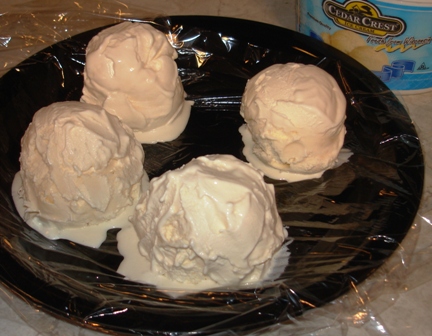
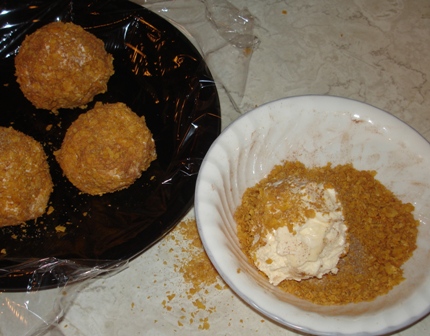
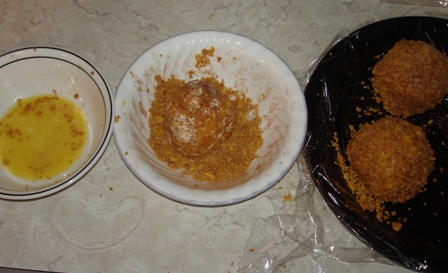
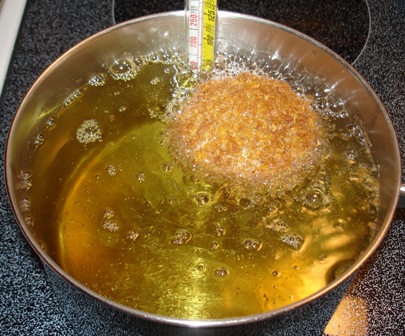
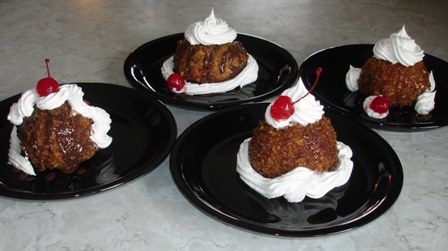
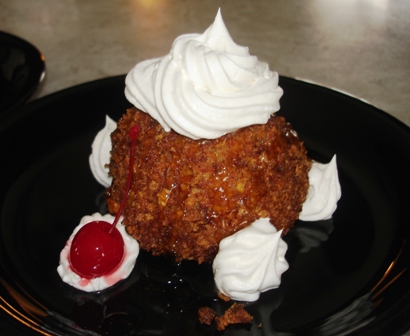
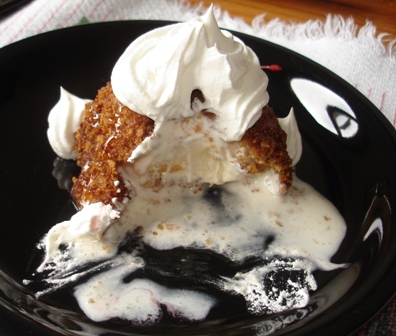


 they’re going on sale pretty often at Marketplace, so I can’t resist keeping them around.

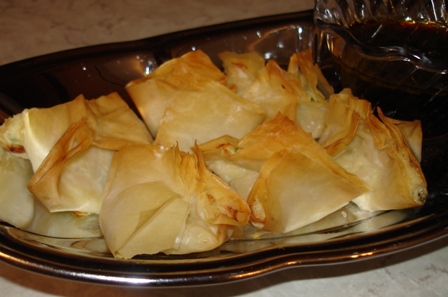
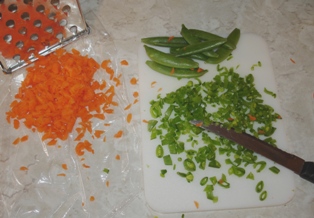 Shred carrot.
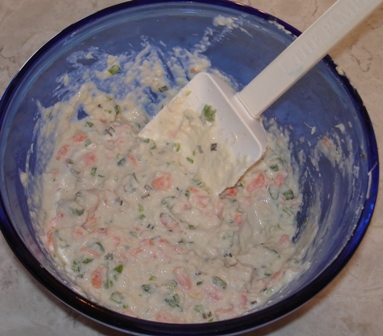

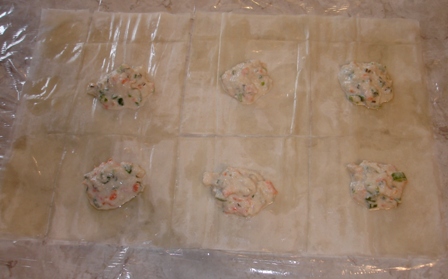
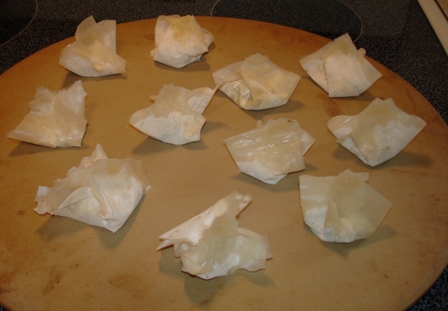
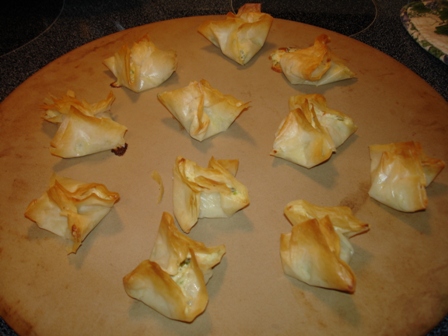
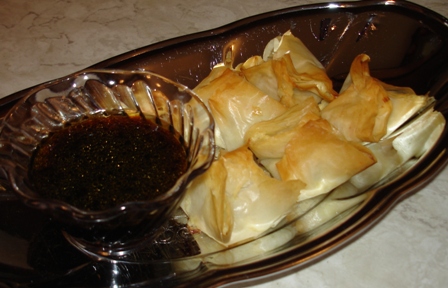
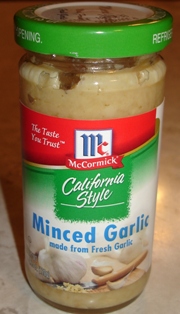
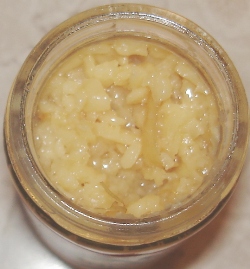
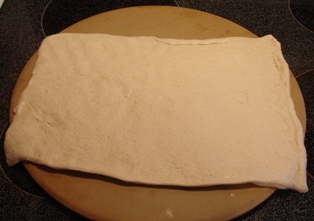 Roll out pizza dough into a rectangle.
 Spread with pizza sauce.
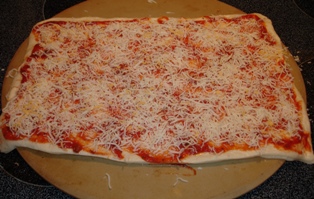 Sprinkle with some cheese.
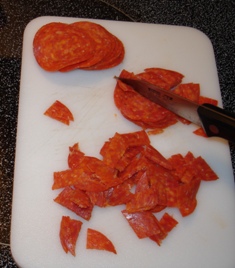 Chop up pepperoni
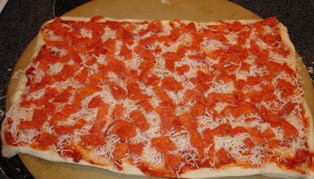 and put on top of cheese.
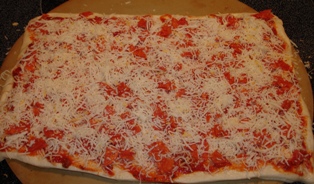 Add more cheese and Parmesan cheese.
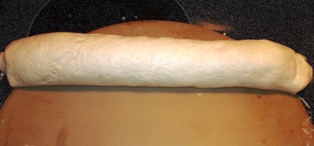 Starting at a long side, roll up like a jelly roll.
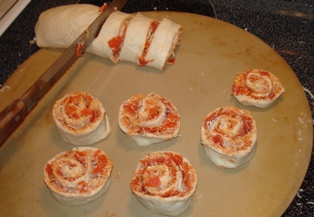 Spray a bit of cooking spray on a sharp knife and cut the roll into 1″ thick pieces. Lay cut side down on baking sheet.
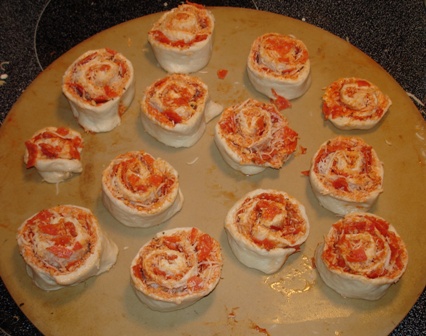
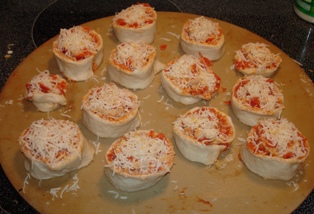 They looked pretty messy, so I gave up on the swirl effect and sprinkled some cheese on top.
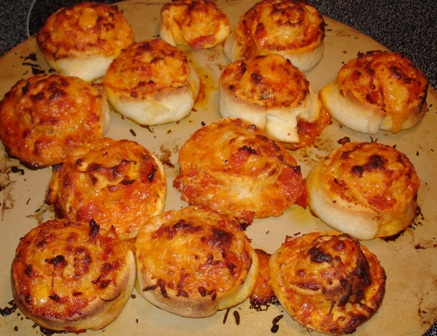 Bake at 400 for 15 – 20 min or until browned.
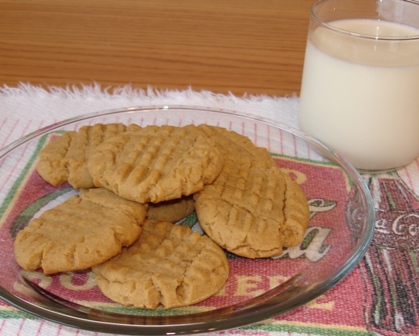
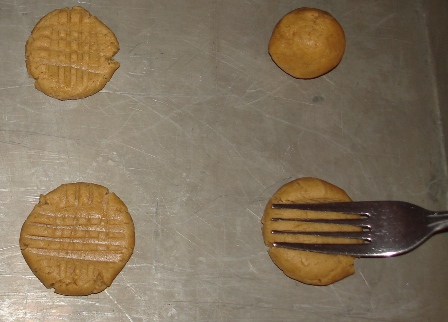
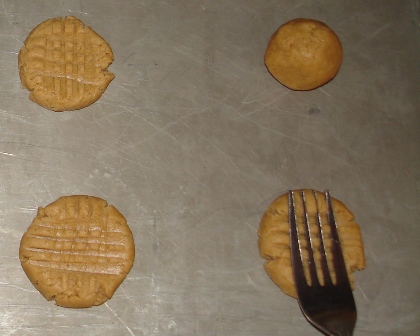
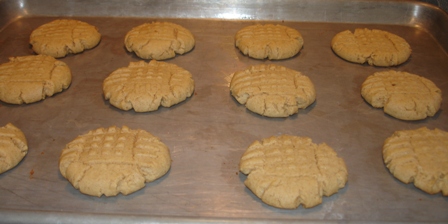
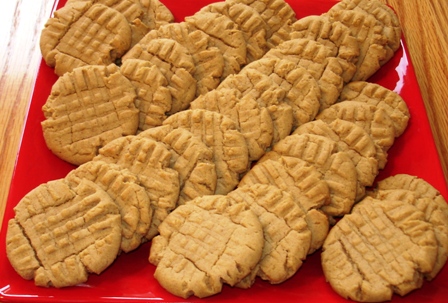

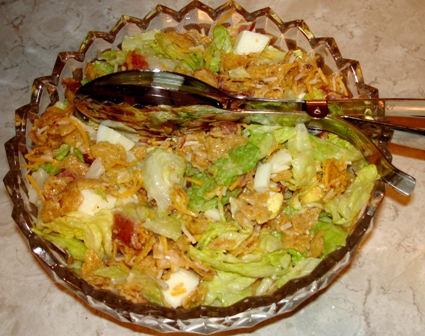
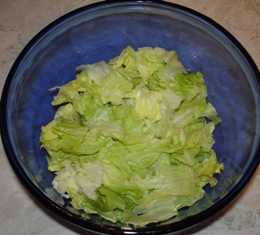 …Lettuce
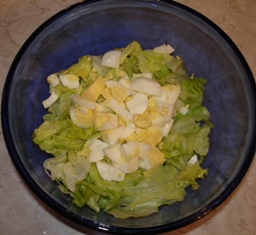 …Eggs
…Eggs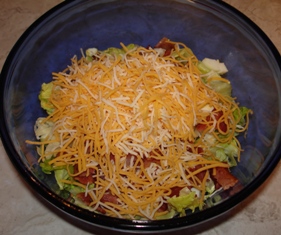 …Bacon and cheese
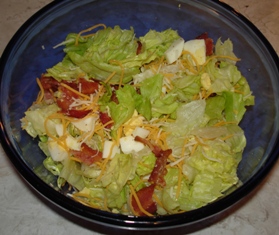 Toss it.
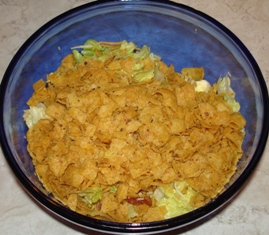 Add dressing and corn chips.

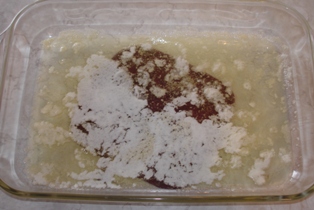 Layer #1: butter.
 Layer #2: graham cracker crumbs
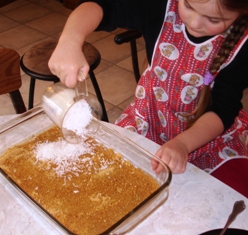 Layer #3: coconut
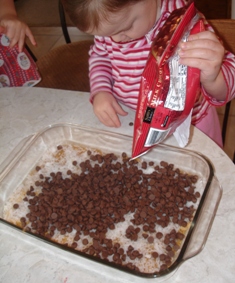 Layer #4: chocolate chips
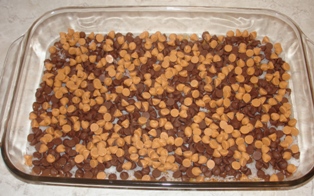 Layer #5: butterscotch chips
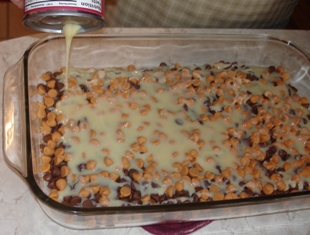 Layer #6: sweetened condensed milk
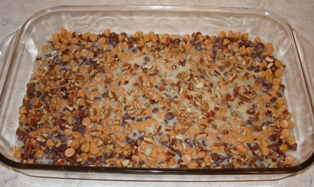 Layer #7: chopped nuts (I used pecans.)
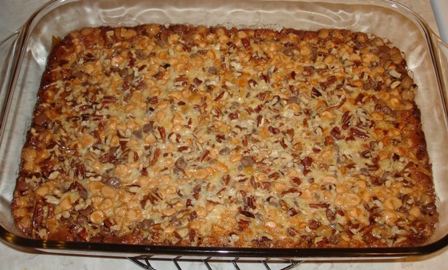 Just came out of the oven. Slightly browned around the edges.
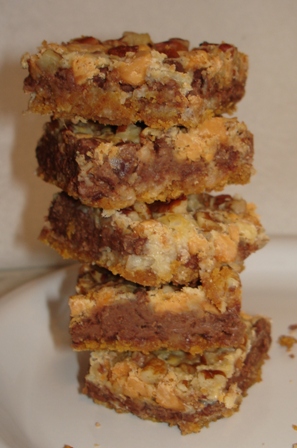 Mmmmmm! Just delicious!
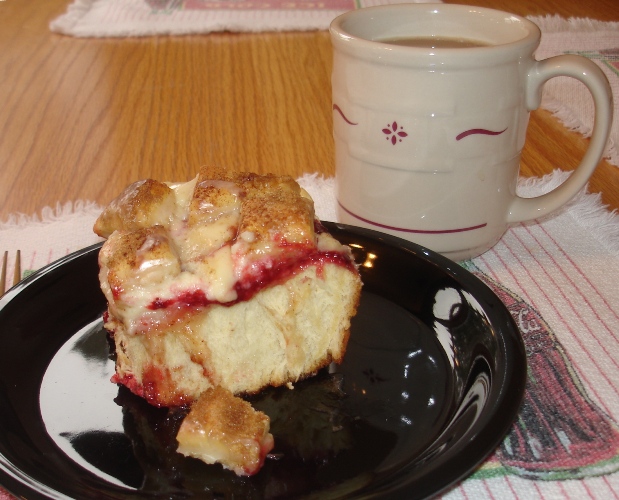
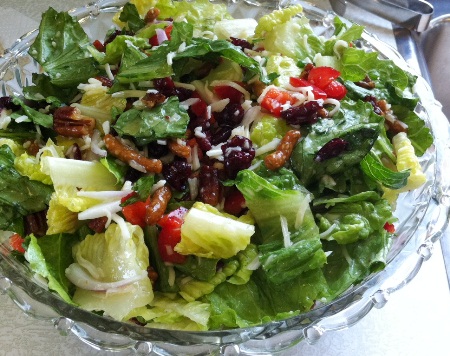


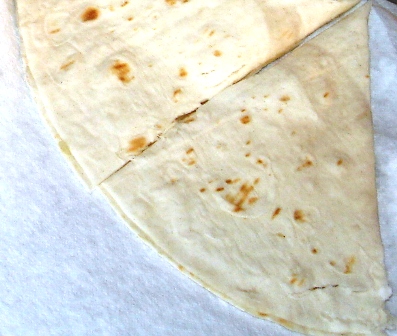

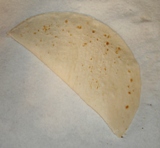
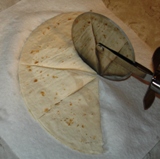
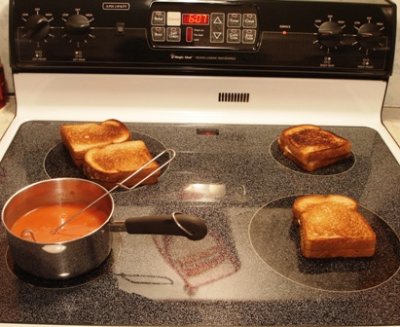
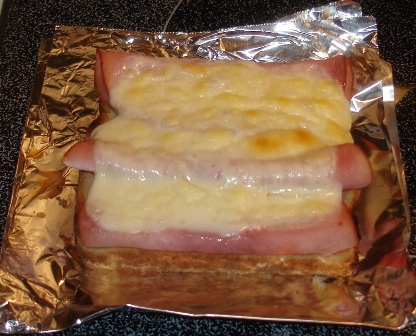
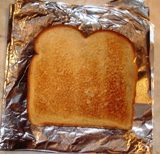
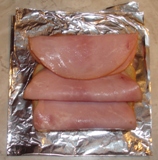
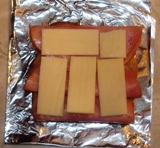
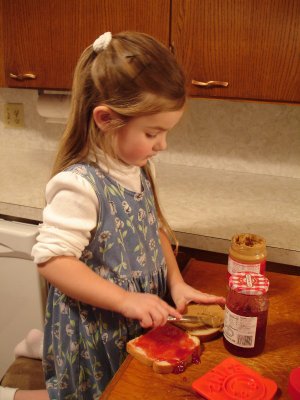
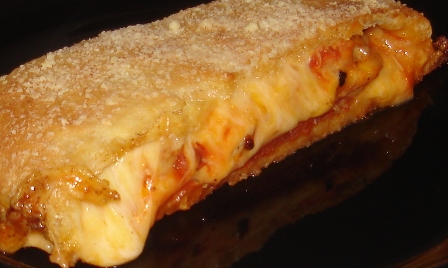
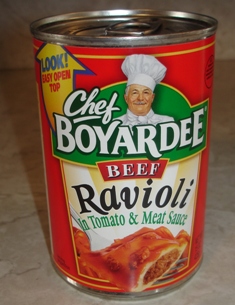
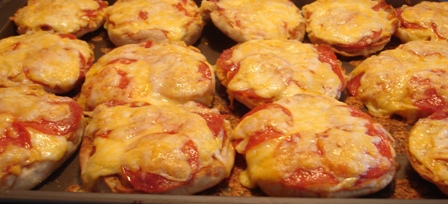


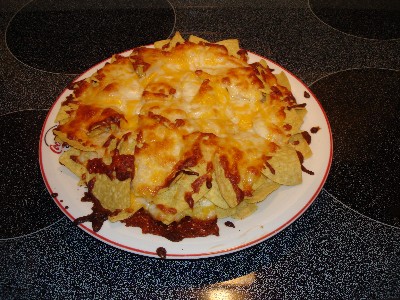
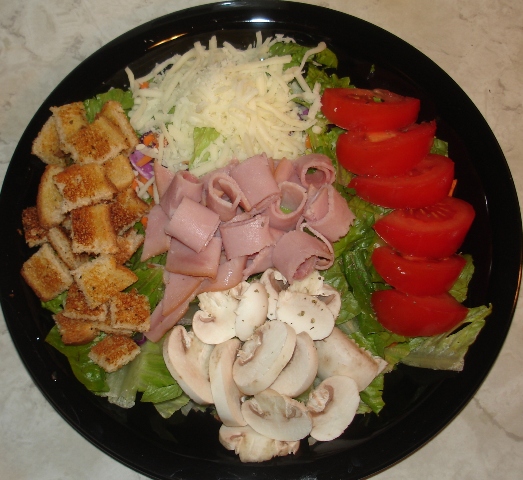
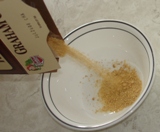
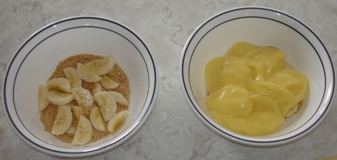
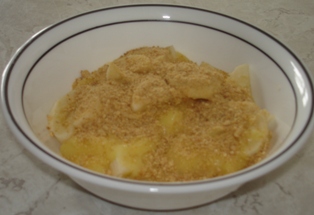

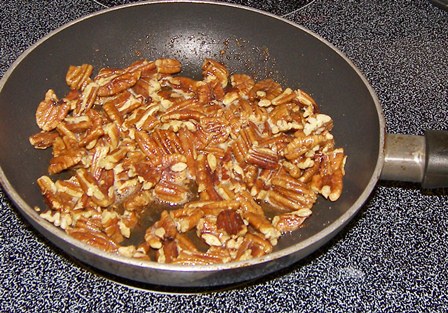
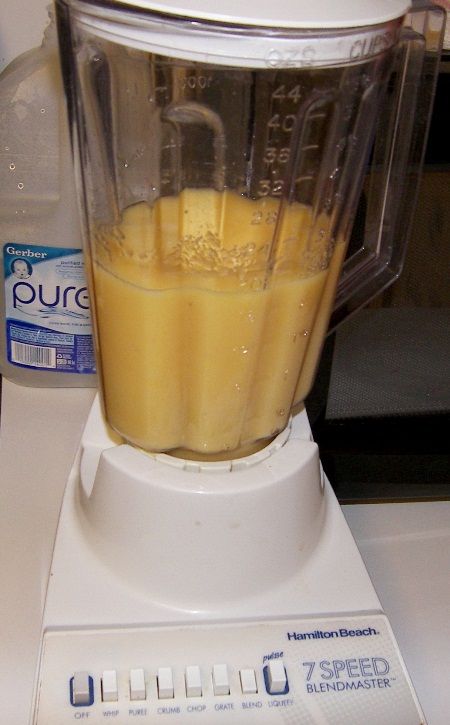
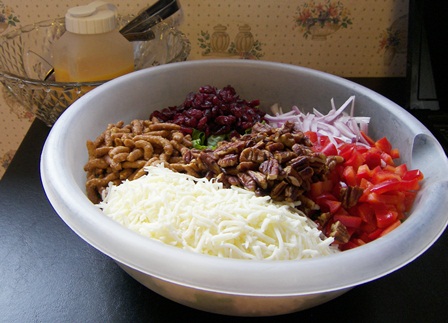
 Oh, well, I’m dieting again anyway. Ha!
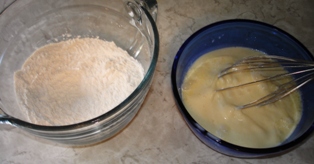
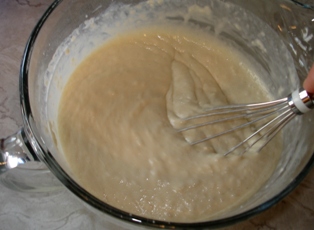 Add milk mixture to flour mixture all at once and stir until just combined (should be a little lumpy and quite thick).
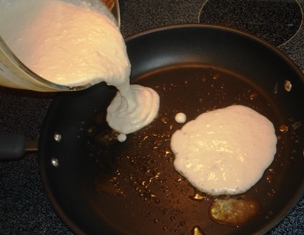 Can you hear the sizzle?
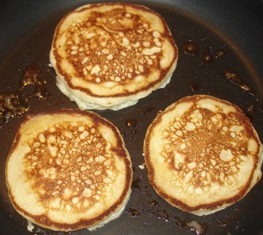
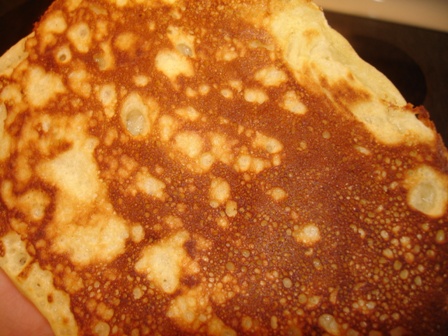 Just look at the texture of these pancakes! They were so soft and fluffy and had visible air pockets. They tasted great too… probably partly because of the melted butter! Delicious! this recipe made 18 4″ pancakes (give or take an inch, depending which pancake you pick).
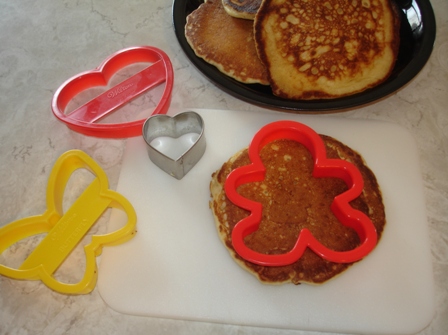
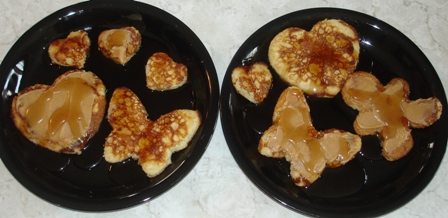 Their plates.
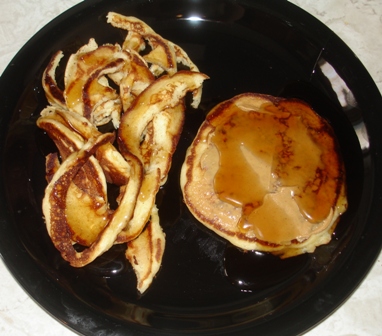 My plate.
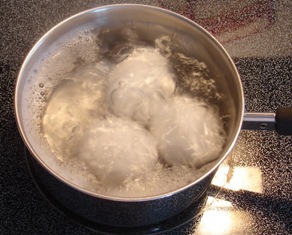
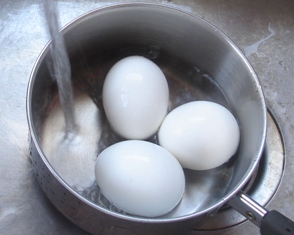


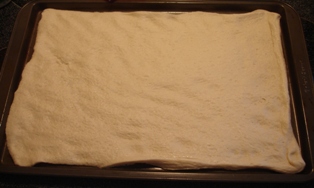
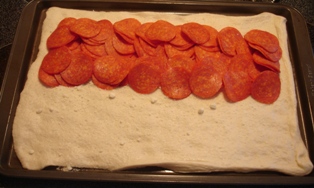

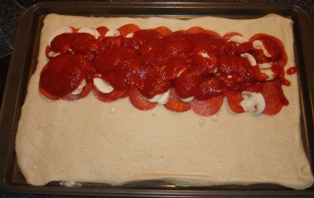
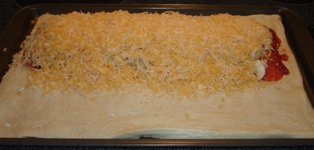

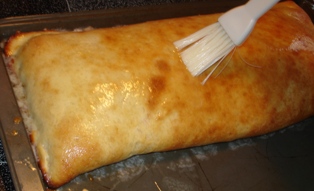

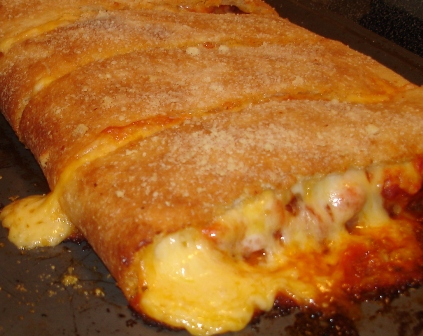


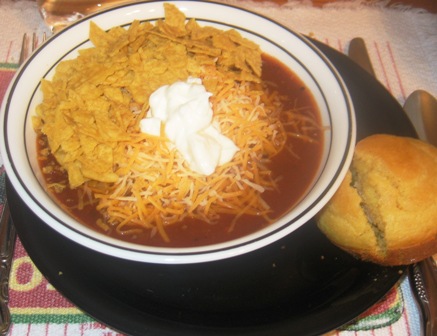
 This is the kind of cookie that I make the most often, even way more than regular chocolate chip cookies. I bake these probably about every 6 – 8 weeks… more often if I’m not on a diet. Speaking of which, yes, I do know the calorie count. It’s 175 calories per cookie if you get 7 dozen out of the batch.
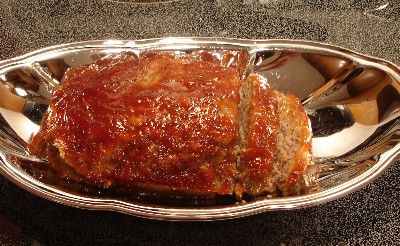 After years of looking for the perfect meat loaf recipe, I finally found it. It is just incredible. And I don’t even put the shredded carrots in. That top ketchup part is great too! Mmmmm, now I’m getting hungry.
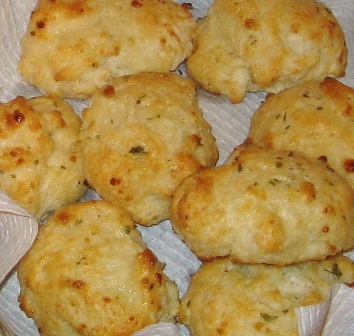 Ever been to Red Lobster? These taste like the real thing! They are so soft and so good and very melt-in-your-mouth. Just delicious! And they’re fast and easy… except the part where you beat the dough with a wooden spoon for 30 seconds!

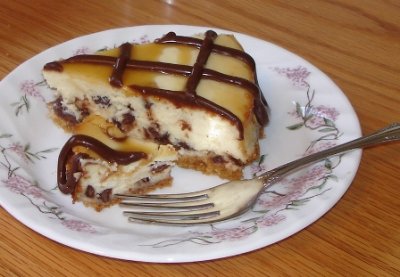
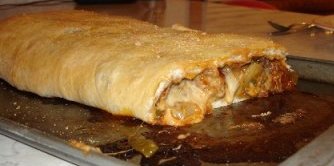
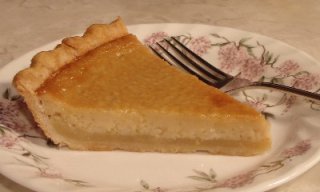
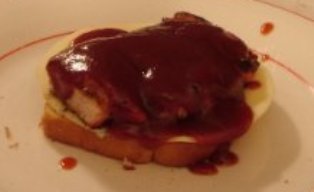
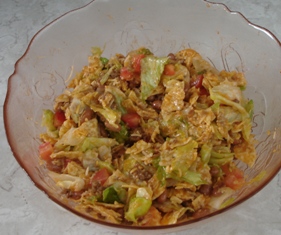
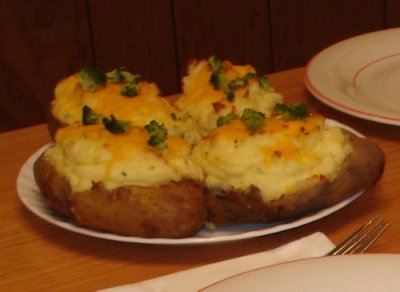
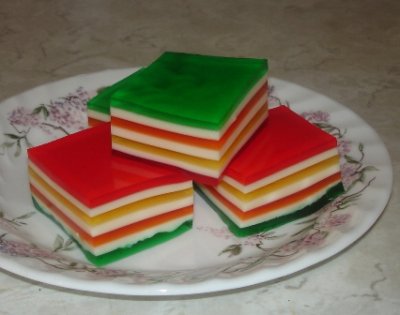

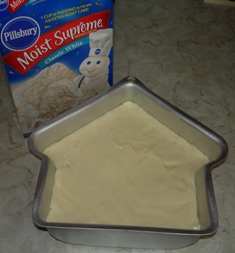
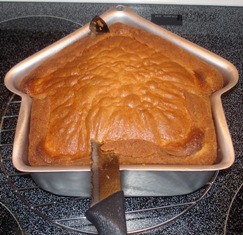
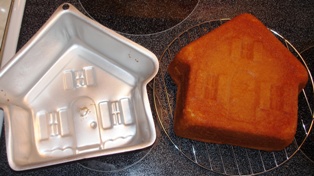
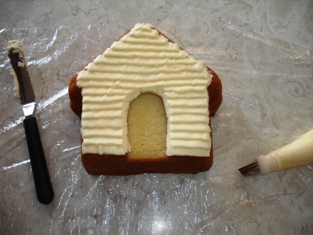
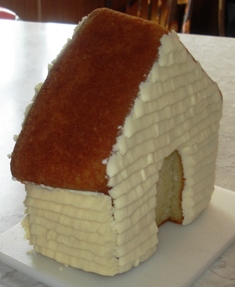
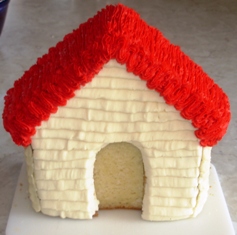 And we have a roof.
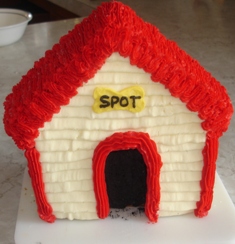
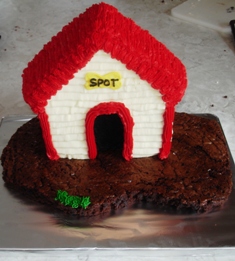
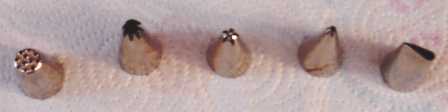


 And here’s the birthday girl!
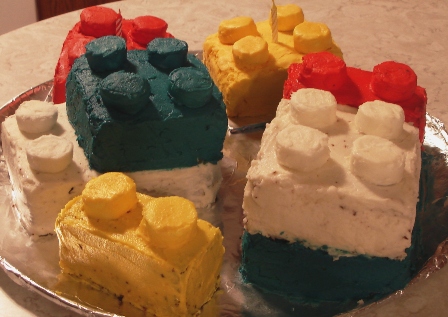
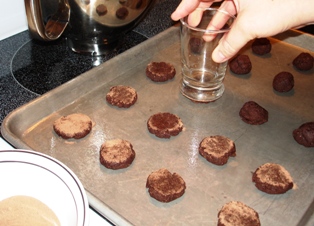
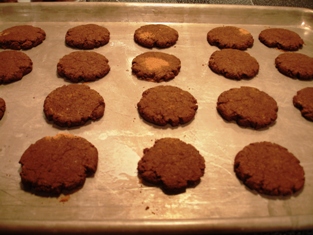
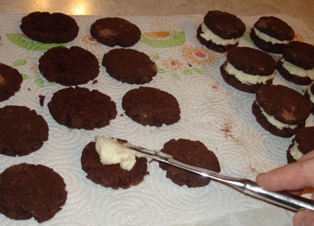
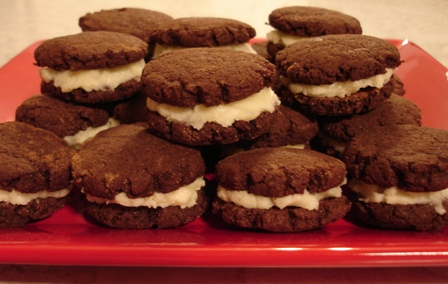

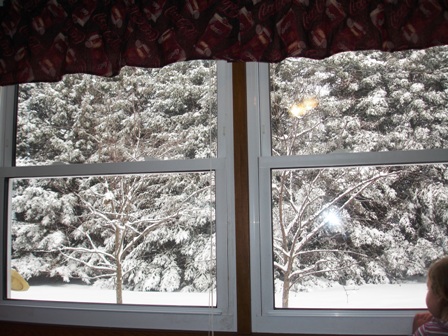


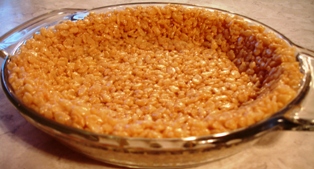
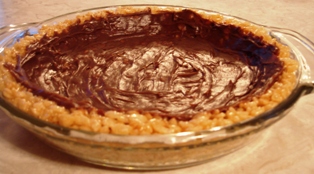
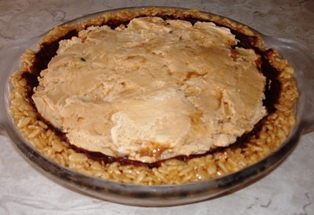
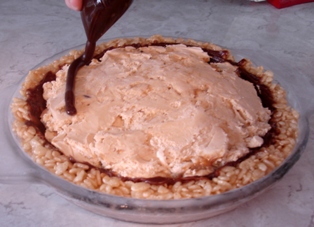
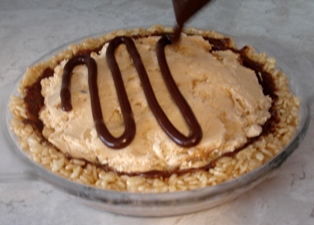
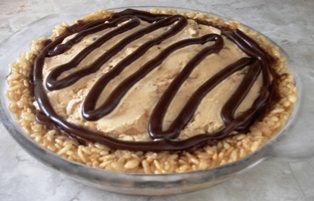
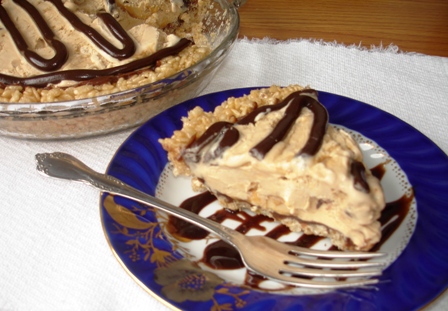
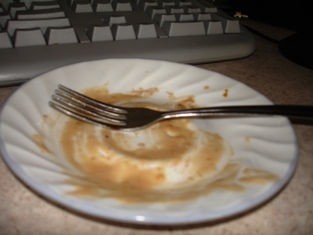
Ummm, the mocha stuff looks good. I’m gonna have to try it. ~I just started drinking coffee and I need a lot of cream with mine yet. Maybe one day I’ll be one of those all time coffee drinkers that can down a whole cup of black.
Looks good!! But, I still like my black coffee the best!! Definitely black coffee with something sweet!
This looks really good. I love coffee!!
I agree with you that you have two wonderful moms. And the raspberry cream cheese cinnamon rolls are wonderful with BLACK coffee.
Thanks for the recipe. I would love to know how to make lots of flavored coffees. I like my PLAIN BLACK coffee the best, but on cold winter days I need something all day long:)
I am not a coffee drinker..never liked the taste much but your mocha makes me want to try some of that!
What a wonderful tribute to your mom and mom-in-love. What blessings they have been in your life!
God Bless You!
Dawn