Posted on August 4, 2008
Filed Under How to…, Pies
Ok, I’ll just show you how I do it, but don’t expect alot of tips and all. Who knows, after this post, you might be giving me a lot of tips! ???? That would be great, it would make us all better pie crust makers. And you might laugh at how I do it, for example, I use Saran Wrap in the pie-crust-making process. *Huh?!*
Warning: Eyes may glaze over… there are lots of pictures and it got a little wordy. 
First, the recipe. This is the only pie crust recipe I use and I don’t even try others because this one works great and has only 4 ingredients and it gets compliments now and then:
Pie Crust
1 1/3 cups flour
1/2 tsp. salt
1/2 cup butter-flavored shortening (Does shortening have an ‘e’ in it? I keep adding then erasing it. I should go look on the can.)
3 Tbsp. ice water
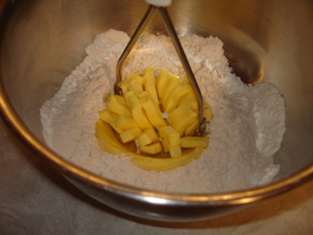
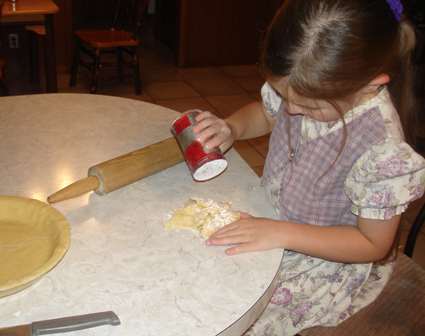
I put the flour and salt into a bowl and give it a few stirs w the teaspoon that I measured the salt with. Yeah, I about always measure stuff, I’m not one of those ‘just dump it in’ people. Then, I mix the shortening in with a potato masher…
 I’ve tried a pastry blender, two knives, a fork, and nothing works quite as good as a potato masher.
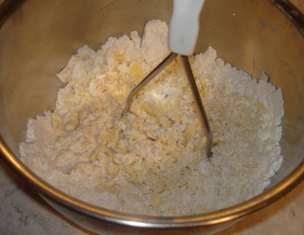
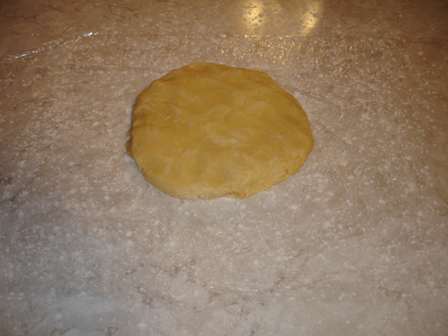
When it looks about like this, pour the water in all at once and quickly stir it with a fork. More like pourthewaterinallatonceandquicklystiritwithafork. Not sure why, but I feel some urgency to get it stirred in, maybe because I’m afraid it would soak into the part where it’s pooled, then not get evenly dispersed. Anyway, I think that little tidbit might fall under the category of ‘Weird Quirks’ instead of ‘Pie-Crust-Making Tips’.
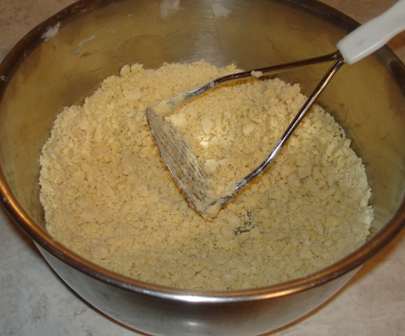
When it looks like this,
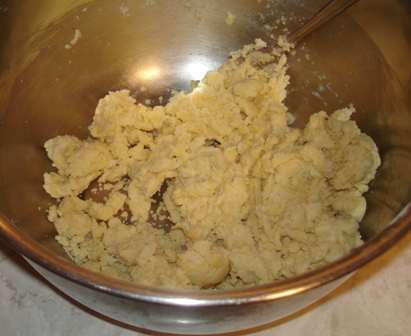
stop stirring and get a piece of Saran wrap, lay it on the counter, and sprinkle it with flour. Then, with your hands, get all the dough and squeeze it together into a ball, then flatten it a bit and put it on the floured Saran wrap.
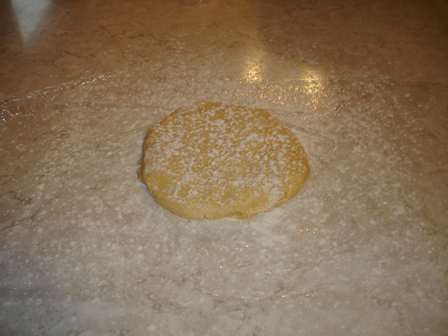
Sprinkle flour over the top.
Take the rolling pin and roll it this way,
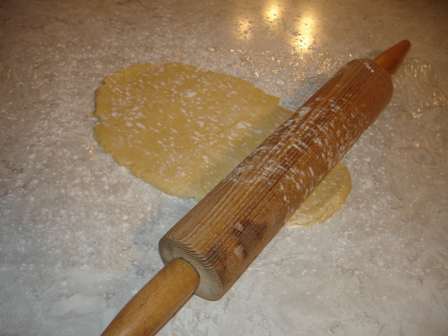
then that way.
Sprinkle some more flour on because the rolling pin will be starting to stick a little.
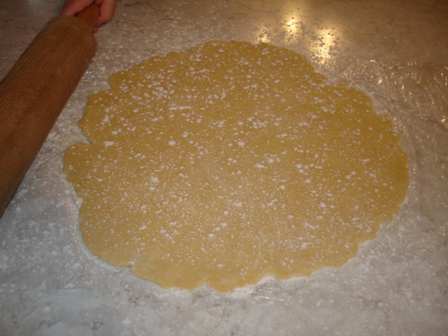
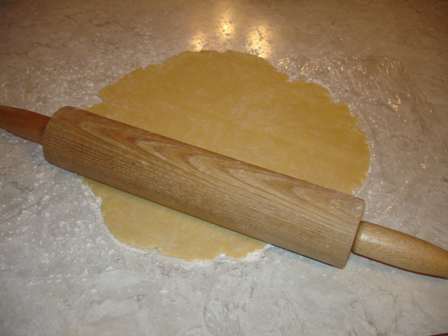
Roll it out some more till it’s a couple inches bigger than the pie plate all the way around. Put one hand under the Saran wrap and the other hand on the back of the pie plate, and flip the whole works over.
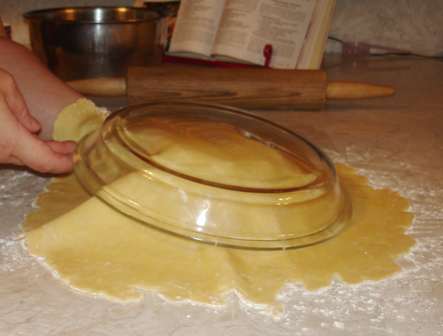
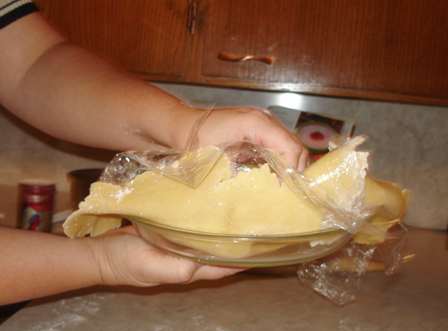
Peel off the Saran wrap. Now, here’s an actual tip: Instead of just pressing the crust down into the pan, lift it up off the edge and let it line the pan without pushing down on it. Otherwise it will stretch the dough, then it’ll shrink when it bakes. I don’t really know how to explain it, but just DON’T make the dough stretch by pressing it down into where the side and bottom of pan meet.
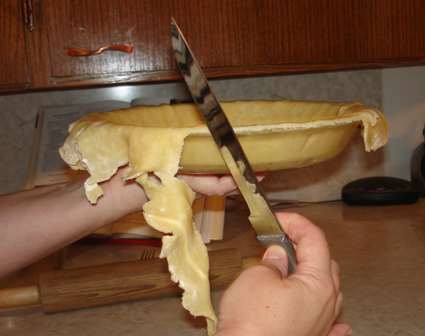
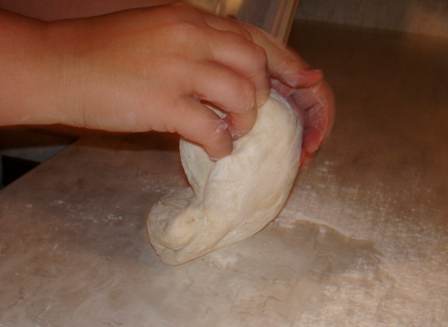
 You can’t really see it, but I’m not just pressing the dough down in with my fingertips… I’m lifting up the edge and putting it down in to line the ‘corner’. Once it’s all in there, press down a little around the top edge, this’ll make it easier to cut the extra dough off. Take a knife and cut it off.
Here’s where my extra dough always goes…
And she’d get my camera and take pictures of her own pie dough creations. Close up pictures. And the camera would focus on stuff behind the subject being photographed…
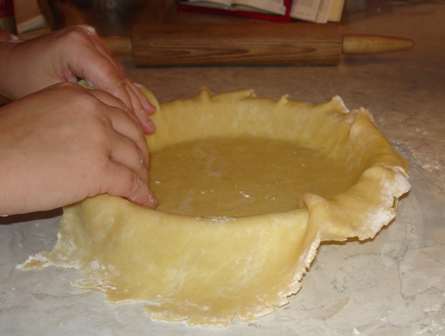
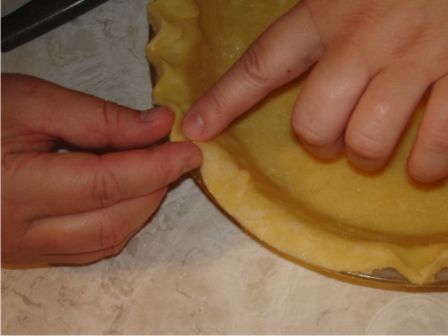
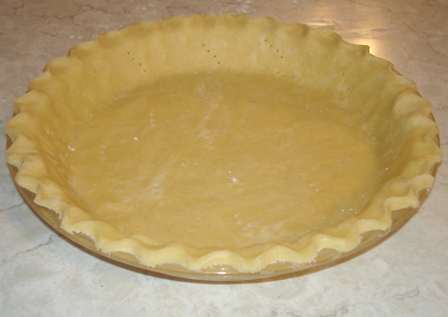
I usually crimp the edges of the dough between my thumb and finger.
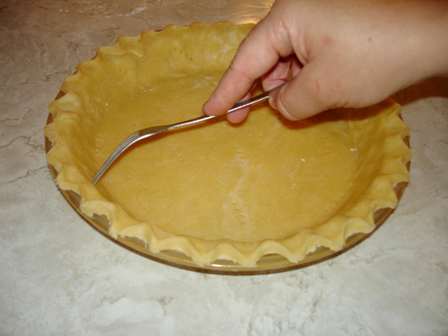
Poke the bottom and side of crust with a fork.
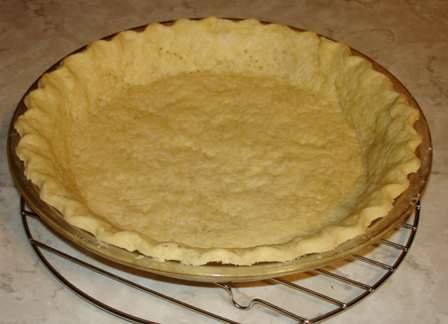
Bake at 375 for 12-15 minutes. And you’ve got a pie crust.
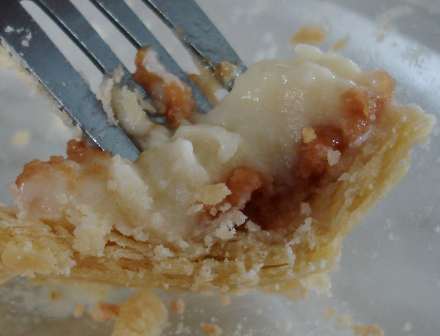
Yeah, it does shrink just a tiny bit, but it’s good enough for me. I’d rather have that than mess with putting beans in it to bake it.
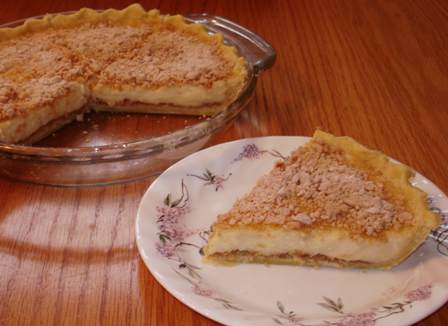
And, last but not least, the famous pie crust question… Is it flaky? I think so…
Now, let’s hear from you… I know alot of you out there make pies. Please give us some more tips!
Comments

 Cover; let rest 10 minutes. Coat 2 large baking sheets with cooking spray. Divide dough into 16 equal pieces. Roll each piece into a 12″ rope. Place on prepared baking sheets.
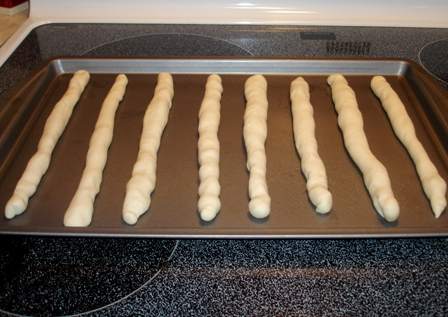


Kay – I hope you have a safe move! My hubby is from Ohio. It’s so pretty there. Hurry back!
Good luck on your move….maybe I’ll get the pie crust perfected before you sign back on….tee hee.
My in-laws live in Toronto, Ohio. Nice little town. Good Luck with the move. I’ll miss your recipes.
Hey, can we come over for supper??!!
Have a safe move. I love your blog. I just wanted to let you know that my church had a kid bake contest and my girls entered. My 6 year old made the 7 layer bar and got 2nd place. My 8 year old made the lemon bars. Thanks for all your great ideas.
God bless you in your transition…moves are stressful, may all go well as you pack and travel. I will surely miss your down to earth posts and recipes and look forward to what you have for us after the move. Blessings, Bernice
Kay,
Best wishes on your upcoming move. I hope you’ll occasionally keep us posted with what is going on. Over the past few months I feel like I’ve gotten to know your family a tiny bit and I think all of us would like to hear how everything is going, not just the cooking side of it!!!
So, when is this move actually happening? What day are you officially moving in? Wondering what brought you to Ohio…..?????
Going…Going…Gone are my dreams of someday meeting you when we are Wisconsin. Best wishes on the move.
That sure looks good. Good luck with your move.
Susan
http://www.raisin-toast.com
What part of OH will you be living? We just came thru OH yesturday on our way home from OK. I will miss your new cooking ideas. But I know how moving is and hope all goes well.
I’m gonna miss your updates so hurry up and move!!:)I’m excited you’re moving closer to us. Ohio’s great, afterall it’s the buckeye state!:)
moving closer to indiana now i can come for supper!
  j/k, but seriously… that salad looks WONDERFUL!
  hope your move goes smoothly and is safe too. what part of ohio are you moving too?
Some of you asked what part of Ohio we’re moving to. It’s close to Columbus (west side). We don’t have an exact moving date yet, but roughly in about 2 weeks. Maybe that means I don’t need them? ????
It is amazing how long stuff takes to pack, esp glass stuff! It has been quite entertaining seeing things that I forgot I had.
Kay,
Just wanted to let you know, I am thinking of you at this busy time. We moved about a year ago, so it is still fresh on my mind how much work it is. God Bless You! Barb
OK, your month is up now! I think about you from time to time and wonder how things are going in Ohio and how you like it. Looking forward to hearing from you soon and seeing more new recipes now that you are (hopefully) settled into your new kitchen.