Recipes and Cooking Ideas for Homemakers and Amateur Cooks
 

How to make a Pie Crust

Posted on August 4, 2008
Filed Under How to…, Pies

Ok, I’ll just show you how I do it, but don’t expect alot of tips and all. Who knows, after this post, you might be giving me a lot of tips! ???? That would be great, it would make us all better pie crust makers. And you might laugh at how I do it, for example, I use Saran Wrap in the pie-crust-making process. *Huh?!*

Warning: Eyes may glaze over… there are lots of pictures and it got a little wordy. :)

First, the recipe. This is the only pie crust recipe I use and I don’t even try others because this one works great and has only 4 ingredients and it gets compliments now and then:

Pie Crust

1 1/3 cups flour
1/2 tsp. salt
1/2 cup butter-flavored shortening (Does shortening have an ‘e’ in it? I keep adding then erasing it. I should go look on the can.)
3 Tbsp. ice water

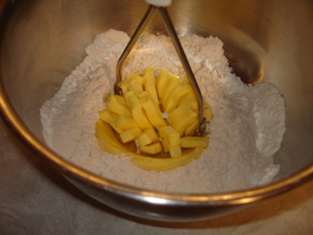
I put the flour and salt into a bowl and give it a few stirs w the teaspoon that I measured the salt with. Yeah, I about always measure stuff, I’m not one of those ‘just dump it in’ people. Then, I mix the shortening in with a potato masher…
pie-crust2.jpg  I’ve tried a pastry blender, two knives, a fork, and nothing works quite as good as a potato masher.
pie-crust3.jpg

pie-crust4.jpg

pie-crust5.jpg
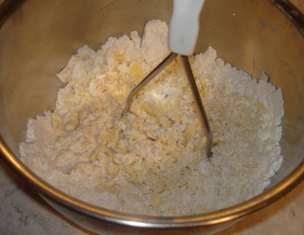
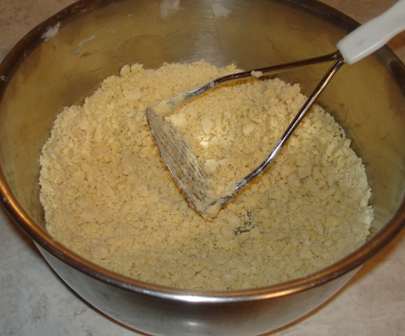
When it looks about like this, pour the water in all at once and quickly stir it with a fork. More like pourthewaterinallatonceandquicklystiritwithafork. Not sure why, but I feel some urgency to get it stirred in, maybe because I’m afraid it would soak into the part where it’s pooled, then not get evenly dispersed. Anyway, I think that little tidbit might fall under the category of ‘Weird Quirks’ instead of ‘Pie-Crust-Making Tips’.

When it looks like this,
pie-crust6.jpg
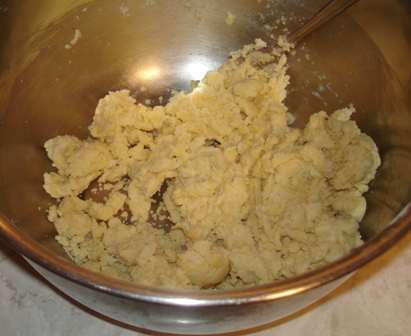
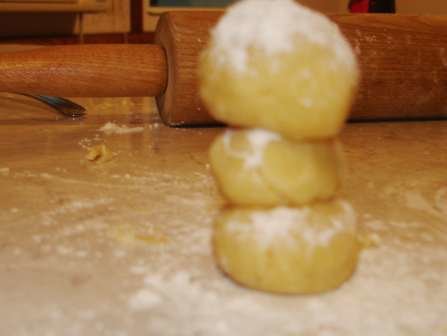
stop stirring and get a piece of Saran wrap, lay it on the counter, and sprinkle it with flour. Then, with your hands, get all the dough and squeeze it together into a ball, then flatten it a bit and put it on the floured Saran wrap.
pie-crust7.jpg

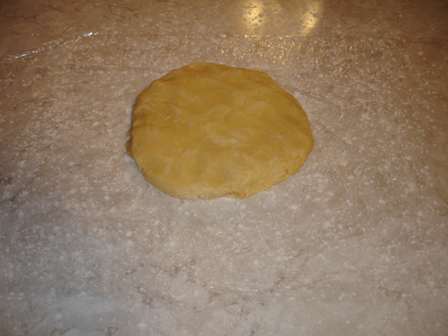
Sprinkle flour over the top.
pie-crust8.jpg
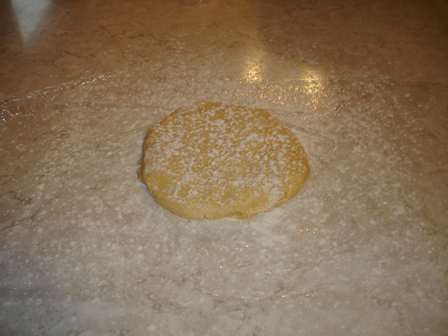
Take the rolling pin and roll it this way,
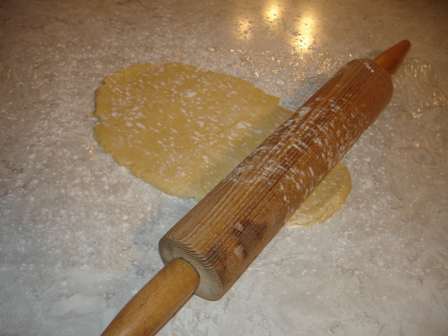
pie-crust9.jpg
then that way.
pie-crust10.jpg
Sprinkle some more flour on because the rolling pin will be starting to stick a little.
pie-crust11.jpg
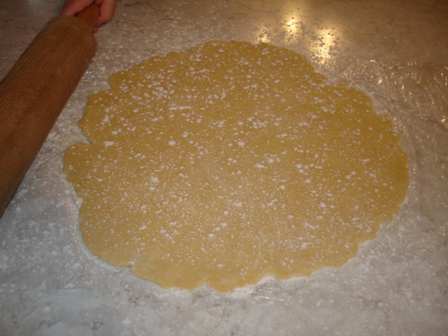
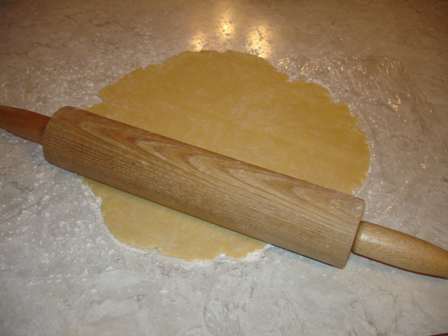
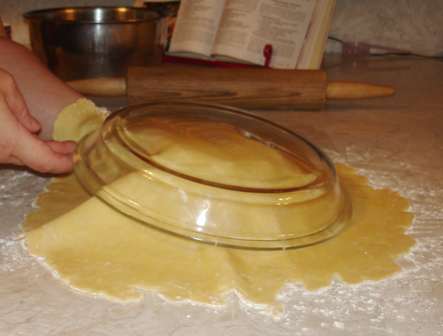
Roll it out some more till it’s a couple inches bigger than the pie plate all the way around. Put one hand under the Saran wrap and the other hand on the back of the pie plate, and flip the whole works over.
pie-crust12.jpg

pie-crust13.jpg
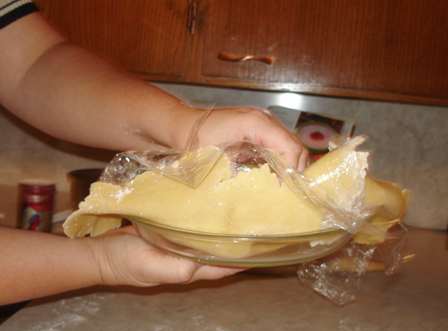
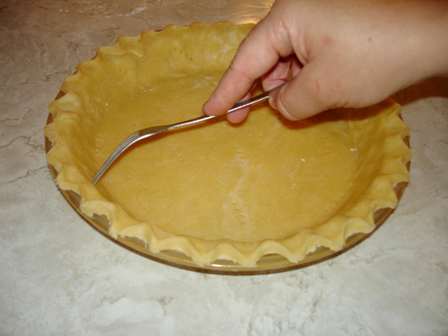
Peel off the Saran wrap. Now, here’s an actual tip: Instead of just pressing the crust down into the pan, lift it up off the edge and let it line the pan without pushing down on it. Otherwise it will stretch the dough, then it’ll shrink when it bakes. I don’t really know how to explain it, but just DON’T make the dough stretch by pressing it down into where the side and bottom of pan meet.
pie-crust14.jpg 
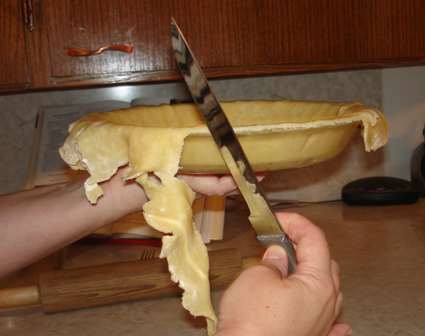
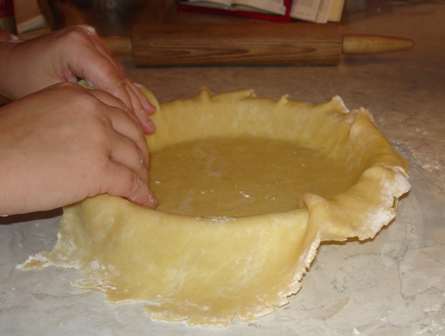
You can’t really see it, but I’m not just pressing the dough down in with my fingertips… I’m lifting up the edge and putting it down in to line the ‘corner’. Once it’s all in there, press down a little around the top edge, this’ll make it easier to cut the extra dough off. Take a knife and cut it off.
pie-crust15.jpg

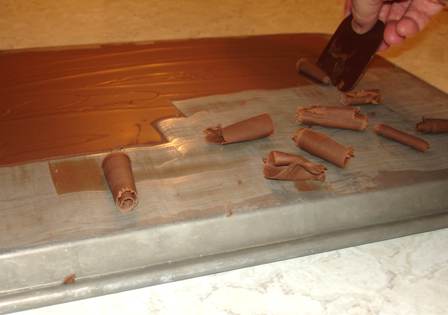
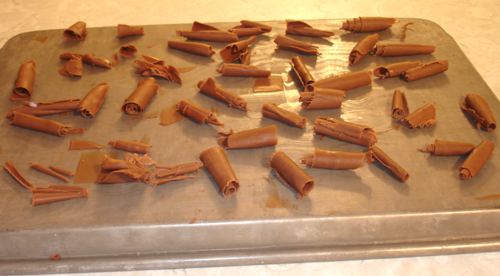
Here’s where my extra dough always goes…
pie-crust16.jpg
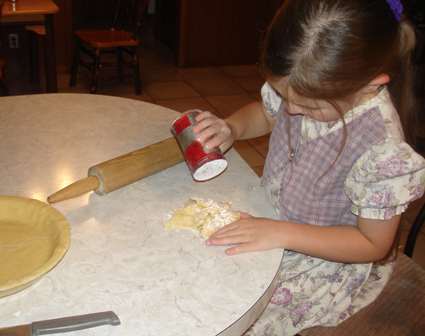
And she’d get my camera and take pictures of her own pie dough creations. Close up pictures. And the camera would focus on stuff behind the subject being photographed…
pie-crust20.jpg

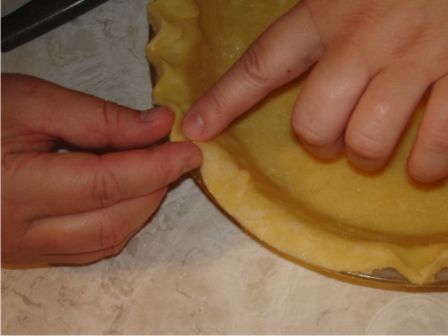
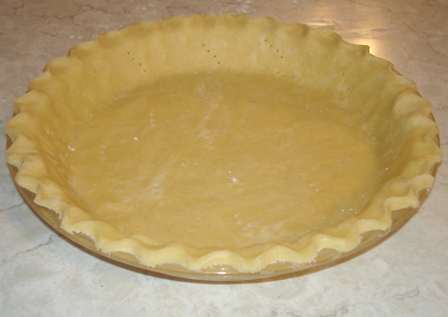
I usually crimp the edges of the dough between my thumb and finger.
pie-crust17.jpg

Poke the bottom and side of crust with a fork.
pie-crust18.jpg

pie-crust19.jpg

Bake at 375 for 12-15 minutes. And you’ve got a pie crust.
pie-crust21.jpg
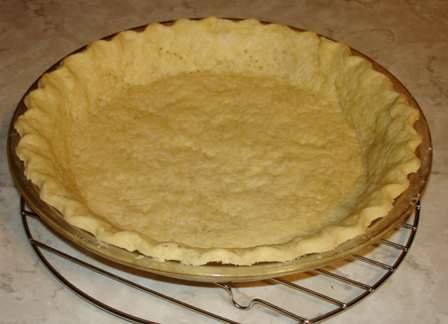
Yeah, it does shrink just a tiny bit, but it’s good enough for me. I’d rather have that than mess with putting beans in it to bake it.

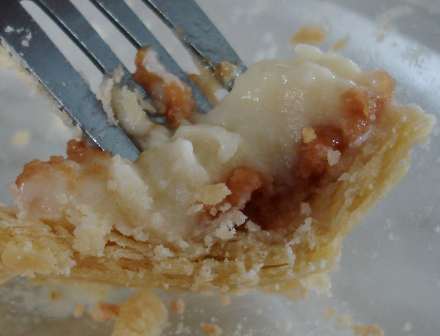
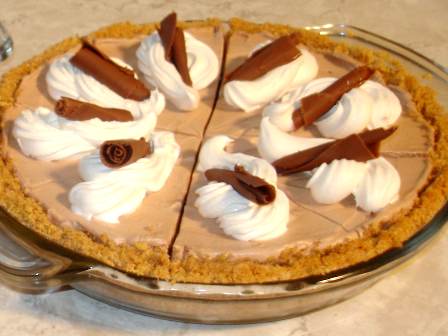
And, last but not least, the famous pie crust question… Is it flaky? I think so…
pie-crust1.jpg

Now, let’s hear from you… I know alot of you out there make pies. Please give us some more tips! :)

Comments

10 Responses to “How to make a Pie Crust”

  1. Traci on August 4th, 2008 5:00 pm

    Oh my, I LOVE you!!! I have needed this like you don’t even know…..THANK YOU THANK YOU THANK YOU.

  2. Michelle on August 4th, 2008 5:13 pm

    Maybe I can make my own pie crust now. I’ve tried to make pie crusts in the past and I’ve always had trouble with rolling them out and getting them in the pan. So I gave up and I buy them at a bulk food store where they’re in the pan ready to go and all you have to is bake them. Very convenient!! I’ll have to give this a try sometime. Thanks for the good tips!

  3. Shannon on August 4th, 2008 7:38 pm

    Hum, I like that saran wrap deal. I always had trouble dealing the dumb stuff off the counter. The last pecan pie I made, the crust SOME HOW lifted off the bottom of the pan while baking and all the filling went underneath, so the crust was right up against the top… explain that one to me. I was mad! I am going to try this again. I really am. Maybe soon you can just make all my pies for me. Please?

  4. Freida on August 4th, 2008 7:44 pm

    I’d say you got it pretty good. The saran wrap is defintely not a quirk. I do that too, altho I use wax paper. Probably not much difference. Looks good. Puts me in the mood for pie again. I should do your peanut butter pie.

  5. Kay on the farm in Neb on August 5th, 2008 4:51 am

    Do you have trouble with the dough developing gluten by mixing the water in quickly? I was taught to always “gently” toss the flour/shortening (yes an “e”) with the water, a tsp at a time. Next time I’ll just dump and stir.
    Peaches are coming into the stores now. Colorado peaches…mmmmmmm

  6. Jan on August 5th, 2008 5:52 am

    Thank-you! I’ve been wondering how to make a buttery pie crust, like I’ve had elsewhere. Bingo: butter Crisco! I’ve been getting hungry for pie and will try this one out. My crust recipe works, but I never was quiet satisfied b/c it wasn’t buttery.

  7. Cordy on August 6th, 2008 8:07 pm

    Your kindness just blesses me! Thanks SO much Kay!

  8. Suzanne on December 28th, 2008 6:12 pm

    I don’t know if you guys have done this, but with the extra pie crust clippings, my grandma always (and to this day still does), takes the leftovers and rolls them out into an oval-type shape. She then sprinkles cinnamon sugar on it and rolls it up. She calls them “roly-polies.” They are almost as good as her pie!

  9. Rhoda on June 16th, 2009 7:54 am

    I used to work at a bakery and we would always insert another pie pan on top of the crust and then bake it…an easy alternative to the ‘beans’ you were talking about. i never heard of using the beans. what do the beans do? I still use the extra pie pan inserted on top of the crust when i bake my own crusts.

  10. Ashley Nicole on August 25th, 2009 7:45 am

    Hey SuzAnne. I always do that w/ my pie crust. Thats my favorite part when it comes to making pies. Thankyou Kay for this recipe. I used it last night and it turned out perfect. It was easy too.

Silk Chocolate Pie with Chocolate Curls

Posted on July 21, 2008
Filed Under Garnishing, How to…, Pies

Silk is right. I wonder whoever came up with that term for pie. But it fits this one. Smooth as silk. And creamy and light. Light as in not heavy, not light as in diet. Far from it!

My grandma always said that she likes to make pies better than she likes to eat them. That doesn’t mean that she doesn’t like pie! Sometimes while I’m making pie, I wonder if I have reached that same status now. Then, I eat a piece and decide I’m not quite there yet. BUT, this pie may have been an exception. Not that the pie itself was so fun to make. The fun was in the garnishing… chocolate curls.

silk1.jpg

This recipe is taken from my newest cookbook… Simply with Taste. I got it about a week ago. I love it! Sometime, I’ll tell you more about it and its nice features. This silk chocolate pie is the first recipe I tried from it.

Silk Chocolate Pie

Printable recipe

1 pkg. (4 oz) Bakers German sweet chocolate
2 Tbsp. milk
6 oz. cream cheese, softened
1/4 cup milk
3 Tbsp. sugar
4 cups whipped topping
2 baked or graham cracker pie crusts

Microwave the chocolate along with the 2 Tbsp milk on high at 20-30 second intervals until chocolate is melted, stirring frequently. Beat the cream cheese, sugar, and 1/4 cup milk until smooth; add the chocolate
silk3.jpg
and mix until well blended.
Refrigerate for 10 minutes. Fold in the whipped topping.
silk5.jpg

Spoon into the prepared crusts. May freeze if desired, or use within a day. Top with whipped topping and chocolate curls for garnish.
silk13.jpg

silk2.jpg

silk12.jpg

And now for the fun… How to Make Chocolate Curls

silk9.jpg

Melt about a 1/2 cup chocolate chips w about 1 Tbsp. of shortening.
silk7.jpg

Spread into a thin layer on the back of a metal cookie sheet.
silk8.jpg
Put in the freezer for 3 minutes. Take it out of the freezer. Immediately, take a flat tool of some sort (I used my Pampered Chef little square scraper that’s actually for cleaning stoneware, I use that little thing for alot of stuff!) and hold it at about 45 degrees and push down and across the baking sheet. The chocolate should curl right up.
silk10.jpg

silk11.jpg

If it just breaks, wait a minute or 2 to let the chocolate soften, then try again. If it doesn’t curl, put it back in the freezer for another minute or so. Depending how long it takes to curl all the chocolate, you may have to put it back in the freezer to harden up again before you’re done. Use a toothpick or utensil of some sort to move the rolls to a plate and put them in the refrigerator. When they’re good and hard again, you can put them in a plastic bag and store in the refrigerator. Or you can just put them on the pies like I did.

Comments

5 Responses to “Silk Chocolate Pie w Chocolate Curls”

  1. Shannon on July 22nd, 2008 7:52 am

    Oh those look good even if I’m not sure I would eat them. :)

  2. Rosalyn on July 22nd, 2008 10:00 am

    This is making me really hungry right now! think I’ll have to make it for supper! ????

  3. Michelle on July 22nd, 2008 11:13 am

    Looks delicious!

  4. Katrina on July 22nd, 2008 5:47 pm

    YUM!

  5. Barb on July 23rd, 2008 9:50 am

    This pie looks really good, and the chocolate curls look fun to try.
    I don’t think I have ever tasted or made silk pie so I will have to try this.

    P.S. I finally updated my blog.

How to Make a Hard Boiled Egg

Posted on April 14, 2008
Filed Under How to…

eggs1.jpg

I’m wondering if, from reading the title, you thought “Duh, everyone knows how to do that!” or if you were secretly happy to finally have directions to do it instead of just putting the eggs on the stove in water and kinda guessing from there.

I would be in the last category, until yesterday. You know, there are some things it seems like everyone evidently is just automatically born knowing… you just never see a recipe in a cookbook of how to make hard boiled eggs. Or how to make baked potatoes or grilled cheese sandwiches.

I so seldom make hard boiled eggs, maybe about once a year for a salad. A salad was actually the reason I made them yesterday. I used to not like eggs at all. It was actually more psychological than anything, I think, just picturing what the yolk could have become. Then I grew up. Now they’re fine if they’re scrambled or made into omelets or somehow fried solid with the yolk and white mixed, nothing over-easy! Hard boiled with salt is too dry. Deviled eggs are good too, but I haven’t made them in ages. I just eat the ones other people bring to church potlucks and picnics. So, that’s my opinion on eggs, for whatever it’s worth.

Anyway, we got together with family last night and I was in charge of bringing salad. Yesterday afternoon, I mused to Shannon, “I wonder what the proper way is to make hard boiled eggs”. He said, “Just boil ’em in water for awhile”. When I didn’t go with those directions, he switched to ‘Google knows everything’. By the way, did you know there are entire websites about cooking eggs?! To make a long story short, I followed some online directions and the eggs turned out PERFECT! So, I’m going to write them here so I have them for future reference (you know, for when I make hard boiled eggs next year). And if you flounder around and guess every time you make hard boiled eggs, then this is for you too. I also learned a tip to keep that greenish color from forming between the whites and yolks.

Put eggs in a pan and cover with cold water. Water should come an inch or so above the eggs.
eggs2.jpg

Bring to a boil over high heat, then turn burner down to medium and cook for 10 minutes.

eggs3.jpg

When the 10 minutes is up, immediately drain the hot water and put them in cold water or ice water. I kept them in the pan and just rinsed them in cold water a few times till the pan was cold, then filled it with cold water. Let them sit in there for a few minutes, then gently crack the shells and peel them.
eggs4.jpg

Tips:
—Getting them in cold water right away after they’re done cooking keeps the yolks a nice yellow and cooling them down quickly keeps that greenish color from forming.
—For deviled eggs, to get the yolks centered, lay the eggs on their sides for about 8 hours (in the fridge of course) before cooking them.
—Don’t use fresh eggs. They peel hard. Eggs should ideally be at least 2 weeks old when using them for hard boiled.

There is another way to hard boil eggs too. You can bring them to a boil, then take them off the burner and let them sit for 20 minutes. I actually made eggs twice yesterday because the first time didn’t work. The yolks weren’t quite done. I had used this method, but the directions said to let them sit only 10 min. There was another site that said 20 min, so I think that might be enough for the yolks to get done.

How do you hard boil eggs? Do you make them alot?

Comments

21 Responses to “How to Make a Hard Boiled Egg”

  1. Sharon on April 14th, 2008 9:59 am

    I actually have a cookbook with directions for hardboiled eggs, but I know they are kinda tricky. I think some of the greenish stuff is from overcooking, but I really don’t know. I always add a little vinegar to the water I boil ’em in, since that supposedly helps prevent them from cracking while they’re cooking and a little white leaking out. (and because my Mom always did that). I don’t usually completely cover the eggs with water (that wouldn’t work in the pan I do it in), and they turn out fine. You first method is basically how I do it, too, tho’ I start timing as soon as the water starts bubbling and do ’em 15 minutes at a slow boil. Definitely do the ice water right away.

    I don’t make ’em as much as I used to, partly because of Sawyer’s egg allergy, and I don’t keep as many on hand. But the rest of us LOVE deviled eggs, and I love just plain hardboiled for a snack, so I do ’em occasionally.

    I laughed over your take on eggs. Sounds similar to mine. When I was younger, just the thought of where they came from & what they might be (and I gathered eggs, and saw what’s on ’em sometimes, which didn’t help) was bad enough, and I didn’t like the over-easy part either. I still don’t like if they ooze, but will eat them otherwise. My family really does think I’ve grown up, though, to eat them at all, and even say they’re good!

  2. Judi on April 14th, 2008 10:01 am

    I bring them to a boil then set them aside for 20 minutes with a lid on. When I put the cold water on them I bang them around a little to get them to crack. The theory is that the cold water will go under the peel and help to remove the shell. Don’t know if that works or not, but I still do it that way. Maybe your theory about the age of the egg is really what counts, but I get mine from the market so I don’t know how old they are.

  3. Freida on April 14th, 2008 10:13 am

    I boil eggs all the time. We LOVE them!…in lettuce salad, regular egg salad, and creamed eggs. I do it pretty much like you said. I’ve heard too that they peel easier if they are not fresh, but I buy brown eggs from our neighbors or church people, so I don’t know if they are fresh or not. Either way, we eat them.

    My take on eggs???? I LOVE them! I can’t imagine not liking them. I laughed at yours. ????

  4. amy on April 14th, 2008 11:02 am

    I always wondered what was up with the green on the yolk part was all about. sometimes it’s there and sometimes not. I am anxious to try the cooling faster method.

  5. Twila on April 14th, 2008 11:35 am

    I love runny yolks! Several years ago our neighbor gave us a number of goose eggs and then I was in egg-yolk heaven, frying those for my breakfast (yeah, I figured that might gross you out, lol.) I boil eggs just like your first method, 10 minutes and then into ice water. Works every time.

  6. Rosalyn on April 14th, 2008 11:56 am

    I do quite a bit of hard boiled eggs. My girls love ’em! I like them for salads, and have to make a few extra for the daughter that wants the egg but no salad. They love deviled eggs, too. I usually boil mine your first method…for 10 minutes. Then I immediately put ice water on them. I try to peel them as soon as possible. I never know how old my eggs are, but sometimes I have such a problem peeling them, and the next time they peel just fine. I wish you’d have a method for no-fail peeling!! ???? (other than old eggs, I mean)

    Oh, and I actually have 2 different cookbooks that tell me how to boil an egg–Better Homes & Garden Cookbook, and then Mennonite Country Style Recipes, by Esther Shank. Both of those are my “tell how to make anything” cookbooks! :)

  7. Elaine on April 14th, 2008 1:17 pm

    you can use fresh eggs, just get the water boiling first, holding the egg over the water drop them in the pan, they will hit the bottom of the pan and crack just a little. You might have some white strings in the water but they peel just fine. When I peel the eggs I have most of the shell cracked before I peel it off.

    We have our own fresh eggs and eat boiled eggs fairly often.

  8. Berneice on April 14th, 2008 3:22 pm

    I have to admit I thought, who needs a recipe to boil eggs, but it was intresting to see all the tips! :)
    We love hard boiled eggs! I have them on hand most of the time. I also use the 1st method you had. If the fridge is void of eggs,we have a problem. We find the nearest source and QUICK get some!

  9. Ruthie on April 14th, 2008 5:24 pm

    I used to do the first method, but kept forgetting that I had them on the stove and would overcook them. (I know; use a timer..duh! I keep thinking I will remember without the timer…) So the second one is my favorite method. And, if the eggs are fresh, add a TBSP or two of salt to the water. Tap the tip of the egg against the counter, just enough to hear it crack, but not enough to actually see the crack. The shell peels right off!

  10. barb on April 14th, 2008 8:40 pm

    I second what Ruthie said about the salt when boiling “fresh” eggs. It works!! I would say at least 2 Tbsp. salt.
    I have a recipe for “Cornchip Salad” that has boiled eggs in it. It also has bacon, cheese, and of course lettuce and corn chips. The dressing is homemade and it is delicous. The recipe came out in one of our church (German Baptist) cookbooks a few years ago and it has become a famous German Baptist salad:) If anyone would like the recipe just comment here and I’ll gladly post it. It is a must have in your recipe collection.
    Barb

  11. Jo on April 14th, 2008 8:41 pm

    I didn’t know how to hard-boil eggs when I got married. *blush* Esther Shank’s cookbook was my lifesaver there. When I’m doing deviled eggs, I cool them in water & then put them in the fridge for an hour or two; they peel effortlessly. I’ll have to remember your tip for centering the yolks, ’cause that’s a pet peeve of mine. Someone mentioned the age of store-bought eggs; I once heard that they are often a couple of weeks old already when we buy them. I’ve hard-boiled eggs that I just got from the store, and they worked great, so they’re obviously not very fresh.
    We love eggs here—and all of us love runny yolks, except Kendric (we hope to convert him soon!)

  12. Kay on April 14th, 2008 9:30 pm

    Hey, Barb, I want that salad recipe! Sounds wonderful! You can just post it in another comment here.

    Thanks to everyone for all your tips and how you do it! This is interesting. And I learned alot about eggs! Maybe I’ll start making them more often. I think I should edit the post now to add all your tips too. :)

  13. barb on April 15th, 2008 7:20 am

    Corn Chip Salad

    1 head lettuce
    6-8 hard boiled eggs (no problem, right?)
    1 pound bacon, fried and crumbled
    1/2 pound shredded colby or cheddar cheese
    4-6 cups corn chips, crushed (the more-the better)

    Dressing:
    1 cup miracle whip
    2 Tbsp. red wine vinegar (can use apple cider vinegar)
    1/4 cup milk
    1/4 cup sugar
    1/4 cup brown sugar

    Toss lettuce, eggs, bacon, and cheese. Add chips and dressing just before serving.

    This is one of those salads that is not good leftover.(I guess I do know of a couple people that will actually eat it the next day. Yuck)
    Anyway, try to remember that when you make it.
    Hope you enjoy it:)

  14. Berneice on April 15th, 2008 11:58 am

    I also have this recipe. It is awesome. Everyone needs to try it. :)

  15. Drew Kime on April 15th, 2008 12:23 pm

    I’ve got a good followup for this, How To Dice A Hard Boiled Egg: http://blog.cooklikeyourgrandmother.com/2008/03/how-to-dice-hard-boiled-eggs.html

    I’ve also got a taco salad recipe you might like. (Hmm, going to have to write this one up on my blog.)

    – 1 head lettuce
    – 2 Roma tomatoes – drained, seeded and diced (just the meaty part)
    – 1 small sweet onion, diced
    – 1 cup shredded cheddar cheese
    – 1 lb ground beef, cooked and seasoned (taco seasoning, chili powder, your choice) then cooled to room temperature
    – 1 cup thousand island dressing
    – 2 cups Fritos or other corn chips (the skinny kind)

    Toss the lettuce, tomato, onion, cheese and dressing. Add the ground beef and corn chips and toss again.

    If you’re taking this on a picnic — that’s how I remember having it, when my Aunt made it — you can mix everything except the corn chips and pack it in a zip-top bag. Add the chips and serve.

    Leftovers are still good for two or three days in the fridge, as long as you add fresh corn chips when you serve.

  16. Christy on April 16th, 2008 7:03 am

    I’m so w/ you on not liking eggs when I think too long about what they are. Aaaack!!! I went through a stage where I could hardly even eat baked things that tasted like eggs. (Still don’t really like it, but just try not to think about it.)

    I also thought it was funny that boiled eggs are something you should just know. My grandma put her recipe in a cookbook, so now I can refer back if I forget. It’s the bring to boil, rest 20 min. version. I thought the green color was from overcooking. ??

  17. Katie Mast on April 16th, 2008 3:21 pm

    I admit when i first saw the title, I’m like people dont know how to boil eggs. But it was interesting to read comments about it. At our house when we are out of eggs we are in trouble. I can hard boil a dozen eggs and by the time i have them peeled they are gone. My husband just loves them and so do my 3 children. I heard a long time ago that if you take a thumb tack and prick a hole in the bottom of each egg before boiling, they will peel clean. That is the way i do all mine, even when they are fresh,(some made comments about cracking them a little) I think it does the same thing. I dont end up with half of my egg coming off with my peelings. If you got a Pampered Chef decorator you got to make deviled eggs they look so pretty when done. ALso we live in PA dutch contry and here we make red beet eggs. MMMM We eat 2 dozen eggs in one day made that way. I am with you on just eating plan eggs, i dont like them that way either, but hard boiled any which way I love them.

  18. Katie Mast on April 16th, 2008 3:25 pm

    I was also going to say that Esther Shank cookbook is the best. I have given that for gifts to so many people that were just learning how to can or newlyweds and it’s a big hit.

  19. Gwen on April 17th, 2008 9:19 pm

    When we were visiting our friends in the hospital in Colombus, OH, we were all eating in the cafeteria one day, and there, for sale in the cooler, a bowl of hard boiled eggs…$1.00 each. Kindof makes you want to start making and selling them!!

  20. Kim Mast on April 19th, 2008 10:47 am

    I bring my eggs to a boil over medium heat and boil for one minute. Remove from heat and let sit for 12 minutes. Then immediatly put in ice cold water. Mine always peel like a charm!
    P.S. I also put salt in mine if I know they are fresh.

  21. how to hard boil egg on April 26th, 2008 10:09 pm

    […] to Make a Hard Boiled EggMake the perfect hard boiled eggs! Tips, pictures, and directions included.https://kitchenscrapbook.com/2008/04/14/how-to-make-a-hard-boiled-egg/Boiled egg – Wikipedia, the free encyclopediaHard-boiled eggs are produced by boiling until both the […]