Recipes and Cooking Ideas for Homemakers and Amateur Cooks
 

Petite Pizza Puffs

Posted on February 23, 2009
Filed Under Main dishes, Snacks

Once again, I’ve attacked my pile of loose recipes, which grew since the last time I got it out back when I did this post. I went thro’ and categorized them all and am planning to be cooking alot from them the next while and will either paste them into my ‘blank’ cookbook or pitch them. In order to keep them, they’ve gotta be ‘would definitely make again’ quality. If it tastes good, is easy to make, and looks good, then it’s a keeper. If only two of those three qualities are true, then I make a decision of whether those two outweigh the other one and still keep it.

So, here’s the recipe I chose out first and I’ll tell you at the end if I kept the recipe or threw it away. Yeah, I chose a recipe that starts with the word ‘petite’!!!???!! When I think of ‘petite’, I think of things like little dainty delicate teacups with little BREAKABLE saucers under them. And I usually shy away from anything like that because I get all thumbs when I’m around those types of things.

petite1.jpg

Petite Pizza Puffs …recipe comes from a card that came with my Pampered Chef Cut-N-Seal.

Printable recipe

12 slices pepperoni
1/4 cup shredded mozzarella cheese
2 Tbsp. chopped mushrooms
2 Tbsp. pizza sauce
1 pkg. (10 oz) refrigerated pizza crust

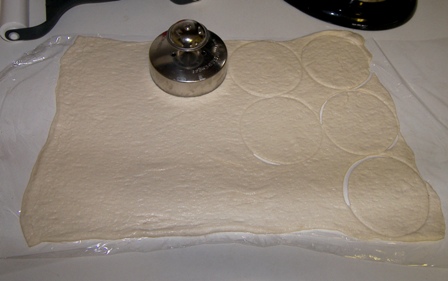
Preheat oven to 375. In Small Batter Bowl, combine pepperoni, cheese, mushrooms, and pizza sauce. Roll out pizza dough to 11″x15″ rectangle, using Dough and Pizza Roller. Cut 12 circles in dough using Cut-N-Seal.
petite6.jpg

Using Medium Scoop, place 1 scoop (2 Tbsp.) pepperoni mixture in center of 6 circles, spreading slightly.
petite5.jpg

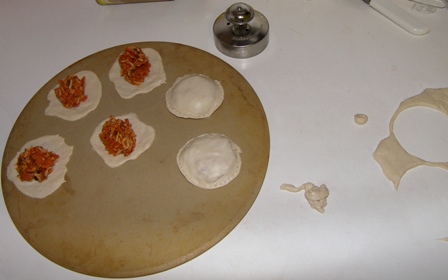
Place second dough circle on top. Lightly seal edges with fingers; seal with Cut-N-Seal.
petite4.jpg

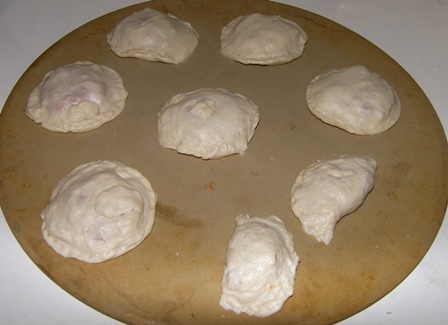
Place on flat Baking Stone. Bake 15-17 min or until light golden brown.
petite3.jpg

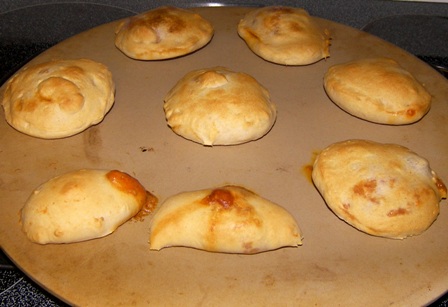
Serve with additional warm pizza sauce, if desired. Yield: 6 pizza puffs
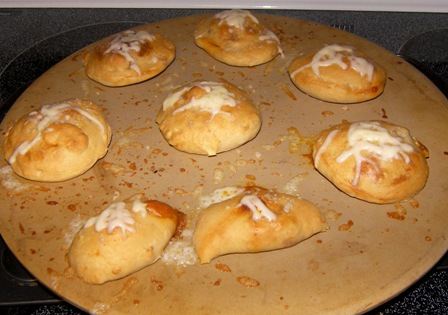
I put a little more cheese on top and put them back in the oven for a couple minutes. Not sure why, I guess I just thought the tops looked a little plain or something. And more cheese is a good thing. ????
petite2.jpg

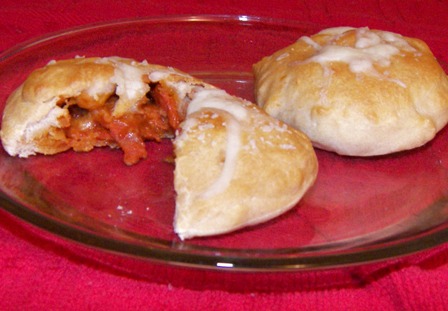
And there you go. Petite Pizza Puffs. Simple as that.

Or not!

So, the question: Will I keep this recipe? Yes, and decide for sure after I make them again. I saw afterwards how I should’ve done it to make it easier. How I did it was quite time-consuming and what a mess! I tried to assemble them on the stone and you cannot pick up a circle of thin sticky pizza dough and keep it from shrinking or ripping or losing its round shape. I should’ve assembled them right where I cut out the circles (which is how I think the recipe means that it should be done), then the whole puff may have been easier to move onto the stone. I should’ve also used some flour underneath the dough before rolling it out.

The taste was all there (I mean, really, how can you go wrong with those ingredients?). And the finished look was great.

So, here is the recipe. They really are perfect for something snacky or a lunch. Go ahead and try it and let me know some tips if you have any. If you don’t have a Cut-N-Seal, a round cookie cutter and a fork or your fingers oughta work fine.

Comments

5 Responses to “Petite Pizza Puffs”

  1. Andrea on February 23rd, 2009 12:48 pm

    MMMmmm! Those look like a tasty lunch item! I am always up for new lunch ideas!

  2. newlyb on February 23rd, 2009 2:21 pm

    These look so yummy! What a great alternative to regular pizza night.

  3. Katrina on February 26th, 2009 3:48 pm

    Yum! My boys would love these!

  4. linda on March 2nd, 2009 3:17 pm

    Thought I might as well comment here since your kaylouann site is badly neglected! Your comments made my day! I love getting comments from you. And, btw, Thankyou Thankyou foy the b-day money. I am properly horrified that I never told you sooner. Belated Thankyous are by far one of my worst traits. I saved it for that perfect thing “just for me” and after freezing our ____ off at the Birke we walked Mn. Street where I stumbled onto this really cool “coffee” sign at the Pavilion. Ever go in there? I love the store but they are usually a little pricey. Well, it was marked down to $8 so I nabbed it, brought it home and set it on my dining room ledge and now love it! Would love to sit and blab with you. Ever coming up here again? Heard you’re liking it really good down there. Am so glad you do but still miss you up here. We can’t even get motivated to scrapbook w/out you.

  5. Roxanna on March 9th, 2009 3:58 pm

    Hope everything is okay with you-haven’t had an update for awhile! I can’t say much cause I’ve let mine go, but you are much more dedicated so just worried about you and yours!

Valentine Cookies for Grandma – Cooks in Training #5

Posted on February 14, 2009
Filed Under For special occassions, Holiday cooking

Lexi (6) was all into Valentines all week. So often I heard “Hey, we should try making that into a heart shape because, you know, it IS Valentines!” And setting foot inside a store created alot of inhales and exclaiming from her (the V-tine displays were always right inside the door). And she has a stack of Valentines ready to go with her to church tomorrow for her little friends.

We had a bit of fun earlier this week. We took regular cookie recipes and made Valentine cookies out of them. We used the Smiling Sugar Cookie recipe featured here, only they cut heart shapes out of rolled out dough instead of forming balls and putting popsicle sticks in them. We also used my good ol’ chocolate chip cookie recipe (which I don’t think I ever featured) and left the chocolate chips out, then they put chocolate decor on top of the cookies.

First up is the sugar cookies…

vtines1.jpg

vtines2.jpg

vtines3.jpg

vtines4.jpg

vtines5.jpg

And then the chocolate chip cookies, with a bit of variation…

First, I melted chocolate and spread it out to harden, then they cut hearts out of it for on top of some of the cookies.
vtines6.jpg

vtines7.jpg

Then, they cut the rest of the cookies into heart shapes and decorated them with melted chocolate…

vtines8.jpg

vtines9.jpg

vtines10.jpg

Now the cookies are all ready. We separated them out, one batch for each Grandma. Lexi scrapbooked cards for each one and we packed them in a box and UPSed them.
vtines12.jpg

vtines11.jpg

P.S. I did help some with these cookies so the process wouldn’t drag on and on. ;)

And now, we wish you a Happy Valentines Day, with our Valentines gifts from Husband/Dad.
vtinesroses.jpg

Comments

4 Responses to “Valentine Cookies for Grandma – Cooks in Training #5”

  1. Shannon on February 14th, 2009 9:50 am

    Ohhh that looks like fun! M has been soo into V-day this year too. The V-day party at school didn’t help the hype. :)

    I love that last picture!!! You and your flowers are beautiful and they look so cute holding theirs. :)

  2. Karen Layman on February 14th, 2009 10:20 am

    Awww….I think that is so sweet that the little girls got flowers from their Daddy. Precious!

  3. liz on February 14th, 2009 3:05 pm

    hey, it’s good see pics of u guys again. So what happens if the box comes within the next couple of days? i’ll send an e-mail with more thoughts

  4. Kay on February 14th, 2009 3:37 pm

    Liz, don’t eat ‘em. :) Actually, the box got to the office yesterday. When we made them, we forgot they were gonna be gone.

How to Make Chocolate Roses

Posted on February 11, 2009
Filed Under For special occassions, Garnishing, Holiday cooking

roses4.jpg

Valentines Day… Chocolate. Roses. What a perfect time to merge the two and make Chocolate Roses! Actually, it isn’t just a Valentines treat, it’s timeless decor for any table or dessert year-round.

I’ve been wanting to try these for awhile. But they always looked so complicated. But they still intrigued me. So, I finally made some…

roses6.jpg

This is all you do:

Take about 2/3 cup of chocolate chips and melt them. Add about 3 Tbsp. light corn syrup.
roses1.jpg

Stir until mixture starts pulling away from the sides of the bowl and starts balling up. It’ll be kinda like taffy. Dump it out onto a piece of plastic wrap and flatten. Cover with more plasic wrap and refrigerate for a half hour or so.
roses2.jpg

Get it out and pull a chunk off, about a tsp., and roll it around with your fingers till it’s a smooth ball, then flatten it into a petal. Make 6 -10 petals, depending on how big you want your rose.
roses7.jpg

Take one of the petals and roll it up loosely. Use your finger to bend the top back just slightly.
roses8.jpg

Take the next petal and start it just behind where the first petal ended.
roses9.jpg

Continue like that until all the petals are used up, bending the tops back slightly as you go. When your rose is done, cut off the stem (which will have gotten quite chunky) so the rose can sit flat. Or, go ahead and try making it thin and having a long-stemmed rose! I might try that next time.
roses10.jpg

roses11.jpg

roses12.jpg

I tried a rosebud by using only 2 petals. After making 2 roses and 1 rosebud and the leaves, I had some chocolate left yet, so I just made a heart with it. So, what you see on this plate is how much 2/3 cup chocolate chips makes.

roses31.jpg

Now what I need is a nice dessert to put them on. ???? But, I don’t have one, so I’m just gonna keep them in the freezer and whip ’em out sometime when I need some quick dessert decor!

So, what do you think? You gonna try them? :)

Comments

11 Responses to “How to Make Chocolate Roses”

  1. Katie Mast on February 12th, 2009 6:17 pm

    Yes i will try them this week. They look so beautiful. I will let you know how they get for me. I used to make roses out of apples, much the same way you did here. Thanks for the cool idea

  2. Lori on February 12th, 2009 9:55 pm

    I made a flourless chocolate cake. It is a dense chocolate cake for chocolate lovers. I found the recipe at allrecipes.com. The roses would look great on my heart shaped cake!

  3. Elaine on February 13th, 2009 12:51 pm

    These would look great on my Chocolate Turtle Cheese Cake for our couples dinner tonight. Now let’s see if I can do it! :)

  4. karen on February 15th, 2009 6:30 pm

    Wow!!!!!!!!Thanks for the beautiful idea. It worked great and I used them on a fruit platter.

  5. katie mast on February 17th, 2009 7:13 pm

    I tryed them, they didnt look as pretty as yours. I thought mine melted so fast. did i do something wrong?

  6. Maria on March 25th, 2011 7:01 am

    Hi. Wow, it looks really amazing, and it looks like it’s not that hard to make. Looking forward to try making some roses, hope I’ll manage to make’em as pretty as yours :)

  7. jayne on May 5th, 2011 3:48 pm

    Hi Kay,
    Chanced upon your site as I am looking to make chocolate roses (I recon I will need around 80-100 for my daughters wedding cake. I can only find recipies with corn oil. Do you know what the equivalent of this is for us in the UK ? can we use a sunflower oil?
    Thanks
    Jayne

  8. Kay on May 10th, 2011 5:10 pm

    Jayne, use corn syrup instead of oil. Wow, 80-100, that sounds like work, but FUN work! :) That will be beautiful on the cake! And congratulations to your daughter!

  9. Kim on May 17th, 2011 3:44 pm

    Do you have to use chocolate chips? I would like to make red roses. Can I use red chocolate wafers?

  10. Kay on May 17th, 2011 3:54 pm

    Awesome idea, Kim! I don’t know if it will or won’t work, but I’m going to try it! :)

  11. UMM on June 6th, 2011 6:01 am

    HOW LONG DO THESE KEEP IN THE FREEZER AND HOW LONG TO THAW

Some Valentines Day ideas…

Posted on February 9, 2009
Filed Under Holiday cooking

Ok, enough of the chili soup and fry bread! And it IS warming up outside too! Yesterday felt like Spring! Yay!

We’ll have a Valentines ‘Cooks in Training’ post later this week with a couple Valentine ideas that Lexi and Tiffany are working on (and that I’m being the damage control person on) and another Valentines post or two, but for now, I’ll just pull up some ideas from previous posts from other years.

Conversation hearts (featured here) out of angel food cake and glaze and frosting…
vtines-conversation-hearts.jpg

My family has an annual Valentines supper… Mom started making heart-shaped food for Valentines supper fun when we were little kids and she faithfully did it every year, then when we got older, we got more involved and now it’s become a tradition. Over the last few years, the menu has changed every year, but this year is planning to be the Valentines meal menu we grew up with, complete with little heart shapes of bologna in the lettuce salad. 🙂

Here are samples of the last couple years:
… and the links to the posts (2007) (2008)

vtines-2007table-decor.jpg 
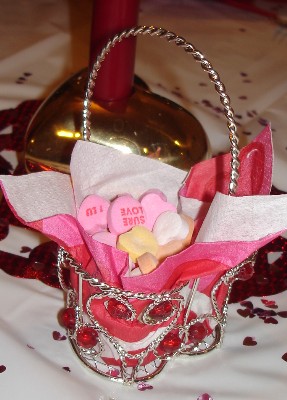
Simple easy decor… a little basket, a napkin, and candy.
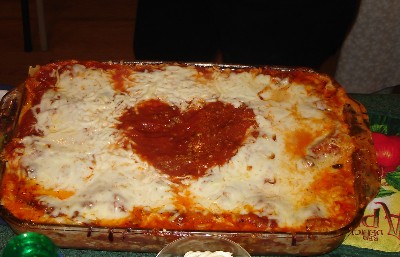
vtines-2007lasagna.jpg Lasagna

vtines-2007cheesecake.jpg 
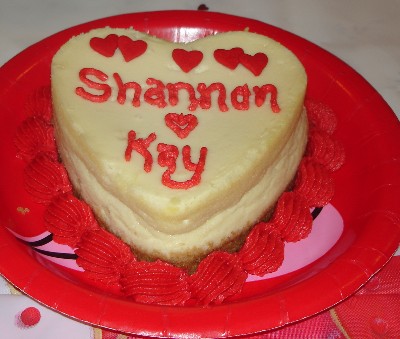
Cheesecakes to share. They’re about 4″ wide. We put them on the table right away and used them as place markers.
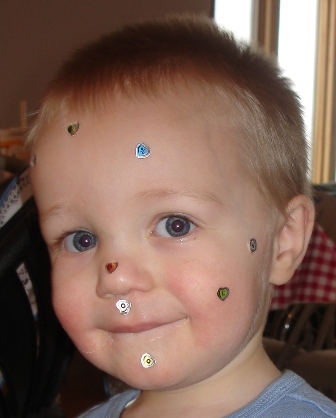
vtines-benny.jpg Decorate the kids. :)

vtines-baby.jpg

vtines-2008pizza.jpg 
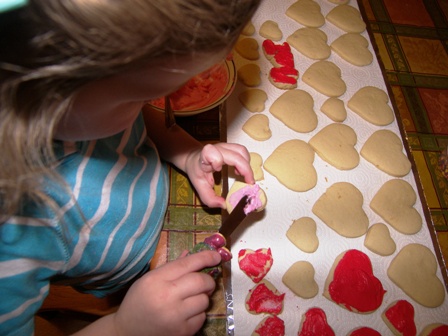
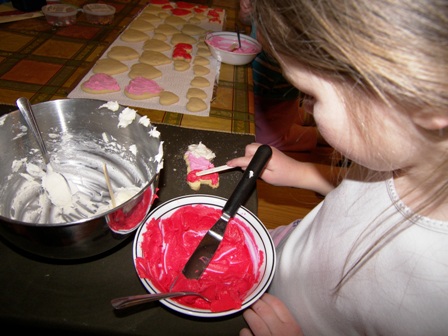
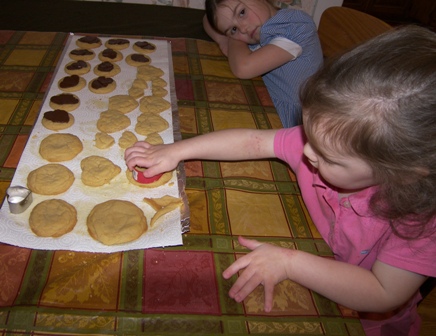
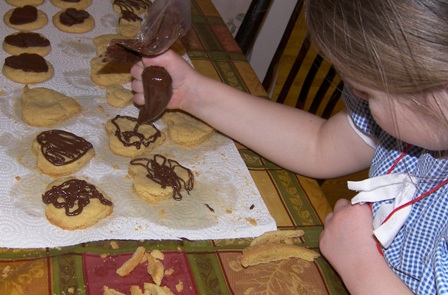
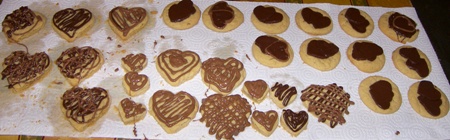
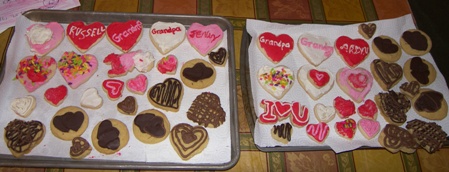
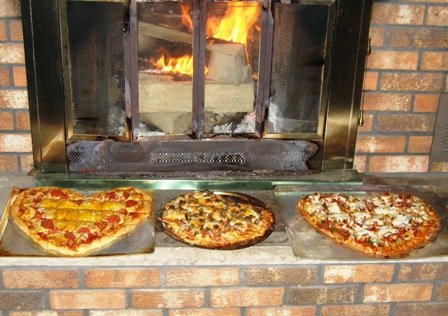
Heart-shaped pizzas staying warm by the fire till serving time.

vtines-2008fruit-pizza.jpg 
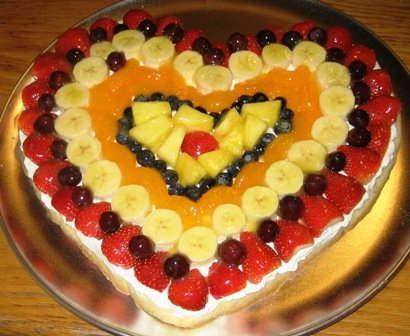
Fruit pizza. Yum, this picture makes me hungry for some. This recipe is actually featured here.

v-decoration.jpg

Any Valentine decor or food ideas from you? We’d love to hear them! 😉

Comments

4 Responses to “Some Valentines Day ideas…”

  1. Joanna on February 9th, 2009 1:15 pm

    My Fruit Pizza does not need to be heart-shaped.I just need fruit pizza -any shape- right now!!! That looks so good!!!!

  2. Rene on February 9th, 2009 1:36 pm

    What a neat idea — heart shaped food! My wedding anniversary is on Valentine’s day but it’s so hard to go out and enjoy yourself with all the crowds that we celebrate our anniversary a week earlier. That always leaves me wondering what to do for Valentines day. I think I’ll do this! That would be a fun tradition to start. Thanks for the idea Kay!

    Hugs,

    Rene

  3. Bobbi on February 9th, 2009 2:40 pm

    Thank you for the Heart Day ideas. I think I might do the cheese pizza and fruit pizza.

  4. Lori on February 12th, 2009 10:01 pm

    You mentioned you would like ideas. I like yours,now I’ll give you mine. I made “Lil’ Cheddar Meatloaves” for Valentine’s last year, I think. They are great looking in a heart shape! They keep their shape, and you put the ketchup sauce on top and you have red edible heart meatloaves. These are the only way I’ve come up with to have red heart meat. If you want the recipe, let me know. It only takes ground beef, oatmeal, egg, milk, and cheddar cheese, things I always have on hand!