Recipes and Cooking Ideas for Homemakers and Amateur Cooks
 

Sweet Lemon Bars

Posted on June 28, 2008
Filed Under Cookies and bars

I love looking thro’ recipes, cookbooks, etc. It can keep my attention as good as any interesting book. And one nice thing about it is that it is calorie-free… the looking and reading, that is! Where I get into trouble is when something reaches out and grabs me and I can’t help but go out to the kitchen and make it. That’s why I purposely don’t keep chocolate chips on hand. Chocolate is my weakness. And I do believe that I’ve become immune to getting sick from it.

Anyway, it was raining yesterday evening and the church ballgame got cancelled, and I was in the mood to bake something. So, I started going thro’ recipes. I had no chocolate in the house, so any recipe with that was out. I also had no brown sugar, so that threw out alot of cookie recipes. Then this lemon bar recipe caught my eye, and I had everything on hand, including fresh lemons. I didn’t know if any of us even liked lemon bars, but they sure looked tempting on the picture, so lemon bars it was.

lemon-bars7.jpg

Sweet Lemon Bars …recipe taken from an Easy to Bake Easy to Make recipe card

Printable recipe 

1 cup flour
1/2 cup butter
1/2 cup powdered sugar
2 eggs
1 cup sugar
1/4 tsp. salt
2 tsp. grated lemon rind
2 Tbsp. lemon juice
1 3 oz pkg cream cheese, softened

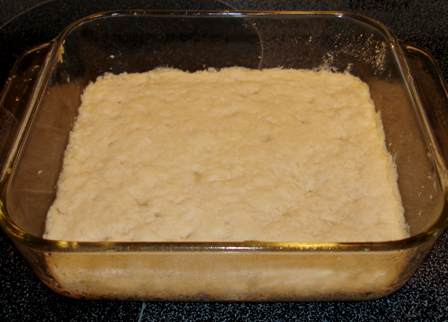
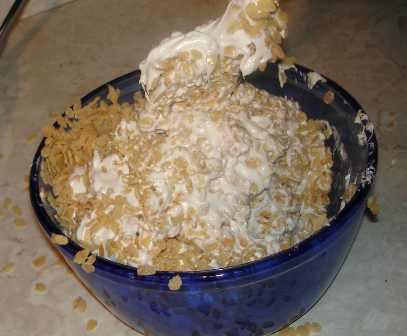
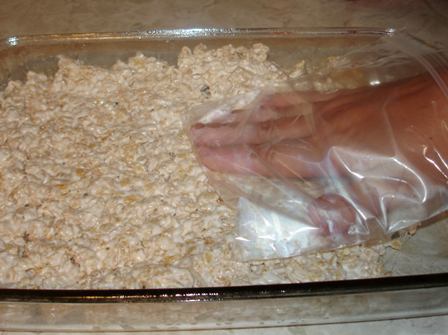
Preheat oven to 350. Line bottom of  8″ square baking dish with parchment paper. I didn’t do that, I just greased the pan well. Mix flour, butter, and powdered sugar together using hand mixer until fine crumbs form. Using drinking glass, press crumbs evenly into bottom of lined baking dish.
lemon-bars1.jpg
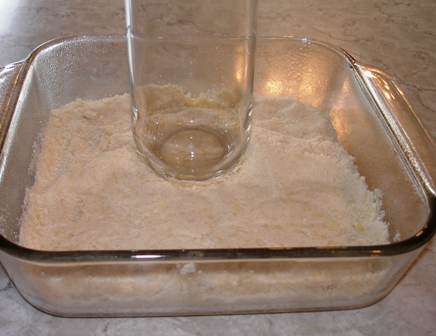
This was sort of a joke. I started like that, but then ended up using my hand. Worked great!

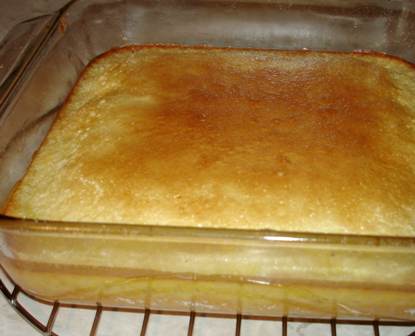
Bake until crust is lightly browned, about 15 minutes.
lemon-bars3.jpg

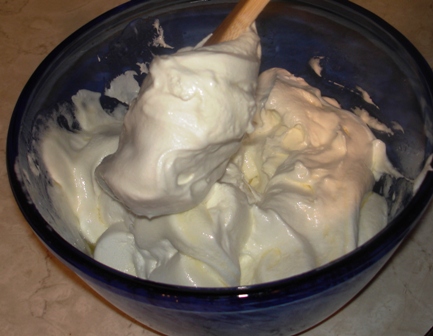
Meanwhile, beat eggs, sugar, and salt until light and fluffy. Add lemon rind and lemon juice. Blend in cream cheese. Pour over baked crust.
lemon-bars4.jpg

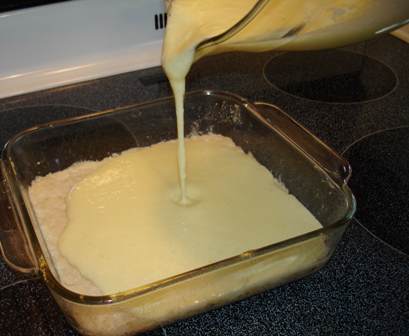
Return to oven and bake until firm in the center when touched, about 25 minutes longer.
lemon-bars5.jpg

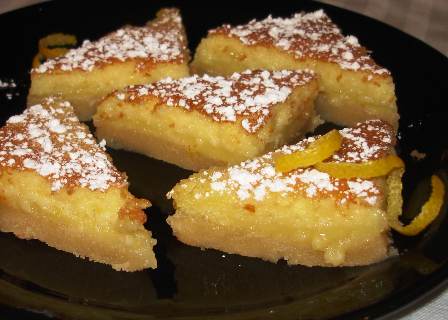
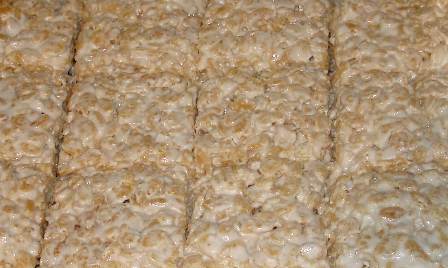
Cool to room temperature; sift powdered sugar over top.
lemon-bars6.jpg

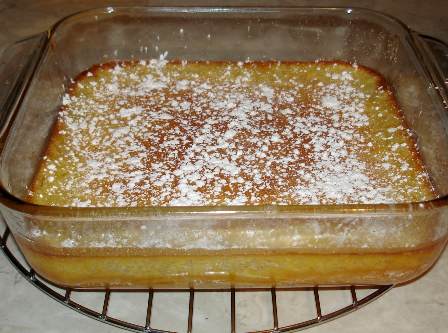
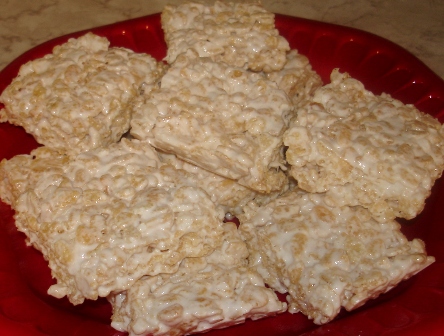
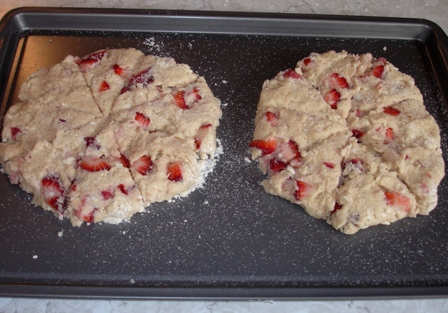
Cut into 9 squares and cut each of the squares in half diagonally to make triangles. Serve or store in refrigerator. Makes 18 triangles.
lemon-bars8.jpg

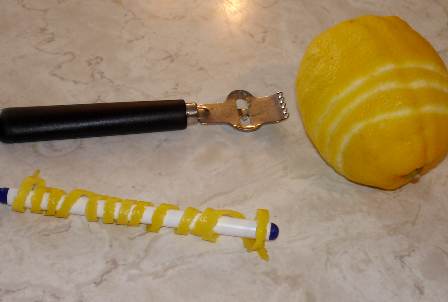
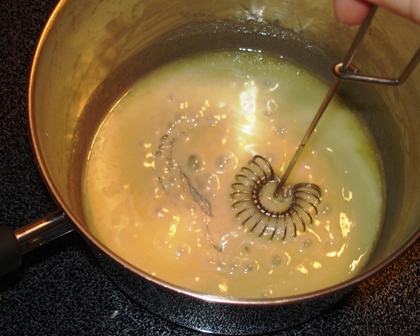
For the grated lemon rind and the lemon curl garnishes, I used the tool pictured below. Not sure what it’s called, maybe a lemon zester/scorer. It’s a Pampered Chef item and it works like a charm! I cut off a string of peeling with the part in the middle of the tool, then curled the peel around a pen so it would be more apt to curl on the plate later. I tried to find a utensil with a round handle and had none, so I used a pen. Yeah, even my wooden spoon handles aren’t round! The grating was actually lemon zest, done with the top part. I do it in as tiny pieces as possible so it dissolves or whatever it does that you don’t see it or feel the texture of it in the finished product.

lemon-bars2.jpg

I liked these bars the best chilled. When I told Shannon that, he said he’s tried them at every temperature from slightly warm to chilled and they passed with flying colors at all stages. They were just tops and I do know now that baked stuff doesn’t have to be chocolate to taste great and leave you coming back for more. So, we were pretty hard on them and I don’t think I’ll tell you how much of the pan is left! And we’re not sharing, so you’ll just have to make them yourself. :)

Comments

9 Responses to “Sweet Lemon Bars”

  1. Shannon on June 28th, 2008 10:57 am

    I love lemon bars!! Makes me think of Africa. Freida’s mom made them all the time when we were over there and we just inhaled them!!

  2. Rene on June 28th, 2008 12:41 pm

    I just love lemon bars! I’ll be making these soon I’m sure!

  3. Freida on June 28th, 2008 1:01 pm

    Ditto. Lemon bars are tops!!!

  4. Berneice on June 28th, 2008 2:01 pm

    Amen,amen! Love lemon bars, basically anything lemon hits the spot on a hot summer day.

  5. anita on June 28th, 2008 8:16 pm

    When I see lemon bars that ask for lemon zest i know its going to be good i’m going to have to give them a try some time….

  6. Denise on June 29th, 2008 7:07 pm

    Lemon bars are one of my hubby’s favorites. When we were dating, he would drive the 1100 miles from Mississippi to PA to come and see me. So at least one time I sent lemon bars with him. I’ve never seen or made this particular recipe. It looks too!! good!!

  7. carolyn on June 30th, 2008 2:45 am

    Ive never tried lemon bars, but thank u for sharing here, will give it a try :-)

    cheerio

  8. Katie Mast on June 30th, 2008 3:38 pm

    Lemon Bars are one of my husbands favorites as well. I will make these, they look great. Yes that Zestor works great, i use mine a lot to. Thanks for sharing this delightful treat.

  9. Sheila Graber on July 11th, 2008 11:46 am

    I thought these were a little too sweet and not enough lemon but it’s my fault b/c I didn’t have lemon zest and just used the recommended amount of juice instead of increasing it. The crust was perfect-I am going to use it again w/ my fav topping in a 9×13. 6 eggs-6 Tbsp flour-1 3/4 cup sugar-1 cup lemon juice-3 drops yellow food coloring. Bake an additional 25 min and they’re delicious if you like a tart/sweet lemon bar!

Italian Breadsticks

Posted on June 25, 2008
Filed Under Breads Biscuits and Rolls

I keep up with about 45 blogs via my Google Reader, but I’m slipping behind now and there are 73 unread posts. They keep faithfully updating (as opposed to me) and I only check them now and then. I do keep up with Pioneer Woman though, no matter how busy I am. And no, it’s not just so I don’t miss when she’s giving away a big beautiful KitchenAid mixer in the Cooking part of her blog!

Thanks for all your tips on the whoopie pie filling and I’m glad to know that a few others make more filling than the recipe calls for. :) I wasn’t sure if you’d agree when I said that’s what I’m going to do from now on or if you’d have fits at all the extra fattening unnecessary filling that would make.

Also, Lorinda (Hi!, by the way. Glad to see you on here!), you said you’re experimenting with homemade pizza and wondered if I have any recipes on here. I do have one recipe on here: Saturday Night Pizza. The crust is homemade and is just tops! One thing I don’t do (yet) is make my own pizza sauce. I have a friend Linda who is known for her good pizza sauce, so maybe I’ll ask her for her recipe and start with that one, then try a few others. So far, I’m just buying Ragu pizza sauce from the grocery store.

Now, for the breadsticks. This is one of those recipes that I made awhile ago, featured here, and didn’t like it how it was and said, “Next time, I’m going to…”. So, here is ‘next time’ and the breadsticks were much better AND easier and faster! These are the breadsticks I had pictured with the glazed baby carrots and the zesty mozzarella chicken.

carrots6.jpg

Italian Breadsticks

Printable recipe 

1/2 cup shredded mozzarella or Italian blend cheese
Italian seasoning
1 can (11 oz) refrigerated breadstick dough
1 egg
1 Tbsp. water

Preheat oven to 375. Spray baking sheet with cooking spray. Unroll dough; separate breadsticks. Cut each strip in half crosswise. On a lightly floured surface, with floured fingertips, twist the 2 halves together. Put the breadsticks on the baking sheet and press down on the ends to prevent unraveling.
italian1.jpg

Beat egg w water. Lightly brush tops of breadsticks with egg mixture.
italian2.jpg Yeah, I know, the picture is crooked. That’s because I was holding the camera with one hand and brushing with the other hand.

Sprinkle with cheese and Italian seasoning.
italian3.jpg

Bake until golden brown, about 15 minutes. Serve warm.
italian4.jpg

I was just thinking, I wonder how it would work to put melted butter on in place of the egg and water. Would be easier and seems like it would taste at least as good. I’ll have to try some of each like that next time and compare them.

Comments

2 Responses to “Italian Breadsticks”

  1. Linda on June 25th, 2008 6:44 pm

    Here is a spaghetti and pizza sauce I love. I have access to tomato sauce in #10 cans so I often cook up a big batch. If using a #10 can I usually add a little water to come closer to a gallon. The extra sauce can be canned or frozen. I haven’t gone to the work to downsize the recipe. There is nothing like fresh cooked sauce.

    4 Quarts Tomato Sauce
    3 Tbsp. Minced Onions
    1/2 Cup Sugar
    1/4 Cup Olive Oil
    2 Tbsp. Salt
    2 Tbsp. Dried Basil
    2 Tbsp. Dried Oregano
    1 Tbsp. Italian Seasoning
    1 1/2 Tbsp. Minced Garlic

    Bring to a boil. Simmer and serve.

  2. Kay on June 28th, 2008 8:58 am

    Thanks alot for the pizza sauce recipe, Linda. I’ll have to give it a try!

Rice Crispy Treats

Posted on June 23, 2008
Filed Under Snacks

Back again. I survived the week of the 4-yr-olds. There were 7 of them… you know the McCaugheys that had septuplets around 10 years ago? Now I know a little bit of what the mom was going through when they were 4. Only, she couldn’t send them home mid-afternoon and then go home herself and take a nap.

The week actually went good though. The first day, they were all low-key, then they got progressively roudier each day as they learned the ropes a little better and we got used to each other. By the end of the week, there were more sommer-saults going on and more ‘falling’ off the bench during assembly and bringing an inchworm to class. Do you want proof of an inchworm in class? Here you go:
inchworm.jpg

It’s the light green thing on the leaf. It was Sammie’s worm and she’d rip up little leaves for it to eat. That’s what she’s doing on the picture.   ——————————————————————————————————————————————————————————–

Teaching these little people was definitely more like being a mom than a teacher. For example, at lunchtime: “Can you open my juice/yogurt/pudding/lid for me?” “I don’t like this green stuff on my sandwich (lettuce). Can you get it off?” “I spilled my chocolate milk on my dress.” “Do you have a napkin? Look at my hands.” “I’m gonna go play now” as the lunch bag is thrown down beside me and on and on.

We had snacktime every afternoon… cookies, finger jello, rice crispy treats, pretzels, fish crackers, chocolate milk, juice, iced tea, etc. So, in honor of this post, I’m posting a rice crispy treats recipe. It’s nothing special, just the usual, probably what you’d get off of the rice crispy box.

rice-crispy6.jpg

Rice Crispy Treats

Printable recipe

1/4 cup butter
10 oz bag of marshmallows
5 1/2 cups rice crispy cereal

Melt the butter and marshmallows in the microwave.
rice-crispy1.jpg

rice-crispy2.jpg

Stir cereal in.
rice-crispy3.jpg

Press into a greased 9×13 pan. I spray cooking spray on a sandwich bag and put my hand inside to press the mixture into the pan.
rice-crispy4.jpg

Let sit for awhile till it cools and firms up. Cut into squares. If you’re making squares for 4-yr-olds, take extra time to cut the squares as evenly-sized as possible… this cuts down on the “Hey! She got the biggest piece!” and pawing through them, touching every piece, looking for the biggest one.
rice-crispy5.jpg

Serve with pretzels and chocolate milk.
rice-crispy8.jpg

rice-crispy7.jpg

Comments

5 Responses to “Rice Crispy Treats”

  1. Michelle on June 23rd, 2008 8:11 am

    It’s good to have you back! I missed the posts last week.

  2. Shannon on June 23rd, 2008 9:10 am

    Looks like you had your hands full. :) Good to hear from you again.

  3. Jo on June 23rd, 2008 12:09 pm

    Your rice krispie treats look like the kind I’d like—plenty of marshmallow goo! The only thing that would improve them would be to melt one cup of milk chocolate chips w/ one cup of butterscotch chips & spread it over top. :-) That’s the way my best friend used to make them…mmmhhmmm…

  4. Jo on June 23rd, 2008 12:10 pm

    I’ve been meaning to tell you…I tried your Zesty Mozzerella Chicken & your Glazed Carrots last week…they were a huge hit! Thanks for the new faves!!

  5. Rene on June 23rd, 2008 5:09 pm

    Welcome back! I’m in the throes of vacation bible school this week so I’m feeling a little bit kid overwhelmed myself! It sure was nice to walk out of church at noon knowing that I didn’t have to keep the peace any longer today. More to come tomorrow! BTW…I’ve made the finger jello a couple times now and it keeps turning out better each time. Thanks for that recipe!

Whoopie Pies

Posted on June 15, 2008
Filed Under Cookies and bars

My Father’s Day post I had planned didn’t really happen then, but Happy Belated Father’s Day anyway. Especially to the father of my daughters. And also to my own father.

I’ve got good memories growing up. Dad spent alot of time with us, from laying on the floor playing games with us to taking the family out on the boat multiple times a week in the evening in the summer.         Dad taught us children how to play chess when we were pretty young. He’d take off his queen AND give us hints. As we got older, the hints stopped and eventually the queen came back on, and we could even beat him sometimes.       We went boating and picnicking on islands and fishing alot too. I grew up here among the many lakes in the northwoods and a boat was almost as important to own as a car, in our opinions. At a certain age, Dad stopped taking the fish off of our hooks and said we were old enough to do it ourselves. I don’t remember exactly what age that was (maybe 9 or 10 yrs old), but whenever it was is when I started mostly just going along fishing for the ride and not getting my pole out. I missed seeing my bobber jerk underwater and feel the tug on the line, but it was worth giving up not to have to take a fish off the hook!         His storytelling ability is amazing and kept us very entertained and wide-eyed growing up… especially the stories involving his horse Dusty and the stories about their one-of-a-kind neighbor.    Oh, and one other thing, not alot of people grew up with yearly Donald Duck renditions by their dad of the “Happy Birthday to you” song. :)

Another thing about Dad is that he loves whoopie pies. Every year for his birthday, Mom would make him whoopie pies and at least one year, she made a whoopie pie cake. It was huge (maybe about 12″ across) and looked exactly like a whoopie pie. I haven’t made whoopie pies for years, but I did just lately. I was so disappointed that they didn’t turn out like Sheila’s OR Julia’s… the 2 people that I consider to be whoopie pie queens. But oh well, they were good anyway.

whoopie-pies6.jpg
Not sure why this picture has a lavendar hue! ????

Ever wonder why whoopie pies are called whoopie pies? I didn’t really wonder it until Lexi wondered it and started questioning me like I’d just automatically know. It’s like 3 desserts all in one… they taste like chocolate cake with frosting, but you bake them like cookies, and they’re called pies! Maybe it’s one of those things that will forever be a mystery… try explaining that to a 5-yr-old! Her world is full of questions and she’s not satisfied with no answer.

Whoopie pies …recipe taken from the Tasty Favorites cookbook (Pleasant Grove Mennonite Church)

Printable recipe

2 cups sugar
1 cup shortening
2 eggs
3/4 cup cocoa
2 tsp. soda
2 tsp. salt
2 tsp. vanilla
1 cup hot water
1 cup sour milk or buttermilk
4 cups sifted flour (sift?! Does anyone out there sift?)

Mix and drop by teaspoonfuls (I did more like 2 Tablespoonfuls) on cookie sheet. I spread them out a little so they wouldn’t be so thick. I don’t like thick whoopie pies… too much cake.
whoopie-pies1.jpg

Bake at 400 for 8 minutes. I baked it for 7 minutes.
whoopie-pies2.jpg

Filling:
2 egg whites
2 Tbsp. vanilla
4 tsp. flour
4 tsp. milk
2 cups powdered sugar
1 cup Crisco

Beat egg whites until stiff. Add vanilla, flour milk, and powdered sugar. Beat and cream, then add Crisco. Spread filling on bottom side of one cookie.
whoopie-pies3.jpg

Top with another cookie. Yield: 66 cookies (33 sandwiches) Here you go, Dad… I wish you could just pick one off the screen!
whoopie-pies4.jpg

This recipe tasted great, but I had a couple problems with it. The filling didn’t get white. It was a light tan. Do you think the vanilla is a misprint? Should it be teaspoons? Everything else in the filling is white except the Crisco I used is yellow, so I think it was mainly the vanilla’s fault that it got tan. The other problem I had was that the cookie part made 5 1/2 dozen cookies, which made 33 sandwiches, but the filling was gone after 24 sandwiches. And it was none too thick, either. So, next time, I’d either make 1.5 times the amount of filling or do what I did this time… filled the leftover cookies with ice cream.
whoopie-pies5.jpg
That was good! They tasted like ice cream sandwiches!

On a different note: I won’t be posting on here much at all this week… we have Summer Bible School at church Monday – Friday and I’m teaching the nursery class (4-yr-olds), so that’s where I’ll be during the day. Then, the rest of the time I’ll be trying to keep up with the laundry, cleaning, etc. around here. Some wonderful ladies from church who aren’t teaching offered to make suppers, so I’ll probably be doing little cooking this week. I will be making rice crispy treats for snack time at Bible School though. :)

Comments

12 Responses to “Whoopie Pies”

  1. Shannon on June 16th, 2008 6:12 am

    The girls would love these. Mom used to make them all the time at home. I love your tribute to your Dad, sounds like fun stories growing up. Someday you’ll have to do a book for your own family. :)

  2. Freida on June 16th, 2008 7:17 am

    We are big whoopie pie fans here. I haven’t made them in awhile, but they never last long around here. These look good. I don’t like the thick ones either.

  3. Twila on June 16th, 2008 7:47 am

    I think the best part of a whoopie pie is the fluffy filling so I always make 1.5 recipes of that for every one recipe of the cookies and I load ’em up! :-) I use the recipe from the original Basics cookbook which calls for 1 T. of vanilla (but I have “tsp” penciled in). It also calls for 4 T. each of flour and milk and 4 C. pwd. sugar to 1 1/2 c. Crisco. I wonder if the butter Crisco wasn’t part of the reason for the tan colored filling. When you have time you could make them again with reg. Crisco and try clear vanilla and report on the difference. :-) Have a good week with those energetic 4 year olds!

  4. Lisa on June 16th, 2008 8:16 am

    I blogged about whoopie pies when I made them back in April. They are a huge hit at my house. When I was getting ready to post, I researched a bit about the origin of the name. I didn’t really find a straight forward answer (see link below)

    http://thecuttingedgeofordinary.blogspot.com/search?q=whoopie

    My recipe came from Leites Culinaria and made 24 pies. (48 tops and bottoms with more than enough filling). My filling only called for 1 TEAspoon of vanilla. That might be where you got the brown filling. You can buy clear vanilla, but for just one recipe, it probably isn’t worth it. Mine also look smaller than yours (I’m just judging by how big they look in your hands), so that might be the reason for running out of filling. I just might have to make whoopie pies again, your post is making me crave them now!

  5. Katrina on June 16th, 2008 9:45 am

    I’ve been lurking on your site since finding it linked on Cookie Madness a few months ago. Your stuff always looks yummy!
    I recently went on a rice krispy treats binge and made a bunch of different kinds. You can look at my blog and see some different ones, if you’d like. Choc/PB, Red/white/blue, Strawberry/Banana. The possibilities are endless.
    Have fun.
    http://www.kevnkoi.blogspot.com

  6. Jessi on June 16th, 2008 2:32 pm

    Whoopie pies were a fav of mine, as a kid–I should try them w/ my kids now…..

    As for the icing-here are my thoughts–yellow crisco can taint the color and I think 2 TBSP is A LOT of vanilla….AND, if you made your cookies thinner–that means that you’re going to have more cookies to fill, so, therefore, you’d need more icing (b/c even though the cake part is thinner-it’s not like you’re going to go thin on the filling….ya know what I mean?)

    Okay-now my tummy is growling….teeehee!! gotta print this out, to take me w/ back “home” when I go visit my family next month.

  7. Barbara Miller on June 16th, 2008 3:25 pm

    My son is a fireman and around Christmas he mentioned whoopie pies to them and they were curious so I made some I also made pumpkin ones. They loved them.(Of course they like most anything I send) I heard?? The reason for the name is because a mom made them and the children were excited and yelled “whoopie”. Sounds good enough for me.

  8. chelsa on June 17th, 2008 6:52 am

    i had never had whoopie pies before i met my h.s. sweetheart at age 15, now my husband! :) my mother in law made them quite often back then… she would make them for my birthday, not enough time i guess anymore b/c she hasn’t made them for a few years! i have always wanted to try, but been to nervous i would mess them up! our recipe in the church cookbook (bethel mennonite, odon indiana) looks kinda hard… but yours seemed more simplified, or maybe it’s just not intimidating b/c it’s not in a book! haha! but thnaks, i’m def. going to try it soon!!

  9. Michelle on June 18th, 2008 9:36 am

    Yum… Whoopie pies are my favorite cookie! I’ve learned with making frosting for cookies you always have to make more than the recipe says.

  10. Lorinda on June 18th, 2008 12:32 pm

    Hey, cousin, this website is really cute! My mom told me about it, so this is how I found it. Ahhh, whoopie pies. I have to tell my own whoopie pie story. It was 5 days after Rose’s birth and I was hanging up laundry outside on the washline (which I really should not of been doing at that moment in my life), and this construction worker nearby shouted across his construction fence, asking if I would please bake him some whoopie pies. He said he’d pay for them. And me, being a sucker for money, baked them. And yes, I was severly sleep deprived and not thinking straight. And no, I didn’t make a big profit either. But ahhh, I could eat one right now. By the way, I’m experimenting with homemade pizza. Do you have any recipes for it on this site? I tried to search, but for some reason it didn’t work. Maybe you can direct me to the right link. Thanks!

  11. Sean on June 21st, 2008 6:41 pm

    i haven’t had these in years!

  12. Jessica on June 21st, 2008 6:41 pm

    I love whoopie pies!

Zesty Mozzarella Chicken

Posted on June 13, 2008
Filed Under Chicken and Turkey

This recipe would be worth your time. Not that it takes a bunch of time. I just really REALLY like it. The last time I made it, I was going to feature it, but I burned the chicken.

Hey, here’s a question for you… How often do you make flops? …anything from desserts not setting up right to burning something to cooking veggies too long to forgetting to cut an ingredient amount in half when you’re making half of a recipe. Maybe those don’t all classify as flops, but I mean things like that where maybe only you as the cook know they even happened. For example, if I burn garlic toast under the broiler, if it’s not too bad, I take a knife and scrape off the burnt part. Nobody ever knows the diff. And the ingredient thing, I do that quite a bit because I cook small and am often halving recipes. Anyway, I mess something up at least once a week. What about you? :)

This chicken recipe is taken from A Taste of the Country 8th Edition cookbook…

zesty6.jpg

Zesty Mozzarella Chicken

Printable recipe

1 egg white, lightly beaten
2 Tbsp. milk
1 cup dry bread crumbs (I use Club cracker crumbs)
2 Tbsp. Parmesan cheese
1/4 tsp. each salt, pepper, garlic powder, cayenne pepper, and dried oregano
8 boneless skinless chicken breast halves
1/4 cup butter or margarine
1 can (8 oz) tomato sauce (instead of the tomato sauce mixed with basil, I just use Ragu pasta sauce)
1 tsp. dried basil
1 cup (4 oz) shredded mozzarella cheese (or Italian blend cheese)

In a shallow bowl, combine egg white and milk. In another bowl, combine the bread crumbs, Parmesan cheese, and seasonings.
zesty1.jpg

Dip each chicken breast in the egg white mixture, then in the crumb mixture. Melt butter in a skillet; brown chicken on both sides until pink and juices run clear.
zesty2.jpg

zesty3.jpg
To tell if the chicken is done, I either cut into a piece to see if it’s not pink anymore or poke a fork thermometer into it.

Meanwhile, heat tomato sauce and basil until warm. When chicken is done, sprinkle with mozzarella cheese.
zesty4.jpg

Remove from the heat and cover for 2-3 minutes or until cheese melts. Serve with tomato-basil sauce.
zesty5.jpg

I don’t think the breading is enough for 8 pieces because I always make 4 pieces and use about 3/4 of the breading for a full recipe! So, if you do make the full 8-piece recipe, make more of the crumb mixture than it calls for. Or maybe I just like more breading than most people.

I usually serve this chicken with noodles, Pillsbury French bread, and salad.

Comments

7 Responses to “Zesty Mozzarella Chicken”

  1. Jo on June 13th, 2008 11:38 am

    My mouth is watering. :-) Can’t wait to try it! Titus is on day shift next week; I may have to put this on our supper menu for one night.
    As for flops—well, I’d have a lot more if I’d cook supper every day. But it’s kinda hard to “flop” breakfast foods.

  2. Freida on June 13th, 2008 1:42 pm

    That looks like something worth trying. Oh lalalaala. Can’t wait!

  3. Michelle on June 13th, 2008 2:19 pm

    Mmm.. This looks good. It seems like my food usually decides to “flop” when I’m making it for company or to take away. I don’t know if I try too hard or what. By the way… the breadsticks you had with your meal of chicken and carrots looks good. Wouldn’t mind to have the recipe posted sometime:)

  4. Kelly on June 13th, 2008 4:37 pm

    Mmmm…looks delicious!
    And in response to your question — it seems like I do pretty well without messing up….as long as I’m not making it for someone ELSE.

    Every time I have to provide a food for a function, it seems I run the risk of screwing it up!

  5. Melissa K on June 15th, 2008 5:25 am

    This is similar to my chicken parm recipe except I just do it all in the oven and add the sauce & cheese at the end too.

    I do flops often enough, mainly because I LOVE to cook outside my comfort zone and try new things. Some of them work, some of them don’t. I especially try new dessert recipes all the time and I don’t hesitate to try, for example, three brand new desserts for a family party. So of course mistakes happen. It’s just part of trying something new (or being very frazzled when I cook a tried and true recipe!)

  6. E on June 16th, 2008 6:21 pm

    I can only recall one flop since I’ve been married. (under 2 years) That one was because I subsituted too many things. I think my lack of flops are because of two things:
    1. Since I work part time, I only cook 2-3 times a week.
    2. I am very picky with the recipes I use and I love to try new recipes. I do very little cooking out of Mennonite cookbooks. I use recipes from Taste of Home, Pampered Chef, and Food Network that have been tried and perfected in test kitchens.

  7. Megan Boris on June 19th, 2008 7:05 am

    Megan Boris-

    I tried this and it was AMAZING! Thanks for making it available! I cut the recipe in half & used whole wheat crackers for the bread crumbs…it came out great!

Glazed Baby Carrots

Posted on June 12, 2008
Filed Under Side dishes

I’ve always wanted a recipe for this. I’ve tried recipes, but they never taste like the ones you get at restaurants, like Perkins and Cracker Barrel. Not long ago, Mama’s Southern Cooking posted this recipe. So, last night, I tried them. They were perfect! Tasted just like I hoped they would!

So, now, these will be added to my list of veggie dishes to make for meals. Tiffany (2) will be glad about that. She ate a serving spoonful, then said, “Mo’ caccots”, ate another serving, and asked for more! She ate 3 servings! They are not low-calorie by any means, but man, are they ever good!

Glazed Carrots

Printable recipe

2 pounds of fresh baby carrots
1/2 cup of butter
1/3 cup of sugar, or 1/2 cup of honey (I used sugar)
1/2 teaspoon of salt

In a small pot, add the carrots and cover with water. Bring to a boil.
carrots1.jpg

Reduce heat, cover and simmer over medium heat for about 10 minutes. Drain. Set aside.

In a saucepan, melt the butter and the sugar.
carrots2.jpg

Add the carrots and salt. Saute over medium-low heat until carrots are fork tender.
carrots3.jpg
This could take anywhere from 10 to 20 minutes depending upon the size of your baby carrots.

carrots5.jpg Mmmmmmm! Delicious!

Here is the rest of our meal. I’ll post the other 2 recipes too (breadsticks and chicken), but for lack of time right now, that will be in later posts. That chicken is awesome. It’s breaded, fried, and topped with cheese and speghetti sauce. I make it now and then, but haven’t featured it yet.
carrots6.jpg

Comments

12 Responses to “Glazed Baby Carrots”

  1. Amber on June 12th, 2008 11:38 am

    Looks like a recipe that similar to what i use, except I use Brown sugar and add a teas. of ground mustard. I need to make them again, they’re one of our favorites!

  2. Mary Faith on June 12th, 2008 12:55 pm

    I LOVE your printable recipe option. Can you do that easily enough to do it all the time??? :)

  3. Shannon on June 12th, 2008 1:08 pm

    Hum, must say if I ever made this my family just might boot me into WI. ????

  4. Kay on June 12th, 2008 2:13 pm

    Amber, brown sugar sounds like a good idea… I’m going to try that next time.

    Mary Faith, yeah, I’m planning to do the printable recipes all the time from now on and little by little, add them to past posts.

    Shannon, ha, try the carrots! I’m fine with the others booting you to WI. :)

  5. fran’s kitchen on June 12th, 2008 3:14 pm

    I am so gald to have this recipe. I absolutly love Cracker Barrels glazed baby carrots. If I can make them at home that is even better.

  6. Mama on June 12th, 2008 4:26 pm

    I’m so glad you enjoyed them Kay! I’ve been making them for years and I never have any leftovers!

  7. Michelle on June 12th, 2008 6:15 pm

    Thanks for adding the printable recipe feature!

  8. Jo on June 12th, 2008 8:14 pm

    Applause to you for the printable recipe feature! Thank-you, thank-you! And another thank-you for the glazed carrots recipe; I’ll definitely be using it sometime (hopefully soon). We all love carrots here.

  9. fran’s kitchen on June 12th, 2008 9:31 pm

    I made the crrots tonight and they were awesome.
    No leftovers here either.

  10. fran’s kitchen on June 12th, 2008 9:32 pm

    Carrots, not crrots!

  11. Elvida Yoder on June 13th, 2008 7:36 am

    They look yummy! I have a recipe that uses a packet of dry Hidden Valley Ranch Dressing mix. I have given that recipe so many times cuz it is always a hit…just cook the carrots (1 lb.)until tender as you like, then in a seperate skillet melt 1/4 cup each of butter and brown sugar, add the cooked carrots and dressing mix… cook and stir 5 minutes. They are delicious! They are also easy to make for larger dinners and have been served around this area in those instances.

  12. Ruth on June 15th, 2008 4:29 pm

    I make the glazed carrots using brown sugar, and adding approximately a teaspoon of prepared mustard. It gives the carrots just a little zip. If you can taste the mustard, you’ve probably added too much. I’m not a great mustard fan, but I rarely make the carrots without.

Food Ideas for a Baby Shower

Posted on June 10, 2008
Filed Under For special occassions

I just ran across some pictures of a baby shower that I was at recently. So, I’ll post pictures of the food in case anyone needs any ideas if you’re planning one. As I go to more baby showers, I’ll be sure to take pictures of the food and post them. I’d love to post some other pictures too, like of the washline game we played, but I guess I’ll just stick to the food. :)

baby-shower1.jpg

baby-shower2.jpg
This baby carriage was so cute. Someone did a good job on it! baby-shower3.jpg

The girl in the white dress is the new mother-to-be… lookin’ good for 8 months pg! We also had chips and dip, which you can’t really see on any of the pictures.

baby-shower4.jpg

——————————————————————————————————–

This shower was from a couple years ago. We had a baby boom at church and one of them was a first-time mom.
baby-shower5.jpg 
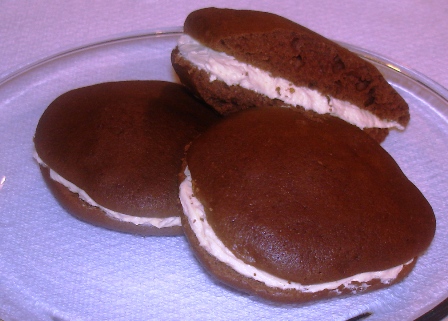
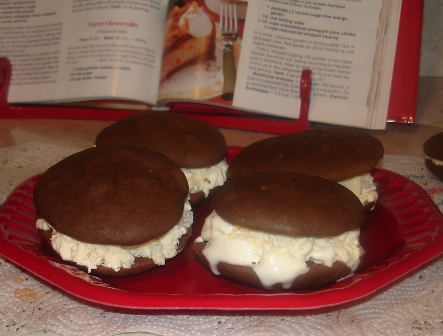
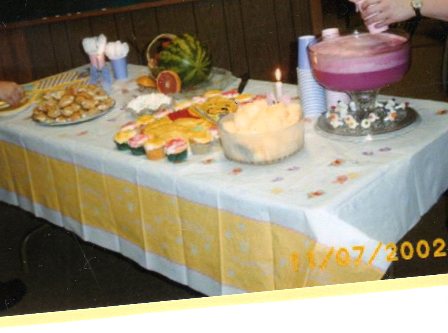
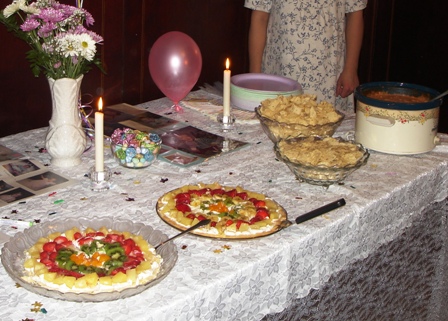
That fruit pizza was great!

baby-shower7.jpg The ice cream wasn’t out yet on this picture. We also had hot chocolate made with melted candy bars. It was SO good. I need to get that recipe from my friend who made it.

———————————————————————————————————

And I’m also adding a couple pictures of the baby shower that my friends did for me just before Lexi was born 5 1/2 years ago. I don’t have digital pictures of it, I just scanned a page of Lexi’s baby album, so the quality isn’t as good.

baby-shower-mine2.jpg

baby-shower-mine3.jpg
Notice there’s another watermelon baby carriage. That must be THE thing!

What other foods have you seen at or made for baby showers?

Comments

9 Responses to “Food Ideas for a Baby Shower”

  1. Jo on June 10th, 2008 2:04 pm

    We’re having a baby shower for my SIL in July…that baby carriage is a cute idea. Thanks! I’ll be checking back here for other tips.

  2. Monica on June 10th, 2008 2:58 pm

    I just helped with a baby shower at church and we did the “Little Yellow Duckie” theme. We had brushetta, a hot dip, blue and yellow finger jello cut with a duckie cookie cutter, cheese cut into ducks with crackers, mixed fruit with rainbow sherbet, and blue hawaiian punch/7Up with a few yellow duckies floating in it!! Also a yellow duck foil balloon with blue balloons around it (balloon bouquet). We had a lot of fun decorating for it and a lot of compliments, too!!

  3. Monica on June 10th, 2008 2:59 pm

    Forgot to say that the baby carriage is so cute!! I’ll have to remember that for later!!

  4. Kay on June 10th, 2008 3:11 pm

    Monica, that sounds so cute! If I’m ever in charge of a baby shower, that would be a good theme to go with. I love the idea of the ducks floating in the punch. :) And little ducks are easy to find! They’re everywhere!!!

  5. Lois on June 10th, 2008 5:11 pm

    An idea I used for a shower was “Diapers”, and was a hit. We took a square napkin and folded it to look like a diaper, keeping the corners together with a small safety pin. Then filled them with nuts/mints. Oh, we put 2 cho.covered raisin in the bottom, and found a lot of them in the trash later!!+) We had that rubber ducky theme, by accident at this shower too. And it was so cute… But a different twist to the punch was vanilla ice cream on the punch, to look like bubbles. I had a watermellon carriage at my shower too… must be the thing to have.

  6. Mary on June 10th, 2008 6:16 pm

    The watermelon carriage is adorable! Shouldn’t be too hard to make either.

    Diaper cakes are all the rage now too. If you can fold or roll diapers and tie a bow around them that makes a layer. Then just add baby stuff for decorations.

  7. Rene on June 10th, 2008 8:31 pm

    Too cute! I’ve seen watermelon baskets but what a neat idea to make a carriage instead.

  8. fran’s kitchen on June 10th, 2008 9:35 pm

    Wow, I never went to all that work when I helped with baby showers. Ours were boring compared to this. The only food I can ever remember at a baby shower is “chicken salad”. Exciting, huh?

    I hope you get the recipe for that hot chocolate. Sounds wonderful!!

  9. Jo on June 12th, 2008 8:25 pm

    Another idea for the duck theme…my cousin did this for her SIL’s shower…they made little soaps for favors, clear glycerin w/ a tiny ducky inside. Then they attached a card that said, “Thanks for ‘showering’ with us!” Love the pun! :-)

Let’s make dinner rolls in different shapes and sizes!

Posted on June 9, 2008
Filed Under Breads Biscuits and Rolls

Are Mondays crazy for you, too? They always are for me and I’m not sure why. Extra cleaning up from the weekend, more laundry, lack of energy? Anyway, today was one of them days and so the post I wanted to post this morning is happening now instead.

Speaking of Mondays, my family rarely gets anything special for supper on Monday evenings. In fact, I almost always make the same thing… fried chicken breasts and veggies and bread to go with it. That meal can be made from chicken-still-in-the-freezer to eating in under a half hour. That timing fits in well with my Monday schedule. Or lack of schedule… I don’t want to give the wrong impression here.

Last Friday evening, we tried something new. My sister was here and my mom and dad were coming for supper, so we decided to get fancy with the rolls. And if they didn’t turn out, it didn’t really matter because our extra people for supper were comfy guests. And my mom always likes kitchen experiments anyway. I took 2 loaves of thawed frozen bread dough (does ‘thawed frozen’ make sense?) and split each loaf in half, making 4 equal 4ths (I think my English is having a Monday, too. 4 equal 4ths sounds weird).

rolls8.jpg

4th #1: Divide it into 4ths. Divide each 4th into 3rds. Put 3 3rds each into 4 ‘holes’ of a muffin tin. Did you at all get that? It should look like this:
rolls1.jpg Should’ve rolled each ball a bit longer to get them more smooth, but they looked better in real life. At least I didn’t notice the roughness.

4th #2: This was the easiest one. Divide it into 4 balls. They seemed too big, so I pinched some off of each ball and gave it to Lexi to play with. So, now that the 4 balls are the right size, put them in the muffin tin. Then take a scissors and snip it almost the whole way thro’, first one way, then the other way. It should look like this:
rolls2.jpg

4th #3: You’ll need a bit of help from 4th #4 for this one, so don’t save it till last! Put the 2 together and roll into a 12″ circle. With a pizza cutter, cut it in half. Cut the one half into 4 or 6 triangles, then roll each one up starting at the wide end. Should look like this:
rolls3.jpg

4th #4: Roll it out into a rectangle about 6″ x 6″ and butter it. With a pizza cutter, cut it into 4 strips. Then stack the strips on top of each other and cut the other way, making 4 square stacks. Lay each stack sideways into a muffin cup. Should look like this:
rolls4.jpg

And now, you should have a total of something like this:
rolls5.jpg

Then, let them raise for about 45 min…
rolls6.jpg

Bake them for 25 min at 350.
rolls7.jpg

And you’ve got yourselves a fine assortment of rolls to pick from! Those stacked ones separated while baking, must’ve been because of the butter. Next time I’d skip the buttering. Lexi and Tiffany made the crescent rolls. The reason there are 6 crescent rolls and only 4 of the other kinds is not a thought-thro’ culinary reason. It’s simply because I’d have run out of room in the muffin tin and I only have one. They would’ve been a better size divided into 6ths instead of 4ths though. Some of them got pretty big.

They were fun to make. And it added more character to the meal. Ok, that may have bumped it up a level, saying a meal had character. The rest of the meal was glazed meatloaf, twice-baked potatoes in a casserole dish (instead of putting the potato mixture back into the shells), and peas. Our dessert was chocolate peanut butter milkshakes later in the evening.

Off-the-subject tidbits:
I’m still going to do ‘Out of my Comfort Zone’ posts, but they’ll be more hit-n-miss now instead of weekly. Also, I figured out a way (um, after talking to my tech support husband… maybe that should say ‘we’ instead of ‘I’) to do printable recipes now, so one of these days, I’ll start adding one to each post. And eventually making one for each recipe all the way back to the beginning. That last sentence makes me want to run and hide. Just kidding. It’s fun.

Comments

4 Responses to “Let’s make dinner rolls in different shapes and sizes!”

  1. Sharon on June 9th, 2008 9:22 pm

    Yay on the printable recipes!!! I was wondering when you’d get to that…but I’m a mom, too, so wasn’t going to bug you about it. Figured Shannon could figure it out if you couldn’t–I have great confidence in you!!! :-)

    Reading this reminded me of where you get your knack for neat ideas and ways of writing things–your Mom! Gotta love her.

  2. Annette33 on June 9th, 2008 10:03 pm

    Yes! Good idea on the printable recipes!

  3. fran’s kitchen on June 10th, 2008 5:06 am

    Those rolls look fun. Tasty too:)
    Wow, I’m excited about the printable recipes, thanks for putting the effort forth to figure it out.

  4. Lisa on June 10th, 2008 5:58 am

    I can only dream of heating up the oven. It’s going to be almost 100 here today! We are melting!! Those rolls sure look good though!

    I found a way to do really super easy printable recipe on my site! If anyone wants info feel free to email me at ghenne64@gmail.com and I can email you directions on how to do it. It’s a bit much to print here….but it’s easy, honest, lol.

Baking up a storm

Posted on June 6, 2008
Filed Under Tidbits

Now I want to open a bakery again. This happens every year. I bake a bunch of stuff for a bake sale and love it so much that I dream of opening a bakery. I could bake to my heart’s content. And people would come and pay me for doing it. But I don’t want to be that tied down and another major thing is I’m not sure exactly how bakeries make money! Must be the mass production and the wholesale ingredients.

I figured up my time and ingredient costs and if everything would sell that I baked, I would’ve made less than $4/hr. Yeah, my bakery would be a place of voluntary service and a non-profit organization. When I figured that up, it wasn’t figuring in heating, air conditioning, electricity, rent for the building, advertizing, appliances, or anything besides the labor and ingredients. Another thing that would help at a bakery is that it’s done every day… for example, I made 10 pie crusts (5 double crust pies) and by the 6th crust, it was going much faster than the first crust did!

So, yeah, I contribute to the bake sale because I love to, not to make a bunch of money. I’m kicking myself for not taking a picture of everything all sitting on the counter ready to go. Maybe I didn’t think of it because it wasn’t all sitting on the same counter ready to go all at the same time. But, I did the same 4 things as I did last year (monster cookies, apple pies, rice crispy roll, and fudge), so the picture would’ve looked about the same as last year’s picture. Here’s last year’s post.

I did get a couple pictures of the pie operation…

This first one was taken sometime between 5:30 a.m. and 6:00 a.m. this morning. I was going to do a self-timer picture and be dutifully peeling apples, but then I thought about it that I was in my pjs, so I just stayed behind the camera instead.

bake-sale1.jpg

Here are the pies in the oven, almost ready to come out.
bake-sale2.jpg

See ya later. If you need me, you’ll find me in the kitchen eating monster cookies…

Comments

4 Responses to “Baking up a storm”

  1. Jessica on June 6th, 2008 3:33 pm

    You would waste time eating monster cookies when there are things like fudge and apple pie and rice krispie anything lying about??? You are just crazier than I thought.
    I was hoping to see some cute pj’s. I am fixin to sew some and need some inspiration…

  2. Judi on June 6th, 2008 4:43 pm

    Most of the things I love to do I wouldn’t make any money for either. Maybe that’s why it isn’t a “job”. If we’re having fun or enjoying it then we can’t get paid. That’s just the way it is lol

  3. Liz on June 6th, 2008 7:32 pm

    Jessica, you obviously have never had Kay’s Monster Cookies (and yeah, that should be capitalized cause they are so good). Those were the only things I ate today of the things she bought. I wouldn’t have minded trying the pie, but I didn’t feel like buying a whole pie. But her Monster Cookies by far top fudge and rice crispie rolls. I haven’t tried her fudge recently though, but I think I would still rather have a cookie.

  4. fran’s kitchen on June 6th, 2008 7:43 pm

    Your apple pies look fantastic. They look too good to eat.
    I grew up working in my parents bakery and it was fun. I have lots of good memories (and some bad ones) working with my sisters in the bakery. Now that I am married and don’t work there anymore, it sounds even more fun. I have done my own little personal bake sales and they are a blast. It just gets in your blood and its addictive.
    I hope your sale went well.

Garlic Bread – easy and delicious

Posted on June 5, 2008
Filed Under Breads Biscuits and Rolls

I faithfully serve French bread of some sort whenever we have an Italian meal. The reason for that is because I serve hot bread or rolls or biscuits at every meal and that goes the best with an Italian meal.

Hmmm, that’s weird, I just skimmed what I wrote and it’s Italian and French and I’m saying it goes great together! I wonder what the French and Italian people would say about that theory! I’ve never been outside the US, except for Canada, so I don’t know that much about other countries, except from what I’ve read or heard. My dream is to someday fly over to Europe and spend 2 or 3 weeks there, just seeing the sites and hearing the people talk (I love the sound of French, the little bit I’ve heard) and eat a REAL authentic Italian pizza and see the Swiss Alps and then sail back to America on the Queen Elizabeth or Queen Mary. I think about that dream every time I think about anything Europe.

Anyway, this has nothing to do with France and Italy! We’re talking American-baked French bread from a grocery store bakery. Or worse yet, a popable can of French bread or Italian bread! I usually either do the popable can thing or take a bought loaf of French bread, cut it into diagonal slices, butter both sides and sprinkle garlic on one side, then broil both sides till they’re toasted. I’ve been dodging around a recipe I’d had for awhile, scribbled in my own handwriting, not sure where it came from. I was always afraid it would be too soggy and then I finally made it Tues evening to go with our meal of tortellini and Italian mix vegetables.

garlic-bread7.jpg

It was wonderful. And now I regret the last couple years of thinking about making it but saying “No, not this time.”

Garlic Bread

1 loaf French bread
1/4 cup butter
1/4 tsp. garlic powder
1/2 tsp. parsley flakes
1/4 cup grated Parmesan cheese

Cut bread diagonally into 1/2″ slices, but not quite the whole way through.
garlic-bread1.jpg

Soften butter and mix it with the garlic powder, parsley and parmesan cheese.
garlic-bread2.jpg

Spread on both sides of each slice of bread.
garlic-bread3.jpg

Wrap in foil.
garlic-bread4.jpg

Bake at 350 for 15 minutes.
garlic-bread5.jpg

Unwrap and cut the pieces the rest of the way apart. Serve immediately.
garlic-bread6.jpg

Man, that was so good! I could eat a piece or two right now! It was soft and buttery and chewy and looked good too. Sometimes I’ll still broil individual pieces of garlic bread, but this will definitely be on the menu more often! It’s so easy too! You don’t have to remember to watch it like you do when it’s under the broiler. I’ve wrecked many garlic bread pieces that way, or salvaged them by scraping off the burnt part. When I made this garlic bread, I made it a bit ahead of time and then threw it in the oven 15 min before mealtime.

Comments

8 Responses to “Garlic Bread – easy and delicious”

  1. Shannon on June 5th, 2008 9:57 am

    May I go with you to Europe? :) I want to go to Italy sometime too… and lots of other places. $$$??? Anyway back to the food, I am gonna try this. I love garlic bread.

  2. Karisa on June 5th, 2008 10:04 am

    I am going to try this tomorrow night when we have company. I think it would go wonderful with the Italian Chicken and Pasta that I am going to make. Thanks for posting this !!!! BTW — lets start to plan our trip to Europe. :)We didn’t get to Italy and that is one place I want to see someday :)

  3. Rene on June 5th, 2008 10:25 am

    That looks so good!! I usually buy the premade garlic bread but I think this would be more economical. I will definitely be trying it. Thanks for all the great recipes! My family thanks you too because they are pretty sick of my old standbys and enjoy the new creations I’ve been serving due to your inspiration.

  4. Jo on June 5th, 2008 12:44 pm

    My mouth is watering! Garlic bread is a favorite of mine, but I don’t make it often. Have to change that…

  5. Monica on June 5th, 2008 2:01 pm

    I love garlic bread and this sounds so good!!! I’ll have to try it. I’ve been to Europe, but it was not nearly long enough and I didn’t get to go to France or Italy, so I’d love to go back someday!!

  6. Lisa on June 5th, 2008 4:01 pm

    Looks great! I have been making garlic bread like this for 20 years. The only difference with mine is I use fresh chopped garlic. Either way I’m sure it’s delicious!

  7. barb on June 5th, 2008 4:15 pm

    Wow, you take such good pictures. That bread looks awesome. I am just curious, I wonder why you’re not supposed to cut all the way through?
    Thanks for another great recipe:)

  8. Liz on June 5th, 2008 4:32 pm

    That’s how my mom always made garlic bread when I was at home. I don’t think all seasonings were the same but it was the same idea.

Bacon-Wrapped Chicken

Posted on June 3, 2008
Filed Under Chicken and Turkey, Pork and ham

I’ve never made bacon-wrapped anything. I’ve had bacon-wrapped crackers and I’ve had bacon-wrapped filet mignon, but didn’t make either of them. So, here it is, the first time I’ve made a bacon-wrapped something…

bacon-chicken7.jpg

Bacon-Wrapped Chicken    Recipe taken from the 2001 Quick Cooking cookbook

6 boneless skinless chicken breast halves
1 carton (8 oz) whipped cream cheese with onion and chives
1 Tbsp. butter or margarine, cubed
Salt to taste
6 bacon strips

Flatten the chicken to 1/2″ thickness.
bacon-chicken1.jpg

Spread 3 Tbsp cream cheese over each. Dot with the butter and sprinkle with salt. Have you ever tried spreading cream cheese on slippery raw chicken? It’s hard!!!
bacon-chicken2.jpg

Roll up. Wrap each with a bacon strip. Place, seam side down, in a greased 9×13 pan.
bacon-chicken3.jpg

bacon-chicken4.jpg

Bake, uncovered, at 400 for 35-40 minutes or until juices run clear. Broil 6″ from the heat for 5 minutes or until bacon is crisp. Yield: 6 servings. Look at the difference in the pan of the picture above and the picture below! The bacon sizzled and splattered while baking. We could hear it.
bacon-chicken8.jpg

bacon-chicken6.jpg
We had creamed peas and Red Lobster biscuits with it.

This bacon-wrapped chicken actually looked REALLY good and sounded like it would be top notch, as in put it on the make-for-company list. The combo of chicken and bacon was really good, but the chicken was a bit dry and it wasn’t really all that extra flavorful.

Next time, I’m going to skip the cream cheese thing and sprinkle other seasonings inside instead. Then, I’ll bake it covered (so the splattering bacon doesn’t total my oven!) and uncover it for the broiling at the end. I think the chicken would stay more moist that way. And then we could eat it with barbeque sauce. Bbq sauce didn’t seem like it would go with that cream cheese mixture.

But it does look kinda neat, doesn’t it? One thing that surprised me was that the bacon stayed on, even when it ended at the top. I didn’t have to tack it down with toothpicks or anything!

One of these weeks, I’ll have to do a week of re-doing recipes that I’ve tried. I say ‘next time’ and then just keep making new recipes and ‘next time’ doesn’t really happen, although I did try something different with those carrot pancakes… I traded the cup of carrots for 1/3 cup of pumpkin and doubled the pecans. I kept everything else the same, but maybe should’ve added nutmeg. It was much better than the original recipe!

Comments

10 Responses to “Bacon-Wrapped Chicken”

  1. Annette33 on June 3rd, 2008 12:00 pm

    I think I’ve tried this one before, and I didn’t like the cream cheese filling. I may just have to try it again, making your change suggestions. If you decide to redo the recipe, you could call it Recipe Remix, or Seconds with a Twist, lol.

  2. Shannon on June 3rd, 2008 1:55 pm

    Interesting. I rarely buy bacon… might be something I have to try.

  3. Kelly on June 3rd, 2008 2:41 pm

    Mmm..this looks good. I think I would take your advice, remove the cream cheese, put some herbs in, and then use some BBQ sauce.

    Looks delish!

  4. Freida on June 3rd, 2008 2:44 pm

    Those look yummy! The only time I ever bacon-wrap anything is for shish-kabobs. I wrap it around fresh mushrooms and put it on there. Never thought of putting it on chicken. I’ll have to give it a try.

  5. barb on June 3rd, 2008 3:59 pm

    Looks really good Kay. I have never bacon-wrapped anything either. They do look really neat. I am glad you tried them first, because I don’t like dry chicken. Isn’t it funny how some recipes are that way. You just know they will be good. With the ingredients it calls for, its got to be good. But then it just isn’t that great. It’s a good thing there are cooks like you that can re-do a recipe and make it taste wonderful.

  6. Elizabeth on June 3rd, 2008 4:07 pm

    It sounds good though! you should try bacon wrapped hot dogs!! grilled of course. its really good!

  7. Cheryl on June 3rd, 2008 6:21 pm

    One summer we had a favorite of marinating the chicken breasts in Italian dressing and then we put onion and pepper strips in the center and rolled the chicken and wrapped them in bacon. If you like peppers and onions…its really good, at least we liked it. We grilled them. I want to say there was some swiss cheese in there too but don’t remember for sure. I’m not sure how you would keep it from running out the ends.

  8. Angela on June 4th, 2008 1:49 pm

    You might want to try grilling this recipe, that would bring out more flavor. My husband says if you wrap bacon around anything it will taste better! =)

  9. barb on June 4th, 2008 8:08 pm

    Kay,
    I guess I am going to try blogging my kitchen experiences. Thanks to you, it just got me motivated. I went ahead and did a post on soft pretzels, but I still want you to. People need to know how to make them:)
    franskitchen.blogspot.com

  10. Jo on June 4th, 2008 8:54 pm

    We’ve sometimes put a slice of pineapple on top of a burger, wrapped bacon around it, and grilled it. Mmm, mm, good! (A challenge to manuever on the grill, however!)
    I’d second your idea of covering the chicken during the baking time. Maybe a bit of lemon juice & water in the bottom of the pan, too…I despise dry chicken breasts!!!!

Katie’s Strawberry Scones

Posted on June 2, 2008
Filed Under Breads Biscuits and Rolls, Breakfasts

I don’t know who Katie is, but her scones are GREAT!!!! This was one of those recipes that I saw and right away knew I had to make. I got the recipe off of a new cooking blog I found last week: Kelly Cooks…and Other Amazing Feats. I had fun browsing thro’ her other recipes too.

One thing that grabbed me about these scones was that they take fresh strawberries. We don’t have fresh strawberries around here yet, but I’ve still been getting them regularly because they’re perpetually on sale at the grocery store. And that has got to be one of my favorite fruits, especially cut up and mixed with sugar. As the season wears on and I’ve had lots of strawberries and foods with strawberries in them, I get over my craving, but for now, strawberries it is. Second to chocolate… which of course is a helpless non-stop year-round craving.

Katie’s Strawberry Scones

2 1/4 – 2 1/2 cups all-purpose flour (depending on how ripe your strawberries are) I used 2 1/4 cups.
1/4 cup granulated sugar, plus extra for sprinkling
1 Tbsp. baking powder
1/4 tsp. salt
1 stick (8 Tbsp.) butter, chilled and cut into small pieces
1 egg
1/4 cup yogurt (I used strawberry yogurt.)
1/4 cup milk
2 tsp. orange zest  (I didn’t have oranges on hand, so I skipped this.)
1 cup fresh strawberries, diced

Preheat the oven to 350 degrees and line a baking sheet with parchment paper. In a small bowl, combine egg, yogurt, milk, zest; whisk to combine thoroughly and set aside. In large bowl, combine flour, sugar, powder, salt, and whisk to combine. Using pastry cutter and two knives, cut butter into flour until all pieces are smaller than pea-sized. Add strawberries, and toss to coat.
scone2.jpg

Add wet ingredients to dry and mix in lightly with fork until dough just comes together. Turn dough out onto well-floured work surface and pat into large ball. Cut the dough ball in half.
scone3.jpg

Shape half of the dough into a flat disk shape and cut into 8 slices. Place on baking sheet and repeat with other half of dough. Sprinkle tops of scones with sugar. I shaped the disks right on the baking sheet. One thing I wasn’t sure about is if the wedges were supposed to be separate or still in a circle for baking. But it turned out great like this!
scone5.jpg

Place in the oven. Bake until slightly brown, about 25 minutes. Remove from oven and let cool on a baking sheet for 10 minutes.

scone6.jpg
T
ransfer to a wire rack and let cool.

I think they’re best if you eat them while they’re still warm. To serve, I cut one in half and spread butter inside, then put a dollop of whipped topping on top. Just delicious!!!

scone11.jpg

These got rave reviews around here from all of us! I’d like to experiment a little with using different yogurt flavors and maybe even different fruits, in addition to or instead of the strawberries. Also, I’ll bet the orange zest really adds something too. I want to be sure and have that on hand next time.

Comments

7 Responses to “Katie’s Strawberry Scones”

  1. Kelly on June 2nd, 2008 6:11 am

    They look amazing! Good call on the baking separate or together — it never even occurred to me LOL

    I baked mine separated out, but, as you found out, it works both ways.

    Katie gave me one more AMAZING strawberry recipe, if you’re interested…they’re the best cupcakes I think I’ve ever had. Hands down.

    http://kellycooksandotheramazingfeats.blogspot.com/2008/02/famous-strawberry-cupcakes.html

    Enjoy!

  2. Arla on June 2nd, 2008 7:19 am

    Kay, you ought to try serving those with Devonshire whipped cream. Devonshire takes scones to a whole new level, trust me.

  3. Anna on June 2nd, 2008 7:40 am

    Those look good! My daughter’s teacher and teacher’s assistant both love scones. I think I’m going to make a little collection of good scone recipes and give it to them on the last day of school. This one is going on the list.

  4. Berneice on June 2nd, 2008 8:25 am

    these look wonderful. I had some of the best choc chip scones over the weekend. I might have to try it in here.

  5. Shannon on June 2nd, 2008 8:29 am

    We had wonderful scones over the weekend. I’m gonna try these!!

  6. Lisa on June 2nd, 2008 9:07 am

    Oh it’s almost strawberry picking time here in Rhode Island, so I think I will be saving this recipe for some fresh berries! Thanks!

  7. Rosalyn on June 2nd, 2008 1:32 pm

    I love scones…I’ll definitely have to try these when my strawberries are ready! :) Yummy! :)