Kitchen Scrapbook

Recipes and Cooking Ideas for Homemakers and Amateur Cooks
 

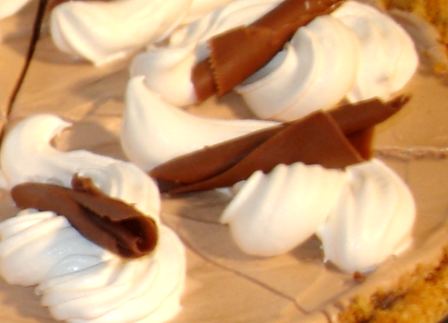
‘Tis the Season… bake some festive Meringue Candy Canes!

meringue7.jpg

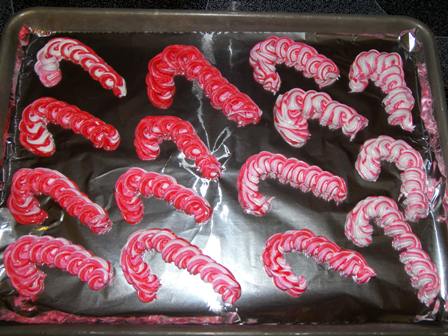
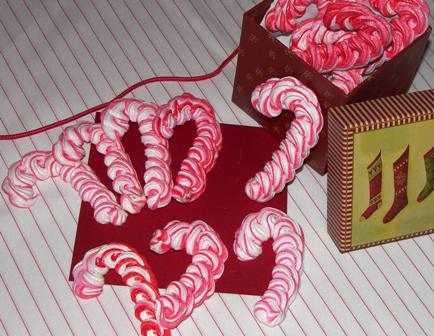
Mostly when we talk about food, we think of taste. Well, not this time… the strong point of these candy canes is the looks, not the taste. Aren’t they pretty? I think they’d technically be called a candy… they have no substances like a cookie does. Speaking of substance, they might even be calorie-free because when you take a bite of one, within seconds, that bite dissolves into nothing inside your mouth, so the calories must dissolve into nothing too, right? ;) Lexi says they taste like dried out frosting.

They were fun to make… you get to make swirls with a decorating bag. I actually did something I’ve never done before in featuring cooking and took a video. It’s a very poor video, but my standards have gone from no videos to poor videos, so gradually, I’ll up my standards to good videos. Part of the problem may be that my lighting was bad or that I saved it in low resolution or that I was piping the meringue with one hand while holding the camera and videoing with the other hand. Not a good idea. Live and learn.

By the way, if someone would just out of the blue ask you, “How do you spell meringue?”, could you spell it? It has gotta be one of the weirdest-spelled words in the English language!

Meringue Candy Canesfrom the Taste of Home Christmas Cookies and Candies cookbook

Printable recipe

3 egg whites
1/2 tsp. cream of tartar
3/4 cup sugar
1/4 tsp. peppermint extract
Red paste food coloring

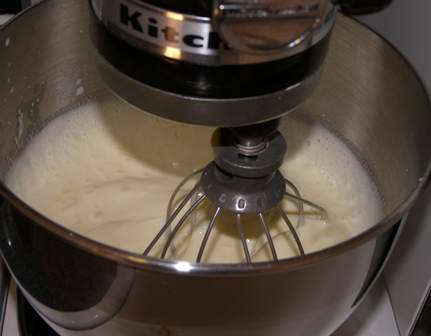
In a mixing bowl, beat egg whites until foamy. Add cream of tartar; beat on medium speed until soft peaks form. Gradually add sugar, 1 Tablespoon at a time, beating on High until stiff peaks form and sugar is dissolved, about 6 minutes. Beat in peppermint extract.
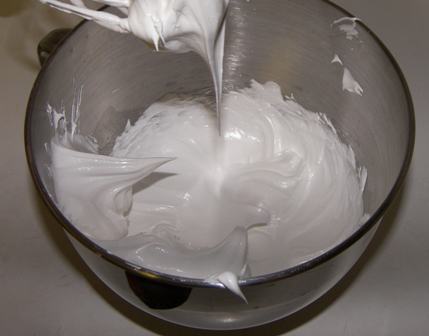
meringue1.jpg

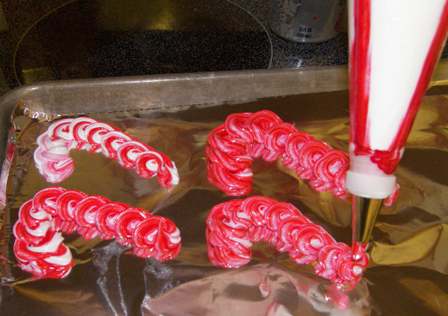
Cut a small hole in the corner of a pastry bag; insert star tip #21. On the inside of the bag, brush 3 evenly spaced 1/4″ strips of red food coloring from the tip to 3/4 of the way to the top of the bag. Carefully fill bag with meringue. Pipe 3″ candy canes onto parchment-lined baking sheets. I didn’t have parchment paper, so I used tin foil. Worked great and they didn’t stick to it.
meringue2.jpg

And now for the video:

meringue3.jpg
See the difference in redness here in these 2 panfuls? The top ones on the left were made first. I guess the food coloring got less concentrated as the meringue slid past.meringue4.jpg

Bake at 225 for 25 min; rotate baking sheets to a different oven rack. Bake 25 min longer or until firm to the touch. Turn oven off; leave canes in oven with door ajar for at least 1 hour or until cool. Yield: 4 dozen. I must’ve made them bigger because I got only about 2 1/2 dozen, but I did use the #21 tip.

meringue6.jpg

meringue5.jpg

Put these festive candy canes on an assorted cookie plate for your mailman this Christmas! Or take a plate to your local fire dept. Or to your neighbors. Or eat all your Christmas cookies yourself.

Comments

4 Responses to “‘Tis the Season… bake some festive Meringue Candy Canes!”
  1. Shannon on December 14th, 2008 9:16 pm

    Had to come watch this video. :) Where’s the sound? Wanted to hear a step by step how-to-do on it. :)

  2. Jessica on December 14th, 2008 9:30 pm

    cool.

  3. Katrina on December 19th, 2008 7:20 pm

    Those look great!

  4. lou on November 23rd, 2011 11:08 am

    How much sugar in grams do i need?

Oven Denver Omelet… Good morning! :)

Posted on December 10, 2008
Filed Under Breakfasts

I love hot breakfast foods. Sometimes when we go out to eat to we-serve-breakfast-all-day restaurants, I never get past the breakfast section of the menu. So, there I am, eating an omelet or stuffed French toast while everyone else is eating a cheeseburger and fries. But I’m fine with that. I don’t get hot breakfasts enough. And now that I think of it, I guess that’s nobody’s fault but mine, what with me being the cook around here.

I oughta start doing what my mom does… I grew up with having one evening meal a week a breakfast foods meal. With school and Dad going to work early, it didn’t work out in the morning to have breakfast as a family, so that is how we got those good hot breakfast meals in… have them for supper. I know quite a few of my friends do that now and then too.

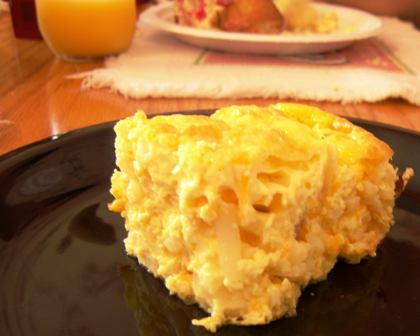
This baked omelet is what we had for a Saturday brunch recently. Mmmmmm, it was good! And quite easy too! It comes from the 2001 Quick Cooking annual cookbook. By the way, if you’re keeping track of how often I’ve used this cookbook lately, awhile ago I sat down with it and whenever a recipe grabbed me, I wrote the recipe name and the page # on a separate piece of paper. Till I got to the end of the cookbook, I had 25 recipe names written down. So, little by little, I’m making them.

denver1.jpg

Oven Denver Omelet

Printable recipe

8 eggs
1 cup milk
1/2 tsp. seasoned salt
2 cups frozen shredded hashbrown potatoes
1 cup diced fully cooked ham
1 cup (4 oz) shredded cheddar cheese
1 Tbsp. dried minced onion

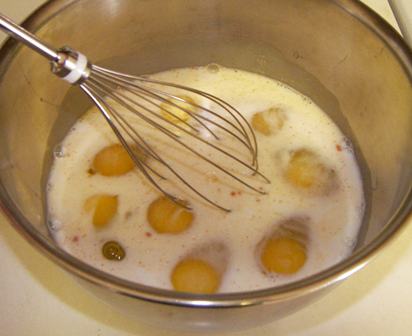
In a large bowl, beat the eggs, milk, and seasoned salt.
denver5.jpg

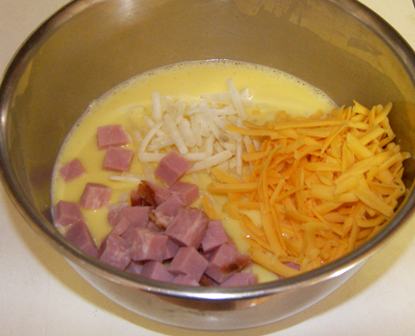
Stir in the remaining ingredients.
denver4.jpg

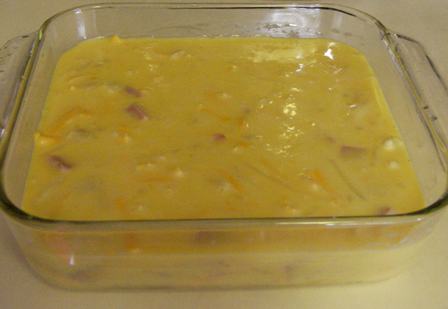
Pour into a greased 8″ square baking dish.
denver3.jpg

Bake, uncovered, at 350 for 45-50 minutes or until a knife inserted near the center comes out clean.
Yield: 6-8 servings.
denver2.jpg

I’m going to have you all start helping me a little with serving ideas. I find a recipe I want to make and then get stuck on the ‘What shall I serve with it?’ question. I like to have a minimum of 3 things at each meal. What would you serve with the Oven Denver Omelet?

I know, it won’t help for this time because I already served this omelet, but I want your suggestions anyway for future reference, in case I make this again or something like it. By the way, I served this with Raspberry Cream Cheese Cinnamon Rolls, fruit, and orange juice.

Comments

10 Responses to “Oven Denver Omelet… Good morning! :)”

  1. Joanna on December 10th, 2008 8:52 pm

    Since breakfast is usually our only sit-down meal as a family, I often run out of ideas. The past week or two, I’ve been uninspired in the mornings, and we’ve had some pretty sorry excuses for breakfast. Your omelet is inspiration! It looks easy, & I have all of the ingredients (or substitutes). Thanks for saving my reputation with my family; looks like this is breakfast for us tomorrow!

  2. Berneice on December 10th, 2008 9:37 pm

    Definitely have to have toast, then probably some juice and fruit. Btw, it looks delish. I will have to try it soon.

  3. Melissa K on December 11th, 2008 5:29 am

    While the cinnamon rolls would be great with it, I need toast if I’m eating eggs of any kind. Then fruit or maybe smoothies too! This looks yummy. Too bad I’m the only one in my family that actually likes eggs!

  4. Twila on December 11th, 2008 6:48 am

    I would probably also serve toast, maybe even pancakes. And sweet rolls or doughnuts is always a happy ending to brunch!

  5. Beth on December 11th, 2008 9:37 am

    I shall certainly try this. Looks awesome!

  6. Ralph on December 11th, 2008 12:23 pm

    An english muffin topped with some sort of fruit preserves and a drizzle over the top of the omelet with some hollandaise sauce.
    Fresh fruit on the side would be a great addition too.
    In my family an omelet topped with tomato gravy would have been the order of the day.
    I’m gettin hungry just looking at the pics.

  7. Fran on December 11th, 2008 12:50 pm

    Yummy! This looks so good. I love almost any kind of egg casserole. Thanks for another recipe.

    I finally updated my blog.

  8. Judi on December 11th, 2008 2:27 pm

    That looks totally YUMMY!! (I’m teaching my granddaughter to go ‘yum’ when she eats something she likes – I always do – say ‘yum’ that is) I think I’d serve it with toasted bagels and cream cheese and just a glass of juice. It has everything else in it which is just fine with me.

  9. Sharon on December 12th, 2008 2:08 pm

    toast and applesauce or fresh fruit. Salsa or ketchup is great on casseroles like this. I make a similar breakfast casserole and use sausage. And you know you can do it the night before, right? And sprinkle a little more cheese on top when it comes out of the oven to melt…mmmmm……

  10. Shannon on December 14th, 2008 9:19 pm

    Oh this looks good. Not sure how I missed it. I love breakfast foods too, maybe we should meet for breakfast sometime. :)

Let it Snow! – Happy 6th Birthday, Lexi!

Posted on December 8, 2008
Filed Under Birthday cakes

Lexi turned 6 yesterday. The big 6. She’s got a loose tooth and she starts Kindergarten in March, then 1st grade next Fall. Life is pretty exciting for her right now.

See?…
6bday31.jpg
Actually, what she’s exclaiming about here is the mini kitchen set that she got from her cousin Krista. I think we’ll have a kid’s cooking post coming up soon… she’s anxious to try it out. It IS really cute.

And here is her birthday cake:
6bday1.jpg

It was an attempt to match her hat, gloves, scarf, and boots. She gets all excited every time it snows, even though we haven’t had much yet. The colors didn’t exactly match, but it was obvious at what I was trying for.

Especially because I had her put on her snow stuff for the picture:

6bday41.jpg

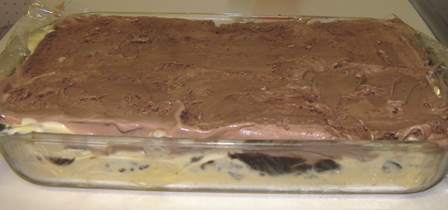
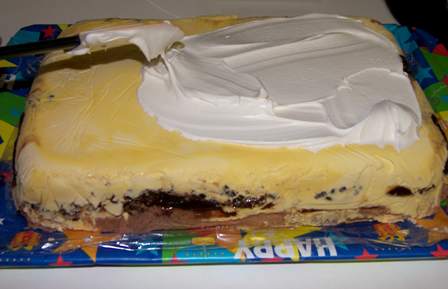
The base is an ice cream cake, covered with Cool Whip. I was trying to copy the cakes that Dairy Queen makes, you know, with vanilla ice cream and chocolate ice cream layered on either side of that to-die-for fudgy layer. If I’d do it over, I’d get regular vanilla instead of French vanilla because I think it’s whiter.

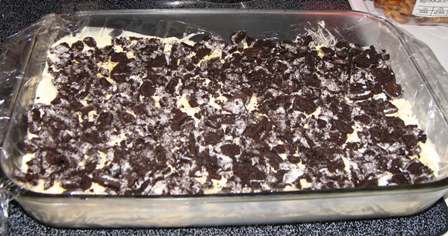
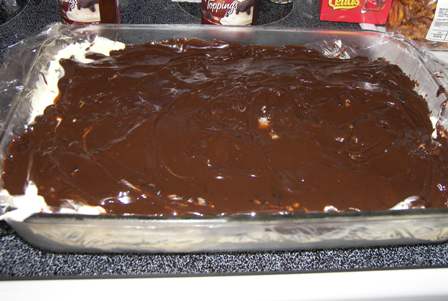
I lined a 9×13 pan with plastic wrap (so it would turn out onto a tray easier), then put a 1/2 gallon of vanilla ice cream in, then a layer of crushed Oreos, then about 2 jars of Smuckers hot fudge topping, then a 1/2 gallon of chocolate ice cream, then froze it for awhile, then turned it out onto a tray, then covered the top and sides with Cool Whip.
6bday5.jpg

6bday6.jpg

6bday7.jpg

6bday8.jpg

6bday9.jpg

And now for the fun part! ????
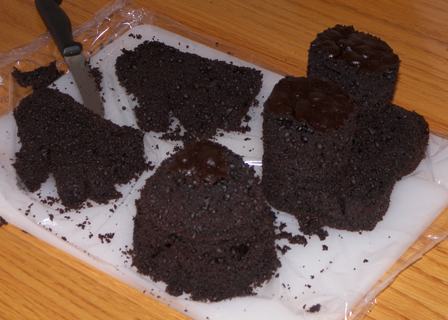
The things on top are just carved out of a baked 9×13 chocolate cake, then covered with fondant (a roll-out icing). The gloves got carved to about half that size… they wouldn’t have fit on the cake being that big.
6bday13.jpg

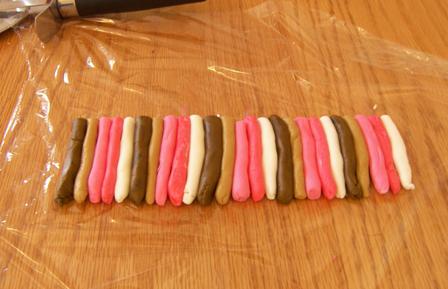
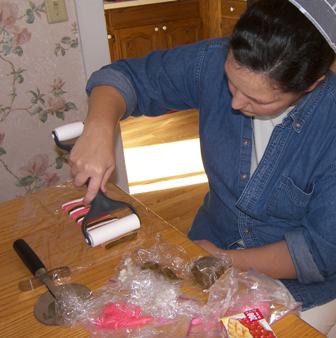
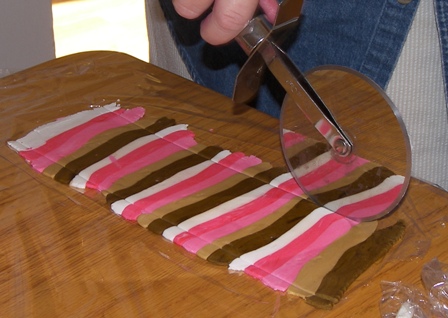
The scarf shows the fondant process the best. To make stripes, the fondant (which is pure white) is tinted different colors, then rolled into ‘sticks’, lined up against each other, and rolled out flat…

6bday10.jpg

6bday11.jpg

6bday12.jpg The fondant is soft and pliable, but dries out pretty fast, so it was pretty easy to get a the-scarf-was-just-thrown-over-there look by lifting up one edge and putting a ball of tin foil under it and then flipping the other end over. Then, instead of covering it, I let it out to dry and it hardened in that shape. The fringes were piped on later.
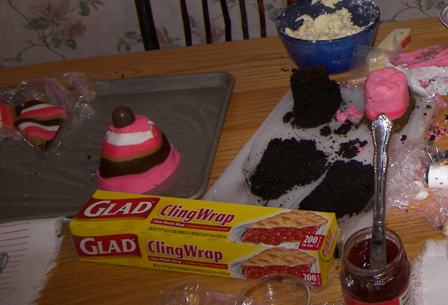
Here is a progress picture and then the finished product. It was fun to make and I learned alot about using fondant! One main thing is that it you need to keep it tightly covered because as soon as it dries out even a little, it breaks instead of bends. I do think I’ll use it more often though. It’s fun! :) The only other time I used it was 5 years ago to cover the building blocks on Lexi’s 1st birthday cake. But that time I bought it and just let it white, no tinting it.

6bday14.jpg If you see that jar of jelly in the foreground, they say fondant holds to the cake better if you spread jelly on the cake first.
6bday2.jpg

Oh, one thing I forgot to mention was the snowflakes… I melted white chips and then piped snowflakes onto plastic wrap on a cookie sheet and chilled them till they were hard, then placed them on the cake. They were fun for the kids to pick off and pop into their mouths. :)

Enjoy the snow if you have some! We’ve got a little bit on the ground here.

Comments

19 Responses to “Let it Snow! – Happy 6th Birthday, Lexi!”

  1. Shannon on December 8th, 2008 8:43 pm

    YOU, my lady, are absolutely unreal!! Want to start a business? My girls are just in awe of this cake and I agree, it is just completely cute!!

  2. Freida on December 8th, 2008 8:48 pm

    You are completely totally amazing and I am standing in complete awe!!! Wow! I agree with Shannon- you really should start a business.

  3. Traci on December 8th, 2008 9:19 pm

    You are so much more a better mother than me! I don’t think I would have had the patience for that. You did an amazing job!!! Pat yourself on the back. I would have had to framed the cake…ba haaaaa….NO TOUCHY!!!

  4. Twila on December 8th, 2008 9:37 pm

    It’s ever so cute!

  5. cretora on December 8th, 2008 10:28 pm

    wow. that is really neat!

  6. Karen Layman on December 8th, 2008 10:36 pm

    Impressive! Really really cute.

  7. Charlene on December 9th, 2008 5:27 am

    WOW! looks cute, May I ask how long it took you??

  8. Audrey on December 9th, 2008 8:34 am

    That is a beautiful cake and Lexi should certainly appreciate the time and effort that went into it…although she probably won’t appreciate it fully till her little girl wants her to make a cake that is so tough. I can guarantee you this…if I had tried it, it wouldn’t look 1/2 that nice. Great job!

  9. Berneice on December 9th, 2008 10:57 am

    Brooklyn wants a cake like that for her 5th B-day. There you have your fisrt order! :) It is beautiful!! Btw, her b-day is in March

  10. Loretta on December 9th, 2008 1:23 pm

    You did a great job. I am not a decorator at all, so it looks extra hard, I do love to bake.

  11. Marilyn on December 9th, 2008 1:55 pm

    Wow! great job on the cake, it is so cool! :-)

  12. Sharon on December 9th, 2008 2:15 pm

    Neat cake! You are one creative Mom! I love spending a little extra time to make special cakes too. That fondant looks a little complicated, but maybe I should try it sometime. Can you still eat it after it hardens? Why does it look shiny? And HOW did you make the pom pom on the hat?

  13. Kay on December 9th, 2008 3:00 pm

    I’m going to answer some questions on here, and thanks for all your nice comments.

    Shannon, no, I don’t want to start a business, I’d have to charge too much to make it pay. ????

    Charlene, I didn’t time how long it took (thankfully!), but at least 5 hours, I’d say. *gasp* Oh well, I won’t start justifying it. At least it’s fun. :)

    Sharon, yeah, the fondant is a bit complicated, BUT yeah, you should try it sometime. ???? Yeah, you can eat it, it doesn’t get rock hard. It’s made out of egg whites, light corn syrup, and powdered sugar (I guess I didn’t post the recipe). Mixing in the color takes FOREVER, but with kneading it so much, it gets soft and pliable (that’s how you mix the food coloring in, by kneading it). The shiny part was because of a mistake on my part… I found out that fondant and freezing does not mix! After I took it out of the freezer at partytime, it got shiny, then the colors started running! Ack! But it had to be frozen because the base was ice cream. So, I will never put fondant and ice cream cake together again. For the pom-pom, I put a chocolate covered cherry on top of the hat (you can see it on the one progress picture before it’s covered), then piped little dots all over it. Should’ve made all the dots pink, not sure what I was thinking because Lexi’s pom-pom has no brown in it!

  14. Katie Mast on December 9th, 2008 7:04 pm

    WOW! how cool. You are amazing. I have only made a few cakes for my kids. The ice cream cake i made for our oldest looked a lot like yours, but i only put cool whip right on top and put a space shuttle candle and space candles on it. Very easy compared to yours. I would love to play around with the fondant, i may need to come up with a idea to use it. I love your cooking ideas.

  15. Ruthie on December 10th, 2008 11:06 am

    Glad I could personally see and taste the cake. Thanks for the snack. Lexi looks so happy. We thought about her on Sunday.

  16. Katrina on December 10th, 2008 2:31 pm

    GREAT cake! I would not attempt something like that. Looks great. What a great mom!

  17. JoAnn on December 11th, 2008 8:38 am

    Very, very cool cake!

  18. Judi on December 11th, 2008 2:41 pm

    Wow! you went to a lot of work. Your Lexi better appreciate you. That is absolutely adorable! Bet it was positively yummy too. There’s that word again ‘yummy’ lol

  19. Christy on December 17th, 2008 2:44 pm

    That’s an adorable idea!!! The fondant looks like so much fun. I’ve wanted to play with it, but just haven’t done it, yet.

Robust Italian Salad with Homemade Croutons

Posted on December 3, 2008
Filed Under Salads

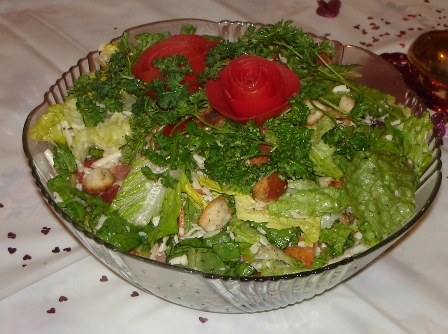
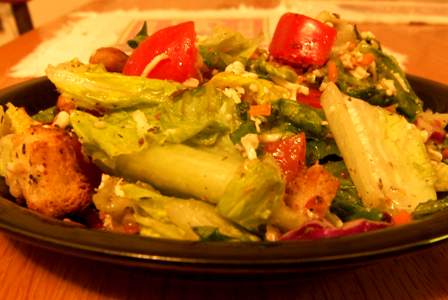
Here’s a quick and easy and delicious salad recipe you’ve gotta have. It’s got Italian flavor. Yum. I actually put Italian seasoning on lots of stuff, including all salads.

This salad recipe comes with a homemade croutons recipe. I haven’t bought croutons for several years now… these don’t take long to make and it uses up bread that’s not soft anymore and here’s the best thing about them (besides the taste): They’re soft enough to poke with a fork, but still have a crunch. I don’t like croutons that are so hard that when you try to poke them on your fork, they break into 5 pieces and no piece actually gets onto the fork. Just a trivial tidbit that this reminds me of… when we were on our FIRST date, we were at a restaurant eating our house salads and my boyfriend (who’s now my husband) poked into a crouton and a piece shot across the table and hit me. I still remember, in my nervousness, trying to make a quick decision of whether I should ignore it or laugh about it or throw it back at him. We just laughed about it. Now, I kinda feel like telling you all about our first date because several funny things happened and I still remember thinking it was so crazy that I was nervous because we were highschool sweethearts and were just WAAAAAAAITING for my 18th birthday when I was allowed to date (we had our first date the evening of my 18th birthday) and I guess I was nervous because the atmosphere was somehow different and this was the real thing, but I guess I won’t go into it because most of it has nothing to do with cooking, not that everything I write on here has something to do with cooking.

italiansalad1.jpg

Robust Italian Salad …recipe comes from the 2001 Quick Cooking annual cookbook

Printable recipe

1 pkg (16 oz) ready-to-serve salad
1 pkg (2 1/2 oz) sliced pastrami, cut into 1/2″ pieces, optional
1 cup (4 oz) shredded mozzarella cheese
4 plum tomatoes, chopped
1 tsp. Italian seasoning
1/3 cup Italian salad dressing
1 cup Seasoned Croutons (recipe below)
Sliced ripe olives, optional

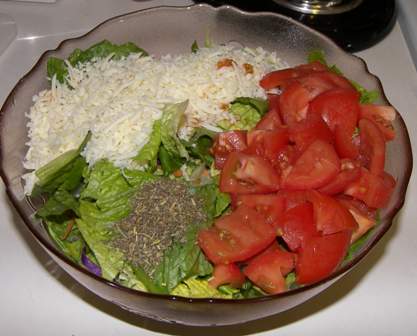
In a large salad bowl, combine the first 5 ingredients. Drizzle with dressing; toss to coat. Top with croutons and olives if desired.

italiansalad3.jpg

Garnish with tomato roses and parsley.
rose-on-salad.jpg

Seasoned Croutons (the kind that don’t shoot across the table when you poke them with your fork)
2 Tbsp. butter
1 Tbsp. olive or vegetable oil
1/4 tsp. garlic powder
1/4 tsp. onion powder
1/4 tsp. dried oregano
1/4 tsp. dried basil
Pinch of salt
6 slices day-old bread, cubed
In an ungreased pan, combine the first 7 ingredients. Place in a 300-degree oven until butter is melted. Remove from the oven; stir to combine. Add bread cubes and toss to coat. Bake for 10 – 15 min or until lightly browned, stirring frequently. Cool. Store in refrigerator in airtight container. Yield: 3 cups. These are not only great with salad, but we also use them in soup.

Comments

3 Responses to “Robust Italian Salad with Homemade Croutons”

  1. Shannon on December 3rd, 2008 7:56 am

    Oh my lands, I could eat some for breakfast! :) Without tomatoes. :)

  2. Arla on December 3rd, 2008 12:26 pm

    Hi Kay,
    It’s good to see you’re back and writing blogs again. I like the crouton idea. It’s just about as good as making the old bread into bread pudding.

  3. liz on December 3rd, 2008 7:46 pm

    Mom was just saying she told you that you probably don’t have time to update what with having so much company. You must need more company – wish I could help you out.=) Give me a couple of weeks. Can’t wait.

Peanut Butter Candy Cake

Posted on November 11, 2008
Filed Under Cakes

Ok, it’s about time to feature something sweet again, wouldn’t you say? I would! I have to force myself to try to keep this site balanced… would be more fun to have all desserts. But maybe the reason for that is because that’s the type of stuff that I‘m addicted to get cravings for the most. So, of course it’s more fun to post about it. That’s probably why I haven’t posted the crunchy-baked fish yet that I made awhile ago.

This recipe is hand-written in my ‘blank’ cookbook. It’s my mother-in-law’s recipe. I’d never had it or even heard of it until she made it one time when my family went over to their house for a meal one time many years ago, before I even dreamed she’d be my mother-in-law someday. Ok, I’d better take that back… it may have been in my dreams for the future… ????

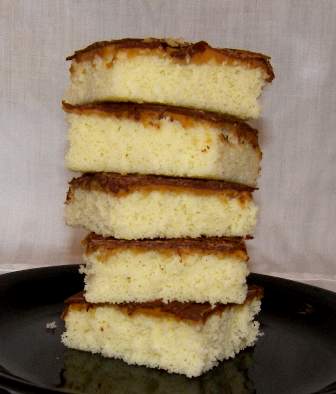
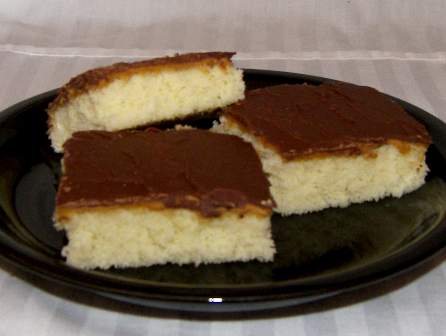
I think this cake is meant to be a knock-off of the TastyKakes Peanut Butter Kandy Kakes, which are (in my opinion) the BEST in the entire TastyKake line. It does actually taste a lot like them, except those have chocolate on all 4 sides instead of just the top. Hmmmm, never thought of it till right now, but I could cut them out in circles after the peanut butter is on and dip them in chocolate. Given the choice of chocolate on 1 side or chocolate on ALL sides… that’s a no-brainer.

Peanut Butter Candy Cake

Printable recipe

4 eggs
2 cups sugar
1 cup milk
1 tsp. vanilla
2 cups flour
1/4 tsp. salt
2 tsp. baking powder
1 cup peanut butter
8 oz. milk chocolate chips (I used most of a 12 oz. bag)

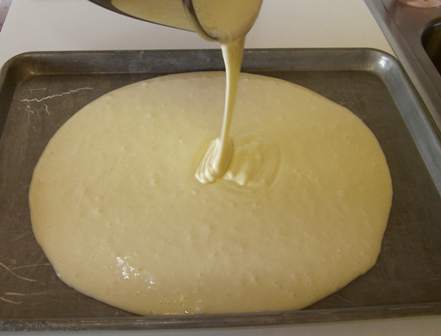
Beat and beat the eggs. Gradually add the sugar, milk, and vanilla.
pb-cake1.jpg

Then add the flour, salt, and baking powder. Pour into a greased jelly roll pan.
pb-cake2.jpg

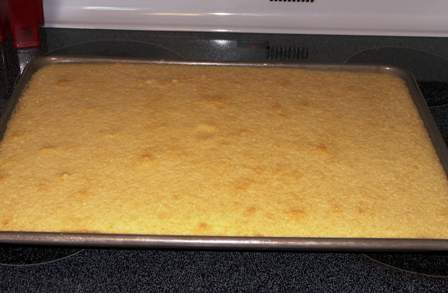
Bake 15-20 min at 350.
pb-cake3.jpg

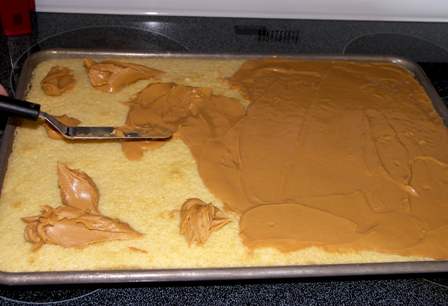
When you get the cake out of the oven, put dollops of peanut butter all over the cake. When it softens and melts a bit, start spreading it out until the entire cake is evenly covered. I didn’t actually measure out 1 cup for this (and probably put on over 1 cup), so don’t hold yourself to 1 cup if it seems like more would be better. :) Same with the chocolate.
pb-cake4.jpg

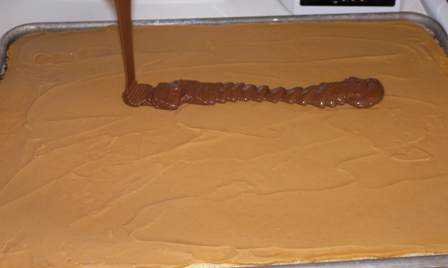
Let the cake cool, then put it in the freezer for awhile until the peanut butter firms up. Melt the chocolate and spread on top of peanut butter. It’ll harden because the peanut butter underneath is cold.
pb-cake5.jpg

Cut into squares. Some of my pictures got blurry, and I don’t have a good one of the cake all covered with chocolate. I really should check my pictures before eating the food!
pb-cake6.jpg

pb-cake7.jpg

I don’t think I need to sell the idea that this is good stuff! The cake part is kind of like a moist pound cake. Moist cake with peanut butter and chocolate… nothin’ wrong with that combo! :)

Comments

10 Responses to “Peanut Butter Candy Cake”

  1. Lisa @ The Cutting Edge of Ordinary on November 11th, 2008 10:50 am

    Oh my kids would LOVE these! I so have to make them! Thanks for sharing!

  2. Michelle on November 11th, 2008 12:19 pm

    I’ll have to give these a try. My husband is a big peanut butter fan.

  3. Judi on November 11th, 2008 12:52 pm

    This looks great. I think I like the idea of dipping the whole thing in chocolate.

  4. Amber on November 11th, 2008 2:11 pm

    Those look so awesome! I believe I’ll make some right now. :)

  5. Cordy on November 11th, 2008 6:55 pm

    Love them! Love them! Love them!

  6. Suzanne on November 11th, 2008 9:02 pm

    Hello-

    I ran across your website today, and I LOVE what I see! Your peanut butter cake reminds me of Tasty Kakes from Pennsylvania-which I cannot get in WI. Thanks for sharing all your wonderful looking recipes. I will be trying some of them!

  7. elaine on November 12th, 2008 7:21 pm

    I have been making these bars for years.My family loves them!I don’t make them quite as often since the kids are all married.I need to make them again.Thanks for the reminder.

  8. Princess T on November 13th, 2008 6:47 pm

    Yum! I’m so hungry…
    PS – LOVE the kitchenaid mixer – Kitchen appliance make me giddy.

  9. Katrina on November 16th, 2008 9:24 pm

    Goodness–yummy!

  10. Karen on November 19th, 2008 6:50 pm

    I made these last week and the girls thought they were WONDERFUL! Rondyn took one bite and knew exactly why the recipe was yours……….all that pb and chocolate!=)
    Never heard of Tasty Cakes but they must be good.

Super Pizza Subs

Posted on October 30, 2008
Filed Under Main dishes

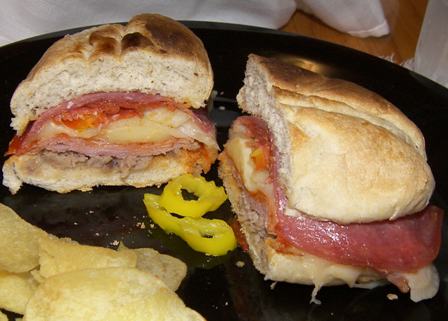
I’m not just being gushy about the pizza subs by adding the word ‘super’ in the title… that’s actually the official name of them in the cookbook that I got the recipe out of, which is the 2001 Quick Cooking annual cookbook. They do live up to their name, though, and the ‘super’ in the title is very fitting.

Another fitting name would be Meat Lover’s Sub, what with having 4 different kinds of meat on them.

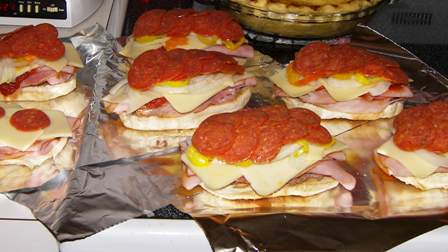
The recipe called for 6 9″ sub rolls. What I had was 7 6″ sub rolls… don’t do the Math because the inches won’t hold out. (If any perfectionists out there wonder why I had a 7-pk of rolls instead of an even #, it’s because I had stolen one out of there before to make a sandwich because I was out of bread.) I know this is one of those things that you can just throw together and don’t need a recipe for, but I wanted to follow the recipe (ingredient-wise) to see if I thought the ingredients went well together and then I’d add or delete stuff from there.

Super Pizza Subs

Printable recipe

6 submarine sandwich buns (about 9″), split
1/2 lb. bulk Italian sausage, cooked and drained
1 lb. shaved deli ham
1 can (8 oz.) pizza sauce
1 lb. sliced mozzarella cheese
1 medium onion, halved and thinly sliced
36 mild banana pepper rings
2 pkgs. (3 1/2 oz. each) sliced pepperoni
1/4 lb. thinly sliced hard salami

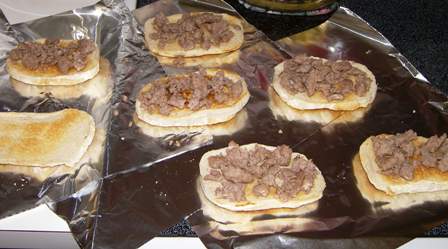
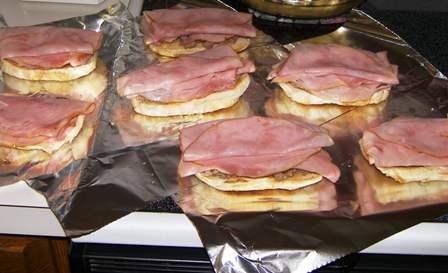
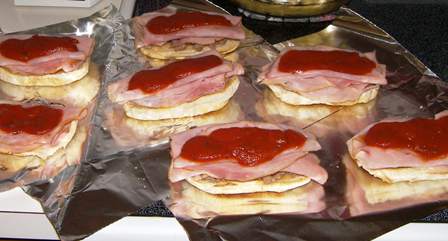
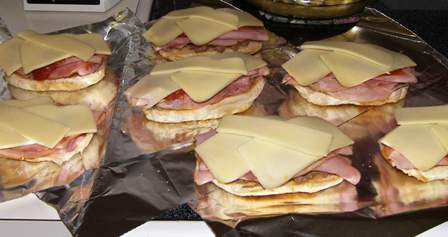
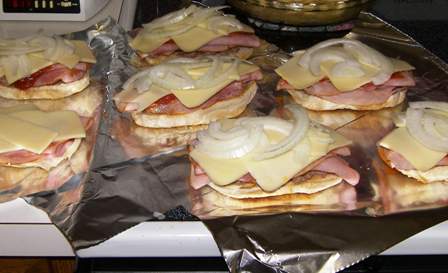
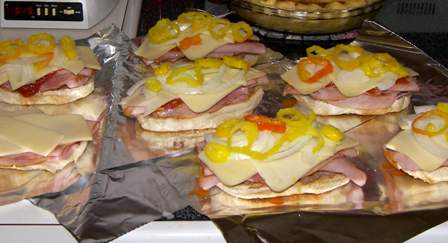
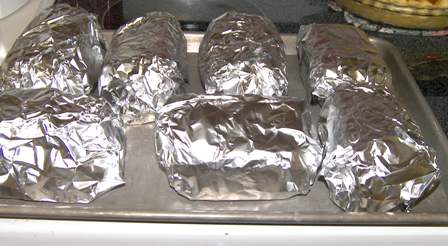
I toasted the buns first because I thought a little extra crunch would be nice. On bottom half of sandwich buns, layer sausage, ham, pizza sauce, cheese, onion, banana peppers, pepperoni, and salami. Replace tops. Wrap each sandwich in heavy duty foil; place on baking sheets. Bake at 425 for 12 – 15 minutes or until cheese is melted. Serve immediately. Yield: 6 servings.

subs1.jpg

subs2.jpg

subs3.jpg

subs4.jpg

subs5.jpg

subs6.jpg

subs7.jpg

subs9.jpg

subs10.jpg

subs11.jpg

They were great! Yum! Here’s what I would change though… use more pizza sauce, go easy on the onions, and sprinkle on some Italian seasoning. Or, I’d saute the onions first, then use the full amount… we’re not cracked over raw onions, even though they were baked a little. And then if I’m sauteing onions anyway, I’d throw some sliced raw mushrooms in the pan too. ???? By the way, if you notice that the one sandwich in the front on the far left didn’t get all the ingredients, it’s because that one is for my picky little eaters to split.

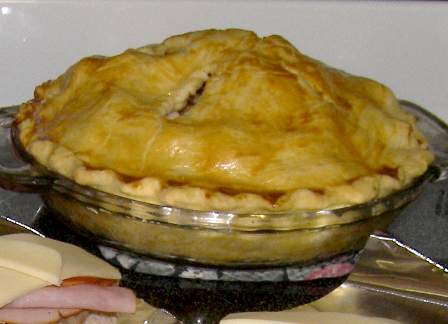
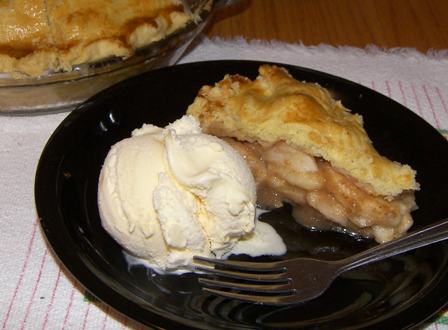
I served them with chips and then had fresh warm apple pie (recipe posted here) and ice cream for dessert…
subs-dessert1.jpg

subs-dessert.jpg

Comments

12 Responses to “Super Pizza Subs”

  1. Shannon on October 30th, 2008 12:54 pm

    Awww they look good. Might have to try them tonight since I’m slap out of ideas. You helped me the other night with baked oatmeal, I just forgot to tell you. :) Now if you’d just post every day! :)

  2. Shannon on October 30th, 2008 12:56 pm

    Umm, your from OH now aren’t you? Your bio still says the land of snow. ????

  3. Michelle on October 30th, 2008 2:43 pm

    Hmm.. The subs look delicious!! I might have to try them sometime.

  4. JoAnn on October 30th, 2008 3:12 pm

    I’ll be trying these, too!

  5. Ruthie on October 30th, 2008 5:26 pm

    Yum! I will put the missing ingredients on my shopping list. =)

  6. Monica on October 30th, 2008 5:51 pm

    MMMM! They sound yummy!! I’m gonna try it sometime, but right now I have no sausage, ham, salami, or cheese!!

  7. Traci on October 30th, 2008 7:40 pm

    I think I just gained 15 pounds……

  8. lisa on October 31st, 2008 12:23 am

    it’s 12:25 a.m. in montana. can you make me one right now? i’m hungry and they look like just what i’m hungry for!

  9. Jo on October 31st, 2008 8:39 am

    Yum, those are making me hungry. It doesn’t help that I haven’t had breakfast. But those look really good!

  10. Berneice on October 31st, 2008 12:48 pm

    Pizza for supper here tonight, but if I had buns it would be pizza subs! They look scrumtious!

  11. Judi on November 11th, 2008 12:57 pm

    omg those looks delicious!! I love a sandwich that you have trouble putting your hands around. And those ingredients are exactly what I like. Next time tell your picky eaters that you’re going to send theirs to other needy families…well, maybe not needy, but more appreciative.

  12. bjuliette on January 9th, 2009 9:08 am

    I just tried your recipe today and wanted to say thank you, because it was really tasty! :)

Baked Oatmeal

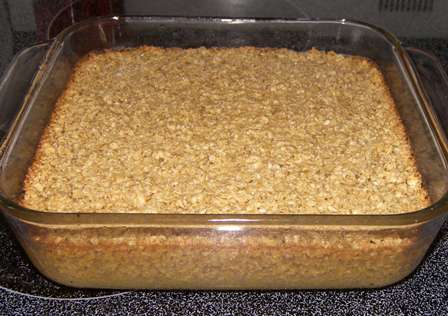
I’ve never made baked oatmeal. I think I’ve had it before (Mom might have even made it at home), but I don’t really remember when. The only oatmeal I really liked (before this) is the stuff in packets, the maple & brown sugar flavor. I just saw this recipe while looking for something else and it kind of grabbed me, so I decided to try it. And, it was GOOD!!! It’s filling too! (with seconds, that is) ????

It’s easy and quick too… you can get out of bed, make it in your pjs, put it in the oven and by the time you’re dressed and combed and have the bowls, spoons, and milk around, it’s ready to pull out of the oven. Make it tomorrow morning!

oatmeal1.jpg

Baked Oatmeal    … recipe taken from the Simply with Taste cookbook

Printable recipe

1 cup brown sugar
1/2 cup butter, softened
2 eggs, beaten
3 cups quick oats
2 tsp. baking powder
1 cup milk
1/4 tsp. salt

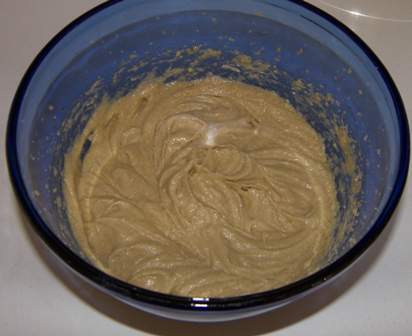
Cream sugar and butter together until light. Then add the eggs and mix well.
oatmeal4.jpg

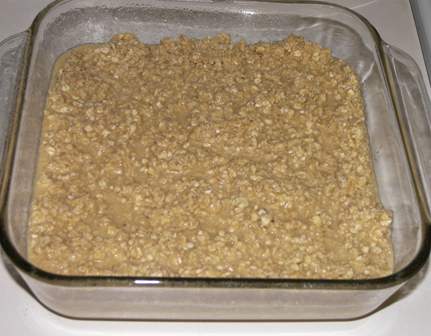
Add the baking powder and salt, then alternately add the oats and milk, mixing just until well blended. Pour into a greased 9×9 baking dish.
oatmeal3.jpg

Bake at 350 for 30 minutes.

oatmeal2.jpg

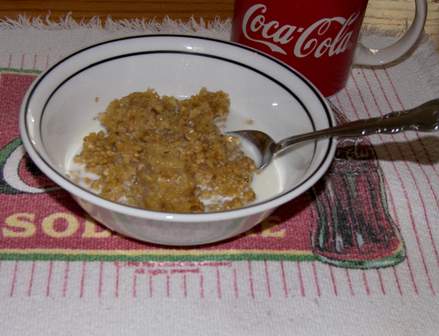
Serve this warm with milk for a breakfast dish or with ice cream for a dessert. When I got this out of the oven, Lexi thought I had made bars! We all really liked it, even the girls had seconds, which by the way is quite something… usually at mealtime we deal with “Do I have to eat all this?” instead of “Can I have more of that stuff?”

Up next on Kitchen Scrapbook: Super Pizza Subs (from the 2001 Quick Cooking annual cookbook, if you have it and want a sneak peek)

Comments

16 Responses to “Baked Oatmeal”

  1. JoAnn on October 28th, 2008 8:35 pm

    I LOVE baked oatmeal! I always used to bake it in the oven, but was in a hurry one time and discovered it’s just as good done in the microwave for 7 minutes. My 16-year-old son was just asking for this the other night.

  2. Liz on October 28th, 2008 9:14 pm

    Funny thing, the other day I wrote down a recipe that is the same as this one, except the salt is different. I also just wrote down the halved version of it beings I doubt Kait and I will eat that much. Now I am just waiting until I decide on a morning to make it. I saw the idea somewhere else, and I see JoAnn ^^ already uses it, to do it in the microwave. I think I am going to try that method.

  3. Freida on October 28th, 2008 9:20 pm

    Oh yum! We love baked oatmeal.’Bout time to make it again.

  4. Kelly on October 29th, 2008 6:20 am

    Welcome back to the blogging world, Kay!

    I’m hoping to return this weekend — we’ll see…I’m still trying to “adjust” to the stove and oven in my new house. (As in — my first post might be more of a disaster than a treat! LOL)

  5. Traci on October 29th, 2008 7:11 am

    On this very cold morning….this looks amazing!! I will have to try it this weekend. I’m so glad you are back…..I love the tutorials!!!

  6. Jan on October 29th, 2008 8:10 am

    yum! i love baked oatmeal, it’s a comfort food. it would have been perfect this morning. i cut the sugar in half, replace it w/honey add sliced apples tossed in the brown sugar with a little cinnamon too. i guess you can add any fruit or even filling, they used to do that at a restaraunt i worked at(way back when).

  7. Monica on October 29th, 2008 10:27 am

    I just made this on Sunday morning!! I like to put a layer of frozen blueberries in the bottom of the pan and top it with the oatmeal mixture and then bake it. Then I eat it vanilla yogurt instead of milk!! It’s so good.

  8. Kay on October 29th, 2008 11:37 am

    I took my own advice and made it again this morning. :) This time i tried it in the microwave, like you suggested, JoAnn, and it turned out great! Now I want to try it sometime with fruit in it and eating it w yogurt.

    One of my favorite things about this site is getting tips and ideas from you all! ????

  9. Liz on October 29th, 2008 2:09 pm

    I made it for breakfast in the microwave – turned out great. Then I took your idea for dessert at lunch by eating it with ice cream. Of course, I added chocolate chips to it. I liked that better than the breakfast version. I want to try it with fruit sometime too. Too bad I can’t say that my daughter just loved it. =(

  10. Ann on October 29th, 2008 1:07 pm

    We love it with with 1/2 – 1 TB cinnamon in the recipe. We also like to eat it with frozen blueberries. The last time I made it, I used maple flavoring (about half the amount of vanilla) since I was out of vanilla, and it turned out very tasty!!

  11. Liz on October 29th, 2008 2:09 pm

    I made it for breakfast in the microwave – turned out great. Then I took your idea for dessert at lunch by eating it with ice cream. Of course, I added chocolate chips to it. I liked that better than the breakfast version. I want to try it with fruit sometime too.
    Too bad I can’t say that my daughter just loved it. =(

  12. Joanna on October 29th, 2008 3:02 pm

    This is a fairly frequent breakfast for us, but my recipe is different, I’ll have to try this one. I sometimes add apple chunks, and I love it with dried cranberries in it (especially at this time of the year!). We eat it with syrup drizzled over the top, and milk. I love the blueberries/yogurt idea above!

  13. Ruthie on October 29th, 2008 4:24 pm

    Baked, or unbaked – oatmeal is not a favorite of ours. But, I am glad to see you’re posting again.

  14. Linda on October 29th, 2008 9:36 pm

    I had some awesome baked oatmeal at a coffee shop in Arkansas. I don’t know what all they added but there were nuts and dried cranberries in it too. I’ve started adding either chopped walnuts or sliced almonds to my oatmeal as a way of adding more protein. I should do some experimenting with the baked oatmeal. I’ve started cooking my oatmeal in apple juice for a natural healthy sweetener. I love to add cinnamon, nuts, and dried cranberries if I have those on hand. I was needing to cut calories so I did this version to cut back on the oil and sugar.

  15. sandra on October 30th, 2008 6:04 am

    This is a favorite of ours. I make it for a quick and filling lunch. Try adding a teaspoon of cinnamon to the batter. Yum!

  16. Ruth on October 30th, 2008 11:19 pm

    I love baked oatmeal. It’s not at all like cooked oatmeal, which I also enjoy. It’s consistancy is more like a cake. I like to add cinnamon and raisins, or cranberries, and nuts of any kind. I also like to have leftovers, because you can warm it it the microwave, and its as good as freshly made.

Mom’s Potato Salad

Posted on October 20, 2008
Filed Under Salads, Side dishes

Because Mom’s is always the best, isn’t it? No matter who ‘Mom’ is.

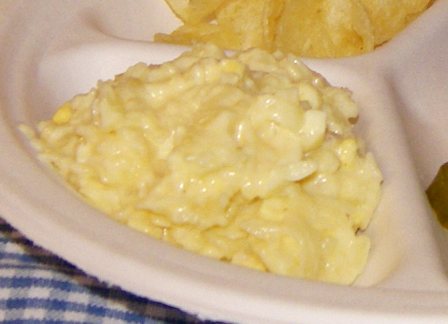
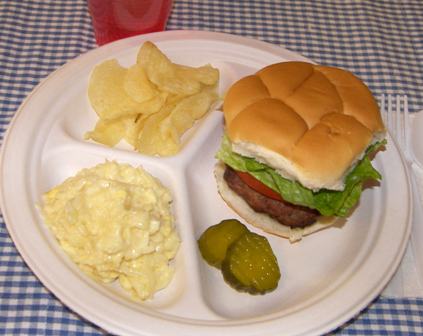
This potato salad is not my mom’s recipe, it’s just potato salad that’s like hers… just basic potato salad, with no fears of biting into a piece of celery or a pimiento. The reason it’s not her exact recipe is because there is none. She just cooks a few potatoes, cooks a few eggs, and makes the dressing, which is a few dollops of salad dressing, a bit of milk, a squirt of mustard, a scoop of sugar, etc., then she tastes it and adds more as needed.

I think that’s what makes a truly good cook… when you don’t need recipes, yet the food turns out great. My sister Jan inherited that style of cooking, but not me. I do really admire that style of cooking and am impressed when I ask someone for a recipe and they say ‘I don’t actually have one’. But the times I’ve tried to fling it without a recipe, it’s been mostly flops, so I’ll stick to recipes.

This recipe doesn’t have progressive pictures because I wasn’t planning to post it when I made it, but then after tasting it again, I changed my mind because I just love it. But, you didn’t miss much by no progressive pictures, it’s pretty basic.

potato-salad2.jpg

Mom’s Potato Salad

Printable recipe

6 hard boiled eggs, cut up (I put them thro’ the egg slicer one way, then the other)
5 medium potatoes, cooked, then peeled, then cooled, then shredded

Dressing:
1 1/2 cups salad dressing
1 1/2 Tbsp. Dijon mustard
2 Tbsp. vinegar
1 heaping cup of sugar
2 tsp. salt
1/4 cup milk

Pour dressing over potatoes and eggs and stir slowly till evenly mixed. Refrigerate. It can be made ahead… it’s just as good or better the next day. Enjoy!

potato-salad1.jpg

Comments

10 Responses to “Mom’s Potato Salad”

  1. Monica on October 20th, 2008 9:10 am

    Mmmmm!! I love potato salad, especially in the summertime. But, I’ll have to say that I like the crunch of celery in mine!! :) And a teeny tiny bit of really fine onions.

  2. Barb on October 20th, 2008 9:45 am

    Kay, I am soooooo glad you’re back, and getting settled into your new home. I missed your updates and wonderful recipes.

    Potato salad has to be about one of my favorite foods. I do agree with Monica though and would put celery and onion in mine. Although yours looks really good too, just a basic one.

    I have been wanting to make potato salad anyway, so I think I will just make some today since I read your post.

  3. Michelle on October 20th, 2008 9:56 am

    I’m glad your back!!!!!! The potato salad looks delicious, except I like the crunch of celery in mine. I usually add more than the recipe says because I like it so much. Makes me kinda of hungry for some right now…

  4. Judi on October 20th, 2008 12:04 pm

    Your pictured plate looks like what my hubby is making for dinner tonight. I love having a retired hubby.

  5. Freida on October 20th, 2008 12:58 pm

    Ahh, my kind of potatoe salad- no celery OR onion. I’ll have to try this. Probably won’t be till next year sometime, since I hardly EVER make potatoe salad. :)

  6. Joanna on October 20th, 2008 3:05 pm

    I’m w/ you & Freida—definitely no celery or onion crunchies. I actually put a little bit of celery salt & onion powder in mine ’cause I like what it does for the flavor, but I hate the crunch!
    I just ate, but now I’m hungry again…. ????

  7. denise on October 20th, 2008 6:33 pm

    Here’s a little suggestion. My husband doesn’t care for pieces of celery or onion in his potato or macaroni salad, but I like the flavor and don’t want to let that taste out. So I substitute celery salt for half of the salt called for. Then I also add onion powder– a few shakes.( not sure how much cause I’m way too much of an add a little bit of this and a little bit of that type of cook). Anyway, the potato salad does look very yummy. And by the way my husband really likes potato salad made the way I make it. But everybody likes something different so it might not be to your liking. Just thought I’d drop a suggestion. Glad 2 see you are back with us and posting your wonderful recipes. Have a great day!! :-)

  8. cathy on October 21st, 2008 12:00 pm

    I also like onions and celery in mine. I have never heard of putting in milk and sugar..Wouldn’t that make it really sweet?

  9. Ruth on October 26th, 2008 3:16 pm

    Your recipe is a lot like mine except I want celery and onion in mine, and I run the potatoes and eggs through a grater. I was surprised how much sugar goes into a good salad dressing, and it doesn’t taste sweet either, just good.

    We moved in the last year, after living at one place for the 20 years of our marriage. It is quite a chore!! I’m still unpacking and trying to find places for some of my things. I like to keep my seasonings and herbs in alphabetic order on several lazy susan type thig-a-ma-jigs.

  10. Lorrie on March 29th, 2009 7:48 pm

    I have a few favorites of potato salad, but this sounds interesting. I’m going to try it and see. Thanks!

Hi from OHIO!

Posted on October 16, 2008
Filed Under Tidbits

Here I am, equipped with my feather-duster, ready to dust off this site again. Ah, how I missed it! I had a list a mile long that I had to get done before I was going to allow myself to start posting again. But, I’m pretty gracious, especially with myself (sigh!), and I let that little rule slide. Not totally slide though, I did get about 3/4 of the things done that I wanted to.

So, have any of you ever moved? Do you know how much WORK it is?! You have to still do the laundry, make meals, take care of the kids, go scrapbooking, clean the house, PLUS decorate the house, unpack boxes, and fit everything into cupboards and closets. And it doesn’t all fit quite as good as it did… you know how when you go grocery shopping and you’ve got a full cart, then you put it all on the checkout counter and when you load it back into the cart bagged up, the cart is overflowing and you’ve still got 5 more bags to put in it. So, I have quite a few things that don’t have homes yet. Like the Kleenex box. It is on top of the fridge, but how many guests will manage to spy it up there? And the spices, I need to figure out a better system for them. They have a home, but not a very organized one. …Not like I’m stuck on being organized or anything.

I think for the next while, my house will be like a Rubikscube (I have no idea how to spell that, so just sound it out and you’ll know what I mean). Once everything is in place, I’ll still be changing this and changing that till it feels right.

Anyway, I’m not posting a recipe right now, just checking in to say Hi and that you’ll be seeing more action on this site again now.

And if you ever get bored, make a duck bill with Pringles chips…
duck-bill.jpg

Comments

12 Responses to “Hi from OHIO!”

  1. Traci on October 16th, 2008 9:35 pm

    Welcome back, I’ve missed you!!! When you get all the decorating done, you must post pics of new house.

  2. Loretta on October 17th, 2008 3:27 am

    It has been fun to find you here, and now today when I checked you had written—-that is great. Glad you are back and will be writing. I tried calling you this week, will try again. Have a great day and God bless you.

  3. Lisa @ The Cutting Edge of Ordinary on October 17th, 2008 4:35 am

    Welcome back! We missed your cooking!

  4. Michelle on October 17th, 2008 9:11 am

    Welcome back!! I really missed the updates the last month. Please show us pictures of your house sometime.

  5. Judi on October 17th, 2008 9:53 am

    Welcome back. I missed you, kept checking in to see if you were back yet. Love the duck bill.

  6. Arla on October 17th, 2008 10:05 am

    Hi Kay,
    At last you’re back. Lexi looks like Jan on that pic. We’re looking forward to your recipes and pics coming back. I thought you ought to name your first official post, Cooking Is Back On The Burner, or something like that. Actually, Sometimes when I checked in; I thought that’s what I was seeing. Imagine my disappointment!
    amg

  7. Monica on October 17th, 2008 12:50 pm

    Welcome to Ohio!! I was wondering when you were going to post again!! Glad your getting settled in. Cute picture, we always called them “Duck Lips”!!

  8. Ali on October 17th, 2008 9:12 pm

    Glad to see you back!!

  9. Rene on October 17th, 2008 9:22 pm

    Kay — I’m so glad to see you back!! I’ve been thinking about you a lot lately. I’ve been doing a lot of home cooking and have used several of your recipes. Since you’ve been gone we had a horrible thing happen in our family and my husband was diagnosed with Leukemia. He’s doing chemo now which has messed with his taste buds so I’ve been trying all kinds of new recipes trying to find things he actually likes. So far the only thing that does it for him are sweets. So….I’ve been making lots of desserts which my hips are absolutely loving but I’m not loving my hips! ????

    How was the move? Are the girls happy in their new home? My hubby is from Ohio — Akron. I love that state. It’s so pretty and green. It is much different than Wisconsin?

  10. Melissa K on October 18th, 2008 6:13 am

    Welcome back! I’ve missed reading your blog and have been checking back every few days, waiting eagerly for you to be ready to start up again!

    I’m glad you made the trip safe and sound. Good luck on settling in to the new place & finding homes for all of your stuff. Can’t wait until you’re ready to start posting recipes too!

  11. mary cluley on October 18th, 2008 6:28 am

    Hi and good morning,
    I am orginally from Columbus, Ohio. I love Ohio, but live in TX now. Anyway, I wanted to invite you to my scrapbooking website. I see you scrapbook, and we have a wonderful “project center” with lots of idea. It is http://www.mycmsite.com/marycluley
    Then, click on the project center. I hope you can garnish at least one good idea from there.
    I will check out your recipes, as I also love to cook. My children are mostly grown now so I do not cook quite as much, but do enjoy it. God bless always,
    Mary in Wichita Falls, TX

  12. Katrina on October 18th, 2008 10:14 pm

    Glad you’ll be back cookin and sharing again! Cute pic of your daughter!

Cooking is on the back burner…

Posted on August 18, 2008
Filed Under Tidbits

*Digging myself out from under a mountain of boxes* All I’ve been thinking of lately is bananas and an occassional apple… maybe it has to do with the fact that I’ve been spending alot of time with banana boxes and an apple box now and then.

We are moving.

From
WISCONSIN
to
OHIO.

So, this website will be put on the back burner for the next month or so. Ah, how fitting to use the term ‘back burner’ in a kitchen-related post. You know, it is true that when I make a meal, I very seldom need more than 2 burners and always use the front ones. The back ones aren’t used near as often. I wonder if they keep that it mind when they’re making stovetops. Not sure exactly what they’d do to make the front ones better and last longer, I guess that was just a weird random thought.

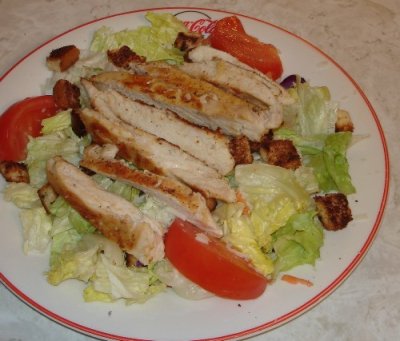
Anyway, for tonight, I’m making, er, WE’RE making Grilled Chicken Breast Salad. It’s ‘we’ because the grill is not my territory, and I’m quite happy to keep it that way. :)

chicken-breast-salad.jpg

Comments

16 Responses to “Cooking is on the back burner…”

  1. Rene on August 18th, 2008 4:48 pm

    Kay – I hope you have a safe move! My hubby is from Ohio. It’s so pretty there. Hurry back!

  2. Traci on August 18th, 2008 5:18 pm

    Good luck on your move….maybe I’ll get the pie crust perfected before you sign back on….tee hee.

  3. Lisa @ The Cutting Edge of Ordinary on August 18th, 2008 6:43 pm

    My in-laws live in Toronto, Ohio. Nice little town. Good Luck with the move. I’ll miss your recipes.

  4. Rosalyn on August 18th, 2008 7:52 pm

    Hey, can we come over for supper??!! :)

  5. Bobbi on August 18th, 2008 8:36 pm

    Have a safe move. I love your blog. I just wanted to let you know that my church had a kid bake contest and my girls entered. My 6 year old made the 7 layer bar and got 2nd place. My 8 year old made the lemon bars. Thanks for all your great ideas.

  6. Bernice Wagner on August 19th, 2008 5:55 am

    God bless you in your transition…moves are stressful, may all go well as you pack and travel. I will surely miss your down to earth posts and recipes and look forward to what you have for us after the move. Blessings, Bernice

  7. Melissa K on August 19th, 2008 6:06 am

    Kay,
    Best wishes on your upcoming move. I hope you’ll occasionally keep us posted with what is going on. Over the past few months I feel like I’ve gotten to know your family a tiny bit and I think all of us would like to hear how everything is going, not just the cooking side of it!!!

  8. Monica on August 19th, 2008 1:11 pm

    So, when is this move actually happening? What day are you officially moving in? Wondering what brought you to Ohio…..?????

  9. Cheryl on August 19th, 2008 2:22 pm

    Going…Going…Gone are my dreams of someday meeting you when we are Wisconsin. Best wishes on the move.

  10. Susan on August 19th, 2008 2:51 pm

    That sure looks good. Good luck with your move.

    Susan
    http://www.raisin-toast.com

  11. Katie Mast on August 20th, 2008 2:28 pm

    What part of OH will you be living? We just came thru OH yesturday on our way home from OK. I will miss your new cooking ideas. But I know how moving is and hope all goes well.

  12. Michelle on August 21st, 2008 9:23 am

    I’m gonna miss your updates so hurry up and move!!:)I’m excited you’re moving closer to us. Ohio’s great, afterall it’s the buckeye state!:)

  13. chelsa on August 22nd, 2008 6:55 am

    moving closer to indiana :) now i can come for supper! :) j/k, but seriously… that salad looks WONDERFUL! :) hope your move goes smoothly and is safe too. what part of ohio are you moving too?

  14. Kay on August 22nd, 2008 10:58 am

    Some of you asked what part of Ohio we’re moving to. It’s close to Columbus (west side). We don’t have an exact moving date yet, but roughly in about 2 weeks.
    It is amazing how long stuff takes to pack, esp glass stuff! It has been quite entertaining seeing things that I forgot I had. :) Maybe that means I don’t need them? ????

  15. Barb on September 3rd, 2008 11:04 am

    Kay,
    Just wanted to let you know, I am thinking of you at this busy time. We moved about a year ago, so it is still fresh on my mind how much work it is. God Bless You! Barb

  16. Audrey on October 6th, 2008 1:06 pm

    OK, your month is up now! I think about you from time to time and wonder how things are going in Ohio and how you like it. Looking forward to hearing from you soon and seeing more new recipes now that you are (hopefully) settled into your new kitchen.

Parmesan Breadsticks and what they turned into…

Posted on August 11, 2008
Filed Under Breads Biscuits and Rolls

As I was saying in the last post, we had breadsticks with our ham meal that was featured and they went into the ‘don’t make again’ department.

And as I’ve said hit-n-miss in previous posts, me and making yeast breads from scratch don’t go together too well.

I don’t know, do you think those 2 facts had anything to do with each other?

Parmesan Breadsticks …recipe from an Easy to Bake Easy to Make recipe card
Printable recipe
3 cups all-purpose flour
1 envelope (.25 oz) quick-rising yeast
3/4 tsp. salt
1 cup warm water (120F – 130F)
2 Tbsp. olive oil
1 large egg white, lightly beaten
2 Tbsp. grated Parmesan cheese

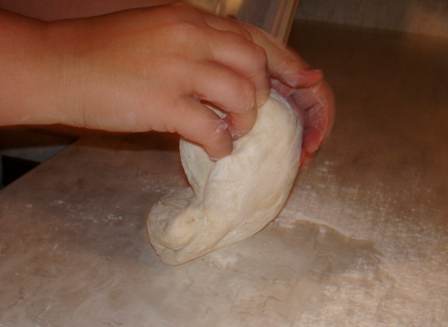
Combine 1 1/2 cups flour, yeast, and salt in a large bowl. Mix water and olive oil in a small bowl; add to flour mixture. Beat w an electric mixer on low speed until moistened. Beat on medium speed until well blended, about 2 minutes. Gradually add remaining flour until a soft dough forms. Turn dough onto floured work surface. Knead until smooth and elastic, about 6 minutes.
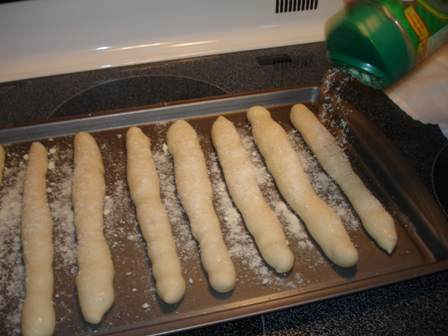
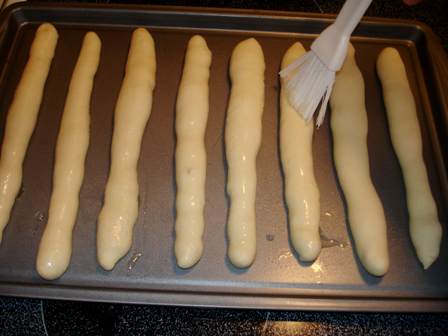
parm-breadsticks1.jpgCover; let rest 10 minutes. Coat 2 large baking sheets with cooking spray. Divide dough into 16 equal pieces. Roll each piece into a 12″ rope. Place on prepared baking sheets.

parm-breadsticks2.jpg

Cover; let rise until almost double in size, about 20 minutes. Lightly brush breadsticks with egg white.
parm-breadsticks3.jpg

Sprinkle with Parmesan cheese.
parm-breadsticks4.jpg

Bake at 400 until lightly browned, about 15 minutes. Transfer to wire racks to cool completely. Makes 16 breadsticks. I made an entire batch of 16 breadsticks and put the other half (unbaked) in the freezer to see if it works to get them out, thaw them, let them rise, put egg white and Parmesan on them and bake them for fresh breadsticks at another meal.
parm-breadsticks5.jpg
Ah, don’t they look just delicious?! Well, they’re not. They were dry and not very flavorful and you could smell the olive oil.

Soooooo…

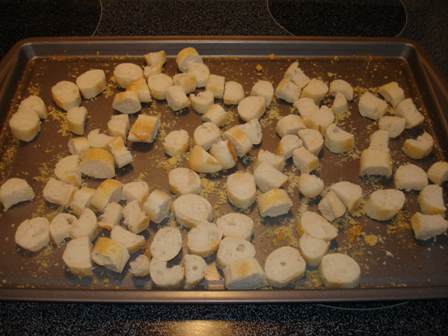
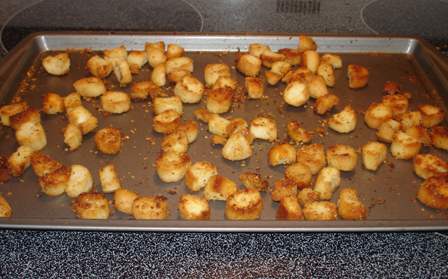
After we were done eating, while I was cleaning up, I made the rest into croutons. I think there were 4 or 5 left over out of 8. I cut them up into chunks with a scissors…
parm-breadsticks6.jpg

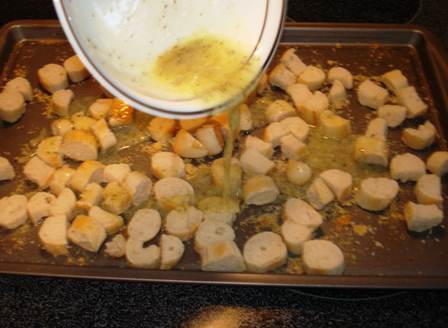
then added about 1/2 tsp. of Italian seasoning and a couple shakes of salt to 1/4 cup melted butter and poured it over the bread pieces and tossed it till they were all coated.
parm-breadsticks7.jpg

Then I baked them at 400 for 10 minutes, turning them over once during baking.
parm-breadsticks8.jpg
Mmmmm! They were great! Probably the BEST croutons I’ve ever had! Kind of a roundabout way of making them though. Maybe they were so good because I may have gone a little overboard on the butter. And what isn’t good, laden with butter?!

Oh, and by the way, those extra breadsticks I put in the freezer, you know, the other half of the batch? Someday, I’ll get them out, thaw them, let them rise, put egg white and Parmesan cheese on them, bake them, chunk them up, drown them in butter and Italian sesoning, and eat them on a salad or in soup. Or just plain.

Comments

7 Responses to “Parmesan Breadsticks and what they turned into…”

  1. Barb on August 11th, 2008 8:51 am

    Wow, those croutons look really good. I have made croutons before, and they are way better than the ones you buy at the store.

  2. Rene on August 11th, 2008 8:51 am

    Kay — they looked great if that counts for anything. I’ve never had luck with yeast breads either. The only thing I make with yeast that turns out is pizza dough and really it’s my bread machine that does all the work. Do you have one of those? I’ve never tried making yeast dough for anything other than the pizza but I just might have to try it now!

  3. Katrina on August 11th, 2008 11:52 am

    Sorry the breadsticks didn’t taste as good as they looked. Great use of something you didn’t like though by making croutons. They look and sound yummy, too.

  4. Katrina on August 11th, 2008 11:55 am

    Oh, and maybe try drowning the breadsticks in butter next time, you know, places like Pizza Hut who have really good breadsticks, that’s what they do, they literally sit them in a pool of melted butter (an old roommate used to work there). Just an idea! ????
    Pizza Hut’s pizza is the same, baked in a pizza pan with tons of oily butter in it. So good, though!

  5. Roxanna on August 11th, 2008 8:28 pm

    Doesn’t saving something like that just make you feel so frugal? When I do something like that I always want to call my grandma and tell her because she is always so proud of me when I don’t throw stuff away! :) They look de-lish!

  6. Karen Layman on August 11th, 2008 9:28 pm

    Hey…..like they say…..”when life gives you lemons….make lemonade”. :-)

  7. Francie on August 14th, 2008 6:37 pm

    Yay! Someone else has kitchen disasters too! But what a way to make lemonade out of lemons. The croutons do look yummy.

Baked Ham with Sweet Potatoes and Pineapple

Posted on August 9, 2008
Filed Under Pork and ham

Wow, where did my week go?! Here it is, Saturday morning already. Did you ever wonder why life seems to go faster now that you’re older? The first I remember wishing life would pick up a little speed was 6 years old, er , 5 years old, I wanted to be the big 6. And then it was like that up until 19 when I got married. You know all the milestones… 13 – teenager, 16 – driver’s license (which I flunked twice, by the way… once was an over all lack of driving experience and the other was getting caught in a funeral procession at a stop light. And worse than the fact that I still didn’t have my license was the fact that I had to blushingly tell my friends that, sigh, I flunked again. At 16, it’s not easy to admit mistakes to friends. I guess that goes for any age, actually.) Anyway, after I got married, I had no more milestones to be reaching ahead for. I just wanted to settle in and have life slow down. And be in the ‘young marrieds’ group forever. Now a couple years ago, we got ‘kicked out’ of that. But, that’s not too bad, we just passed our 12th anniversary a few days ago.

Anyway, this has nothing to do with HAM, but I still wonder where my week went!!!!

This recipe comes from the Grandma’s Recipes cookbook. I love this cookbook! Maybe one reason is because I know Ray and Elsie, the ones who compiled it. And I must compliment them on the index! It’s VERY user-friendly! I think in a cookbook, one of the hardest things would be making the index, categorizing everything and making sure you didn’t miss a recipe.

ham-sweet-potatoes4.jpg

Baked Ham with Sweet Potatoes and Pineapple

Printable recipe

1/2 ham, 5-6 lbs.
1 c. brown sugar
6 medium sweet potatoes (didn’t have these, so I subbed canned ones)
1 c. crushed pineapple

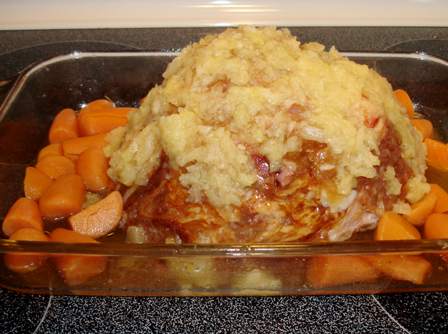
Rub fat side of ham w brown sugar. Peel sweet potatoes and arrange around ham (or dump in a can or two of canned ones, they didn’t get too mushy). Pour crushed pineapple over ham.
ham-sweet-potatoes1.jpg

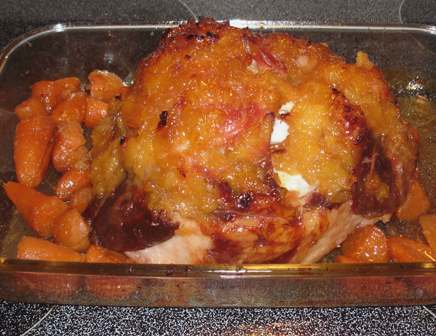
Bake at 325 allowing approximately 25 minutes per pound or until internal temperature reaches 160.
ham-sweet-potatoes2.jpg
That white part is the bone.
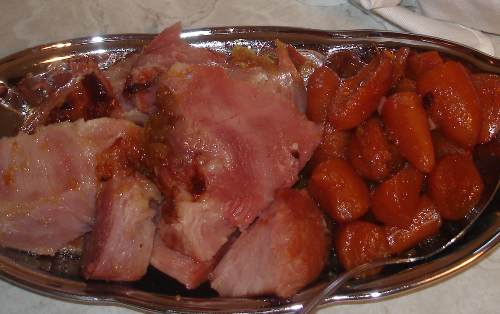
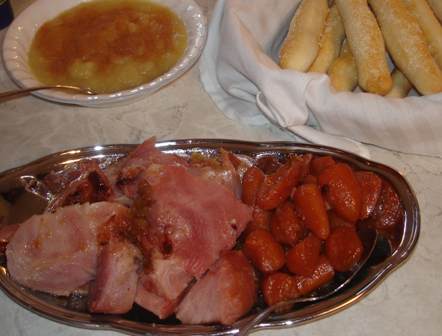
This was great! And easy! No scoring the ham and poking a bunch of cloves in. I baked it uncovered and the ham was really moist. Those sweet potatoes tasted candied, just delicious!!!! Part way through baking time, I took some of the juice and basted the ham and also turned the potatoes over. Not sure if that made a difference or not.

Here was the rest of our meal: Ham and sweet potatoes along with breadsticks and applesauce…
ham-sweet-potatoes3.jpg
Those breadsticks landed on the ‘Don’t bother making again’ list, but I’ll feature them sometime anyway. :) Can’t have all top notch recipes… as Pioneer Woman would say ‘Just keepin’ it real’.

Comments

7 Responses to “Baked Ham with Sweet Potatoes and Pineapple”

  1. Jan on August 9th, 2008 8:54 am

    This sounds like a great one for sunday lunch, quick and all in one!! ~ Jan

  2. Karen Layman on August 9th, 2008 9:49 am

    This looks like a yummy yummy meal. Wish you would have invited me over when you served it. :-)

  3. Kelsie on August 10th, 2008 2:08 pm

    Mom was pleased that you mentioned them(=…and don’t worry, the organization part is pretty much why Mom loved making those cookbooks. once again, I love this site!

  4. Ruth on August 10th, 2008 7:14 pm

    I think the index is the most important part of a cookbook. A lot of cookbook indexes aren’t worth the paper on wich they are printed. They are the ones that have only one entry per recipe, by recipe name.

  5. Shannon on August 10th, 2008 7:27 pm

    I love a good ham and pineapple together!!! :) Eric hates sweet potatoes but I just might try it. :)

  6. Rosanna on August 18th, 2008 9:35 am

    I made this for Sunday dinner yesterday, and it was delicious. Even my husband who doesn’t really like sweet potatoes ate them! I covered it with foil and baked it at 250 for almost 4 hours.

  7. Moni on September 20th, 2009 2:22 pm

    Did this recipe with fresh sweet potatoes and they potatoes stayed hard so I took the potatoes and juice from ham and made yams on top of stove.

How to make a Pie Crust

Posted on August 4, 2008
Filed Under How to…, Pies

Ok, I’ll just show you how I do it, but don’t expect alot of tips and all. Who knows, after this post, you might be giving me a lot of tips! ???? That would be great, it would make us all better pie crust makers. And you might laugh at how I do it, for example, I use Saran Wrap in the pie-crust-making process. *Huh?!*

Warning: Eyes may glaze over… there are lots of pictures and it got a little wordy. :)

First, the recipe. This is the only pie crust recipe I use and I don’t even try others because this one works great and has only 4 ingredients and it gets compliments now and then:

Pie Crust

1 1/3 cups flour
1/2 tsp. salt
1/2 cup butter-flavored shortening (Does shortening have an ‘e’ in it? I keep adding then erasing it. I should go look on the can.)
3 Tbsp. ice water

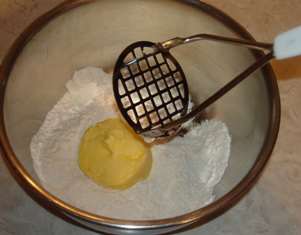
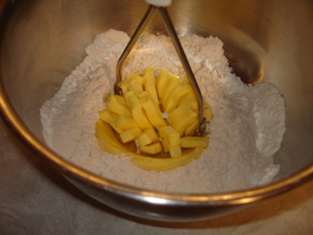
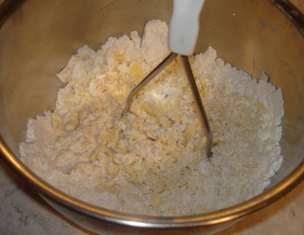
I put the flour and salt into a bowl and give it a few stirs w the teaspoon that I measured the salt with. Yeah, I about always measure stuff, I’m not one of those ‘just dump it in’ people. Then, I mix the shortening in with a potato masher…
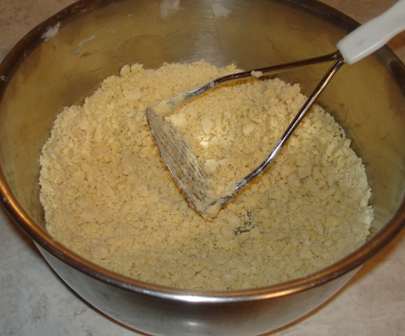
pie-crust2.jpg  I’ve tried a pastry blender, two knives, a fork, and nothing works quite as good as a potato masher.
pie-crust3.jpg

pie-crust4.jpg

pie-crust5.jpg
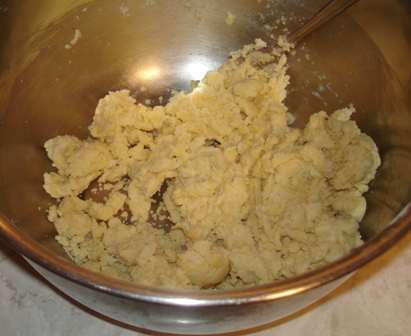
When it looks about like this, pour the water in all at once and quickly stir it with a fork. More like pourthewaterinallatonceandquicklystiritwithafork. Not sure why, but I feel some urgency to get it stirred in, maybe because I’m afraid it would soak into the part where it’s pooled, then not get evenly dispersed. Anyway, I think that little tidbit might fall under the category of ‘Weird Quirks’ instead of ‘Pie-Crust-Making Tips’.

When it looks like this,
pie-crust6.jpg
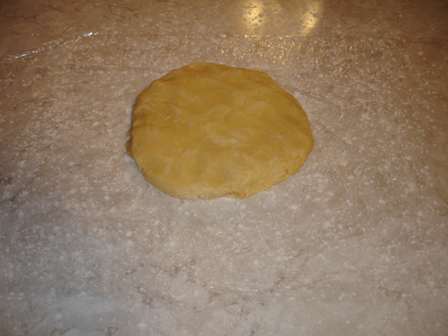
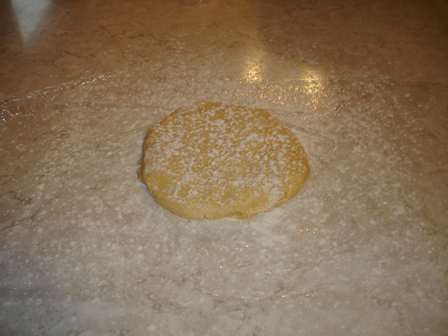
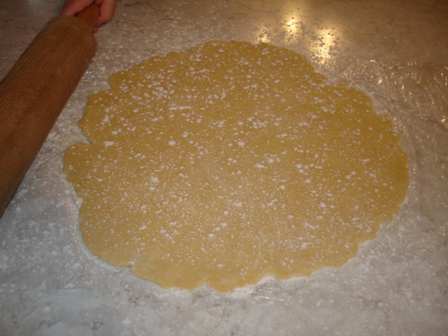
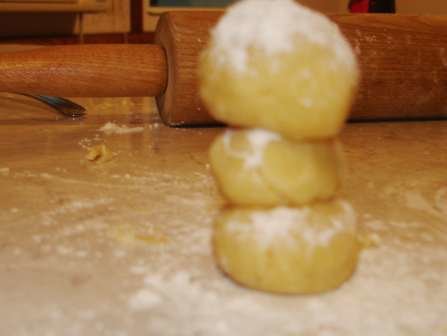
stop stirring and get a piece of Saran wrap, lay it on the counter, and sprinkle it with flour. Then, with your hands, get all the dough and squeeze it together into a ball, then flatten it a bit and put it on the floured Saran wrap.
pie-crust7.jpg

Sprinkle flour over the top.
pie-crust8.jpg
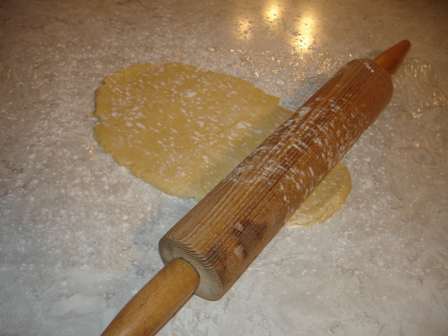
Take the rolling pin and roll it this way,
pie-crust9.jpg
then that way.
pie-crust10.jpg
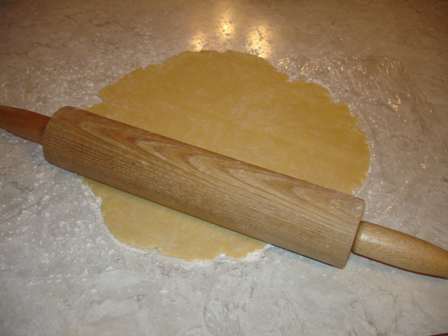
Sprinkle some more flour on because the rolling pin will be starting to stick a little.
pie-crust11.jpg
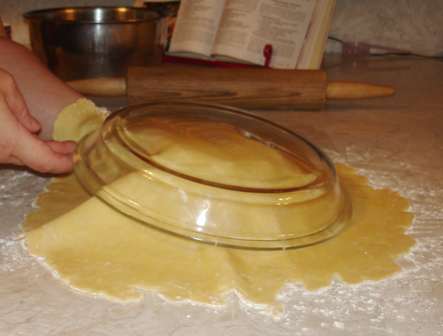
Roll it out some more till it’s a couple inches bigger than the pie plate all the way around. Put one hand under the Saran wrap and the other hand on the back of the pie plate, and flip the whole works over.
pie-crust12.jpg

pie-crust13.jpg
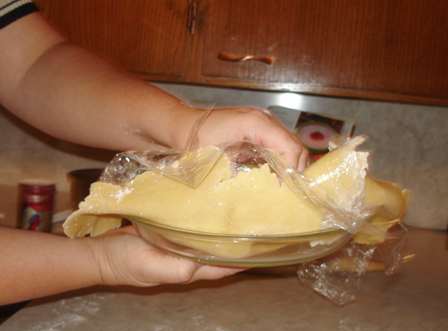
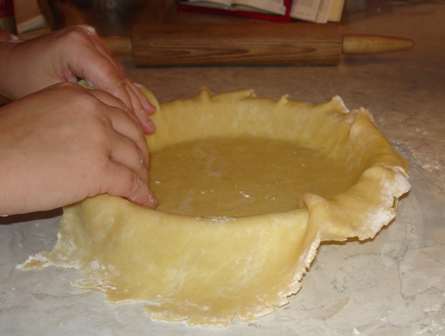
Peel off the Saran wrap. Now, here’s an actual tip: Instead of just pressing the crust down into the pan, lift it up off the edge and let it line the pan without pushing down on it. Otherwise it will stretch the dough, then it’ll shrink when it bakes. I don’t really know how to explain it, but just DON’T make the dough stretch by pressing it down into where the side and bottom of pan meet.
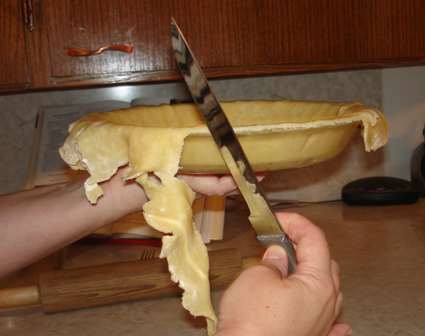
pie-crust14.jpg You can’t really see it, but I’m not just pressing the dough down in with my fingertips… I’m lifting up the edge and putting it down in to line the ‘corner’. Once it’s all in there, press down a little around the top edge, this’ll make it easier to cut the extra dough off. Take a knife and cut it off.
pie-crust15.jpg

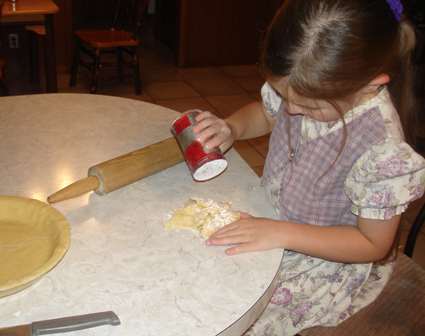
Here’s where my extra dough always goes…
pie-crust16.jpg
And she’d get my camera and take pictures of her own pie dough creations. Close up pictures. And the camera would focus on stuff behind the subject being photographed…
pie-crust20.jpg

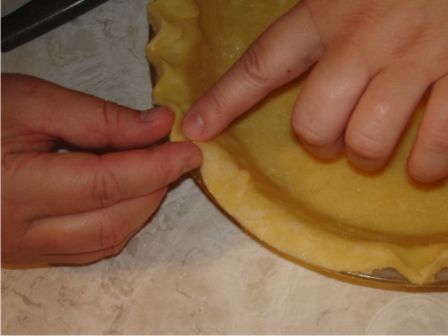
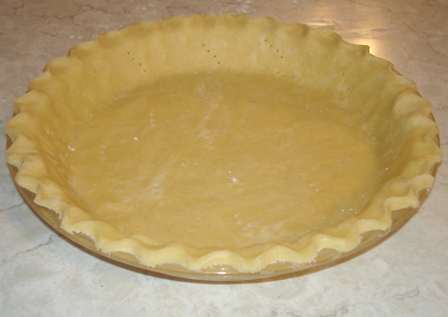
I usually crimp the edges of the dough between my thumb and finger.
pie-crust17.jpg

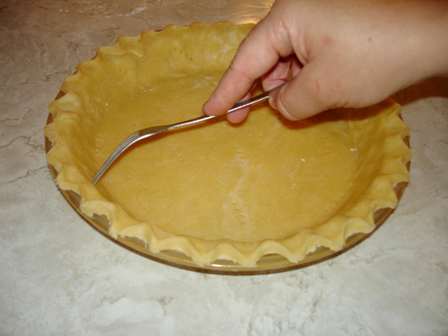
Poke the bottom and side of crust with a fork.
pie-crust18.jpg

pie-crust19.jpg

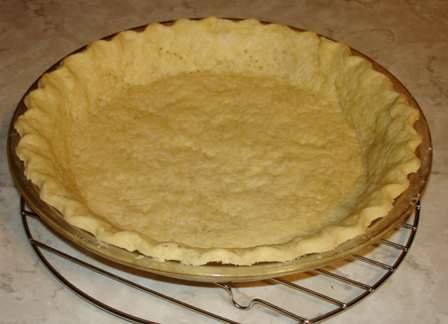
Bake at 375 for 12-15 minutes. And you’ve got a pie crust.
pie-crust21.jpg
Yeah, it does shrink just a tiny bit, but it’s good enough for me. I’d rather have that than mess with putting beans in it to bake it.

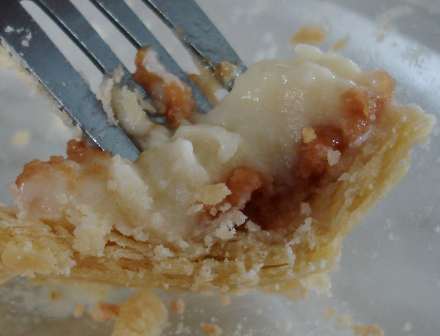
And, last but not least, the famous pie crust question… Is it flaky? I think so…
pie-crust1.jpg

Now, let’s hear from you… I know alot of you out there make pies. Please give us some more tips! :)

Comments

10 Responses to “How to make a Pie Crust”

  1. Traci on August 4th, 2008 5:00 pm

    Oh my, I LOVE you!!! I have needed this like you don’t even know…..THANK YOU THANK YOU THANK YOU.

  2. Michelle on August 4th, 2008 5:13 pm

    Maybe I can make my own pie crust now. I’ve tried to make pie crusts in the past and I’ve always had trouble with rolling them out and getting them in the pan. So I gave up and I buy them at a bulk food store where they’re in the pan ready to go and all you have to is bake them. Very convenient!! I’ll have to give this a try sometime. Thanks for the good tips!

  3. Shannon on August 4th, 2008 7:38 pm

    Hum, I like that saran wrap deal. I always had trouble dealing the dumb stuff off the counter. The last pecan pie I made, the crust SOME HOW lifted off the bottom of the pan while baking and all the filling went underneath, so the crust was right up against the top… explain that one to me. I was mad! I am going to try this again. I really am. Maybe soon you can just make all my pies for me. Please?

  4. Freida on August 4th, 2008 7:44 pm

    I’d say you got it pretty good. The saran wrap is defintely not a quirk. I do that too, altho I use wax paper. Probably not much difference. Looks good. Puts me in the mood for pie again. I should do your peanut butter pie.

  5. Kay on the farm in Neb on August 5th, 2008 4:51 am

    Do you have trouble with the dough developing gluten by mixing the water in quickly? I was taught to always “gently” toss the flour/shortening (yes an “e”) with the water, a tsp at a time. Next time I’ll just dump and stir.
    Peaches are coming into the stores now. Colorado peaches…mmmmmmm

  6. Jan on August 5th, 2008 5:52 am

    Thank-you! I’ve been wondering how to make a buttery pie crust, like I’ve had elsewhere. Bingo: butter Crisco! I’ve been getting hungry for pie and will try this one out. My crust recipe works, but I never was quiet satisfied b/c it wasn’t buttery.

  7. Cordy on August 6th, 2008 8:07 pm

    Your kindness just blesses me! Thanks SO much Kay!

  8. Suzanne on December 28th, 2008 6:12 pm

    I don’t know if you guys have done this, but with the extra pie crust clippings, my grandma always (and to this day still does), takes the leftovers and rolls them out into an oval-type shape. She then sprinkles cinnamon sugar on it and rolls it up. She calls them “roly-polies.” They are almost as good as her pie!

  9. Rhoda on June 16th, 2009 7:54 am

    I used to work at a bakery and we would always insert another pie pan on top of the crust and then bake it…an easy alternative to the ‘beans’ you were talking about. i never heard of using the beans. what do the beans do? I still use the extra pie pan inserted on top of the crust when i bake my own crusts.

  10. Ashley Nicole on August 25th, 2009 7:45 am

    Hey SuzAnne. I always do that w/ my pie crust. Thats my favorite part when it comes to making pies. Thankyou Kay for this recipe. I used it last night and it turned out perfect. It was easy too.

Peanut Butter Pie!

Posted on August 2, 2008
Filed Under Pies

I get cravings for this pie. And it’s so easy to make. And you can make it and put it in the fridge and it cools down and firms up in less than 3 hours. I’ve already got the craving in the morning, made it, and had a piece for lunch. Mmmmm, now I’m thinking afternoon snack today…

This recipe comes from the Derstine cookbook. But I skip the meringue. Meringue on peanut butter pie?! No way! What’s crazy is that most regular peanut butter pie recipes have meringue. One time I tried it and it just seemed really weird. Maybe because Mom always made it without the meringue. I guess people put it on because the filling takes egg yolks and then what do you do with the eggs whites?

I should actually study up on eggs a bit. When I make something that takes yolks only, I throw away the whites. When I make something with whites only, I throw away the yolks. I do wonder how long yolks or whites would last in the fridge if I’d save them. And I also wonder about freezing them… on that laminated substitution chart that I have (part of it is posted here), for the “when you’re out of eggs” part, one of the substitutions is 3 Tbsp + 1 tsp thawed frozen egg. Probably they would only work in baking or cooking. I’m out of eggs right now and couldn’t even make pancakes this morning! And I can’t even make that peanut butter pie that I’m craving! Oh, hey, speaking of peanut butter pie…

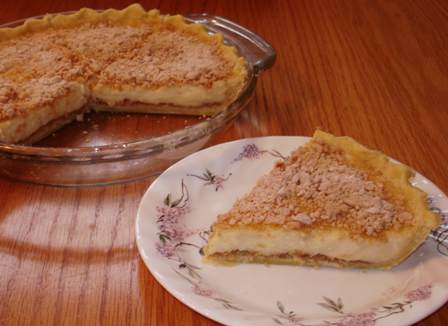
pb-pie6.jpg

Peanut Butter Pie

Printable recipe

1/3 c. peanut butter
3/4 c. powdered sugar
1 9″ baked pastry shell

Filling:
1/3 c. flour
1/2 c. white sugar
2 c. milk (always use whole milk, it turns out much better)
2 tsp. butter
1 tsp. vanilla
1/8 tsp. salt
3 egg yolks, slightly beaten

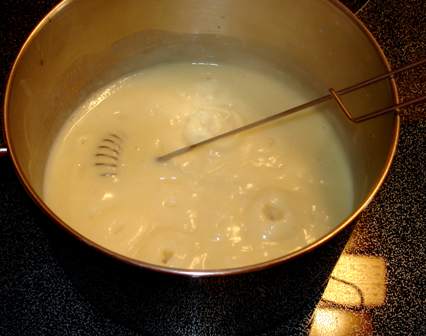
Combine filling ingredients and cook in heavy saucepan over medium heat until thick, stirring often.
pb-pie1.jpg

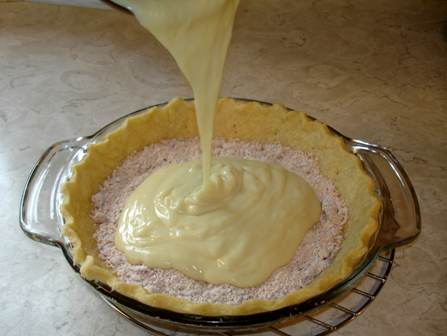
Blend peanut butter and powdered sugar. Sprinkle 2/3 of mixture into baked shell. Pour filling on top.
pb-pie2.jpg

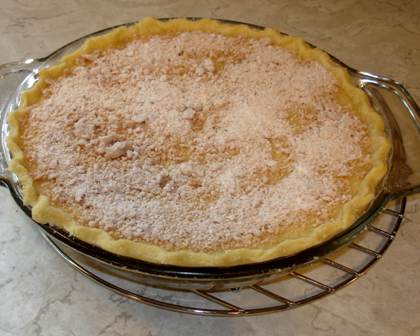
Sprinkle with remaining peanut butter crumbs.
pb-pie3.jpg
I think I’ll just leave the meringue details off of here because I’m afraid then you’d be tempted to make it with the meringue.

Note of interest: That picture up there where I’m pouring the piping hot filling into the crust was taken at 8:54 a.m. on July 10. And this picture was taken at 11:39 a.m. on July 10. That’s how fast it cools down and sets up!
pb-pie5.jpg 

I won’t clutter this post with it, but sometime I want to feature making a pie crust, how I do it anyway. I’m not a pro and don’t really have secret tips and techniques, but they don’t shrink and they taste fine. I counted up what I can remember and I’ve rolled out about 20 pie crusts in the last 2 months, and enjoyed every minute of it. Most of those pies were for bake sales, we don’t eat THAT much pie! Two of those pies were peanut butter pies, um… not for bake sales. But I did give one of them away. I made one to go with a meal for a new mom and then got home and was feeling like I had slighted myself by not getting to eat any (I could not figure out a way to take a piece without her noticing it, that’s what’s nice about bars… you can bake a panful, put them out on a plate, snitch a few, and the recipient will never know ???? ). So, anyway, this no-peanut-butter-pie-for-me thing was still bugging me the next day, so I made one for me… the very one that’s featured above.

———————————————————————————————-

Edit: (This will make more sense if you’ve read the comments on this post.) I tried peanut butter pie with Cool Whip…
pb-pie-cool-whip.jpg

It was great. It added something to the looks of it. I still prefer the taste of it without the Cool Whip though. I’ll put it on now and then, especially if I’m taking it away somewhere. But if I’m making it to settle a craving for me, it’ll be without. Richer-looking: WITH. Richer-tasting: WITHOUT. That is, of course, just my opinion. :)

Comments

15 Responses to “Peanut Butter Pie!”

  1. Nancy on August 2nd, 2008 11:13 am

    I’m not sure about egg yolks but I did freeze egg whites. Then I make angle food cakes. I do enjoy your recipes and trying then out. Thanks! Nancy

  2. Shannon on August 2nd, 2008 11:19 am

    I’m hungry for pb pie! Maybe I should make one for tomorrow. Can’t wait for the pie crust details. I’m a looser on that one!!!

  3. Michelle on August 2nd, 2008 12:51 pm

    Hmm… I’ve never heard of putting meringue on peanut butter pie. I think that would ruin it. I noticed that you didn’t top the pie with Cool Whip. Around here peanut butter pie always has cool whip on top. You should try it sometime. It’s delicious!

  4. Lisa@The Cutting Edge of Ordinary on August 2nd, 2008 1:51 pm

    That looks great. I’m surprised that the peanut butter didn’t make it look more, well peanut buttery. The paleness of the pie wasn’t what I was expecting. Oh well, as long as it tastes good!

    Speaking of tasting good, I’m getting ready to make your Butter Pecan Turtle Bars in a bit. Check my blog later to see how I did! Thanks for that recipe. My husband can’t wait to try them.

  5. Amber on August 2nd, 2008 2:48 pm

    I was going to say, “you missed the Cool whip”, but someone’s beaten me to it. :) Definitely needs cool whip under those top crumbs! Awesome!

  6. Kay on August 2nd, 2008 4:55 pm

    Hey, c’mon you guys! I cannot believe you wreck peanut butter pie w Cool Whip! :) Really though, wouldn’t that kinda dilute the wonderful peanut butter/vanilla pudding taste?

    I’m actually going to make one this weekend (it is about time for another one around here, the last one I had was nearly a month ago! :)) and I’m gonna put Cool Whip on it, then taste it with an open mind. ????

  7. Angela on August 3rd, 2008 12:35 pm

    It looks delicious, but I’ve stopped copying new dessert recipes awhile ago. Jeff doesn’t care for sweet things (he’s missing a gene somewhere I think . . !) so I’m the one that ends up having to eat most of it. I guess we’re better in the long run; I am a meat and veggies kind of girl.

  8. Monica on August 3rd, 2008 6:10 pm

    Mine’s gotta have Cool Whip, too! Then top with crumbs. Yummy! Wish I had some right now!

  9. Carmen on August 3rd, 2008 6:42 pm

    This was a specialty of my Mom’s, although she did always put the meringue on it. It is also a favorite of one of my cousins. I want some now!!

  10. Cordy on August 3rd, 2008 6:49 pm

    Sounds wonderful…..I’ll wait until the pie crust instructions come! Please don’t wait too long!!

  11. Katrina on August 4th, 2008 7:56 am

    My husband is a peanut butter pie finatic! Another quick tip is to just use 1 large box of instant vanilla pudding. (I never tried making my own, but I can only imagine it flopping.) I add the cool whip as well and then garnish the top with chopped/broken peanut butter cups along with the crumbs.

  12. JoAnn on August 4th, 2008 2:34 pm

    I’ve never had it without the Cool Whip, either. Trust me, it’s really good! That’s my favorite kind of pie–right up there with Shoo Fly Pie!
  13. Jo on August 4th, 2008 6:20 pm

    I’ve frozen egg yolks and whites and they’re fine. The first thing that comes to my mind to make with them is noodles and angel food cake. And by the way, whites will last a looong time in the freezer. My mom-in-law had some in the freezer for quite a few years and made some angel food cakes and they were fine.

  14. Twila on August 5th, 2008 6:36 am

    Oh, please don’t throw those egg whites away! I freeze mine, too, until I have enough for an angel food cake. Maybe you could mail them to me! We love angel food cake, and the mixes just aren’t as good as from scratch.

  15. Elaine on September 28th, 2008 4:20 pm

    I’ve made a version of this peanut butter pie for about 40 years. My recipe differs in that I use cornstarch, not flour, in the filling…….. and I always top it with meringue!! That’s what makes this version so delicious. I cannot imagine serving a homemade cornstarch pudding-style pie without homemade meringue. Some of the remaining peanut butter/10X sugar mixture gets sprinkled on the meringue before baking…..beautiful when it comes out of the oven. When I make this again, I’ll remember your suggestion of sprinkling part of the pb/sugar mix on top of the custard. Thanks for such an interesting blog.

Back again, with a few pictures…

Posted on July 31, 2008
Filed Under For special occassions

It was a wonderful trip. Lexi and Tiffany travelled well. And if it wouldn’t’ve been for the gum episode (where Tiffany took it out of her mouth and was playing with it and it got on her carseat and the floor and on Shannon’s computer case) and the cappuccino episode (where I actually dropped mine and caught it upside down and had to wash up part of the area in and around the cup holders), we’d have had an uneventful trip, disaster-wise.

The wedding was beautiful… have you ever seen one that wasn’t?! It was pink and brown w aqua accents. Here are some food-related pictures from the reception…

The cake. Neat, huh?
wedding1.jpg

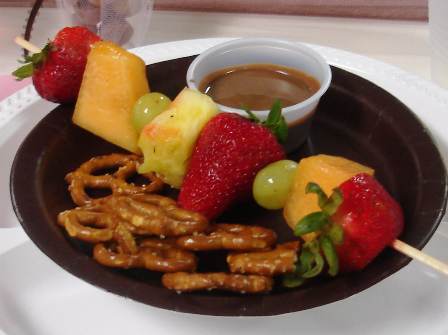
As we entered the reception hall, there was a table with a chocolate fountain and fruit and pretzels and marshmallows and also a punch table that we stopped at before being seated. I don’t have a good picture of those tables, but here’s my plate from it…
wedding2.jpg

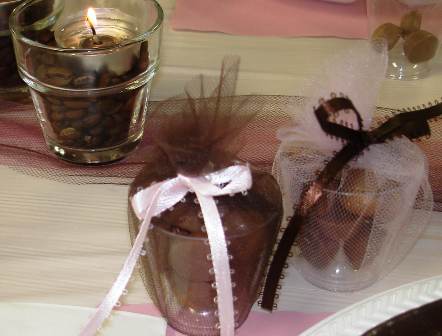
Decor on the guest tables was little cups filled with mini buckeyes and tied shut with tulle and ribbons and there were tea lights sitting on top of coffee bean filled votive candle holders. They looked really neat. Some people were actually munching on the coffee beans. I love the chocolate covered ones, but never ate one plain!
wedding3.jpg

The meal was chicken sandwiches, baked beans, chips, and macaroni salad (I think, for some reason I’m having a hard time remembering the salad and I don’t have any pictures of the main meal part). Good food! My b-b-qued chicken sandwich was great!

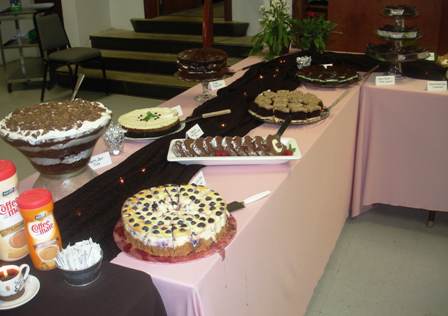
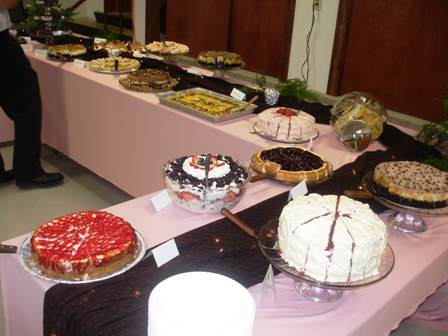
The dessert area. Instead of the usual cake and ice cream, they had an impressive display of desserts. Cheesecakes, cookies, chocolate roll, trifles, bars, cakes, fruit pizza… Just delicious! It was so hard to choose from…
wedding6.jpg

wedding5.jpg

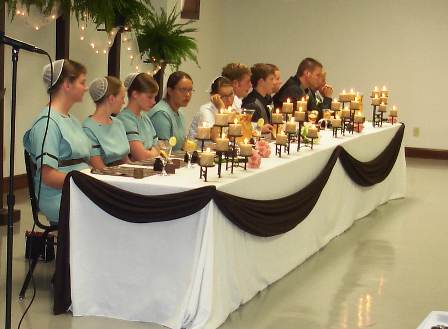
And the bridal table, beautifully decorated…
wedding4.jpg

Comments

7 Responses to “Back again, with a few pictures…”

  1. Rene on July 31st, 2008 10:33 am

    Kay — could you send me some of that cheesecake?!? That looks great!! My friend is a cake decorator at a local German bakery in our little town and they have been making cakes like that one lately too. They have a really cute one on display that looks like hay bales with a farm themed bride and groom on top. It has little tractors and animals sitting on each of the tiers. I’ll have to go over and get a pic. I love going over there but when I’m on a diet (like all the time) it’s dangerous!

    Welcome back and just to let you know I started my own recipe blog (http://cookingwithwingsaway.blogspot.com) and I linked to your site and said a little something about you. You’ve inspired me to spend more time in my kitchen — something I’m sure my family is very grateful about!

  2. lisa on July 31st, 2008 10:40 am

    i love the cake, except the black curly things don’t quite seem to fit. picture it with just the daisy on the top layer. and maybe a few daisys on top. better, right? =) the coffee beans, the chocolate fountain, the DESSERT TABLE-so neat! looks like a fabulous wedding!
  3. Michelle on July 31st, 2008 11:04 am

    I love weddings!! I liked the display of desserts!!

  4. Michelle on July 31st, 2008 11:04 am

    Oh- by the way, Welcome Back!! I missed your daily post.

  5. Angela on July 31st, 2008 2:40 pm

    Hey, that wedding was at my church, wasn’t it? Things were looking familiar there. . . It does look beautiful, and yes, I have seen some weddings that weren’t much to behold!

  6. Kay on July 31st, 2008 3:15 pm

    Rene, good for you on starting your own cooking blog! :)

    Lisa, those things on the top looked great in person… it was chocolate melted, then piped into a design, then stood up on top of the cake. It was brown instead of black. The picture doesn’t do it justice.

    Thanks, Michelle. :)

    Angela, do you go to United Bethel?

  7. Jan on August 1st, 2008 7:42 am

    I agree with whoever thought that daisys would look better on the cake. My first thought was, “No flowers!” But the dessert table!! I wouldn’t be fit to be turned loose with an array like that around, esp. with having to watch my sugar right now. I could eat some cheese cake……NOW!

Be back next week…

Posted on July 26, 2008
Filed Under Tidbits

No, the kitchen didn’t fall off of my house. I’ve taken to eating out instead of cooking… we’re on a trip, left on Wed. We’re in Ohio, going to a wedding later today, and then catching up with some friends tomorrow and Monday. We should be getting home Tues or Wed, so I’ll be updating again then, after getting the salad of duffel bags and all down to the laundry room.

The motel room that we’re in actually has a little kitchen and in the Guest Services Directory book, there is a section of recipes. I copied a few down to try at home. Here are 2 of them:

Hole-in-One Eggs
2 slices bread
2 tsp. butter, softened
2 eggs
1 strip bacon, cooked and crumbled
Cut a 2″ round circle out of the center of each bread slice. Spread both sides of bread with the butter. In a skillet, toast bread on 1 side over moderate heat till golden. Reduce heat to moderately low. Turn the bread over. Break an egg into the hole in each slice. Sprinkle the bacon over the eggs. Cook, covered, for 5-6 min until the eggs are firm. Serves:2. I can picture having some fun trying different shapes for that middle part.

Slice-of-Comfort Pie
16 marshmallows
4 milk chocolate candy bars (1.45 oz) w almonds
1/2 cup milk
1 8-oz carton Cool Whip
1 9″ graham cracker crust
Heat and stir marshmallows, chocolate, and milk till melted. Remove from heat; stir in Cool Whip. Pour into pie crust. Refrigerate until firm. Serves 8. This just plain sounds GOOD!

After we get home, I’ll feature these with pictures.

Have a good day!

Comments

3 Responses to “Be back next week…”

  1. Arla on July 27th, 2008 10:01 am

    Hi Kay,
    Don’t you think we ought to see your kitchen sometime on a post? I’d love to see that bookshelf of cook books for one thing. You used to have a Coke theme. Is this still the case? Anyway, it seems fair for us to see the birthing room so to speak. :)

  2. Cordy on July 28th, 2008 12:26 pm

    Hi Kay – hope you are enjoying being away from routine for now! I was sooo sure you had a recipe on here for Zucchini bread. I looked under breads…..cannot find it…..am I dreaming??!!

  3. Kay on July 30th, 2008 7:57 am

    Arla – yeah, my kitchen is still Coca Cola, basically just wallhangings and valances and a few knick knacks. I might post a picture sometime.

    Cordy – There is no zucchini bread on this site… I’ve never ever made it, but I’ve eaten it and love it! The closest thing to it on this site would be banana bread.

Silk Chocolate Pie with Chocolate Curls

Posted on July 21, 2008
Filed Under Garnishing, How to…, Pies

Silk is right. I wonder whoever came up with that term for pie. But it fits this one. Smooth as silk. And creamy and light. Light as in not heavy, not light as in diet. Far from it!

My grandma always said that she likes to make pies better than she likes to eat them. That doesn’t mean that she doesn’t like pie! Sometimes while I’m making pie, I wonder if I have reached that same status now. Then, I eat a piece and decide I’m not quite there yet. BUT, this pie may have been an exception. Not that the pie itself was so fun to make. The fun was in the garnishing… chocolate curls.

silk1.jpg

This recipe is taken from my newest cookbook… Simply with Taste. I got it about a week ago. I love it! Sometime, I’ll tell you more about it and its nice features. This silk chocolate pie is the first recipe I tried from it.

Silk Chocolate Pie

Printable recipe

1 pkg. (4 oz) Bakers German sweet chocolate
2 Tbsp. milk
6 oz. cream cheese, softened
1/4 cup milk
3 Tbsp. sugar
4 cups whipped topping
2 baked or graham cracker pie crusts

Microwave the chocolate along with the 2 Tbsp milk on high at 20-30 second intervals until chocolate is melted, stirring frequently. Beat the cream cheese, sugar, and 1/4 cup milk until smooth; add the chocolate
silk3.jpg
and mix until well blended.
Refrigerate for 10 minutes. Fold in the whipped topping.
silk5.jpg

Spoon into the prepared crusts. May freeze if desired, or use within a day. Top with whipped topping and chocolate curls for garnish.
silk13.jpg

silk2.jpg

silk12.jpg

And now for the fun… How to Make Chocolate Curls

silk9.jpg

Melt about a 1/2 cup chocolate chips w about 1 Tbsp. of shortening.
silk7.jpg

Spread into a thin layer on the back of a metal cookie sheet.
silk8.jpg
Put in the freezer for 3 minutes. Take it out of the freezer. Immediately, take a flat tool of some sort (I used my Pampered Chef little square scraper that’s actually for cleaning stoneware, I use that little thing for alot of stuff!) and hold it at about 45 degrees and push down and across the baking sheet. The chocolate should curl right up.
silk10.jpg

silk11.jpg

If it just breaks, wait a minute or 2 to let the chocolate soften, then try again. If it doesn’t curl, put it back in the freezer for another minute or so. Depending how long it takes to curl all the chocolate, you may have to put it back in the freezer to harden up again before you’re done. Use a toothpick or utensil of some sort to move the rolls to a plate and put them in the refrigerator. When they’re good and hard again, you can put them in a plastic bag and store in the refrigerator. Or you can just put them on the pies like I did.

Comments

5 Responses to “Silk Chocolate Pie w Chocolate Curls”

  1. Shannon on July 22nd, 2008 7:52 am

    Oh those look good even if I’m not sure I would eat them. :)

  2. Rosalyn on July 22nd, 2008 10:00 am

    This is making me really hungry right now! think I’ll have to make it for supper! ????

  3. Michelle on July 22nd, 2008 11:13 am

    Looks delicious!

  4. Katrina on July 22nd, 2008 5:47 pm

    YUM!

  5. Barb on July 23rd, 2008 9:50 am

    This pie looks really good, and the chocolate curls look fun to try.
    I don’t think I have ever tasted or made silk pie so I will have to try this.

    P.S. I finally updated my blog.

Microwave Mac ‘n’ Cheese – Cooks in Training #3

Posted on July 18, 2008
Filed Under Cooks in Training, Main dishes

Whenever there’s a microwave recipe, I usually shy away from it. Here’s the reason. It’s because of my microwave… sounds like a good reason, huh? My microwave is a half-pint. I can’t fit a 9×13 pan in it and when my girls were babies on bottles, I always had to lay the 8-oz bottles down to warm up the milk because they wouldn’t fit in there standing up. The size isn’t the only reason. The other reason is that it takes SO long to cook stuff in it. We joke that the microwave has only one setting and that’s DEFROST. True, it does have only 1 setting, but it is a bit hotter than defrost. It takes forever to boil water and it literally is faster to throw a pan of water on the stove rather than do it in the microwave, like when I make finger jello. But the microwave works great for warming up serving-sized portions and thawing meat, but other than that, I don’t use it for general cooking. Oh, I guess I do cook half a bag of frozen veggies in there sometimes.

But, you can’t beat the deal we got on it. We got married about 12 years ago (in fact our 12th anniversary is in a couple weeks) and a little bit after we got married, we realized we need a microwave, so we found one at a pawn shop for $25 and it’s still the same one we use today. Not sure why it doesn’t give out! Here it is:
microwave.jpg

Anyway, having said all that, I decided to try a microwave dish. For the Cooks in Training foods, I don’t like to use the stove because my little cooks might burn themselves, even with adult supervision, but the microwave is fine. So, here you go, a food that kids like… and made by them.

mac-n-cheese1.jpg

Microwave Mac ‘n’ Cheese  …taken from the 2000 Quick Cooking cookbook

Printable recipe

2 cups uncooked elbow macaroni
2 cups hot water
1/3 cup butter or margarine
1/4 cup chopped onion (I had to do some fast talking to get that in there because I couldn’t sneak it in! I said we wouldn’t put in as much as it says, we only put in a couple tablespoons)
3/4 tsp. salt
1/4 tsp. pepper
1/4 tsp. ground mustard
1/3 cup flour
1 1/4 cups milk
8 oz. process American cheese, cubed (we used Velveeta)

mac-n-cheese2.jpg
Hmmmm, I may have to outlaw the aprons! We don’t really plan ahead and suddenly decide to cook or bake and away they dash for the aprons, putting them over whatever clothes they already have on! In this cooking session, Tiffany’s combo clashes even more than usual. :(

mac-n-cheese3.jpg

In a 2-qt microwave-safe dish, combine the first 7 ingredients. Cover and microwave on high for 3 1/2 minutes; stir. Cover and cook at 50% power for 4 minutes or until mixture comes to a boil, rotating a half turn once. (I didn’t rotate at all because my fashionable microwave has a turntable, and it still works.)

mac-n-cheese6.jpg

Combine flour and milk until smooth; stir into macaroni mixture.

mac-n-cheese4.jpg

mac-n-cheese5.jpg  Yeah, I was watching this process very closely, and it was one of my duller knives. Velveeta is soft… a butter knife may have even worked.

mac-n-cheese8.jpg

Add cheese. Cover and cook on high for 6-8 minutes or until the macaroni is tender and sauce is bubbly, rotating a half turn once and stirring every 3 minutes.  Yield: 4 servings.

mac-n-cheese9.jpg

mac-n-cheese10.jpg

This was really good, although I’ve tasted better made-from-scratch macaroni and cheese. I missed the buttered crumbs that are usually on top of macaroni and cheese. This definitely beats the stuff from a box though and got rave reviews by the girls. Plus, Lexi thinks it’s more fun to eat food that they made themselves.

Comments

3 Responses to “Microwave Mac ‘n’ Cheese – Cooks in Training #3”

  1. Shannon on July 18th, 2008 7:10 pm

    Hum, wonder what all I could get them to eat if they cooked it by themselves! :)

  2. Freida on July 18th, 2008 8:17 pm

    You need a new microwave! :)

    Tucker saw this and says- “MMMM, that looks yum. I wish I could taste it. ” My kids love mac and cheese. I’ll have to try this one.

  3. Barb on July 20th, 2008 7:26 pm

    I am going to try this for sure. My children love macaroni and cheese. I usually just make it as I go so it will be good to have a recipe to go by, and to be able to do it in the microwave is even better.

Mystery cookies, kids, weird fork, soup, recipe index… in other words, a misc post!

Posted on July 17, 2008
Filed Under Tidbits

I bought peanut butter chips for something and had half the bag left over. A few days later, I got a (another) baking urge and got the bag out of the cupboard and looked on the back for some ideas. On the back, was a recipe for chocolate cookies with peanut butter chips in them. So, I made them, with the intent of featuring them. After I was done, I was cleaning up, and never thought to save the empty bag with the recipe on it. So, into the trash it went. And I didn’t even think about it till a day or so later when I went to feature them. By then the trash was already taken out. And it would be rather anti-climatical to feature them without a recipe. So, if you ever are in the baking aisle at the store, these cookies would be worth your time. All you’d need to do is get a bag of Recees peanut butter chips and check the recipe on the back to make sure you’ve got all the ingredients. I don’t even remember the name of the recipe, but here is what the cookies looked like…
p-butter-chip-cookies1.jpg
They’re easy to make, soft, fudgy, and taste great!
p-butter-cookies2.jpg

Tiffany was having quite a time keeping everything on her lap here. I offered to take her doll, but no, she wanted to multi-task…
tiff-w-doll-book.jpg

She also finishes my coffee alot of mornings… she asks “Wome o’ hot?” If I say ‘warm’, she reaches for it and says, “Cn’I have it?” Goodbye coffee… which actually is using the term ‘coffee’ very loosely… my cup is full, but only about half of it is coffee, the other half is chocolate milk and some sugar.
coffee.jpg

And then we have a fork…
fork2.jpg
It just suddenly got like that and we don’t know when or how it happened. It seems like the whole tine would’ve bent instead of just the top part. It’s not bent down or up, just over. Weird!
fork1.jpg

Tomato soup: Once in awhile, we have a quick meal of grilled cheese sandwiches and tomato soup. I usually keep Campbell’s tomato soup on hand, but the last time I went to make it, I didn’t have any. So, I found a recipe and made some from scratch. It took considerably longer, but it was WAY better than the stuff from the can! So, now I guess I’ll have to weigh the pros and cons of time vs. taste every time I make that quick and easy meal. Do you always make tomato soup from scratch? I remember Mom making it from scratch when I was younger.

Recipe index: I don’t know if you noticed the Recipe Index link up at the top of the header. Slowly, but surely, I am getting all the recipes under their respective categories on that page. I just started it, so only a fraction of it is done, but I think when it’s done, it’ll make the site more user-friendly. You can use it awhile for the recipes that are there so far.

Have a good day! :)

Comments

9 Responses to “Mystery cookies, kids, weird fork, soup, recipe index… in other words, a misc post!”

  1. Amber on July 17th, 2008 8:55 am

    I made tomato soup once or twice from scratch and have a wonderful recipe that has little chunks of tomatoes in it. I hardly ever make soup in the summer because it’s so hot, here. Although i might need to, that’s when i have fresh tomatoes from the garden. :)

  2. Michelle on July 17th, 2008 9:30 am

    I usually can tomato soup when tomatos are in season. It’s really easy to do. And it’s so convenient when you’re in a hurry and don’t have time to get supper around. Just grab a can of soup off the shelf and add a little milk and heat it up. If you want the recipe let me know. This is making me hungry. I think Jadon and I will have this for lunch today along with Grilled Swiss Sandwich.

  3. Mary Faith on July 17th, 2008 10:39 am

    Tomato soup. That makes me hungry for some! I can it, too. Have an awesome recipe that I’ve used ever since teenage years when I made it for Mom. (Somehow, not sure how, I ended up being the “tomato soup canner”.) Several years ago I had trouble with the milk curdling and discovered that if I use evaporated milk, it never curdled PLUS it made it awesomely rich and wonderful. :) That’s how I make it ever since. “Acid-y” tomatoes or not. :)

  4. Jo on July 17th, 2008 11:41 am

    I canned tomato soup for the 1st time last year & we absolutely loved it. Should do a whole bunch more this year. I use evaporated milk, too, and add it right at the end of the heating time to keep it smooth & rich. And the best ingredient of all: a couple of tablespoons of browned butter, stirred in just before serving! It takes tomato soup from “good” to “scrumptious” (never mind the calories!) We used to always use tomato soup out of a can—but after you’ve had homemade, the canned stuff just doesn’t cut it anymore. :-(

  5. Jessica on July 17th, 2008 12:27 pm

    I seriously doctor the Campbell’s soup. Buttermilk or cream or sour cream and a dash of cayenne and lots of basil and a pnch of oregano and less liquid than they call for. Think I’ll go make lunch…
    I’ve never had homemade that was not curdled. ugh

  6. Michelle on July 17th, 2008 12:38 pm

    For what it’s worth… My mom always told me to add a pinch of baking soda to the soup when you’re heating it up. I think the reason being so the milk doesn’t curdle.

  7. Christy on July 17th, 2008 7:56 pm

    Yummy! Those are probably my favorite cookies!

  8. Gina on July 19th, 2008 12:03 pm

    The best soup is your aunt Eva’s recipe. Can it in the summer, and have quick soup handy any time. I never liked the tomatoe soup with milk, so this one is my favorite because it doesn’t have milk.

  9. Lois on July 31st, 2008 2:03 pm

    I love your Aunt Eve’s recipe too… wonder why, since I grew up with it. Mom always made it, and now it’s is our favorite fast meal. We even eat it for Sunday lunch!! I do not like the boughten stuff.

Butter Pecan Turtle Bars

Posted on July 15, 2008
Filed Under Cookies and bars

I can’t tell you how good these are! It’s good I don’t have a pan of these sitting around, what with trying to be on a diet and all. I’d be helpless.

This recipe came from the Tasty Favorites cookbook and the 2-page spread that they’re on is a dynamite 2 pages. Seriously, I was trying to choose between all 4 recipes. First, I weeded out the Chewy Peanut Butter Bars, I think because I wasn’t too sure about the coconut… they, by the way, are not similar to the Peanut Butter Dream Bars featured awhile ago. Next, I weeded out the Chocolate Crunch Bars, mostly because I had made something similar to those before, except the brownie part was a brownie mix in my other recipe instead of made from scratch like this one. I just could not choose between the Caramel Toffee Bars and the Butter Pecan Turtle Bars (which are actually called Butter Pecan Turtle Cookies in this cookbook, but I’d say they’re bars because they’re made in a pan then cut apart, not made individually like cookies). And finally the Turtle ones won. BUT, you will probably be seeing those other recipes sometime in the future.

Back to that Tasty Favorites cookbook, I love it! It’s got 227 pages of good solid down home cookin’ recipes in it. It’s compiled by the Pleasant Grove Mennonite Church in IN. If any of you readers are from there, you did a GREAT job compiling that cookbook! I know my cousin Nic goes to that church, but I don’t think I know anyone else there.

Anyway, back to the Turtle bars…

turtle7.jpg

Butter Pecan Turtle Bars

Printable recipe 

2 cups flour
1 cup brown sugar, packed
1/2 cup butter, softened
1 cup pecan pieces

Mix flour, sugar, and butter, and pat into a 9×13 pan.
turtle1.jpg
I wasn’t too sure about this crust when I was making it. It seemed too thick for as fine and crumbly as it was. But after it baked, it was perfectly firm and not crumbly at all.

Sprinkle pecan pieces over crust.
turtle2.jpg

Caramel Layer:
2/3 cup butter
1/2 cup brown sugar, packed
1 cup milk chocolate chips
In a 1-qt pan, combine butter and sugar, cook. When entire surface boils; boil 1/2 to 1 minute, stirring constantly. Pour over pecan crust.
turtle3.jpg
Anybody getting a caramel craving? I’m feeling a strong urge to make these bars again.

Bake at 350 on center rack for 18-22 minutes or until caramel is bubbly all over and crust is lightly browned.
turtle4.jpg

Sprinkle chocolate chips on and allow to melt slightly, swirl as they melt.
turtle5.jpg

turtle6.jpg

turtle8.jpg

I will not go out to my kitchen and make these right now. I will not go out to my kitchen and make these right now. I will not… somebody, please help me… I could use a bit of willpower here.

Comments

14 Responses to “Butter Pecan Turtle Bars”

  1. Traci on July 15th, 2008 10:00 pm

    I WILL go out to my kitchen and make these right now…..oh darn, tomorrow is WEIGH IN WEDESDAY….When I get a few moments, I’m sure going to blog about your site….I LOVE the pictures!!!

  2. Barb on July 16th, 2008 4:44 am

    I WILL…

  3. Lisa on July 16th, 2008 4:49 am

    My husband LOVES Turtles. I have to make these for him. You may see this recipe turn up on my blog soon!!

    Are they the same consistency of a store bought Turtle?

  4. Shannon on July 16th, 2008 6:41 am

    My mouth is watering!!!!! I gonna make these today!!!! I love turtles so I’ll even put the choc on top. :) Oh, was I suppose to be yelling at you not to make them??? :)

  5. Rene on July 16th, 2008 8:13 am

    I just have to make these! I have 2 events that call for a dessert this week (birthday of a co-worker and our church ladies night out). Who knows I might even make them twice!!

  6. Kay on July 16th, 2008 8:48 am

    Lisa, I’m not even sure what store bought turtles are like. Do you find them in the candy section?

    Rene, you make them once, you’ll make them twice. :) These got compliments at the picnic that I took them to.

  7. Lisa on July 16th, 2008 1:42 pm

    Kay – yes they are in the candy section. They are round and have the pecans kinda sticking out of them. Very popular at Christmas time. I believe the box is red striped. My husband wants a box every time he sees them. I think I will have to make these for him this weekend!

  8. Liz on July 16th, 2008 3:59 pm

    You are going to have to start telling me what dishes are yours at social functions. Once I see them on here I wish I would have tried them that way I know if I like them or not. I heard someone make some comments about those bars but never got around to try them. I love turtles so I am sure I would have liked them.

  9. Roxanna on July 16th, 2008 9:07 pm

    I made these today and they are great! Barb ate some-actually, I think she ate half the pan! :)

  10. Karen on July 16th, 2008 9:56 pm

    These look fabulous!! I want one RIGHT now!!

  11. Barb on July 17th, 2008 9:02 am

    No, I did not eat half the pan, but they were WONDERFUL! I am going to make them for our family reunion this weekend.

  12. Traci on July 18th, 2008 2:13 pm

    Ok, my dd read the recipe and we baked the CRUST for 18 minutes BEFORE putting on the carmel…so, we didn’t bake the caramel….not really sure if it turned out like it was supposed to do, but they were still awesome. My caramel didn’t seem to go as far as yours….would you know why? Thanks for the recipe.

  13. Kay on July 18th, 2008 2:54 pm

    Traci, glad you made them. :) I’m not sure about the caramel… I made exactly how much the recipe said and had a 9×13 pan. You probably did the same. When I poured it over the crust, I tried to cover the whole crust while pouring so I wouldn’t have to spread it to the parts I missed. I still had to close in little gaps by spreading it and the caramel layer isn’t very deep at all… the chopped nuts still stuck out above it.

  14. Rene on July 20th, 2008 7:57 pm

    Ok…I just pulled these out of the oven and they smell amazing!! It was near 100 today so I really debated with myself about turning on the oven. I’ll be back to let you know how they turned out. I’m glad you mentioned the crust being so crumbly at first because I was worried I didn’t put in enough butter.

Creamy Sweet & Sour Cole Slaw – Out of My Comfort Zone #6

Posted on July 14, 2008
Filed Under Out of My Comfort Zone, Salads

I’m going to throw in another ‘Out of my comfort zone cooking’ post. Because that’s exactly what it was. I didn’t know a thing about cole slaw, except that I like to eat it. I don’t remember ever buying cabbage in my life. I do, however, remember a science experiment in grade school involving purple cabbage, but I forget what it was all about or I’d tell you. It must not have made an impression on me back then.

I was walking thro’ the grocery store the other day and beside the bagged ready-made lettuce salads in the produce section was shredded cabbage. I suddenly got hungry for cole slaw. Instead of going over to the deli counter and ordering a small container of cole slaw, I decided to try homemade cole slaw, made by me. So, I grabbed a bag of the shredded cabbage.

We had a church picnic last night at Dan’s (our pastor’s) house. There were going to be burgers and hot dogs and from there we were supposed to bring a salad and dessert. I thought of cole slaw for the salad (and what I took for dessert will be featured in the next post). The nice thing about a potluck where there are 50 dishes to choose from is that if something flops, there are enough other dishes to pick from. The other nice thing about a potluck is that if something flops, nobody knows who made it. Unless they ask around. So, I made cole slaw.

I learned something about cole slaw. Saturday evening, I was chatting online with my aunt and I asked her if I should make the cole slaw now so the flavors can blend together or if it would just get mushy and if it would be better to wait till Sunday afternoon. She said she doesn’t know (she must not make cole slaw very often either :) ), and said ‘why do today what you can put off till tomorrow’. So, me, being an expert at procrastinating, made it Sunday afternoon, about 4 hours before the picnic. It looked perfect. I covered the bowl with plastic wrap and put it in the fridge and went to take a nap. 3 1/2 hours later, I got it out of the fridge to go to the picnic and it looked totally different! It had gotten runny and the cabbage was softer than it had been! Must’ve been from the sugar in it. I was so glad I hadn’t made it Saturday evening, because it was about perfect at the picnic. It may have gotten too mushy made too far ahead of time.

Another thing I learned is that it is possible for me to make good coleslaw and another thing I learned is that it’s SO easy and quick to make! This recipe is taken from the Famous Daves Backroads and Sidestreets cookbook.

Creamy Sweet & Sour Cole Slaw

Printable recipe 

10 cups chopped shredded red and green cabbage
1/4 cup grated carrot
2 cups Miracle whip
1/2 cup sugar
1 Tbsp. prepared horseradish (I’d recommend not putting this much in unless you’re making it for a Memphis-style sandwich or really really like horseradish ???? )
1 Tbsp. dry mustard
1 tsp. white pepper
1/2 tsp. salt
1/4 tsp. garlic powder
1/4 tsp. celery seeds

Toss the cabbage and carrot in a bowl. I used a bag of shredded cabbage and carrots. The bag said there is 7 1/2 cups in it, so I just didn’t put all the dressing on.
cole-slaw1.jpg

Mix salad dressing, sugar, horseradish, dry mustard, white pepper, salt, garlic powder, and celery seeds in a bowl. Add to cabbage mixture and mix well.
cole-slaw2.jpg

Chill, covered, until serving time. Yield: 6 to 8 servings.

Right after mixing…
cole-slaw3.jpg

3 1/2 hours later…
cole-slaw4.jpg
That coloring difference is from different lighting, but it did actually get lighter in color too. Actually, I guess it does look more like real cole slaw in this picture. Maybe all cole slaw recipes do that. As far as the taste of this, it was great! It will be my cole slaw recipe, but I might try others now and then too. I’m just so impressed how easy it was and how flavorful it was. I’d even make it for company. Or for a summer picnic. Or just for anyhow.

Comments

3 Responses to “Creamy Sweet & Sour Cole Slaw – Out of My Comfort Zone #6”

  1. Shannon on July 15th, 2008 7:09 am

    I love cole slaw. Need to try this cause it looks easy enough. (The bag of cabbage appeals to me) :)

  2. Lisa on July 15th, 2008 7:30 am

    This past 4th of July was the first time I made coleslaw too. I went with a Blue Cheese Coleslaw. I got the recipe from a friend, and had just never gotten around to trying it. It turned out great and there wasn’t much left of it after the party. I highly recommend giving the Blue Cheese recipe a try too! It was really good.

  3. Mary Faith on July 15th, 2008 10:06 am

    Coleslaw is definitely better (in my opinion anyway) made several hours ahead of time. This makes me hungry for coleslaw again! I got a recipe years ago that tastes very much like the KFC coleslaw. I’ll have to try this one. It looks very good, too!

Smiling Sugar Cookies – Cooks in Training #2

Posted on July 11, 2008
Filed Under Cookies and bars, Cooks in Training

I’m going to try to do this series without talking every time about big messes and me using a rag every 2 minutes before the mess takes over my kitchen. Hmmmm… now, I’m sitting here with nothing to say if I can’t talk about that…

Just kidding. We had fun. And now Lexi can finally stop sharply inhaling and saying, “Mom, let’s make these sometime!” whenever she sees these cookies in the 2004 Quick Cooking cookbook.

Smiling Sugar Cookies

Printable recipe

1/2 cup butter (no substitutes), softened
1/2 cup sugar
1/2 cup packed brown sugar
1 egg
1/3 cup milk
2 tsp. vanilla extract
3 cups flour
2 tsp. cream of tartar
1 tsp. baking soda
1/2 tsp. salt
About 24 popsicle sticks
1 cup vanilla frosting
Food coloring
Assorted small candies (we used M&Ms)

smiling11.jpg

smiling12.jpg

Cream the butter and sugars. Beat in egg, milk, and vanilla. Combine flour, cream of tartar, baking soda, and salt; gradually add to creamed mixture. Roll the dough into 1 1/2″ balls.
smiling1.jpg

Insert stick into the center of each. Place 2″ apart on lightly greased baking sheets; flatten slightly.
smiling2.jpg

Bake at 375 for 8-10 minutes or until lightly browned.
smiling3.jpg
That baking time is a problem for 2 little energetic cooks. Tiffany and I made frosting and Tiffany licked the beater while Lexi wrote stuff with popsicle sticks to pass the time. And they still kept peeking in the oven and asking if the cookies were almost done.

Remove to wire racks to cool. Divide frosting between bowls and tint them to desired colors. Put each frosting in a plastic bag and snip off a small corner of the bag. Pipe hair and mouths onto cookies. Use a small dab of frosting to attach small candies for noses and eyes.
smiling4.jpg

smiling5.jpg Ah, I just love that chubby little hand with a decorating bag. She actually didn’t do too bad at decorating for a 2-yr-old.

smiling6.jpg

Let dry for at least 30 minutes. Yield: about 2 dozen.

And here’s the finished product…
smiling8.jpg They would’ve been kinda cute poked into something and standing up, but I couldn’t think of anything around here that would work for that. 3 were eaten plain, we got 19 cookies out of the batch.

Here’s the smiley section. Alot of the food I take pictures of (if it’s for a meal) gets photographed while everyone is coming to the table or sitting down already and when I take more than 1 picture, there are jokes like, “Wasn’t it smiling the first time?” With these, the joke was, “Oh, now the food actually does have to smile!”
smiling9.jpg Yes, those are all smileys… use your imagination. Tiffany did that one by herself with the red mohawk. And the one with the yellow hair and green eyes has a beard… Lexi’s creation (before we even started decorating, she said she’s gonna make one with a beard, don’t know why she thought of that, she’s rarely around anyone with a beard). I made only one of these and I certainly hope you can tell which one. :)
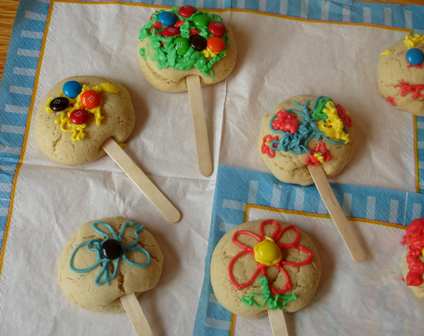
Soon, Lexi got bored with smiley faces, so she switched to flowers and a butterfly…
smiling10.jpg

smiling7.jpg

Now, about making these with your kids… I just went back to check the time on my camera. The very first picture (dumping ingredients into the bowl) was taken at 2:54 p.m. The last picture taken (them sitting there holding cookies) was taken at 4:30 p.m. 1 1/2 hours… not alot of time. Skip storytime and spend 1 hour less on the computer someday (ouch, less computer time? that hurt. Let’s switch that one to ‘skip scrubbing the kitchen floor and weed the flowerbed some other day’). They will have a ball of fun and it’ll make memories for them. And hopefully not too bad of nightmares for you.

Oh, and by the way, this is actually a good sugar cookie recipe if you just want to make regular sugar cookies sometime. I don’t like sugar cookies because they’re always so dry and tasteless (that’s my opinion, I live with a couple of people who really like them), but these are better than most of the sugar cookies I’ve had.

Comments

3 Responses to “Smiling Sugar Cookies – Cooks in Training #2”

  1. Katrina on July 11th, 2008 9:53 pm

    Cute and how fun. I REALLY need to do this kind of thing with my kids more. (4 boys) Thanks for the reminder.

  2. Kelsie Hoover on July 12th, 2008 5:08 pm

    I might try these at out next girl’s club…I’m in charge of craft for the younger half (ages 4 or so-10)…it usually ends up being 15 girls. I will definetly have the cookies made before hand…hopefully we don’t mess up the entire gym! thanks for the idea.

  3. Suzanne on December 28th, 2008 6:15 pm

    I really love the fact you get your kids involved with the cooking. I find it really sad nowadays that girls my age (25) only know how to pull a box of mac n cheese out of the cabinet and that’s what they know how to “cook.” I think it is great your kids are learning the basics and more of how to cook!

Cheesy Chicken Quesadillas, only 4 ingredients!

Posted on July 9, 2008
Filed Under Chicken and Turkey, Easy meals, Main dishes

The title actually sorta gives away what most of the ingredients are! Cheese (actually a can of cheese soup), chicken, and if it’s quesadillas it’s gotta have tortillas, and water. I got this recipe off of the soup can. Southwest Style Pepper Jack soup.
quesadillas2.jpg
It was kind of hard to find… have you ever stared and stared at shelves, just knowing it was there, but you couldn’t lay your eyes on it? I did that with this. I did it in the jello section looking for watermelon gelatin too just lately, but that’s for another time and another post. There is a difference though… with the watermelon gelatin, I was only hoping it was there, with the soup, I knew it was there.

The reason I knew it was there is because my sister-in-law Liz makes these quesadillas and she said Marketplace has the soup, but Walmart doesn’t. After I finally found the soup, I immediately looked on the label to see if the recipe was there and sure enough, it was. Then, I wondered HOW, out of all the soup can labels there, Liz found this soup and tried this recipe. And it was a hit with the family! Wonder how much more I’m missing out on by not trying other soup can label recipes.

There are 4 more recipes on the back (you have to cut the paper off of the can on the specified line and flip the paper over to see them, this is not something you should be doing in the store before purchasing). I think it’s the manufacturer’s trick to getting you to buy more… you can’t see the other recipes till you get home and cut the paper off of the empty can before throwing it away. Then some of the recipes grab you and “Southwest Style Pepper Jack soup” goes right back on your shopping list. The other recipes are: Nachos Grande, Cheesy Pepper Jack Tacos, Mexican Meatloaf, and Cheesy Southwest Potatoes. I’ll bet some of those would be good too. Especially the nachos, meatloaf, and potatoes. They all have 5-7 ingredients. The reason you don’t need many ingredients is because this soup has got LOTS of flavor and kick.

quesadillas1.jpg

Cheesy Chicken Quesadillas

Printable recipe

1 lb. boneless chicken breast halves, cubed
1 can Campbell’s Southwest Style Pepper Jack soup
1/4 cup water
8 flour tortillas (8″), warmed (I used 9″ tortillas, and only 6 of them)

Preheat oven to 325. Cook chicken in nonstick skillet until done and juices evaporate, stirring often. Add soup and water and heat through. Shannon grilled the chicken on the grill while I mixed and heated the soup and water. When the chicken was done, I chunked it up and mixed it into the soup.
quesadillas5.jpg

Spoon about 1/3 cup chicken mixture on half of each tortilla to within 1/2″ of the edge. Moisten edge with water.
quesadillas4.jpg

Fold over and seal. Place on 2 baking sheets (or 1, in this case). Bake 5 min. or until hot. I baked them for 7-8 minutes, until I saw a bit of browning.
quesadillas3.jpg

Cut into wedges and serve with salsa. And/or sour cream. I ate mine with sour cream. It was spicy enough without the salsa.
quesadillas6.jpg

Just delicious for something so simple! If you have a full-time job and need to come home and make supper, this would be a good thing for the main dish! It takes about 20 minutes from start to finish. For a quick idea of something to serve with it, how about tortilla chips and applesauce. Or peanut butter pie (I’m so hungry for peanut butter pie!). Or ice cream. Or something else cold and creamy to cool the mouth. Tiffany’s take on the quesadillas after a couple bites was, “I don’t wike da spicy.”

Comments

10 Responses to “Cheesy Chicken Quesadillas, only 4 ingredients!”

  1. Esther on July 10th, 2008 7:54 am

    yum!! They look good. We have a quesdilla maker that makes making quesdillas fun but i was wondering is this mixture kinda runny from the pic it looked like it was. Our thing closes tightly and i was wondering if i try if everything will get squished out? Keep the good recepies coming! I love your site. I finally found doughnut mix after lots of searching now i can finally make those raspberry things.

  2. Monica on July 10th, 2008 9:19 am

    MMMM!! They sound yummy!! I’ll have to try them.

  3. Shannon on July 10th, 2008 3:32 pm

    Sounds good. My girls would say the same things Tiffany did. Nothing spicy here!!

  4. Kay on July 11th, 2008 7:54 pm

    Esther, wow, I’d be making quesadillas all the time if I had a quesadilla maker. :) Yeah, the filling is kind of runny, but there’s enough chicken in it to keep it from running out, at least when they’re made this way. Not sure what it would do in a quesadilla maker. Might work to put less water in the soup.

  5. Liz on July 12th, 2008 4:15 pm

    Just FYI I didn’t find that recipe by myself. I think my mom got if off one of those adds in Readers Digest that is advertising for Campbells. She served it to us and that is how I found out about it. I sometimes think the same thing of how many recipes are out there that I don’t even see because I am not looking at recipes on the containers.

  6. anxiety on January 19th, 2009 6:01 am

    I just tried your recipe today and wanted to say thank you, because it was really tasty! :)

  7. Jennifer on May 25th, 2010 6:10 am

    I tried this last night and it was yummy! I substituted salsa for the water and added onions to it. We ate them up! Thanks!!!

  8. penguinracing on August 7th, 2010 2:13 pm

    I loved this receipe, and my step kids actually do too. I found the receipe on the label of the soup can. Too bad can’t find it anymore, no substitue found yet

  9. P.J. Scott on April 26th, 2014 12:11 pm

    I’ve spent the last 2 weeks searching for Campbell’s southwest style pepper jack soup and canops and Wegman’s’t find it anywhere. I live in Western NY (Niagara County) and have looked at Tops and Wegmans. Anybody know how I can locate this flavor?

  10. Cassandra on October 14th, 2014 7:27 pm

    I have looked for the last 2 years for this soup and can’t find it anywhere. It looks like Campbell’s isn’t making it anymore. If anyone finds a substitute flavoring, please let me know. This was so good and so quick and easy to make!! Miss it!

July 4th follow-up post…

Posted on July 7, 2008
Filed Under For special occassions, Holiday cooking

First off, about the USA jello. I used a jello mold that’s the shape of the US.
jello-mold1.jpg

jello-mold2.jpg
The mold has teeny shallow lines between each state, so to get the different colors effect, I mixed up the blue and red jello, then used a medicine dropper to drop it into the different sections. (I don’t keep a medicine dropper around, I took a bottle of infant Tylenol out of the medicine cabinet, took out the dropper, washed it really good with hot water, used it to color the states, washed it good again, and put it back in the bottle.) In some states, there’s a mixture of both blue and pink. That happened when the dropper dropped before I was over the state I wanted or when I got too much in the state and it went over the little ‘walls’ between each state. It was a little tedious, but I thought it would look a little blah with just all one color on top. After I got all the states filled in, I put 1/2 of the white mixture in, then layered red, white, and blue from there.

To cut the jello, I followed the lines and cut it apart into states (except some of the New England states!). It was kinda nice because then you could pick your size. Lexi was declaring that she was gonna get Florida and that she’d get Wisconsin out for Tiffany. But when I finally gave them the go-ahead to dig in, she saw the size of Texas and changed her mind about Florida. Then, Tiffany wanted the biggest one too, so to save a fight, we suggested California and she was happy with that. They each ate about 1/4 of their piece, then said it was too big. Sigh. I was thinking, “So, then WHY did you guys have to get the biggest pieces?!” but instead I said, “Just wrap them up in Saran wrap and put them in the fridge. You can finish them later.”
jello-texas.jpg

jello-california.jpg ——————————————————————————————————————————————————————————————————————————————————————————————————————————————————————————————————————————————————————————————————————————————————————————————————————

We got together with some friends Friday night and grilled burgers and hot dogs before the fireworks. I made a fruit pizza for dessert. It’s this recipe, but I cut back on the amounts because it wasn’t gonna fill up the whole pan since it was shaped into a rectangle, a flag. Oh, it was so good. I didn’t count how many pieces I ate. Fruit pizza is one thing I crave, especially in the summer.
flag-fruit-pizza1.jpg

flag-fruit-pizza2.jpg

I have a few fireworks pictures, but other than that, nothing. I was lounging in my lawnchair thinking, ‘I should go get my camera and take a picture of Shannon grilling and of the kids playing and of the adults talking and capture the party atmosphere around us’ and then as I kept lounging, I lowered my standards and started thinking, “I should at least get my camera and take 4 pictures because that would make a pageful for when I scrapbook this event’, but I just kept sitting there, living the moment instead of capturing it. I actually don’t like taking pictures at social events. BUT the only thing I hate worse than taking pictures is not having pictures, so that’s what drives me to take them. Except for this time.

And with that I leave you with a little fireworks show…

fireworks1.jpg

fireworks2.jpg

fireworks4.jpg

fireworks5.jpg

Comments

7 Responses to “July 4th follow-up post…”

  1. Rene on July 7th, 2008 11:22 am

    Kay — Thanks for the explanation! I was wondering how you did the states!! Great fireworks pics!!

  2. Lisa on July 7th, 2008 11:33 am

    I bet my state would’nt fill anyone up! (Rhode Island!)

  3. Shannon on July 7th, 2008 11:34 am

    To cool. Not sure I’d have the patience to fill all the states in. :) I’d be very hungry for fruit pizza right now too. Might have to make some.

  4. Cordy on July 7th, 2008 12:29 pm

    That fruit pizza almost drives me to my kitchen right now. Oh my, that looks wonderful! I appreciate this blessing on here you give to us so very much – THANK YOU! I did wonder how you keep the bananas nice? Do you dip them in lemon juice? P.S. When Bernice drops you a note…..must tell you she also is a wonderful cook….we’ve had brunches at her place…often celebrating someone’s birthday. She loves to give everything an extra special touch. It is not only a wonderful experince with friends but she gives the whole time we’re together a meaningful start as she lifts our time together to our Lord.
    Isn’t the family of God more than precious!!

  5. Berneice on July 7th, 2008 12:35 pm

    Thanks for clueing us in on your USA finger jello. It looks cloo, but I doubt I will ever try it. Not nearly enough patience on this end :( Fruit pizza looks refreshing too.

  6. Kay on July 7th, 2008 1:08 pm

    Cordy, to keep the bananas nice, I glazed them right away as soon as I put a row of them on. The glaze keeps them from browning for awhile. I made it in the afternoon and the next morning, the bananas on the leftovers were just getting a hint of brown, not too bad, but if you’d make it a day ahead, you’d want to save the bananas to put on later for the freshest look.

    Btw, the ’stars’ on top of the blueberries are just little dollops of Cool Whip.

  7. Denise on July 8th, 2008 8:31 am

    I love fruit pizza, and that flag is just so neat. Also thanks for explaining the USA jello. I was wondering how you did it. With you showing all these neat things it makes me want to thow a July 4th party next year.

It’s Independence Day!

Posted on July 3, 2008
Filed Under For special occassions, Grilling, Holiday cooking

4th-banner.jpg

How are you spending the holiday? …Going out on the lake? …Firing up the grill? …Getting together with family and friends? …Going out to watch fireworks? I don’t specifically remember not watching fireworks any year, but I’m sure there was a year or two missed in there somewhere. When we lived in town, we could see them from our house. Fireworks is what I think of first when I think ‘4th of July’, then I think of my oldest brother (Happy Birthday, Tom!), then I think of grilling and burgers and brats. I know, with having a cooking blog, you’d think grilling and all would be first on my list.

Speaking of grilling, I’m sure we’ll be doing some. Here are some of our favorites:

Hot dogs, our favorites are Ball Park beef franks…
4th-ball-park-franks.jpg

Brats, it’s gotta be Johnsonville…
4th-brat.jpg

Cheeseburger, this has got to go on the menu this weekend! I’ll have to talk to the guy in charge of grilling around here…
4th-burger.jpg

New York Strip Steak, and please don’t forget the sauteed mushrooms! Mmmmm…4th-new-york-strip.jpg

Rib-Eye Steak done medium, this was melt-in-your-mouth tender, didn’t even need A1 sauce…4th-rib-eye-medium.jpg

Shrimp and mushrooms grilled on skewers, a great appetizer…
4th-shrimp-mushroom-kabobs.jpg

Pork chop sandwich, last but definitely not least! This is the thing out of this whole list that we grill the most. Yup, even more than throwing hot dogs and brats on the grill. Maybe next time we make them, I can remember to get a better picture! They’re easy, at least for me, because all I do is set the table…
4th-pork-chop.jpg

And then I couldn’t let the holiday go by without playing around with my beloved for-any-occassion layered finger jello! It’s a nice side benefit that it tastes good, too.
4th-stars.jpg
Instead of using a 9×13 pan for a batch, I used a large cookie sheet with sides so it wouldn’t get so thick. The red and blue layers each have 2 batches of jello in them and the white layer is all of the white mixture (as opposed to dividing it in thirds). When I cut it into little shapes, it looks better if it’s not so thick.

4th-stars-flipped.jpg And then you can play around with it a little more and makes squares and cut a star out of the middle, flip it over, and put it back into the hole.
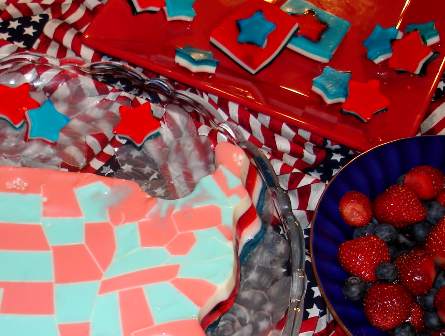
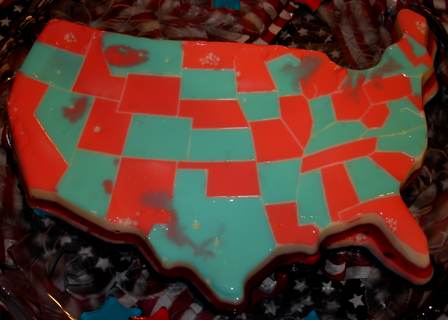
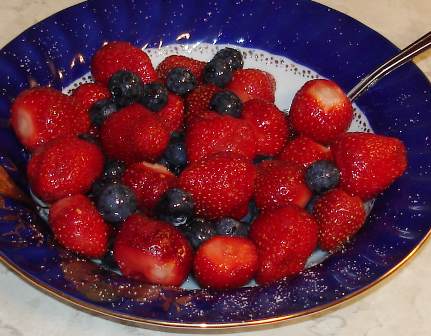
4th-red-white-blue.jpg

And then you can play around with it a little more and make the United States of America…
4th-usa.jpg

And, being in the spirit of things, this is what I was snacking on just now as I wrote this post…
4th-fruit.jpg
Red strawberries, white sugar, and blue blueberries.

Have a safe and happy holiday!

Comments

10 Responses to “It’s Independence Day!”

  1. Shannon on July 4th, 2008 7:11 am

    Oh the food looks good. But then it always does here. :) I love that jello, looks too cool in the stars and the states.

  2. Jo on July 4th, 2008 8:46 am

    Did you SERIOUSLY do that map of the U.S. in jello????? I am in complete awe. May I have your autograph? ;-)
    I was going to do layered jello like that to send w/ my husband to OH for their big doin’s tonight…but changed my mind & did a layered jello cake instead. Red on the bottom, blue on the top, iced w/ the old stand-by Cool Whip. So simple…just hope it tastes good! (since I won’t be there to check) Happy 4th!

  3. Marilyn on July 4th, 2008 3:11 pm

    love the finger jello, esp the stars, those are so cool! my kids would love them. Happy 4th of July to you too! :-)

  4. Mary Faith on July 4th, 2008 3:32 pm

    I decided to google “red, white,and blue finger jello” to find a recipe and guess what? The very first site that came up was this one. LOL It took me back to the recipe you had on here. I had forgotten you had the recipe before. So cool. :)

  5. Kay on July 4th, 2008 5:01 pm

    Mary Faith, sorry I didn’t get here to answer your question! Glad you found the answer in the meantime! :) Hope it turns out good for you!

    To get to the recipe from this post, the words “layered finger jello” in bold red up there between the pork chop and the finger jello pictures is a link to the recipe. Also, the names of some of those grilling pictures are in red… those are also links to their respective recipes.

  6. stephanie on July 5th, 2008 7:04 am

    Whoa lady! The United States? How in the world did you do that?
    Love the stars and the whole Ble, Red and White theme who were the lucky recipients of the gourmet atmosphere?

  7. Jan on July 5th, 2008 7:42 am

    Map of the US???I’m in awe. I’m not artistic so I’m always wowed by those who are. The stars are cute, too.
    I also love the photos of the little cooks in the cherry pie post. For some reason, Tiffany just cracks me up! And Lexi looks so grown up in the apron.

  8. Berneice on July 5th, 2008 8:46 pm

    Like the rest. I stand (sorry,I sit) amazed! Did you really do that map? How in the world?? Happy belated 4th

  9. Katie Mast on July 6th, 2008 7:38 am

    Happy July 4th to you. That Map is incrediable. I have a mold for that as well, but never did it like that. How did you do that? I love the star shape idea and the sq. how cool is that! I am making your meat loaf recipe for lunch today, it has become one of our favorites as well.

  10. Mary Faith on July 7th, 2008 12:34 pm

    I did the star shaped finger jello for the weekend. Took it to Cheyenne on Sat. and then again to the carry in yesterday. (I made how many batches on Fri. to make it enough!) It was definitely a big hit both places. I took some of the “scraps” along to Cheyenne and the children ate those quite freely. :) All that’s left here is a few more “scraps”.