Recipes and Cooking Ideas for Homemakers and Amateur Cooks
 

Cream Cheese Chocolate Cupcakes

Cream Cheese Chocolate Cupcakes

Posted on May 15, 2014 
Filed Under Cakes

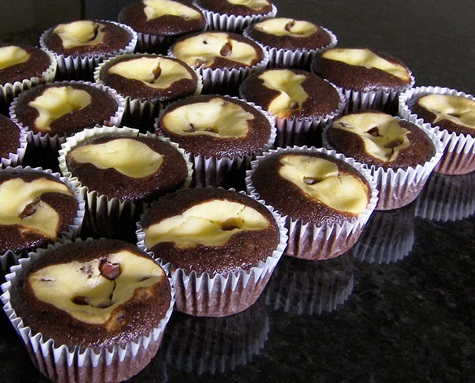
You know how actions speak louder than words? These very cupcakes pictured here are a case in point of that. I made these one morning and what do you know, some utility guys came to replace the telephone pole out in our front lawn that afternoon. After they were here for awhile, I put a bunch of cupcakes on a glass platter, locked the dog in the garage, and took the cupcakes and a little table out, offered them as I was setting them on the table, and said I’ll just leave them out here, eat as many as you want.

There were 3 guys on the crew.
They ate almost all of them.
Or maybe they took some for the road.
Anyway, that has got to be one of my favorite things. Making a lot of something and seeing it get inhaled.

cream cheese cupcakes

They also did rave about them when they brought the platter and table to the door before they left. So, there were words, too. But the actions spoke louder.

Cream Cheese Chocolate Chip Cupcakes …from the Derstine cookbook

3 cups flour
2 cups sugar
2 tsp. soda
1 tsp. salt
1/2 cup cocoa
2 cups water
1 cup oil
2 Tbsp. vinegar
2 tsp. vanilla
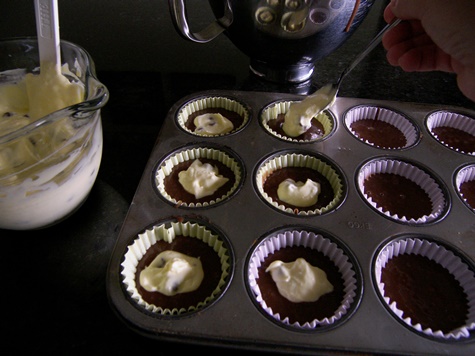
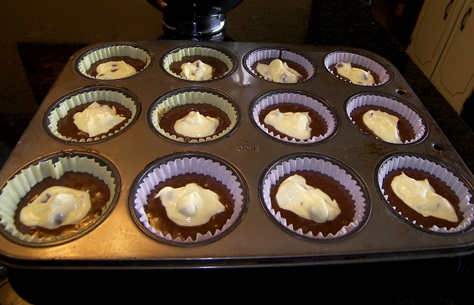
Combine all dry ingredients in a bowl. Add water, oil, vinegar, and vanilla. Mix together until smooth. Here’s a tip for if you’re in a hurry… use a cake mix instead of mixing the cupcake batter from scratch. Fill cupcake papers 1/2 full. I made a note that says I used my biggest scoop for the cake part (which would be the Pampered Chef large scoop) and a heaping regular spoon for the filling. Put 1 rounded teaspoonful of filling on top of each one. Bake at 350 for 22 minutes. The recipe says 20-25 min, but 22 min was perfect for my oven. Makes 34 cupcakes.

FILLING:
1 8oz pkg cream cheese
1 egg
Pinch of salt
1/3 cup sugar
1 cup chocolate chips
Beat cream cheese, egg, sugar, and salt until smooth. Stir in chocolate chips.

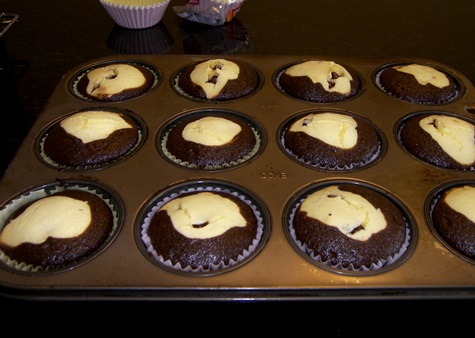
cream cheese cupcakes1

You don’t need to drop the filling in all neat and stuff. Let them have some character. Imperfect perfection.

cream cheese cupcakes2

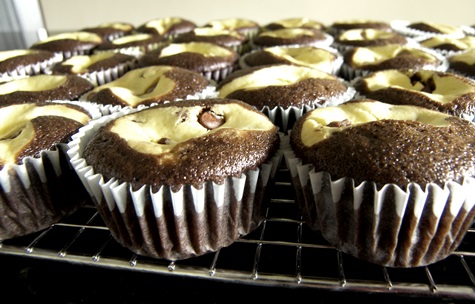
cream cheese cupcakes3
They come out of the oven all puffed up like this. ^^^

And then as they cool, they kind of go down a bit in the middle.
cream cheese chocolate cupcakes

And last, but not least, I have a little note by my recipe that says “165 calories each if makes 34.” I’m pretty sure I must’ve figured that out for a friend. Because why would I be eating cupcakes if I was on a diet?!

Comments

6 Responses to “Cream Cheese Chocolate Cupcakes”

  1. Shannon on May 15th, 2014 10:12 pm

    You know, for being a “non chocolate” person, I will eat one of these, if I must. :) I haven’t ever made them as cupcakes tho, I always pour a choc cake batter into a cookie sheet and the swirl the cream cheese thru it. They are much daintier this way. :)

  2. Kay on May 15th, 2014 10:16 pm

    Wow, good for you, Shannon, eating a CHOCOLATE something! :) I like your cookie sheet tip for a time saver. Going to try that sometime!

  3. Freida on May 15th, 2014 11:35 pm

    Oh la la. I love love love these cupcakes. They were my all-time favorite growing up and they still are. I don’t make them often because they are not safe in this house. Or maybe I should say I am not safe with them in the house. ????

  4. Kay on May 16th, 2014 1:02 pm

    Yeah, Freida, me too… not safe with them in the house! That cream cheese chocolate chip center just continuously calls to me!

  5. Mom on May 25th, 2014 4:35 pm

    These speak “Pennsylvania” all the way through the filling! Don’t PA cooks always have some kind of stuffing/swirl to their dishes? Anyway, it takes me back to our church’s first meals together with the PA influence. And good for you to serve to working men! They always perform better when you feed them – I periodically give to our mailman, and sometimes he brings the mail right to our door!

  6. Kay on May 26th, 2014 11:38 am

    Mom, whatever language these cupcakes speak, I am quite fluent in! :)

American Girl Doll Birthday Cake

Posted on April 11, 2014
Filed Under Birthday cakes, Cakes

Tiffany turned 8 last week. Usually, the girls pick what they want for a cake, but this year Tiffany said, “I don’t want to pick my cake this year, I want you to surprise me. My only thing is I’d like something that has to do with princess-y”.

So, the morning of her birthday, Tiffany left for school and I got busy baking.

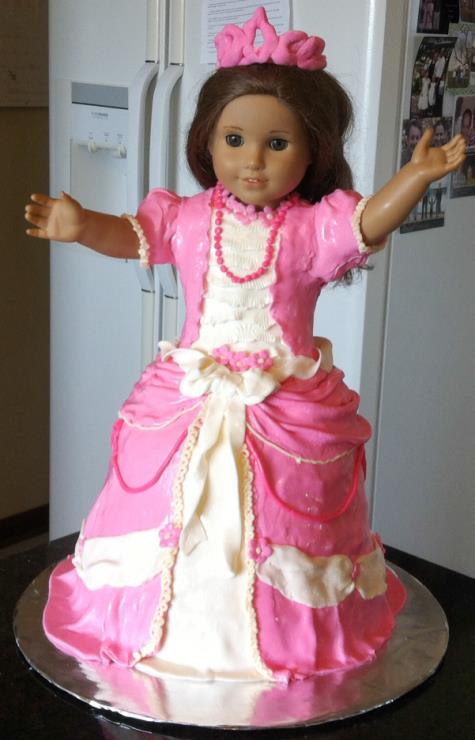
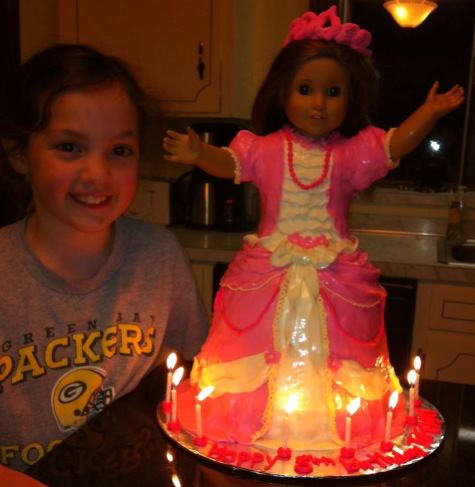
This is what was waiting for her when she got home.

american girl doll cake4

Yes, I did put her American Girl doll Rebecca inside a cake. Yes, I know, it was a little crazy.
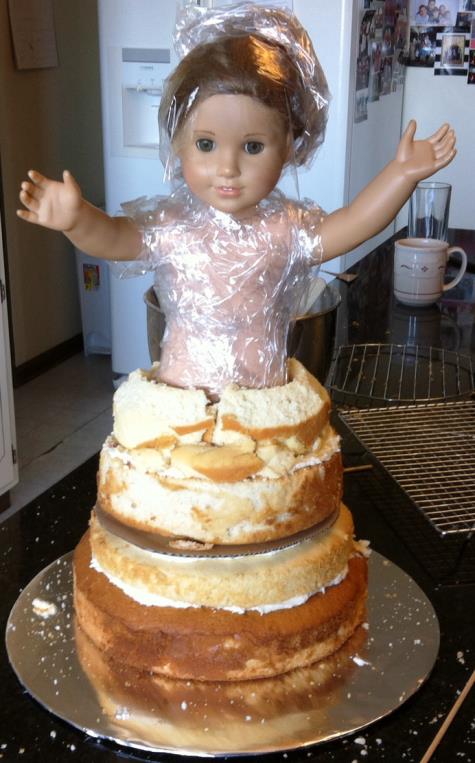
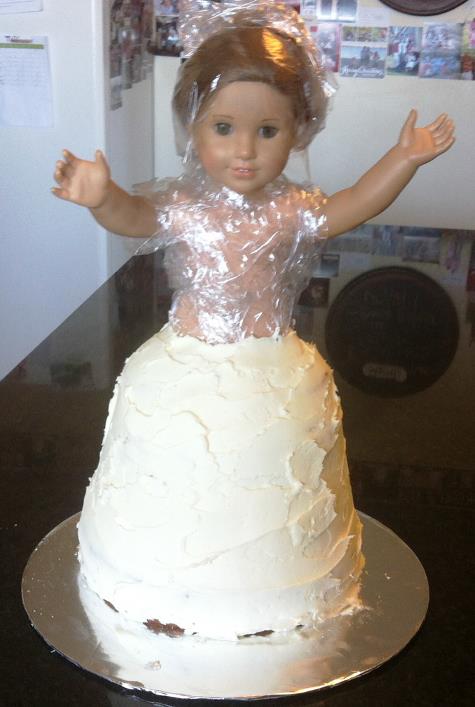
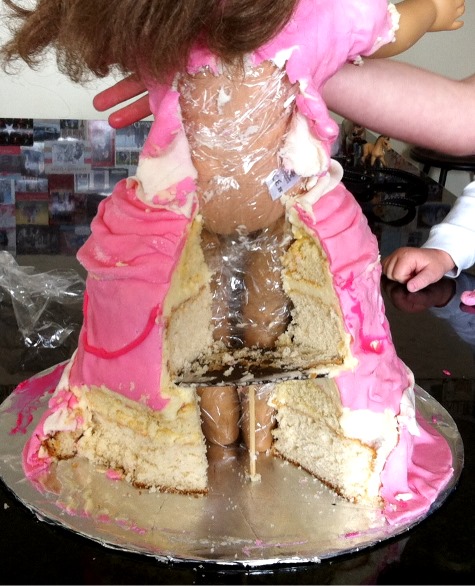
In all of Pinterest-searching for princess cakes, I never saw an American Girl doll in one… Barbie seems to be pretty much monopolizing the whole doll-in-cake thing. If you’re wondering how Rebecca’s cloth body fared, it was totally unharmed. Before putting her in the cake, I wrapped her in plastic wrap up to her chin and down her arms a bit. I did have to wash her hair afterwards, though, because it was against the back of her dress and the fondant tiara was sitting on it.

Tiffany loved the cake extra much because it wasn’t some random new doll… it was a doll she’d had for over a year and already knew and loved. Ok, that sounds weird talking like that about a doll, but if you were once a little girl with a favorite doll, you might understand how that can feel accurate. ???? I don’t know how many times Tiffany said, “I just feel like I have to pick her up and hug her!” and then sometimes adding the obvious “but I know it would get fondant and cake all over me”.

So, for the details, here is how I did it (not to be confused with the professional way to do it, ha). You’ll notice some winging it and some improvising and some lack of planning ahead and some details that didn’t get very good. But so what, my 8-year-old was speechless ….and yours would be too if you’d up n wing a cake like this for her. :)

First is baking the cakes…

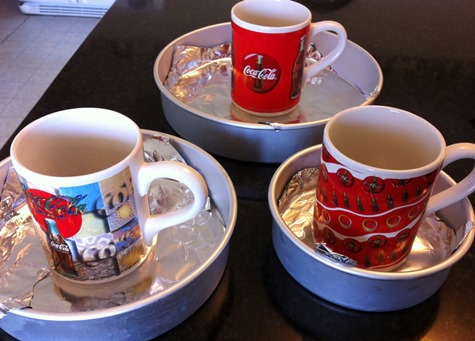
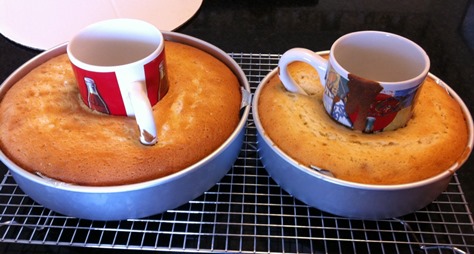
The cake part is white cake baked in 4 pans… a 10″, 9″, 8″, and 6″ pan. I needed a hole in the middle to put the doll down thro’, so I thought why not save on cake instead of cutting out the middles, so I put a coffee cup in the center of each pan and dumped the batter in around it. Can you say “wing it”? Worked great, though! The handles were kind of a pain to work around, but my drinking glasses aren’t big enough for how big I wanted the hole.
cake baking1

cake baking2

Next step was to layer the cakes, put Rebecca in, and cover the skirt with frosting. I did no skirt carving to make an even slant, except for the very top layer so it wouldn’t be quite as big of a jutting out. And yes, the top layer did sort of break in the trimming process, in case you notice it looks a bit pieced together. For the other layers, instead of trimming, I just put more frosting where needed to fill in the gaps. As you’ll see in the picture below, I put a cardboard between layers 2 and 3, and there are skewers going down thro layers 1 & 2 under the cardboard, just in case the cake and frosting would want to settle down into each other from the weight.
american girl doll cake1

american girl doll cake2

Now the fun part… fondant. For the first time ever, I MADE fondant. I got the recipe from Around My Family Table. It was more stretchy than store-bought (which can be good or bad, depending what you’re doing), otherwise it was pretty much the same. And it tastes a lot better, so I’m kind of thinking homemade from here on out. Not sure if it would work as well for figurines though, will have to experiment. For this cake, I made a double recipe of fondant and used almost all of it.

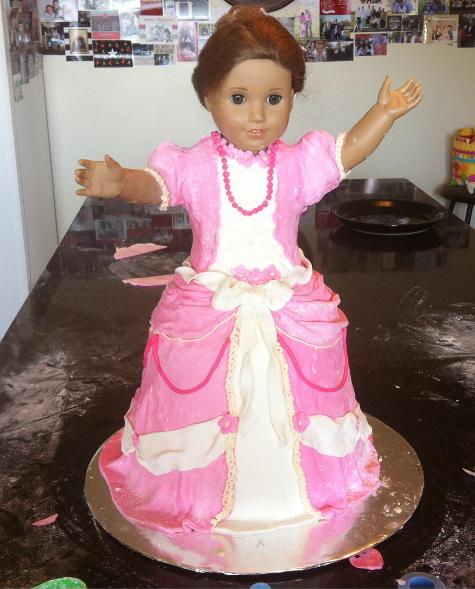
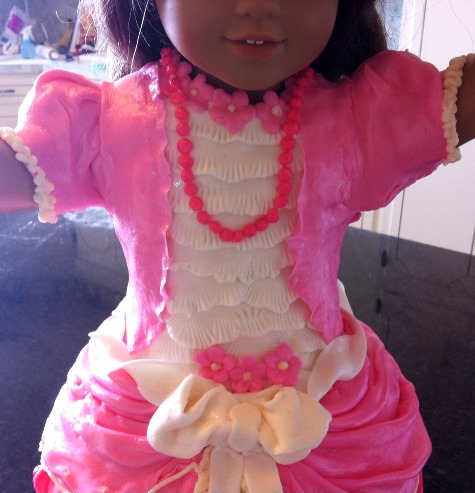
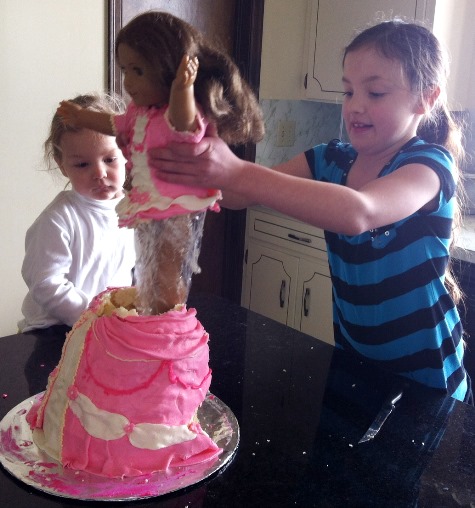
I did not have the dress visualized before making it, so it kind of just happened as it went… deciding it needed some white to break up all the pink and just kinda messing with and adding things here and there. I need to get better at folds in fabric, like at the top of the skirt. The flowers around the neck were to hide the plastic wrap sticking up, so the other flowers on the dress were to tie in with that. Btw, I have a flower cutter set that makes those so easy, my 3-yr-old can even make them. She was making some along with me here and we kept stealing cutters and presses from each other. I think she ate all the flowers she made, though.

american girl doll cake3

After this picture, I put some water in a spray bottle that sprays a very fine mist and misted the dress to give it the look of shiny fabric. Plus, it was an easy way to get rid of the extra powdered sugar on the dress (which is on there from rolling it out because you need powdered sugar to keep it from sticking to the counter and rolling pin).
Tip: If you want to get rid of the powdered sugar without getting the shine, carefully wipe it off with a barely damp paper towel or cloth.

The lack of progress pictures is partially because I forgot, partially because my hands were always powdered-sugary, and partially because you can pretty much see everything in the done picture. For the sleeve puff, I put a chunk of fondant on each shoulder, then gathered fondant and shaped it for a sleeve. There is no cake on the top half of her… that is fondant directly on top of the plastic wrap that she’s wrapped in. The necklace is simply piped dots of frosting.

american girl doll cake5

Just a few tidbits:
— Her arms got in that position when I was wrapping her in plastic. When I was done, I was about to put them down, but instead let them up in the air like that because it looked more festive or something rather than hands boringly at her sides.
— The tiara was a bit of an afterthought. She was done and I thought “oh dear, a princess needs a tiara! I should’ve made one 2 days ago so it could be dry and hard now!” I had to go with a chunky one because a delicate one couldn’t have stood up because there was no time for the fondant to harden. So I made a ‘snake’, looped it a few times, pinched the middle loop into a point, sprinkled it with granulated sugar, and put it on her head.
— The candles… we were ready to light candles and sing Happy Birthday to You, but I hadn’t put any on! We couldn’t think of a good place to poke them in (I mean, really, who wants their dress on fire?!). Just then a light bulb moment hit and I ended up piping 8 little piles of frosting on the cake board, and stuck the candles in. Worked great! You can kind of see it on the very last picture of this post.

I’ll just add a couple pictures yet of a cut view so you can see how Rebecca was in there.

american girl doll cake cutaway

Rescuing the princess from the tower, er, oops, I mean, cake…
american girl doll cake disassembling

Happy birthday, Tiffany. Only 8 years ago, you looked like this:
tiff baby

How did you get to this already?!:
american girl doll cake rebecca tiffany

Comments

9 Responses to “American Girl Doll Birthday Cake”

  1. Rosanne on April 11th, 2014 9:12 am

    Great job, absolutely impressive!
    Did you every work with modeling chocolate? That might be what you need for figurines.

  2. Rosalyn on April 11th, 2014 9:47 am

    Beautiful cake! :) This must be a young girl’s dream cake!
    My girls are oohing and ahhing. “She is the BEST at making cakes!”

  3. Kay on April 11th, 2014 11:35 am

    Rosanne, thanks, esp coming from you, my cake-decorating hero! :) Yeah, I’ve worked with modeling chocolate and I should more! I like how you can join parts together and rub out the seam where it’s joined.

    Rosalyn, I know you have some American Girl Dolls around there… *hint hint*… you oughta try it! I know you could do it!

  4. Jo on April 12th, 2014 8:44 am

    Kay, I can’t believe this cake! Looks great.
    I met your aunt Ruthie and Uncle Dan in Haiti. They were at church with us Sunday morning.

  5. Shannon on April 14th, 2014 2:05 pm

    Wow, you are amazing. My girls couldn’t get over this. :)

  6. Kim on May 8th, 2014 11:30 am

    You ARE AMAZING! “Tiffany left for school. I got busy baking. This is what was waiting for her when she got home.” WOW! You make it sound so easy. And the 3 yr old ‘helping’ makes it even more remarkable. My 2 yr old would be the demolition crew all in one. Kristen and Shaina both have just like you AG dolls, and they would love it. Maybe til Aug I can work up my courage. :) Hey, its’ great to see you here again. It’s been awhile since I browsed. Miss you!

  7. maxine on November 3rd, 2014 1:15 am

    This is totally incredible. I am send in to American Girl Stores Manger in Houston and one in Chicago. You are the best!!!!! God bless. I did want to find someone I can trust to do this for my daughter on her 5th Birthday.

  8. Sandra on November 13th, 2014 12:32 pm

    That is incredible. I won’t even show it to Kiana because she would demand one just like it and I don’t have the talent for cake decorating

  9. stephine on August 8th, 2015 11:57 am

    thats adorable thats a really good idea good job

Wooden Baskets with Daisies Cake

Wooden Baskets with Daisies Cake

Posted on March 7, 2014 
Filed Under Cakes

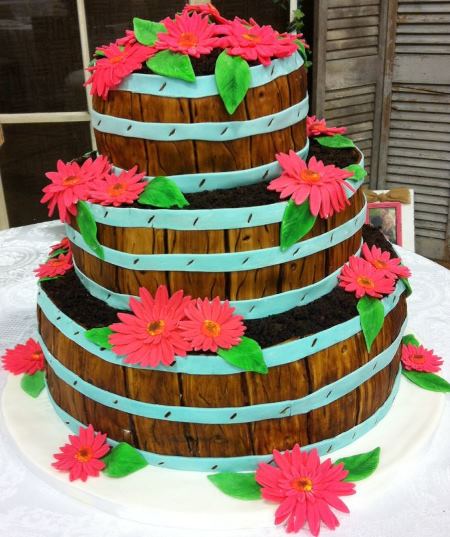
I’m in the mood to feature a cake. I have a bunch that I’ve never put on here. Sometime, I’m going to make a separate cake section on this site. I think at some point, it could merit its own section because that’s what I picture doing in 5 years or so… cakes. Between now and then, I plan to have fun doing a few hit n miss and taking classes and tripling my cake-decorating tools/gadgets/pans supply. I want to take classes so I can prevent mistakes instead of learn from my mistakes. ???? Right now cake-making is pretty much a “wing it” deal, and while that’s worked out pretty well so far, there’s also been a lot of wincing-then-sighs-of-relief involved too. And well, yeah, some wincing-then-starting-over moments, too.

This particular cake was quite an honor. It was the FIRST wedding cake I’ve ever done. The bride-to-be knew I’m not a pro, but she trusted me anyway… uhhhh, in case you wonder, that spells p-r-e-s-s-u-r-e!!! :)

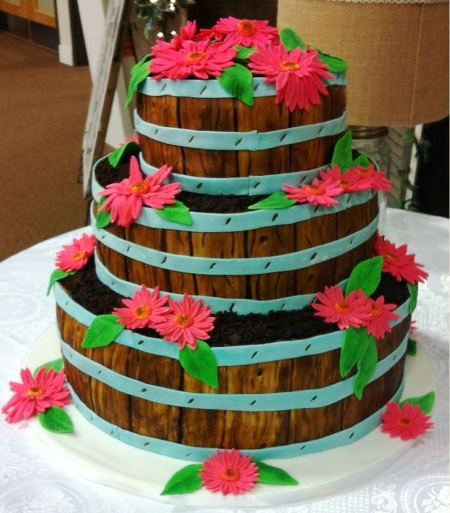
wooden basket daisy cake

You know that whole “wing it” thing I was talking about earlier? Well, I had never done wood grain before. Nor had I ever made a cake this big (the biggest pan size I owned up to this point was a 12″ and I had to go get a 16″ pan for this cake). The bottom layer is 16″, middle layer is 12″, top layer is 8″, and each layer is roughly 6″ tall.

I didn’t take very many step-by-step pictures because I was in the cake-decorating zone and well, simply forgot. But in case you’re interested, here is the construction, then I’ll get to the fun part… the wood and flowers. ????

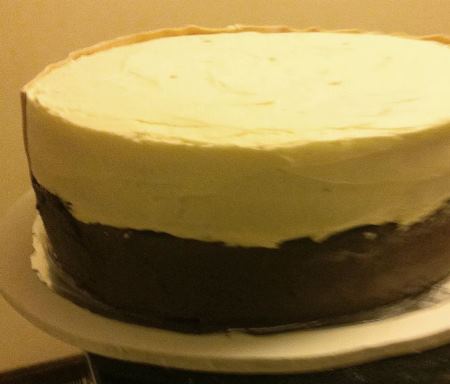
The bottom layer is a 3″ chocolate cake with chocolate buttercream and a 3″ vanilla cake with vanilla buttercream, each split with frosting between. When they were frosted, I put the chocolate layer on the cake board and put four 3″ dowels in it so the weight of the rest of the cake wouldn’t be on it, then set the white layer (which was on cardboard) on top. Here is a (very bad) picture of that, quickly taken before all the fondant was on.
bottom layer basket cake

Then I put four 3″ dowels thro’ the white cake and one sharpened 6″ dowel down thro’ both cakes and the cardboard layer between them.

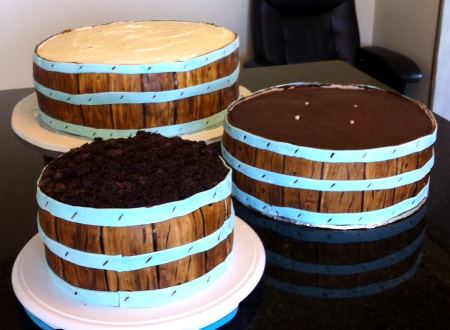
The middle basket is all chocolate with chocolate buttercream and is on cardboard. No cardboard between the layers, but the cake does have dowels in it for holding the weight of the top basket.

The top basket is all vanilla with vanilla buttercream and is on cardboard. No cardboard between layers and no dowels.

ready for stacking and flowers

Now for the fun part! :)

First is the wood grain. The slats may look like individual pieces, but it’s actually larger sections with multiple slats per sections. I started with white fondant and mixed in some cocoa powder to make it a light tan. In hindsight, I don’t think I would’ve had to do that step though because the “stain” would’ve covered it fine without leaving white spots when wiping it off.

Roll out fondant. Cut it to a rectangle… length doesn’t matter, but try to get the height as close to correct as possible. Take something about 1/8″ wide and indent lines from top to bottom, these are the slats. I said “take something 1/8″ wide” so you know you can make wood grain without a well-I-don’t-have-a-decorating-tool-set excuse. ???? You can use the handle end of a small paintbrush or whatever. Next, beat it up. Give it some character. Make dents, make lines, make knots. And yes, there is powdered sugar all over the place… it keeps the fondant from sticking to the counter.
wood grain fondant 1

Then, mix vodka with brown food coloring paste to make “stain” to stain the wood. If you’re concerned about the alcoholic aspect, the alcohol evaporates. Plus, you don’t use much at all, so the teeny bit that would be on one piece of cake wouldn’t affect anyone if it wouldn’t evaporate. (Do NOT use water or you’ll have a mess on your hands because water becomes like glue when it touches fondant.) Get a clean paintbrush and brush the stain on. Wipe it off immediately with a clean cloth. And THAT is when the magic happens. It doesn’t look like much up to that point, in fact it looks like quite a mess. But as soon as you wipe the excess stain away, a beautiful realistic-looking-wood piece of fondant appears!
fondant wood grain 2

If the icing on the cake is a crusting kind, run a knife or something over it to un-crust it so the fondant will stick to it. Carefully pick up the fondant and place it around the cake. If you wait several minutes until the alcohol has evaporated, it doesn’t stick to your hands while you’re placing it on the cake and you can also loosely roll it up without it sticking together to transfer it to the cake.

After all the wood was on, I made the bands. This beautiful blue was one of the wedding colors, which is why the bands were this color… if I’m making a basket case for just anyhow, I’d probably make the bands tan. This was simply coloring the fondant, rolling it out, cutting it into strips, wetting the back of the strips with water, and placing them around the cake. After putting each band on the cake, I did the staples. If I’d have waited to do the staples until all the bands on all the cakes were done, it wouldn’t have worked as well because the fondant on the first bands would’ve started drying out and it wouldn’t have been as easy to make an indentation. After making the indentations, I took a tiny paintbrush and painted brown food coloring inside them. Some of them got a little messy and I was sighing about it to Shannon and he said, “No, it’s great. It makes them just look rusty.” Ah, way to make lemonaide out of a lemon.

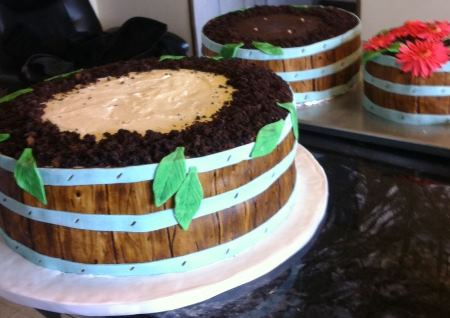
Next, I covered the visible part of the cake board with white fondant and put a white ribbon around the edge. Then, I crumbled up some leftover chocolate cake for the “dirt” and put it around the rims of the 2 lower baskets and over the top of the top basket. It looked good, but next time, I’d use Oreo crumbs… I think they’d look more like dirt, but I didn’t think of it at the time.
fondant wood flower baskets cake

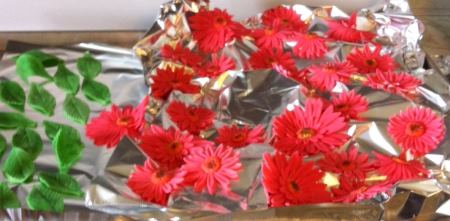
Then, it was time to add COLOR. Fondant daisies. Hot pink was the other wedding color, so that’s what the daisies were. Here are some of the daisies and leaves drying ahead of time. I put them on crumpled tin foil so they wouldn’t dry flat and boring.

fondant daisies

In case these look hard, they’re not. I have a flower/leaf cutter and impression set that I used… one of my happy purchases from Michaels with a 40% off coupon. I also added a bit of petal dust for a more realist look.

So, there you have it, a wooden basket daisy cake. It was challenging and a whole lot of FUN!

stacked wooden basket daisy cake

Comments

3 Responses to “Wooden Baskets with Daisies Cake”

  1. Shana on March 7th, 2014 6:28 pm

    Those flowers are gorgeous! I thought they were real.:) Amazing job!!!

  2. Liz on March 9th, 2014 12:07 am

    It was good reading about the process of it! You have a talent. I hope that your dream of decorating cakes on a normal basis becomes a reality.

  3. Jan on March 25th, 2014 2:02 pm

    Wow! That is just gorgeous!

Happy New Year!

Happy New Year!

Posted on January 1, 2014 
Filed Under Cakes

How can it be 2014 already?! It doesn’t seem that long ago that we brought in the 2000s on the beach in FL. This year was brought in by tucking my girls and their cousins in bed and the cutest conversation in which their grandma (Shannon’s mom) was explaining what new year’s resolutions are and helping them make one. I was glad she vetoed and explained to my 11-yr-old how “Getting Mom and Dad to buy me an iPhone” is not a valid new year’s resolution. :) And the funniest one was when Chad (5) made one for his toddler sister… “I know what Tianna would say. She’d say to make the whole world into nippys”.

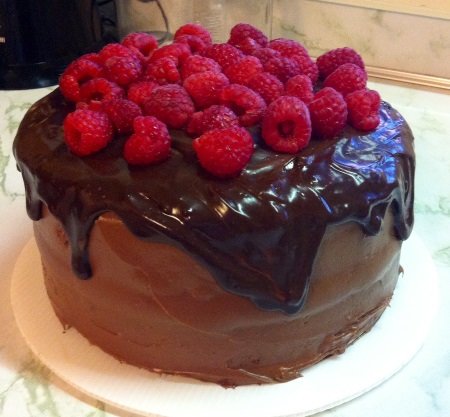
So, I started the year out laughing… here’s to a good one! And wishing you and yours a good year too! May you have plenty of cake.

chocolate raspberry cake

Comments

3 Responses to “Happy New Year!”

  1. Liz on January 7th, 2014 12:38 am

    Made me laugh reading that! But how did you find time to update in the midst of all that was going on.?! I guess there was numerous times when electronic devices came out so it could have been any one of those times. Ha!

  2. Kay on January 7th, 2014 10:03 am

    You got it, Liz… posted with people around. :) First post ever that I did on my phone.

  3. Jo Hershey on January 9th, 2014 4:55 pm

    I’m really happy you’re posting recipes again! :) I tried the baked potatoes ( and ate the kids’ skins :) ) & the meatballs look good too.

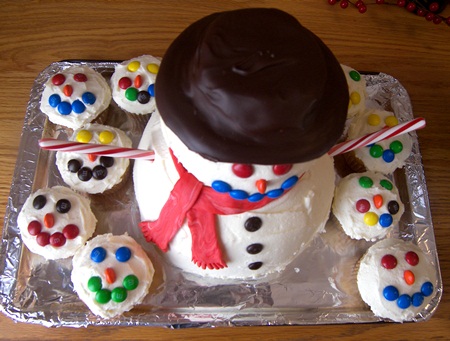
Snowman Cake… cute and EASY, I promise!

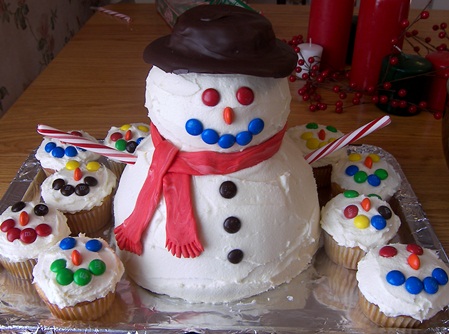
We have snow!! So I’m gonna post a snowman.

snowman-cake-and-cupcakes.jpg

You know, I was just thinking… after I wrote those first 2 sentences, I looked out the window for awhile at the snow I was talking about… you know the snow that I used TWO exclamation marks after when I said we have snow, and I realized how my standards have changed. Do you know how much snow we have right now?
About 1/2 inch.
1 inch at the deep parts.
Wow. :)

I was born and raised in northern WI and moved to OH 3 years ago. If we’d get this much snow in WI and Shannon’s dear grandpa from PA would call and say, “What’s the weather like out there? Do you have snow?”, same as he’d always start every call with between Sept and May, we’d say “No, not really, just a little dusting.” I do really like the mild winters here though. I think it’s pretty cool that in Ohio right now, it’s mid-January and I still haven’t gotten out my winter coat… my temp mark for bulk-of-winter-coat-is-worth-it-for-the-extra-warmth-over-light-coat is about 25 degrees, unless I’m going to be out for a long period of time.  I haven’t gotten my boots out either because… I have none. I threw them away last year because they were so out of style and I was so in love with them… so when I was tempted to wear them, I’d weigh the pros (love them) and cons (out of style)… and love always won. So the only way to make myself stop wearing them was to throw them away.

All that to say that I’m in the market for boots. I love the style of boots right now… especially the sorta short ones with a heel and slouched and black and a bow-type thing on the side… so I’ll probably be back in my out-of-style-but-love-em predicament again in 5 years. :) Maybe I’ll buy some boots tomorrow… we seriously need to get out of the house because we’ve been sick for nearly a week around here and I think we’re all functioning at 85 – 100% power today now… so what better thing to do on a Saturday than to go out on the town.

Anyway… let’s circle back around to where we started… “I’m gonna post a snowman”.

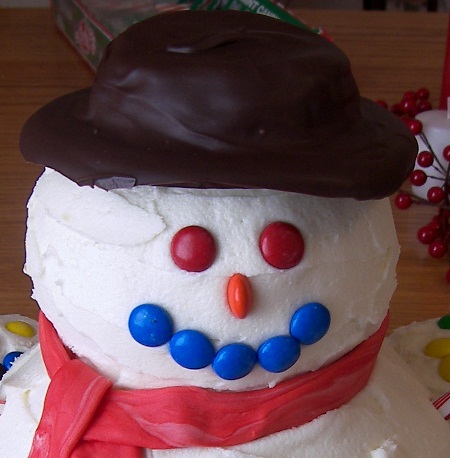
snowman-face.jpg
Isn’t it crazy how M&Ms can almost seem to make something have a personality? :)

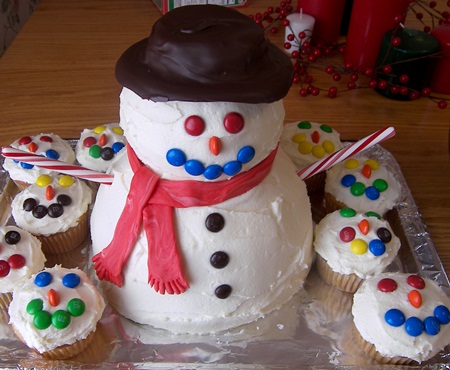
I feel like I need to talk really fast to interrupt any crazy “I’d never have time for that!” thoughts. It’s simply 2 cake mixes… dump one in a mixing bowl instead of a 9×13, dump the other one in a small mixing bowl and the rest in cupcake liners. Bake. Frost… you don’t even have to add food coloring because snow is conveniently white! ;) Press M&Ms on. Make a melty chocolate/peanut butter hat. Fruit roll-up scarf. Eat. There is no carving or shaping of cake going on here. I made this for dessert for hot lunch at school.

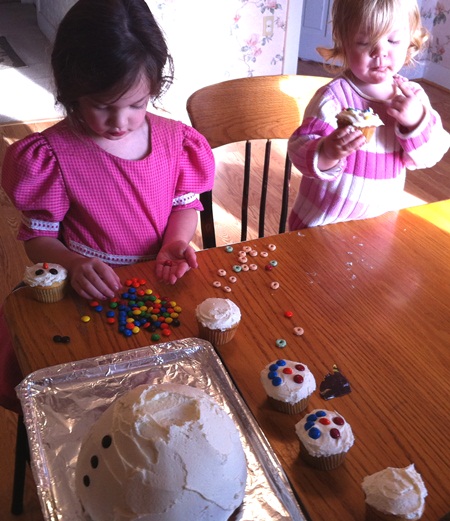
Get your 5-yr-old to decorate the cupcakes… Tiffany did all of them while I did the snowman. We used orange M&Ms for noses only and put them sideways so they stuck out a little more.

snowman-cupcakes.jpg

Keep the 18-month-old demolition-crew-of-one as far away as possible. Or do what I did and count one cupcake and a small handful of M&Ms as loss and set her up to destro—, I mean, decorate it.

snowman-cake-making.jpg
*cell phone pic alert* Yeah, we tried just giving Megan some Apple Jacks to munch on so she could happily watch while munching, but nope, no luck, she was more into M&Ms and gooey frosting.

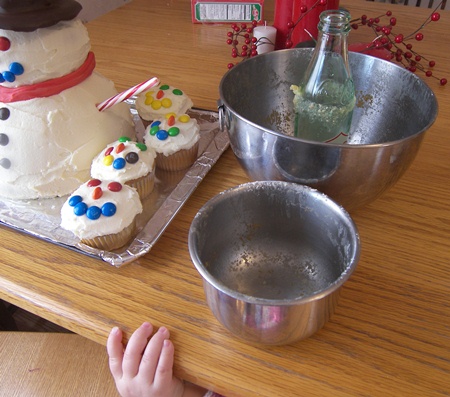
One thing I should say about the baking… I was afraid the cake wouldn’t get done in the middle, so I looked around the kitchen, saw a glass Coke bottle (filled it to make it heavier), covered it in tin foil, and put it in the middle, like it’s sitting in the mixing bowl here… kind of an angel food cake pan effect. It worked perfect. I don’t know if it would be necessary or not, though. I baked the cake for 1 hour.
snowman-baking.jpg

I used candy canes for the arms (broke off the curved part), but you could use pretzel rods or whatever. The hat is a chunk of leftover buckeye-type peanut butter filling dipped in melted chocolate with too much chocolate poured on top so it ran down beside it, making a hat brim. Then I put it in the fridge until it hardened. You could pretty much use anything… like a chocolate-dipped small cookie or whoopie pie or something.

*gasp* Did I just used the phrase “too much chocolate”?! Sorry, it should read “extra chocolate” instead… I’m more comfortable with that term.

Add a fruit roll-up or fondant the color of your choice for the scarf. Snip the ends with a scissors to give a tassle effect.

snowman-cake-done.jpg

And there you go… celebrate winter with your kids! Whether you have 2 feet of snow, a 1/2 inch of snow, or only dream of snow.

Comments

9 Responses to “Snowman Cake… cute and EASY, I promise!”

  1. Beth Graber on January 20th, 2012 8:32 pm

    Do I get to comment first? Well, I think this snowman is just plain perfect!! When I got to the part about you feeling like you need to talk really fast, I automatically started reading faster. lol What I love about your site is all the little stuff you add to it (like the whole thing of the Grandpa who always asked if it snowed). :) P.S. I still wouldn’t attempt this – you just don’t know how good you are.

  2. Freida on January 20th, 2012 9:24 pm

    That is one cute snowman!

  3. Sheila on January 21st, 2012 12:49 am

    Ahh, how fitting since it snowed at least half the day here. We only ended up getting about two inches though. Up until a week or two ago, you hadn’t missed much snow here. I really should make something “snowy” yet this winter. You make things look easy but I’m afraid this would take me at least half a day. :-/ I agree with Beth about liking the interesting little rabbit trails you take in your writing. Glad you all are feeling better!

  4. Kay on January 21st, 2012 1:17 am

    Haha, Beth you’ve made a train; Sheila, you’ve made a teapot and other cool cakes… you guys would think this is easy and fast. Frosting a round something instead of a flat something and pressing M&Ms on, you could use a doll hat if you wouldn’t want to make one, and then flop a fruit rollup around the neck.

    I think a snowman cheeseball would be cute too… thought of that when I wished I could use a real carrot for the nose.

    I love snowmen… they’re so goofy and cheery. If we ever get more than 1/2 inch of snow around here and build a snowman, I want us to build a couple of them and make one upside down… then put 2 sticks sticking up out of the bottom ball (which is now on top) and put boots upsidedown on them. ;)

  5. Aug on January 21st, 2012 2:01 pm

    I am just happening to be looking for ideas for Kendall’s birthday party in about 2 weeks. I may have to try this. But I always have this doubt in my mind…will it actually turn out looking as cool as Kay’s? And btw, I love how you are always involving your girls!

  6. Amy Burkey on January 22nd, 2012 9:50 am

    I made one of these. It wasn’t as rounded? shall we say! But it is pretty easy….for the ones who think it’s not. Here’s mine. http://amyjane30.blogspot.com/2011/01/happy-birthday-keagan.html

  7. Kay on January 22nd, 2012 2:29 pm

    Amy, I hadn’t seen yours! *mental note to add your blog to my Google Reader* Thanks for assuring people that it’s easy. :) Yours looks even harder than mine because you have 3 “snowballs”. And thanks for adding your link.

    Good luck with deciding on a cake, Aug. That’s always kinda fun. Something makes me think you might be thinking down the penguin route too. ;)

  8. Beth on February 6th, 2012 12:33 am

    Hey, guess what? I’ve been browsing your website for lunch ideas for this week (while the guys are remodeling). I found the Thursday Thirteen section & got some great ideas. It was just super fun to read this kind of thing from back when you lived in WI. You made me lol a few times too. :)

  9. amber on March 7th, 2012 1:48 pm

    i’m just always amazed at your talents~ you are a woman of so many skills! i need to come spend a week {or two or three} with you!! :)

Ice Cream Cone Cake Pops

There. I did 2 posts with meat in, so let’s get back to the fun stuff! ;) No, really, I am planning to keep it a little more balanced… I think anyway. Sometimes I think I should’ve named this site something like ”Chocolate Dipped Tidbits” or “Living for Chocolate, Dying for Some More” and do sweets only, what with that being my passion and all.

Speaking of which, I totally get Tiffany (my 5-yr-old) in this little conversation that happened one day last week:
Her: “May I have an ice cream cone?”
Me: “No, you already had one today.”
Her: “Pleeeeeeeeeeeeease? I REALLY need one.”
Me, feeling sorry for her, but sticking to my guns: “No.”
Her, pulling out the trump card in desperation: “I’ll give you all my money if you let me have one.”

If we run out of cones and ice cream around here, my girls think it’s a real crisis. Currently, we have sugar cones (the pointy ones that sorta look like waffle cones) and regular cones in 2 sizes (the ones that are flat on the bottom and taste like newspaper just plain). These cone cake pops use the mini size of the regular cones.

Awwww, aren’t they adorable?
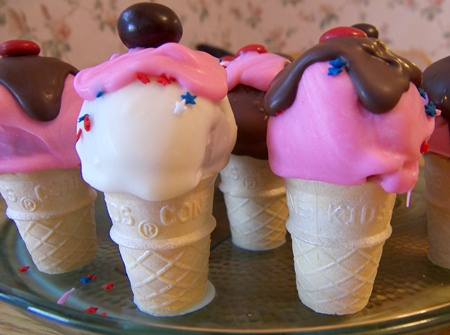
ice-cream-cone-cake-pops.jpg

You really do need to see these in real life. The cuteness factor doubles from a picture to real life.

I know you can’t really tell the exact size because there’s nothing to compare it to. So, here’s one in a 13-month-old pudgy hand, if you know what size they are in real life. This is a real ice cream cone, but the same size cone.
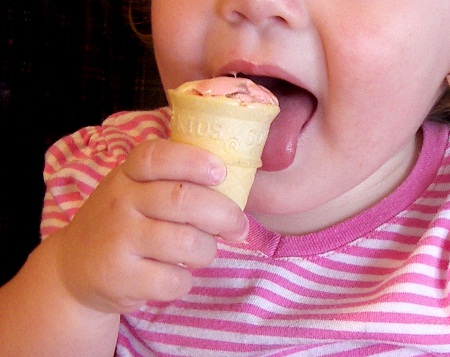
ice-cream-cone-megan.jpg

Yeah, we’re getting Megan hooked on ice cream cones already. This size is so perfect for her because she’s done eating it by the time it starts melting and dripping.

I got this Ice Cream Cone Cake Pops idea from Bakerella’s website and her Cake Pops cookbook (which my friend Ruthie gave to me for my birthday last year… it was on my wish list, and I never told her, how cool is that?!) Bakerella used sawed-off sugar cones, but I decided to just use mini regular cones so I wouldn’t have to do all that cutting.
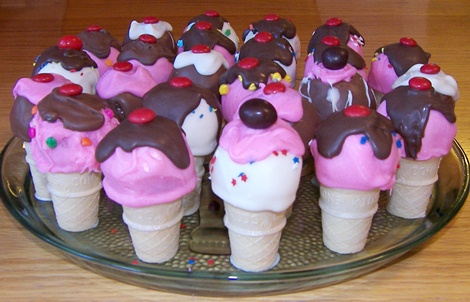
ice-cream-cone-cake-pops-done.jpg

So here’s what you do. Take a baked cake and crumble it up and add a bought can of frosting and mix it together.

Or…

Get the leftover cake out of the freezer from a graduation cake you made earlier, thaw it, crumble it, mix up some frosting and mix a few dollops into the cake crumbs. That’s what I did. So, these cake pops were white cake mixed with cinnamon cake.

By the way, next time you’re buying cake mixes and you’re undecided on the kind, please buy a cinnamon one. This is the first time I tried it and it was SO good! You’d think I would’ve already thought to try that, what with having married into a we-love-cinnamon family. I want to make one sometime with cream cheese frosting. Mmmm mmmm mmm!!! You can use cream cheese frosting in these cake pops, but then you should refrigerate them, which is why I used regular frosting.

Here are the cake crumbs and dollops of frosting. I forgot to take a picture after it was mixed…
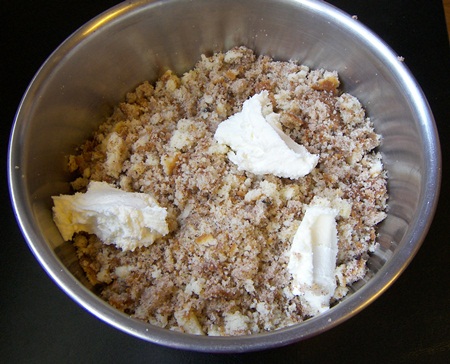
ice-cream-cone-cake-pops-crumbs.jpg

Roll the cake mixture into balls about the size of a golf ball, maybe a little smaller. Don’t make all those little dents in it like a golf ball has, though. Put the cake balls in the freezer for 15 minutes, then transfer them to the fridge if you’re not ready to dip yet. They should be chilled, but not frozen.

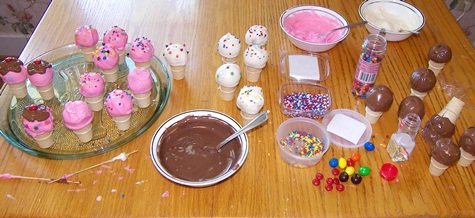
Here is when I was just ready to start. Those bowls are both melted white chocolate, but the one has pink food coloring in it. The melted milk chocolate is missed on the picture. I put some M&Ms in the bottom of the cones just for a fun surprise.
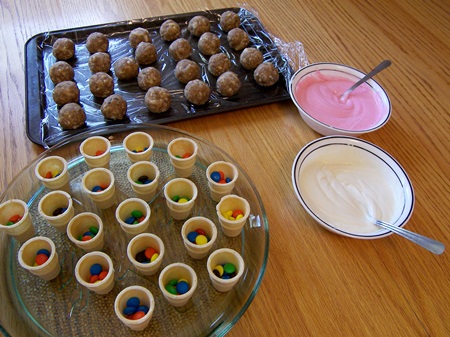
ice-cream-cone-cake-pops-starting.jpg

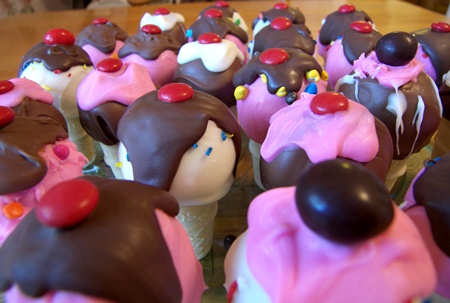
Dip a skewer in the melted chocolate, then into a cake ball. You can take a spoon and spoon some chocolate over to get it fully covered if the chocolate isn’t deep enough to fully immerse the cake ball, but don’t spin or stir or twist it around in the chocolate because crumbs may fall off or it might come apart. Then, put the drippy chocolate covered cake ball on one of these mini cones and pull the skewer out. It will kind of start to drip over the sides to make a melty look. That is a good thing.

This is after the process is underway…
ice-cream-cone-cake-pops-making.jpg

After the cake pops are dipped and put on the cones, take another color of melted chocolate and put on top, letting it start going down the sides a bit. Put on sprinkles if you want to. Put a red M&M or peanut M&M on top for a cherry.
ice-cream-cone-cake-pops-top.jpg

To make tipped over ones, put the cake ball on a flat surface instead of on a cone, then put the cone slanted on top of it. Bakerella calls this a “happy accident on purpose”. I love that term! 🙂

Now, we leave Bakerella and go on to an extra tip and idea for these from me:

1. These little things are top-heavy. So if you’re taking them somewhere, put a little bit of melted white chocolate on the bottom of the cone, then set it on the plate. In no time, it is hardened and you can move the plate around at will… without ice cream cones landing on the floor.

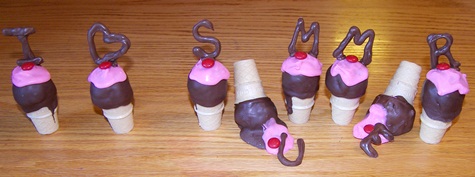
2. Pipe thick chocolate letters on plastic wrap or wax paper, put them in the fridge till they’re hard, and stick them to the top with a dollop or two of melted chocolate… and you’ve just personalized your cake pops to the season/event/occasion!
ice-cream-cone-cake-pops-summer.jpg

Here are some specific ideas:
– Write “Welcome Home” on them and put them on the counter, ready for someone coming home. That’s actually the very thing that made me think of putting letters on top of these… around the time I was making these for a church picnic, some friends of ours were coming home from a trip and I had intentions of doing that with the extra ones, but with a combo of a change of plans in my day and procrastination, they got home before I got it done. But at least I’m glad for the idea now, to use in other ways.

– Use them for the cake at a birthday party and write “Happy Birthday (insert birthday person’s name)” 

– Write your kids’ names.

– Make the entire alphabet, with extra A’s, E’s, T’s, M’s, S’s, and whatever other letters are used more often. Then, let your kids play with them, writing words and phrases or even complete sentences.

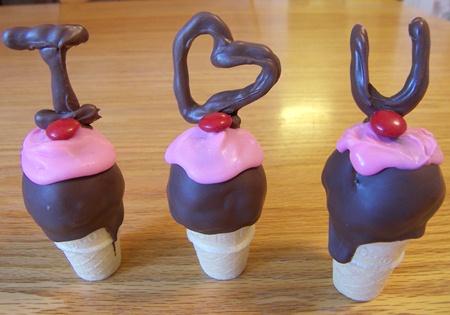
And last but not least, if you love someone, do this…
ice-cream-cone-cake-pops-love.jpg

Comments
8 Responses to “Ice Cream Cone Cake Pops”

  1. Shannon on July 21st, 2011 2:41 pm

    These are so cute!! Any birthday girl would love them. I love the Megan picture! She looks so adorable with the tongue hanging out for a lick! :)

  2. Beth on July 21st, 2011 2:59 pm

    Cuteness! Wish I could have one about now. I got a kick out of the phrase “Don’t make all those little dents in it like a golf ball has, though.” You are goofy! :)

  3. Jan on July 21st, 2011 3:51 pm

    That picture of Megan would win a prize! I think the cute cones could, too. I have leftover birthday cake in my freezer that I’ll probably end up throwing out to the wild animals in the woods after a few months. Maybe I should do this instead!

  4. Renita on July 22nd, 2011 3:03 pm

    love Megan’s pic! Cute! Jordan wants these…right now. :-)

  5. Janice on July 25th, 2011 11:48 am

    Oh dear, I made the mistake of looking at these with three little people. Now, they all want some! I’ll have to put cones on my shopping list.

  6. amber on September 5th, 2011 8:27 pm

    KAY!!! i was trying to think of something cute and fun for emma’s bday next week and i think i just might have found it.. now, if only YOU’D come make them for me??? ;) not sure mine will turn out as well, but i think i’ll give it a shot.

    you’re inspiring~

  7. Christy on September 8th, 2011 7:36 pm

    Hey, just wondering if you’ve ever seen any cute dinosaur cakes. Cute and dinosaur in the same sentence? I’m really not into them, but Zachary is VERY MUCH all about anything dinosaurs, especially triceratops, and anything green. I found a triceratops cake I can make i need to. I was really hoping to do more of a scene kind of cake, so I can buy a pack of little dinos and pop them on top–not up to too much work right now. His birthday is the 18th, so I have a little time to figure it out.

  8. Janice on October 26th, 2011 9:34 pm

    Love the site

Deviating from the Norm in Baking

Posted on May 19, 2011
Filed Under Cakes, Cookies and bars, Pies

You bake cookies. You could do it on autopilot. Your kids even know the drill… one time, Tiffany came out to the kitchen as I was starting cookie baking and said, “Can I help you bake cookies?”
“How did you know I’m gonna bake cookies?”, I asked.
“Because I saw you open the mixer and get that *pointing to the shortening* and the sugar out of the cupboard, and that’s how you always start baking cookies.”, she confidently said.

Sometimes I feel in such a rut with cooking and baking. When we have cookies around, 90% of the time they’re either monster or chocolate chip. When we have cake around, 90% of the time, it’s chocolate with peanut butter icing. When we have pie around, 90% of the time it’s either peanut butter or lemon meringue. And it looks like when I get into a percentage rut, it’s usually 90%. Seriously, though, if I make something other than the things listed above, you pretty much always see it on here. Sometimes I feel too predictable and want to change things up a bit…

We can still have our favorites, but in a different way.

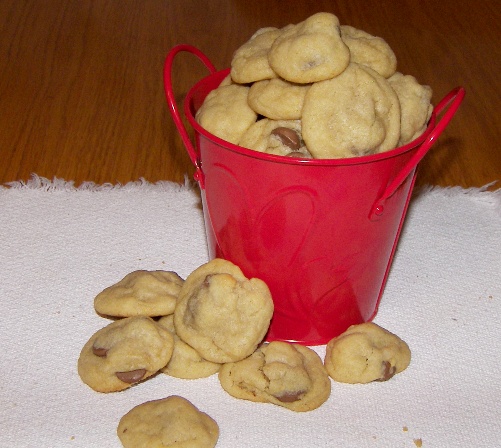
Take chocolate chip cookies, for example. I was making some for an after school snack, so you know, for kids. Instead of using the same ol’ Pampered Chef cookie scoop, I just used a spoon and made teeny little scoops. The teeny little scoops turned into adorable 1-and-a-half-inch-in-diameter cookies. The adorable cookies, placed in a little bucket, turned into an after school snack that was a huge hit… little cookies, huge hit. They thought it was great that they could have TEN cookies for after school snack! ????
chocolate-chip-cookies-in-bucket.jpg

Awwwwwww.

And now, not to wreck the fun I’m-SOOOOOO-gonna-bake-cookies-this-afternoon-and-do-that-cuz-the-kids’ll-love-it mood or anything, but just let me warn you: the dough goes down v.e.r.y slowly, it takes way longer to put them on and get them off the cookie sheet, and the yield is dozens and dozens, do not even try to count.

*WHIPLASH ALERT*

We’re now going to switch from baking dozens of little time-consuming mini cookies to 1 pan of bars.

Let’s say you’re baking cookies and you mix the dough up and while the first panful is in the oven, you realize you’re not really in the mood to bake cookies after all… not in the mood to drop them onto the cookie sheet every 10 minutes, not in the mood to be setting your laptop down and jumping up 5 times an hour.

But, you’ve got a batch of dough sitting there.

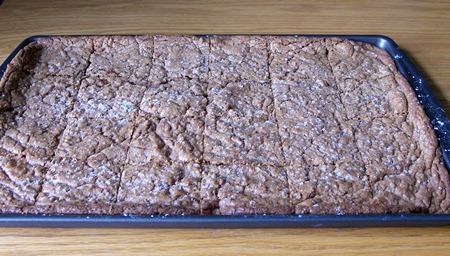
No problem. Just spread the dough in a sheet cake pan and bake it for 25 minutes… and ta-da, bars made from your favorite cookie recipe. I just tried this for the first time about 3 weeks ago and thought it was really great that I thought to do this on my own UNTIL some of my friends said, “Oh, yeah, I do that all the time.” :roll:
bars-from-cookie-recipe.jpg
Side note here: that’s my chocolate chip cookie recipe, except that I substituted FUDGE + 1 cup of flour for the chocolate chips. I had about 5 cups of fudge on hand from when I made this cake.
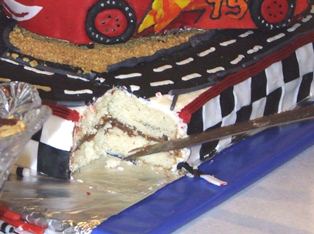
cut-view-lightning-mcqueen.jpg

I was going to use the fudge in the middle layer between the 2 cakes, but then when I started spreading it on, I was afraid it would be too soft and squish out from the weight of the cake plus car on top of it (I used melted-then-hardened chocolate instead). So, I used the fudge up in those cooki— uh, I mean bars.

Another way to change up chocolate chip cookies is to mix them up and bake them, leaving out the chocolate chips. Then, melt the chocolate chips, spread them on something metal to harden and make cutouts. Or just drizzle the melted chocolate over the cookies. After they’re baked, you can cut out some of the baked cookies into heart shapes… the girls (and I) did these 2 years ago for Valentines Day and we shipped them to WI to their 2 grandmas.
valentine-cookies1.jpg

valentines-cookies2.jpg

For cake: sometimes I do chocolate cake with peanut butter icing in a 9×13, sometimes I do it in a sheet cake pan, and once in a great while, into cupcakes. I know, exciting. ???? Next time, I’m going to do mini ones. I made mini cupcakes for the first time last week. If you ever want to do this, one cake mix made exactly 6 dozen… I filled the wells about 3/4 full with batter. And it takes double the frosting. ???? Pile it up even more than this… it’s part of what makes minis fun. I only made a single batch, so I couldn’t put as much on as I wanted to AND I ran out.
mini-cupcakes.jpg

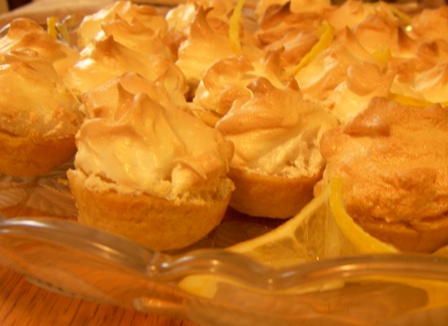
For pie… if you want lemon meringue pie, but not in big piece form, do this: make pie crust, cut 3″ circles, press them into mini muffin pans, and bake. Make your regular lemon pie filling and fill the crusts. Make regular meringue and pipe or dollop it on, brown it in the oven, and you’ve got these sweet li’l thangs…
mini-lemon-pies.jpg

You could do that with probably any kind of pie. It’s great for potlucks or snacks.

And now, still on the pie subject, the grand finale to this whole ‘switching things up’ thing… how about calorie-free… ????
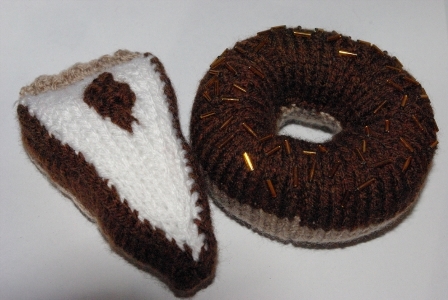
knitted-pie.jpg
I ran across this website (April Cottage Ramblings) one day as I was surfing and immediately saved the link. Absolutely amazing!!! Seriously, this lady is talented… she KNITTED a piece of pie and a donut!!! She knits and crochets other stuff too… I fell in love with a little short-sleeved ruffly purple sweater that she made for her granddaughter. I don’t know her, and I don’t knit, but I’m very impressed. And it sounds like she’s going to knit more cakes, so I’m going to stay tuned. :)

Coming up next… Lately, I’ve been hungry for lettuce salad with craisins and pecans in it, so I’m going to look for a recipe like that. I don’t have one in mind, so if you have a slam good one that you’re bursting to share, let me know! :)

Comments
9 Responses to “Deviating from the Norm in Baking”

  1. Kay on May 19th, 2011 8:37 am

    Every time I see the title, I think “Who’s Norm?” Hmmm, maybe I should’ve worded it differently…
    :)

  2. Beth on May 19th, 2011 9:29 am

    Love this! And I think the title is fine – my ‘normal’ is chocolate chip cookies, but I sure don’t make cakes or pies often enough to call that normal. If I make them, I’m the one who ends up eating it…can’t let that good stuff go to waste! :) I like making dessert though, so I often choose that if I need to take something to family or church activities.

    Hey, do you have the small Pampered Chef scoop? I wonder how that would compare to your method of using a spoon. Also, their large scoop is perfect for filling muffin tins.

  3. Amy on May 19th, 2011 10:47 am

    LOL… That pie slice looks like a skunk tail! I had to read what you said it was, look at it again and then.. AHhh!! Now I see it! ????

  4. Connie Stoll on May 19th, 2011 11:14 am

    Festive Tossed Salad
    12 c mixed greens, 3/4 c dried cranberries, 4 oz feta cheese. Saute 1 c chopped walnuts (or pecans) with 3 T butter, cool and toss with 1/4 c sugar, 1 tsp pepper and 1/4 tsp salt. Toss salad with dressing just before serving. Dressing: 1/4 cup red wine or cider vinegar, 1/2 cup loose fresh parsely, 1/4 cup chopped red onion, 2 cloves garlic, 1/3 cup sugar, 1/2 tsp oregano, 1/8 tsp salt and 1/2 cup olive oil. Puree in food processor or blender, regrigerate until serving. Just had this salad last weekend and it is absolutely delicious!

  5. Shannon on May 19th, 2011 2:34 pm

    Now who did you say Norm was? ???? jk!

    I think my cookie scoop is too small. It always takes forever to get to the bottom of the bowl. I just love that “bar” idea more and more!!

  6. Michelle on May 20th, 2011 8:13 am

    My mom makes those tiny cookies and I LOVE eating them, but since I often feel as though I’m being poisoned in the kitchen (slight exaggeration, of course), I’m a bar kind of girl. :) So I am very happy to know that I can do that with cookies dough, too!

  7. Jolene on May 23rd, 2011 3:04 pm

    I just recently got a wonderful salad recipe with craisins, pecans, sesame sticks, purple onion, red pepper and grated cheese. It’s so good!!! I posted it on “A page in the life of a mom” if your interested.

  8. Beth on June 11th, 2011 6:35 pm

    Isn’t it about time to eat some cheesecake? Ha! I’ll take that back, but I’d welcome a new post. :)

  9. Kay on June 13th, 2011 10:07 am

    Thanks Beth. :) Yeah, cheesecake eaten… new post coming up soon. Actually, it’ll be salad next, not cheesecake.

Watermelon Cake – Take it to a picnic!

Posted on June 12, 2009
Filed Under Cakes

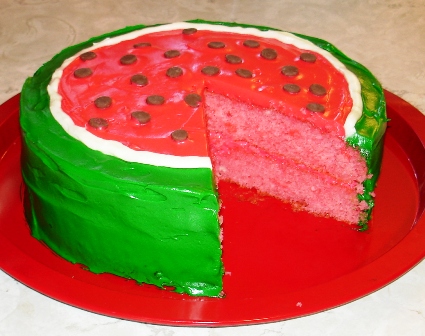
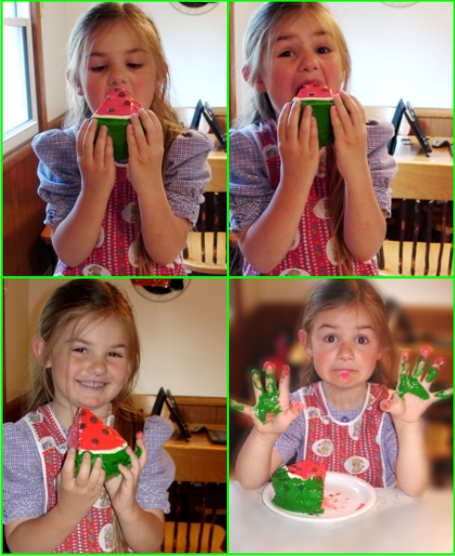
When you saw ‘Watermelon Cake’ in the title, did you think it would be a cake that tastes like watermelon or a cake that looks like watermelon? Well, whichever you thought, you were right. It’s both.

watermelon-cake11.jpg

I was going back thro’ some pictures the other day and found the making of this cake from last summer. I had totally forgotten about it! So, here it is now, a year later.

These pictures are dated July 4. Uh, wait, July 4?! July 4?!!!! I’m just wondering WHY in the world was I making watermelon cake on July 4th?! It’s a holiday! I shoulda been out on a pontoon on Round Lake or at the grocery store buying burgers and brats or something! But the watermelon cake was right in among the USA jello and the flag fruit pizza and the fireworks pictures (all featured here), so… I guess it was the 4th. No wonder I forgot about it!

Watermelon Cake …from the 2002 Quick Cooking annual cookbook

1 pkg. (18 1/4 oz) white cake mix
1 pkg. (3 oz) watermelon gelatin …If you can’t find watermelon flavored, just use strawberry or something else red or pink. That’s what I did.
2 eggs
1 1/4 cups water
1/4 cup vegetable oil
2 1/2 cups vanilla or cream cheese frosting …I used cream cheese.
Red and green food coloring
Chocolate chips

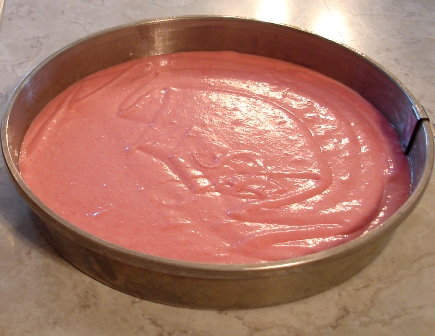
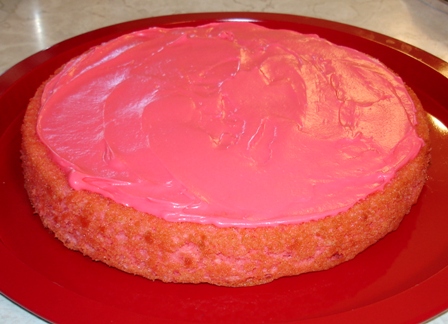
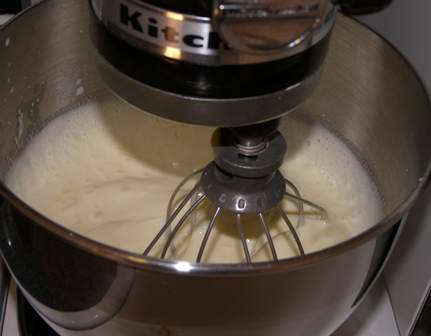
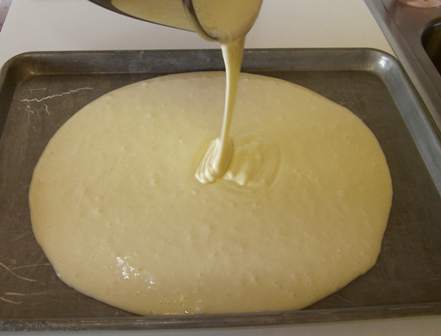
In a mixing bowl, combine dry cake mix, gelatin, eggs, water, and oil. Beat on low speed just until moistened. Beat on high for 2 minutes or until well blended. Pour into 2 greased and floured round 9″ cake pans.
watermelon-cake1.jpg

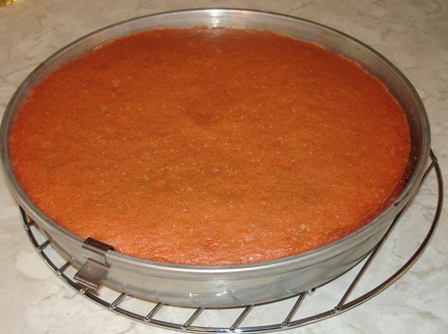
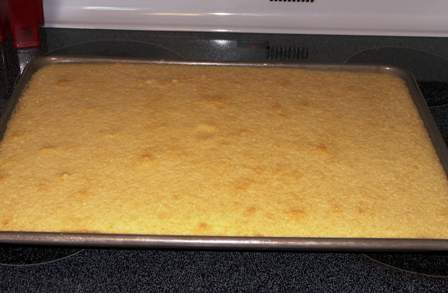
Bake at 350 for 30-35 minutes or until a toothpick inserted near the center comes out clean.
watermelon-cake2.jpg

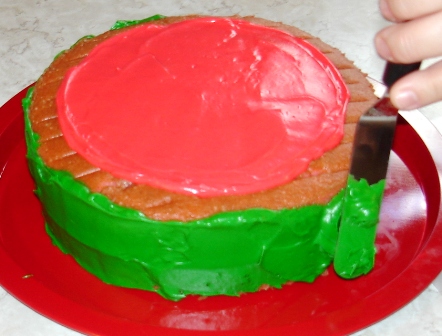
Cool for 10 minutes; remove from pans to wire racks to cool completely. Set aside 2 Tbsp. of frosting. Place 1 1/4 cups of frosting into a bowl; tint red. Tint remaining frosting green. Place one cake layer on a serving plate; spread with 1/2 cup red frosting to within 1/4″ of edges.
watermelon-cake3.jpg

Top with second cake. Frost top with remaining red frosting to within 3/4″ of egdes. Frost sides and top edge with green frosting.
watermelon-cake4.jpg

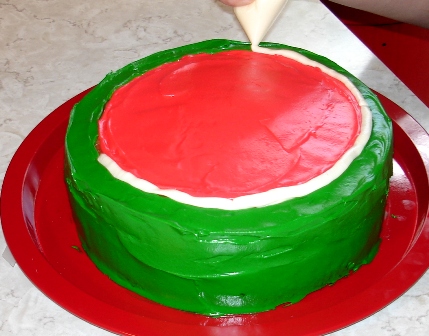
Place reserved white frosting in a resealable plastic bag; cut a 1/4″ hole in one corner. Pipe around top edge of cake where red and green frosting meets.
watermelon-cake5.jpg

watermelon-cake6.jpg

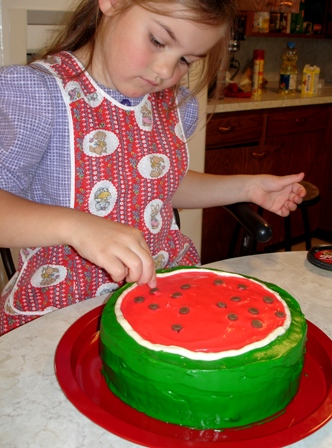
For seeds, insert chocolate chips upside-down into cake top. Yield: 12 servings.

watermelon-cake-eat-piece.jpg

Comments
14 Responses to “Watermelon Cake – Take it to a picnic!”

  1. Shannon H on June 12th, 2009 12:11 pm

    Looks way cooooool. :)
    Madison got a kick out of Lexi. :)

  2. Ruthie on June 12th, 2009 1:24 pm

    Lexi’s expression is priceless!

  3. Larena B on June 12th, 2009 1:37 pm

    What a neat idea! I’ll have to try this recipe although I’ll probably use strawberry since watermellon isn’t a favorite flavor in our house.

  4. Lisa@The Cutting Edge of Ordinary on June 12th, 2009 4:01 pm

    What an adorable cake! Would be great on a picnic!

  5. Linda on June 12th, 2009 8:22 pm

    thanks for this cake idea! i was still searching for a simple cake for my girlie who is turning 2 next month. this is perfect for a July birthday party!

  6. Rina on June 13th, 2009 2:57 pm

    LOVE this!!!!!!

  7. Arla on June 14th, 2009 4:43 pm

    Very cute, Kay, but we all said “Yuck”. “How can you put milk on a watermelon and eat it?!” Elv says. But it is cute, nonetheless. :)

  8. Traci on June 14th, 2009 7:12 pm

    You are so stinkin’ creative!!! …turning the chips upside down….AMAZING!!!

  9. Katrina on June 20th, 2009 1:26 pm

    What a fun cake! Looks great. Love the picture of your daughter holding it like real watermelon, then the picture of her messy hands! ;)

  10. aleasha on May 14th, 2010 9:22 am

    OMg thank you for being so creative !! I needed a good idea for my daughters 2nd birthday and she loves watermelon.

  11. Nici on July 2nd, 2010 9:09 am

    Such a cute idea, just wish mine looked more like yours. I’m new to decorating cakes, and overall this was fairly easy. My colors aren’t as dark as they should be, but still cute! Thanks for the idea!

  12. Rae Ann on July 16th, 2010 3:32 pm

    Looks great! I love the idea of using watermelon gelatin (I’m guessing the flavor doesn’t overpower?) My son wants a watermelon cake for his July birthday and this will be perfect!

  13. greenweddingplannerblog.com » Blog Archiv » Summer Party Themes – Polka Dot Watermelon on October 4th, 2010 8:56 am

    […] parties! What about the cake?! You’ll love the instructions and photos for this DIY Watermelon Birthday Cake by Kay at Kitchen Scrapbook: Her watermelon cake secret? White cake mix, Jell-o, icing, […]

  14. Bella on June 25th, 2011 7:32 am

    Looks cute. Took this idea and made it into a red, white and blue cake with blueberries and strawberries on top to resemble the flag of the United States of America. Nice looking and good; changed to white cake with almond flavoring and a strawberry (thinly sliced) center.

Peanut Butter Candy Cake

Posted on November 11, 2008
Filed Under Cakes

Ok, it’s about time to feature something sweet again, wouldn’t you say? I would! I have to force myself to try to keep this site balanced… would be more fun to have all desserts. But maybe the reason for that is because that’s the type of stuff that I‘m addicted to get cravings for the most. So, of course it’s more fun to post about it. That’s probably why I haven’t posted the crunchy-baked fish yet that I made awhile ago.

This recipe is hand-written in my ‘blank’ cookbook. It’s my mother-in-law’s recipe. I’d never had it or even heard of it until she made it one time when my family went over to their house for a meal one time many years ago, before I even dreamed she’d be my mother-in-law someday. Ok, I’d better take that back… it may have been in my dreams for the future… ????

I think this cake is meant to be a knock-off of the TastyKakes Peanut Butter Kandy Kakes, which are (in my opinion) the BEST in the entire TastyKake line. It does actually taste a lot like them, except those have chocolate on all 4 sides instead of just the top. Hmmmm, never thought of it till right now, but I could cut them out in circles after the peanut butter is on and dip them in chocolate. Given the choice of chocolate on 1 side or chocolate on ALL sides… that’s a no-brainer.

Peanut Butter Candy Cake

Printable recipe

4 eggs
2 cups sugar
1 cup milk
1 tsp. vanilla
2 cups flour
1/4 tsp. salt
2 tsp. baking powder
1 cup peanut butter
8 oz. milk chocolate chips (I used most of a 12 oz. bag)

Beat and beat the eggs. Gradually add the sugar, milk, and vanilla.
pb-cake1.jpg

Then add the flour, salt, and baking powder. Pour into a greased jelly roll pan.
pb-cake2.jpg

Bake 15-20 min at 350.
pb-cake3.jpg

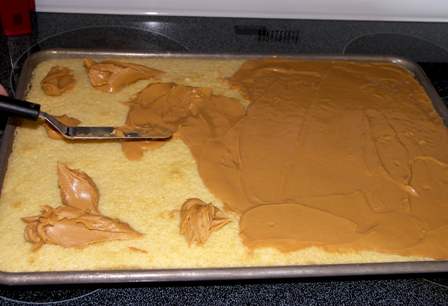
When you get the cake out of the oven, put dollops of peanut butter all over the cake. When it softens and melts a bit, start spreading it out until the entire cake is evenly covered. I didn’t actually measure out 1 cup for this (and probably put on over 1 cup), so don’t hold yourself to 1 cup if it seems like more would be better. :) Same with the chocolate.
pb-cake4.jpg

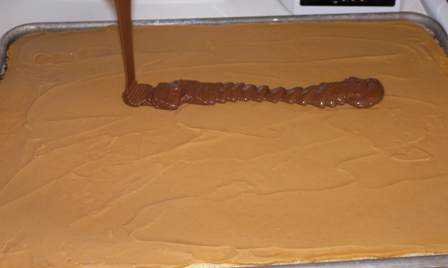
Let the cake cool, then put it in the freezer for awhile until the peanut butter firms up. Melt the chocolate and spread on top of peanut butter. It’ll harden because the peanut butter underneath is cold.
pb-cake5.jpg

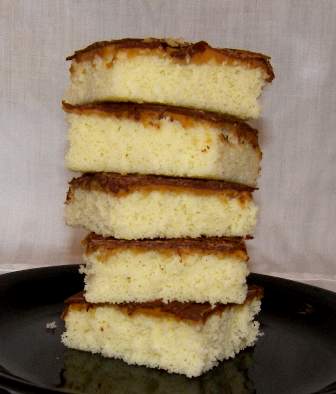
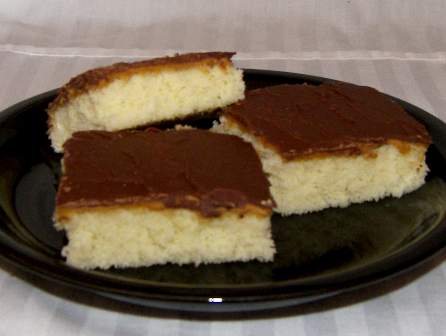
Cut into squares. Some of my pictures got blurry, and I don’t have a good one of the cake all covered with chocolate. I really should check my pictures before eating the food!
pb-cake6.jpg

pb-cake7.jpg

I don’t think I need to sell the idea that this is good stuff! The cake part is kind of like a moist pound cake. Moist cake with peanut butter and chocolate… nothin’ wrong with that combo! :)

Comments

10 Responses to “Peanut Butter Candy Cake”

  1. Lisa @ The Cutting Edge of Ordinary on November 11th, 2008 10:50 am

    Oh my kids would LOVE these! I so have to make them! Thanks for sharing!

  2. Michelle on November 11th, 2008 12:19 pm

    I’ll have to give these a try. My husband is a big peanut butter fan.

  3. Judi on November 11th, 2008 12:52 pm

    This looks great. I think I like the idea of dipping the whole thing in chocolate.

  4. Amber on November 11th, 2008 2:11 pm

    Those look so awesome! I believe I’ll make some right now. :)

  5. Cordy on November 11th, 2008 6:55 pm

    Love them! Love them! Love them!

  6. Suzanne on November 11th, 2008 9:02 pm

    Hello-

    I ran across your website today, and I LOVE what I see! Your peanut butter cake reminds me of Tasty Kakes from Pennsylvania-which I cannot get in WI. Thanks for sharing all your wonderful looking recipes. I will be trying some of them!

  7. elaine on November 12th, 2008 7:21 pm

    I have been making these bars for years.My family loves them!I don’t make them quite as often since the kids are all married.I need to make them again.Thanks for the reminder.

  8. Princess T on November 13th, 2008 6:47 pm

    Yum! I’m so hungry…
    PS – LOVE the kitchenaid mixer – Kitchen appliance make me giddy.

  9. Katrina on November 16th, 2008 9:24 pm

    Goodness–yummy!

  10. Karen on November 19th, 2008 6:50 pm

    I made these last week and the girls thought they were WONDERFUL! Rondyn took one bite and knew exactly why the recipe was yours……….all that pb and chocolate!=)
    Never heard of Tasty Cakes but they must be good.

An Entire Meal of New Recipes

Tired of looking at roses? Me too! Time to dust off this site again and put something fresh on here.

I’m going to feature a full meal today, a napkin folding post soon, and hopefully some inspiration will come by the weekend for some Thanksgiving ideas!

This meal is taken out of the 2003 Quick Cooking Annual Cookbook on pages 8 & 9… I know, I’m like a broken record, Quick Cooking cookbook this, Quick Cooking cookbook that. I just love those cookbooks, and you know why? Because they have PICTURES!!!!

Pepper Jack Meat Loaf

1 egg or 1/4 cup egg substitute (I used an egg)
1 cup seasoned bread crumbs
1/4 cup chopped onion
1/2 to 1 tsp. salt
1/2 tsp. pepper
1 1/2 lbs lean ground beef
1 cup (4 oz) shredded pepperjack or monterey jack cheese, divided (I used all pepperjack cheese.)

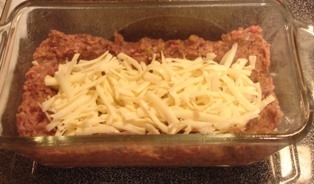
In a lg bowl, combine the egg, bread crumbs, onion, salt, and pepper. Crumble beef over mixture and mix well. Press half of the beef mixture onto the bottom and halfway up the sides of a greased 8″x4″x2″ loaf pan. Sprinkle 3/4 cup cheese over meat to within 1/2″ of sides.
meatloaf1
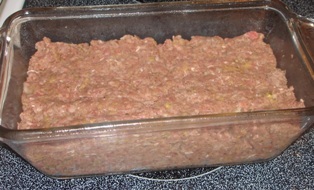
Pat remaining beef mixture over cheese.
meatloaf2
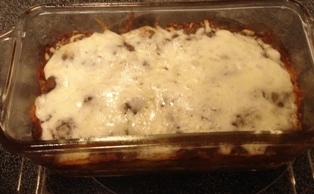
Bake uncovered at 350 for 50 – 55 minutes until meat is no longer pink and a meat thermometer reads 160. Sprinkle with remaining cheese. Bake 5 min longer or until cheese is melted.
meatloaf4
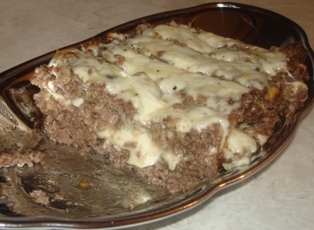
Let stand for 10 min before slicing.
meatloaf3Yield: 6 servings. We really liked this! It was good for something different, although I still prefer meatloaf with ketchup stuff on top. That pepperjack cheese really gave it some kick. Lexi (who is 4 and a picky eater) said it’s too spicy. Tiffany (who is 19 mos and eats anything) chowed it right down. We ate it with ketchup.

Potato Chip Potatoes

6 medium potaoes, peeled and cut into 1/2″ cubes
3/4 cup crushed potato chips, divided
1/2 cup chopped onion
2 Tbsp butter or margarine, melted
3/4 tsp. salt
1/4 tsp. pepper

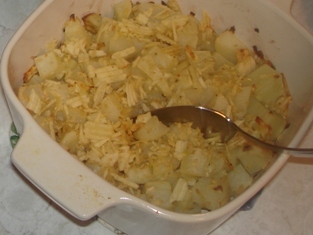
In a bowl, combine everything, except 1/4 cup of potato chips; toss to combine.Transfer to a greased shallow 2 qt baking dish. Sprinkle with remaining potato chips. Bake, uncovered at 350 for 40 – 50 min or until potatoes are tender.
potatoesYield: 6 – 8 servings. This was good, but nothing special. We ate it with ketchup because it was kinda blah without anything. It’s a good way to use up those last broken up chips at the bottom of the bag.

Creamy Pea Salad

2 pkgs (16 oz each) frozen peas, thawed
1/2 cup diced cheddar cheese
1/2 cup diced mozzarella cheese
1 medium onion, chopped (onion AGAIN!)
1 cup mayo or salad dressing
Salt and pepper to taste
4 bacon strips, cooked and crumbled

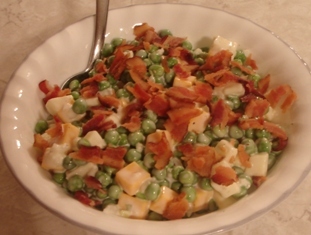
In a bowl, combine everything except the bacon; mix well. Refrigerate until serving. Sprinkle with bacon.
pea saladYield: 6 – 8 servings. Ok, I’m not even gonna pretend… this was NOT at all good! I don’t like cold peas or raw onions, but I decided to be open-minded and give it a shot, thinking maybe the other ingredients would make it good. None of the others liked it either. I ended up fishing out and eating the cheese and bacon and threw the rest away.

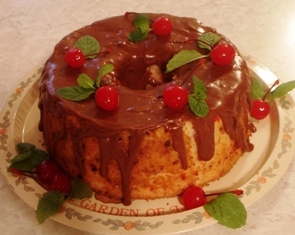
Chocolate Cherry Angel Cake

1 pkg (16 oz) angel food cake mix
1/3 cup finely chopped maraschino cherries, well drained
1 square (1 oz) semisweet chocolate, grated  I put an ounce (at least an ounce ) of milk choc chips in a food chopper.
GLAZE:
2 Tbsp. butter (no substitutes)
1 square (1 oz) semisweet chocolate Again, I used milk choc… I try to stick to the recipe, but with chocolate, whenever I use semisweet like the recipe says, I always end up saying ‘next time I’ll use milk chocolate’. So I’m just going to start always using milk choc the 1st time.
1 Tbsp. light corn syrup
1 cup confectioners’ sugar
3 to 5 tsp. maraschino cherry juice
Maraschino cherries and fresh mint, optional

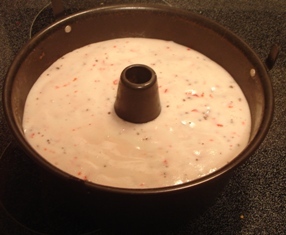
Prepare cake mix according to directions. Fold cherries and chocolate into the batter. Pour into an ungreased 10″ tube pan.
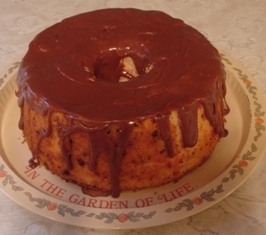
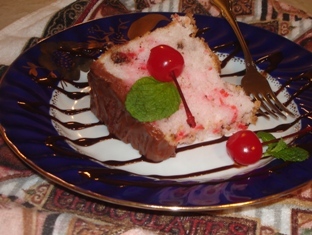
cherrycake1Bake at 350 for 40 – 45 minutes or until cake springs back when lightly touched. Immediately invert pan; cool completely. Run a knife around sides of cake and remove from pan. In a saucepan, combine butter, chocolate, and corn syrup. Cook and stir over low heat until chocolate is melted. Stir in confectioners’ sugar and cherry juice until glaze reaches desired consistency. Drizzle over cake.
cherrycake2
Garnish with cherries and mint if desired.
cherrycake5Yield: 12 servings. YUM!!!! This tasted as good as it looked! If you like chocolate covered cherries, you’ll like this! Shannon doesn’t like cherries and he even kinda liked it. It would be GREAT for around Christmas time too… doesn’t it look sorta Christmas-y?
cherrycake4

Contest winners!

#15 ‘takes the cake’!
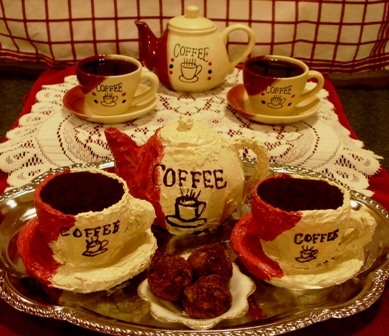
tea set

The congratulations go to Jan from MO. You will not be disappointed in how she made it! And the neat thing is that she asked someone to take progress pictures of the project… ah, progress pictures, a lady after my own heart!   Another neat thing is that she is my sister. Her site is jan_n_dan.

The real set is decor in her coffee-themed kitchen. It’s smaller than normal size… the tea set, I mean. (Someone else with a coffee-themed kitchen was wondering where you got that little set, Jan, and wants one like it for decor in her own kitchen.)

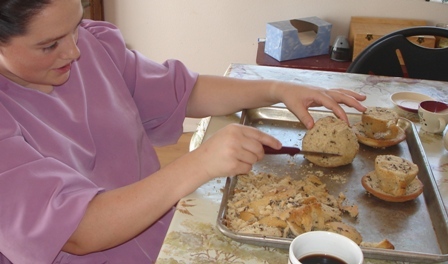
To make the cake, Jan wrapped plenty of tin foil around each piece, then gently pulled each piece out of the tin foil form, filled the forms with cake batter (not just ordinary cake batter, she used a mocha cake recipe so it would be more fitting when they eat it ) , then baked them. When she took them out of the oven, let them cool, and peeled the tin foil off, what she had was this…
winner1
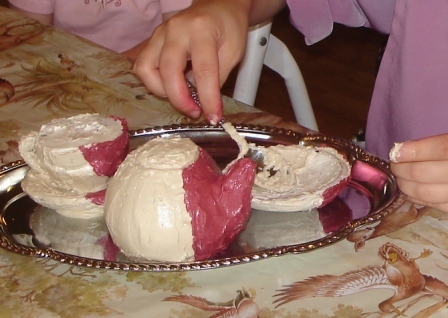
So, she set to work, carving…
winner2
Then came the frosting…
winner3
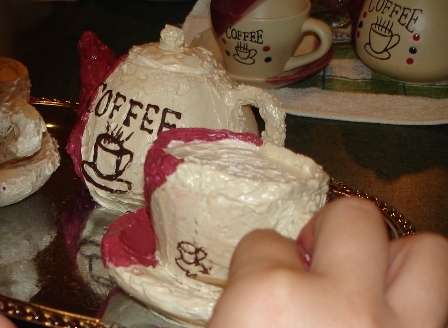
The lettering and drawing was tedious, esp on the little cups…
winner4
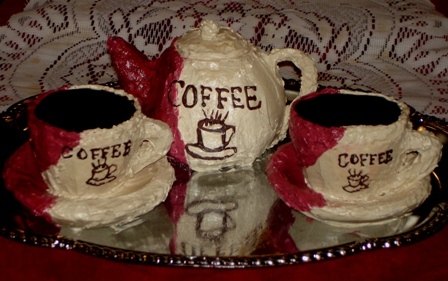
Done!…
winner5
The ‘coffee’ in the cups is chocolate syrup. Everything else is cake and frosting except the lettering and decals were done with melted chocolate and the handle on the teapot was made with chocolate, then covered with frosting. Definitely a work of art!!!! Made just for the contest… and for fun and because she’s adventurous and likes to take on challenges.  Nobody helped her. Completely edible. Very creative. Good job, Jan!

————————————————————————————————

One day last week, I decided to add a runner-up prize
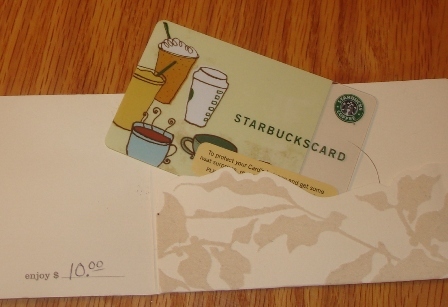
starbucks A $10 Starbucks gift certificate.

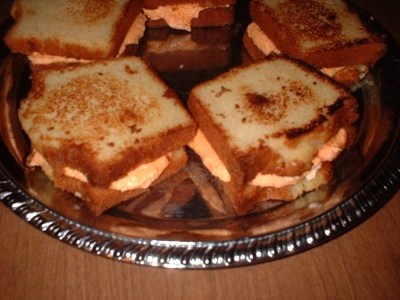
This prize was won by #7 , the ‘grilled cheese sandwiches’ made from pound cake and frosting…
sandwiches  They really do look real! Great job, Evangeline !

  ———————————————————————————————–

And now, the top 4 honorable mentions…

#9, the teapot cake (for those of you who wondered, she shaped the handle and spout with rolled fondant that was tinted pink to match the frosting).

#2, the frosting and apricot ‘eggs’

#12, the kitty litter cake with appropriate props

#19, the barn cake

  ————————————————————————————————-

Thanks so much to all of you who took the time and effort to enter something! You’re the ones who made it a success! I’m anxious to try some of your foods, esp ones that look like main course, but are actually a dessert.

And thanks to all the voters! Contagious enthusiasm and a surge of votes the first 2 days was exciting and fun!

And thanks to the 13 new subscribers who subscribed to seasoned_to_taste last week!

—————————————————————————————————

Next up on seasoned_to_taste:
A series of fun stuff to do for adding a bit of flair to entertaining and food presentation… tomato roses, lemon roses, chocolate leaves, napkin folding, place setting ideas, etc.

Valentine’s Day is this week!

Posted on February 11, 2007
Filed Under Cakes, Holiday cooking, Salads

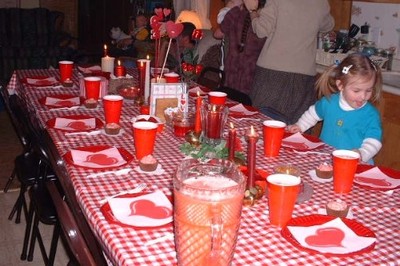
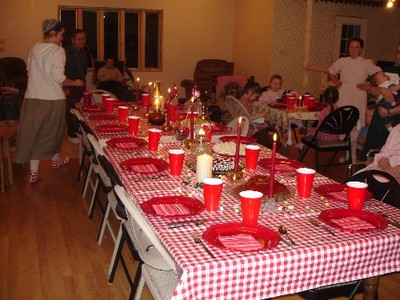
I just thought about it that I should’ve done a little Valentine’s meal in advance in case anyone wants ideas. For as long as I can remember, Mom made a heart-shaped meal every Valentine’s Day. Even after we children started getting married, it has stayed a tradition and we still get together for it. It’s often heart-shaped meatloaf, scalloped potatoes with heart-shaped potato slices on top, salad with heart-shaped cheese and meat in it, bread slices cut out in heart shapes, red punch, candy favors and jellos beside each plate, and a chocolate cake with caramel and white mtn icing. But, we’re not stuck on the same menu. One year we made heart-shaped pizzas. Here are a couple pictures of the table from the last couple years. I didn’t have good pictures of the food… I wasn’t into food photography then yet.   When we have our meal this year, I’ll be sure to get good pictures and put them on here.
vtines05 2005
vtines06 2006
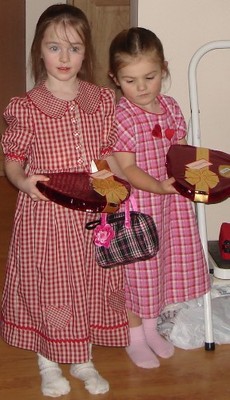
Krista and Lexi with their Valentine chocolates from Grandpa.
vtines06girls

  ———————————————————————————-

And now for a couple recipes…  We had carry-in/fellowship meal/potluck at church today. I, wanting to be in the Valentine’s mood, made a couple things that were red and pink. I was on for salad and dessert.

Easy Cottage Cheese Salad    …From the Magnolia Cookery cookbook.

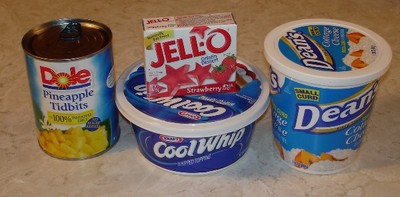
This is not kidding when it says ‘easy’! Here are the ingredients:
salad ingred A can of pineapple, a 3 oz box of jello (any flavor), a carton of Cool Whip, and a carton of cottage cheese.
One thing that makes it easy is that everything is all measured for you because you use it all.
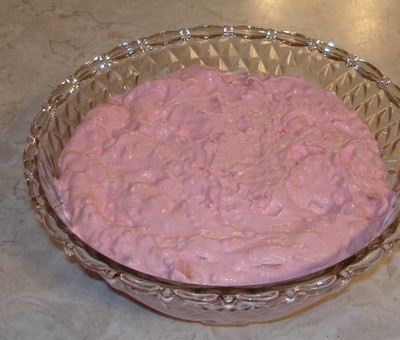
Mix cottage cheese with dry jello. Mix well. Let set 5 min. Drain juice from fruit, then add to cottage cheese. Fold in the Cool Whip. Best when refrigerated 1 hour before serving. I really like this stuff!!!! But, no other comments from the other people in this household, please… they don’t feel quite the same about it as I do.
salad done

Red Velvet Cake     …From an Easy to Bake, Easy to Make recipe card

2 1/4 c. flour
1 1/2 c. sugar
1/2 c. (1 stick) butter, softened
2 Tbsp. unsweetened cocoa powder
1 1/4 tsp. baking soda
1/4 tsp. salt
2 large eggs
1 c. buttermilk
1 Tbsp. white vinegar
1 Tbsp. red food coloring
1 tsp. vanilla extract
2 cans (16 oz each) prepared cream cheese frosting, at room temperature

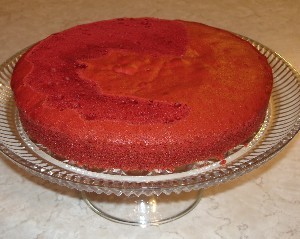
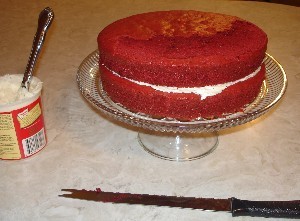
Preheat oven to 350. Coat the bottoms of two 9″ round cake pans with cooking spray. Place 1st 6 ingredients into large bowl of electric mixer. Mix on low speed, scraping bowl, until mixture resembles moist crumbs. Add eggs, buttermilk, vinegar, red food coloring, and vanilla and mix on low speed until dry ingredients are moistened. Beat on high speed until light and fluffy, about 3 minutes.  (I wish I would’ve taken a picture of the unbaked batter, it looks pretty neat.)   Divide batter between prepared pans. Bake until toothpick inserted in centers comes out clean, 25-30 minutes. Remove cakes from oven and cool in pans on wire racks for 10 min. Turn cakes on to racks to cool completely. Stir frosting in cans to fluff the contents. With a spatula, loosen cakes from pans. Invert one layer onto plate.
red1 You can tell part of it is cut away… I do that to make it as level as possible. Plus, it gives some extra cake to make crumbs to go on top.  Spread with 2/3 cup frosting. Place second layer on top.
red2
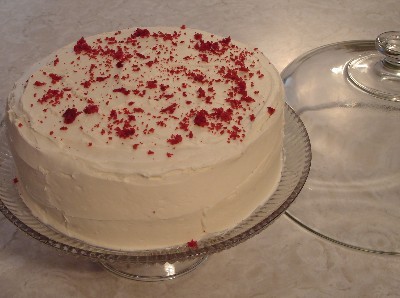
Spread top and sides with remaining frosting.
red3
red4
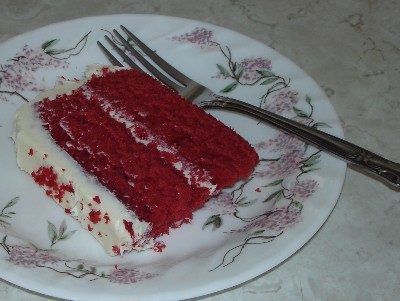
 It is SO good! People rave about it every time! It’s moist and soft. I usually make my own cream cheese frosting, but this time (because I like to try to make things as accurately as possible to feature on here) I bought it, like the recipe says. And, it just isn’t as good as homemade frosting!

I thought about baking it in heart-shaped pans, but didn’t then. If you make it for V-tines Day, you could do that OR bake it regular, then cut out heart-shaped pieces with a cookie cutter, then layer and frost them for individual serving sizes. That would look kind of cute sitting beside each plate.