Recipes and Cooking Ideas for Homemakers and Amateur Cooks
 

A Step-By-Step of How To Have Your 8-yr-Old Make Dinner

Posted on June 14, 2014
Filed Under Cooks in Training, Easy meals

It’s easier than you think. In fact, Tiffany did it because I had another project going. My project was in the kitchen, so I was right there the whole time and pretty much just talked dinner into existence. :) That’s a lot different than how it used to be. It used to be that I wouldn’t let them cook unless I had my schedule cleared and plenty of time. And then my main job was damage control and cleaning up messes as fast as they made them. So, I’m here to say that there. is. hope. for little cooks to get trained. :)

tiff meal menu

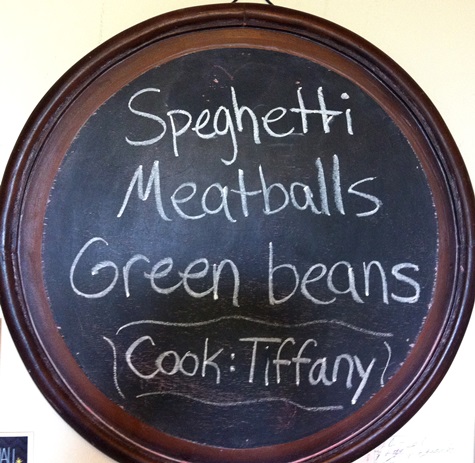
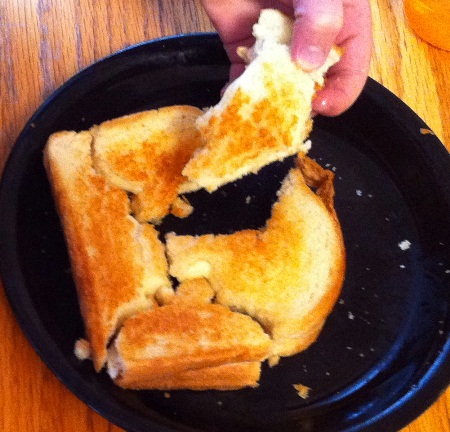
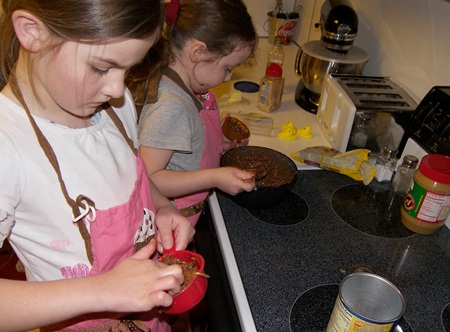
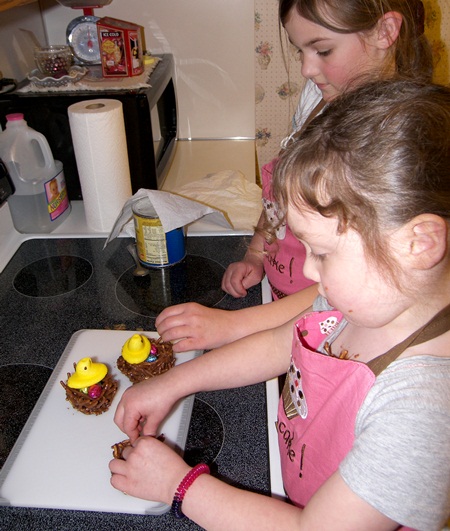
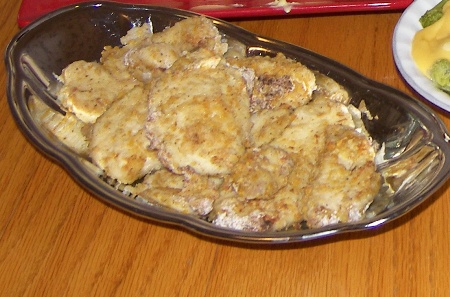
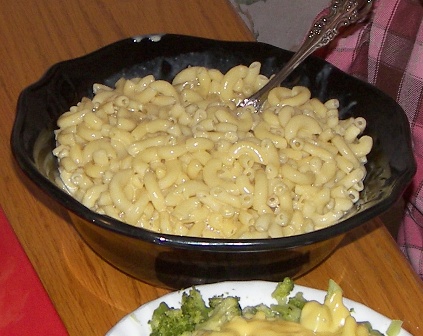
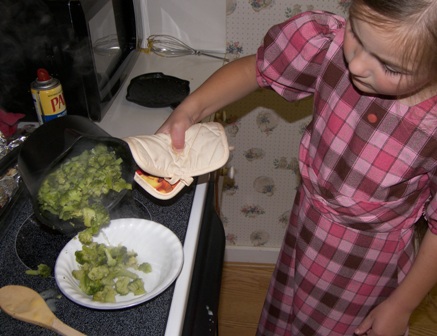
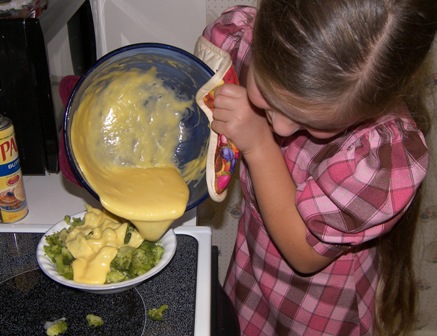
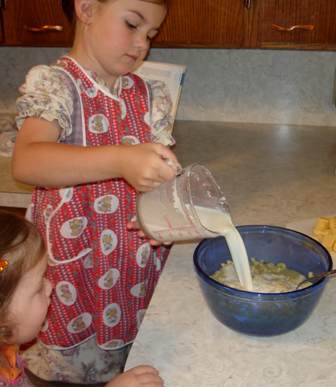
So, here we go, a spaghetti & meatballs meal. I only have 2 pictures because I was busy doing other stuff.

Step # 1. Lower your standards. This is going to be a simple meal. Nothing gets mixed into the meat, for example. And there’s no garlic bread. She did want to get all fancy shmancy with the Parmesan cheese, though.

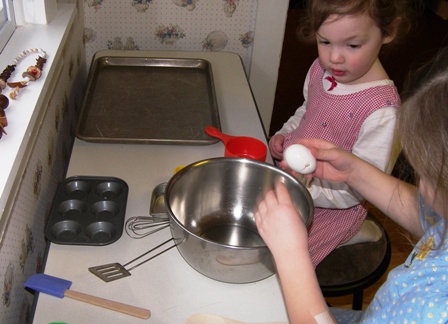
Step 2. Have a little lesson on how to turn the correct burners on on the stove (I actually thought Tiffany would know this, but she didn’t! I guess either I did it for her before, or they’re not born knowing this stuff.) So, we had a little lesson on how the “map” under each control matches the stovetop layout.

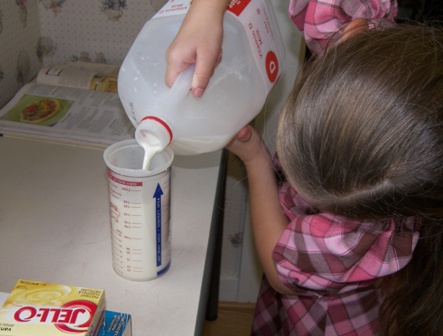
3. Have her get everything out: Spaghetti, kettle, frying pan, lb of burger, jar of pasta sauce, salt, Italian seasoning, canned green beans, bowl for green beans. That’s it.

4. Tell her to fill the kettle half full of water, sprinkle in some salt, put it on the stove, and turn the burner on Hi.

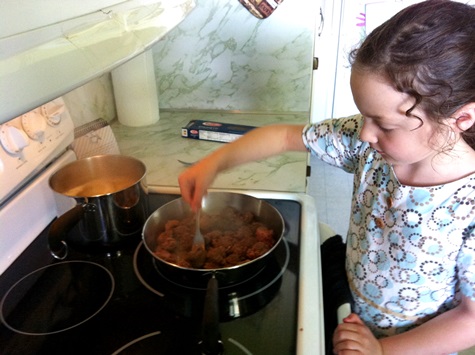
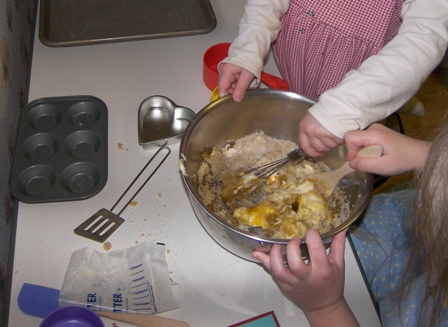
5. Tell her to put the frying pan on the biggest burner, turn it to 5, then take the burger and shape little balls and put them in the pan.
I had her use the stovetop frying pan even though I like the electric better… here’s why: the electric one has legs and a bit higher of sides, so it’s several inches taller and I thought she’d have a hard time comfortably seeing into it.
And it’s always good when a cook is able to see into her frying pan.
I had her fry instead of bake them because she hasn’t mastered the thing of getting stuff in and out of the oven yet, without burning her arm somewhere between her wrist and her armpit. She wants a pair of mitten hot pads that go all the way up her arms. Seriously, she does.  

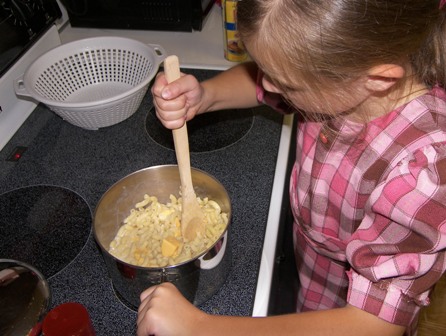
6. The water was boiling by the time she was done making the meatballs, so I told her to put the spaghetti in and stir it a bit. Then flip the meatballs and to just kind of keep flipping them until no more pink was showing.

tiff meal cooking

7. The meatballs and the pasta were done around the same time, so I told her to turn the burners off and I helped her drain the fat off the meatballs, and then she sprinkled them with salt and Italian seasoning, dumped the pasta sauce over them, and turned the burner to Low.

8. Time to dump the beans into the bowl and microwave them for 2 minutes.

9. So now the beans are heating, the spaghetti is holding, and the meat is simmering in spaghetti sauce. Time to set the table, including getting out her beloved Parmesan grater and a chunk of Parmesan, and pour water.

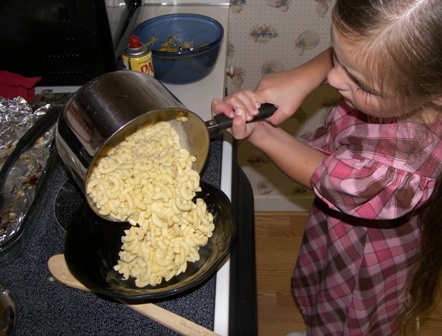
10. Now everything is done. She was able to drain the spaghetti herself by dumping it into the colander in the sink. Time to dish up. Aaaaand grate Parmesan over everything. And call everyone to the table.

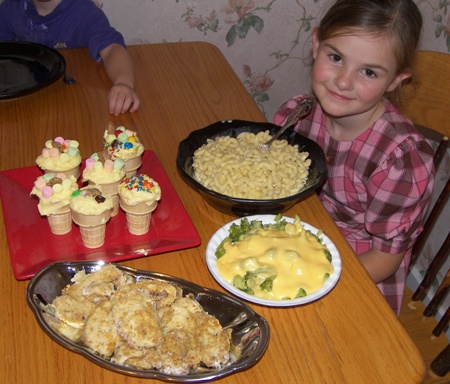
Thank you for making dinner, Tiffany. It was good!!

tiff meal done

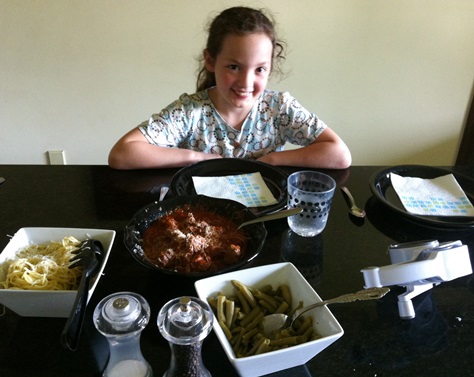
She held the Parmesan grater hostage and the minute we dished food onto our plates, she was magically standing beside us saying, in what we call ‘the fancy lady voice’, “Would you like some Parmesan cheese?” and then we’d answer, with exaggerated politeness, “yes, I would, please” and she’d reach in and grate.

Comments

3 Responses to “A Step-By-Step of How To Have Your 8-yr-Old Make Dinner”

  1. Liz on June 14th, 2014 1:08 pm

    Kaitlyn thought this post was especially for me. :) Think she was trying to hint?

  2. Kay on June 14th, 2014 2:48 pm

    Ha, she’s so subtle. :)

  3. Shannon on June 14th, 2014 6:12 pm

    You go Tiffany! As soon as her cooking class is over I’ll be sending my girls down! :)

Angry Birds, Fishing, Footballs, Pigs with Mud… and other lunches for kids

Posted on March 14, 2012
Filed Under Cooks in Training, Easy meals, Tidbits

I’m not sure who has more fun with this… me or the kids. The thing about kids is that they’re so forgiving. For example, if your lion lunch looks more like a sun with whiskers, they’ll love it anyway. And they’ll even call it a lion, and they’ll grrrr while they’re eating it. Those of you reading this will probably fall into one of 3 categories:
1. Think “That’s a waste of time.”
2. Think “That would take too long, but I’d like a few easy ideas to do someday… maybe one day when I have nothing else to do *hahaha, laughing at your own joke of nothing to do*, or for a birthday party for one of the kids or something.”
3. Think ”I need to make lunch anyway, so instead of cutting a sandwich in half corner-to-corner and throwing it and chips on a plate, I might as well take a couple extra minutes and cut a roofline at the top of the sandwich and place some Doritos here and there to make it a house-on-fire lunch. Not saying I do it all the time… just hit n miss for fun. Because psssssst *whisper* Sometimes I fix lunch in 30 seconds flat and my kids’ lunches look like this:”
kid-lunch-pkged.jpg

If you are person #1, I don’t care, I won’t try to change your mind… I’ll just feel privileged that you’re still putting up with me on here. 🙂
If you are person #2, do it, find that ’someday’, seriously, I can’t tell you how much the kids will love it.
If you are person #3, ahhh, let’s just remember that strengths and weaknesses lie side by side… because I’m pretty sure that spending time playing with food instead of folding laundry would be considered a weakness. ;)

You may notice that this is almost all grilled cheese sandwiches. Nothing fancy. No special recipes or anything.

I’m just going to put up 10 or so pictures here of ones I’ve remembered to take pictures of. Most of them were quickly snapped with my cell phone… without necessarily planning to post them, just more for my own interest. I thought of redoing them all and getting decent pictures, but you know what? I don’t specialize in the photography line like a few of my talented friends do. (My talented friends’ first piece of advice would probably be “use a camera, never a cell phone!”) :)

I think the pictures are pretty self-explanatory, but I’ll try to explain sorta what I did under each picture. I just used whatever I had on hand… nothing was planned ahead, so sometimes I had to improvise, like using melted chocolate on a ham and cheese sandwich… it wasn’t very much though, I just needed something dark for eyebrows. I think you’ll notice the improvising as you look at the pictures. ;)

1. Let’s Go Fishing
kid-lunch-fishing.jpg
Apple boat, fish-shaped grilled cheese sandwich, carrot fisherman, gummy worm, pretzel fishing pole, brown crayon fishing line, blue crayon water, edible marker face (well, just the ink is edible, not the whole marker ;) ), chocolate chip eye.

2. House on Fire
kid-lunch-house-fire.jpg
Sandwich cut into a house shape, windows doors and roof line out of crust, chimney cut from scraps, marshmallow smoke, Doritos fire.

3. Pig with Mudhole and Feeding Trough
kid-lunch-pig.jpg
Grilled cheese pig with ears from scraps and snout from one side of another sandwich, carrot eyes and nostrils, Pringles trough with snack mix pig food, chocolate pudding mud.

4. Caterpillar
kid-lunch-caterpillar.jpg
Trail bologna caterpillar with shredded cheese mouth and antennas, cheese eyes, cheese leaves, cookie & pretzel sun. I let them eat crackers with it, but I should’ve incorporated the crackers into the caterpillar to make it more interesting and varigated!

5. Butterfly
kid-lunch-butterfly.jpg
Snacking on cheese and pretzels on evening, Tiffany (5) suddenly came over to me and said “Look Mom! I made a butterfly with my cheese and pretzels!”

6. Sailboats
kid-lunch-sailing.jpg
Grilled cheese boats, licorice masts, strawberry sails (it was this lunch that I realized ”hey! It would be very easy to make hearts out of strawberry halves!”), Marshmallow clouds, cracker fish (swimming in invisible water, ha).

7. Semi and Car
kid-lunch-semi-car.jpg
Bake ham n cheese sandwiches with hot dog bun instead of hamburger buns. Get them out of the oven and add unmelted cheese details: wheels, smoke stacks, driver with face drawn on. For the cabs, I added one layer from another sandwich. The kids drove these around a bit before eating them. The wheels are held on by toothpicks. A toothpick is the perfect length to span the width of a hot dog bun and have a bit left over on each side to press the cheese onto. The faces stayed on because I put them against the hot melted cheese and they stuck.

8. Lion
kid-lunch-lion.jpg
Yeah, you can laugh at these lunches, I don’t care. :) Grilled cheese head, shredded cheese and cheese chunk face, Doritos mane.

9. Spiral and a Scissors
kid-lunch-spiral-pizza.jpg
Cut-your-own-piece pizza. The girls cut small pieces so they could use the scissors more often.

10. Dog and Bone
kid-lunch-woof.jpg
Grilled cheese dog, Pringles ear, piped chocolate pudding eye, nose, bone, and words.

11. Puzzle
kid-lunch-puzzle.jpg
Grilled cheese puzzle pieces… very simple, but Tiffany had fun playing with it anyway.

12. Are You Ready for some Football?
kid-lunch-football.jpg
Grilled cheese footballs with shredded cheese laces, carrot goal posts (not fastened, just arranged there, and they roll while transporting the plate, then you have to fix them again 🙂 ), cookie jersey (you can’t see it very well, but I used red edible ink to draw a 5 on it (because the tot eating it was 5) and drew lines at the end of the sleeves).

13. Angry Birds
kid-lunch-angry-birds.jpg
Head is round bread, round cheese, and crescent ham with ‘tufts’, cheese eyes and nose (I didn’t have yellow cheese, so I colored white cheese with an edible ink marker), melted chocolate eyebrows and ‘pupils’.

Ok, this ended up being 13… an unlucky number! I’m not superstitious, but maybe I should add another one that I just thought of that I made this week to go with a lunch, but didn’t take a picture:

14. A carrot man. Think stick man with 5 baby carrots: 1 carrot was the torso, 2 were legs, 2 were arms. The head was a round piece of cheese with a smile drawn on with an edible ink marker. Then, I put a raspberry upside down on his head for a cap. One carrot man was sitting and one was standing (or laying, rather). Everything was held together with little pieces of toothpicks. Could even dress them up with fruit roll-ups or cheese/ham slices or something… didn’t think of that till right now.

Have fun! We are! 🙂

Comments

11 Responses to “Angry Birds, Fishing, Footballs, Pigs with Mud… and other lunches for kids”

  1. Arla on March 14th, 2012 10:50 pm

    Kay, what I think is the neatest thing about this is that you’re taking time for your girls and loving it, too. It only gets better from here, I promise.

  2. Monica on March 14th, 2012 10:56 pm

    Thanks for all the ideas!! My children would love the Angry Birds, since that is one of their favorite things right now. I will have to try that.

  3. Kay on March 14th, 2012 11:46 pm

    Arla, I love your last sentence! Thanks for that encouragement! :)

    Monica, yeah, I think the Angry Birds one was about the biggest hit of them all here, too. :) And here’s a hint that I forgot to put into the post: a kitchen scissors is your friend for cutting the ham.

  4. Shannon on March 15th, 2012 7:50 am

    Kay! You are the tops!! My girls are leaning over my shoulder saying, “WOW Mom, you should really try that. She can do all that? She’s good!” :) I really really should try this sometime.

    I betcha when your girls have kids, they’ll say, “Here’s your lunch! Grandma used to do this for me when I was little.” My kids will give their kids a plate and says, “Eat!” :D

  5. cretora on March 15th, 2012 9:56 am

    that is SO cute! I’m thinking birthday party or boring summer day for me. Def. a fun idea for Cali to unleash her creativity in the kitchen. :)

  6. Audrey on March 15th, 2012 11:43 am

    This type of thing is something that I so admire about you. I probably fall into category #2, but then I hardly ever get around to this kind of thing. I know my kids would love it though. And some of them are so simple. Thanks a lot for sharing these with the rest of us!

  7. Renita on March 15th, 2012 3:09 pm

    awesome ideas. Will have to remember to try some. So often I’m in a hurry and just want them to eat their food instead of actually playing with it. :-) Thanks

  8. Kay on March 15th, 2012 4:43 pm

    Shannon, LOL about our kids as moms someday! :p You oughta do the house on fire… that was probably the biggest bang for time taken. There’s nothing to pipe and no shredded cheese to arrange and no faces to draw.

    Cretora and Aug, yep simple. Simple enough for even the older kids to do themselves!

    Renita, I don’t usually sit down with my kids to eat lunch, so I don’t care what they do. :) I usually eat something different than they do, so I make mine while they’re eating theirs.

  9. Beth on March 20th, 2012 9:26 pm

    Once again, you blow me away with your creativity! I should probably admit that I am #1, but I know the kids would love it if I’d do it. I used to cut dog shapes for their ham & cheese sandwich & they loved it! So maybe tomorrow when I get lunch together, I’ll think of you & do something special. :)

  10. Beth on March 20th, 2012 9:30 pm

    I forgot to say that I really love #7. Also, I will keep all of these in mind for parties! …since I’m still holding out on looking at Pinterest for ideas. :)

  11. Judi on April 24th, 2012 2:04 pm

    if I thought my picky eaters (granddaughters) would eat it I would do any of those things lol Although, this weekend we all made cupcakes and the pickiest of them all ate a whole cupcake – the one that eats anything only ate the frosting lol

    Love the ideas.

Think Spring with Food… aka playing with your food :)

Posted on April 18, 2011
Filed Under Breads Biscuits and Rolls, Cooks in Training, Holiday cooking

You can do so much more with food than just eating it. I mean, yeah, eating is usually the end result, but how about having a little fun first? ???? It comes naturally, really. Kids do it without being taught… I remember using Bugles for fingernails, biting eyes and a mouth out of a round slice of bologna and using it for a mask, making roads with stirred up ice cream, shooting baskets with popcorn or M&Ms (in which the basketball net is your or your sibling’s mouth), and best of all was peanut butter playdoh… you could form a bowl and spoon and peas in the bowl, and then actually eat the ‘peas’, and well, eat the spoon and the bowl, too.

Now, I play with food in a more grown-up way. So does my mom. She made garden meatloaf a couple weeks ago for a group of school children.
spring-meatloaf.jpg

The middle 3 rows are obviously corn, tomatoes, and peas. The 2 end rows are potatoes and carrots, which are there, but underground, of course. :) She made sure to put a potato and a carrot against the edge of the pan so you could see it from the outside. And that’s not all… she put in mushroom pieces and the white ends of green onions and told the kids to look for slugs and worms. They had a heyday, digging through their meatloaf.

She also made bird-shaped dinner rolls, which were also a real hit.
spring-bird-rolls.jpg

When Mom emailed these pictures to us girls, my sister Jan wondered if she had taken progress pictures. I thought that was a bit strange that Jan would need progress pictures because she has proven herself quite capable of creating in the kitchen with no directions (more on that later). Mom didn’t have progress pictures, so, Jan, this portion of the post is just for you. Awww. :)

Roll a rope about 7″ long. Tie it in a knot. Fan out one end and make little snips for tail feathers. Put a sliver of almond in the head for the beak and cookies decorations or bits of raisins or something for the eyes… I used cloves.
spring-bird-rolls-making.jpg

spring-bird-rolls-unbaked.jpg

Let them rise and bake them. And TA-DA! fat little birds awaiting butter and jelly. Ok, that may be an unappetizing choice of words.
spring-bird-rolls-baked.jpg

If you notice that the one bird (lower right in the picture with 3 unbaked in a pan up there) has some brown on it… I was making mini cinnamon rolls with this same bread dough, so I made a cinnamon roll bird by rolling the dough extra thin and into about a 4″ wide strip, spreading on butter, brown sugar, and cinnamon, rolling it up, cutting about 7″ off, and knotting it the same as the rolls above. Then, glaze it.

———————————————————————————————————-

Another Spring thing we did was Bird Nests. This portion should be a Cooks in Training post, since my little cooks did these. Melt 1 cup of chocolate chips with about 1/2 cup of peanut butter and mix it with 2 cups chow mein noodles. You can either spoon them onto a plate of some sort and then make a little indent for the eggs to go in, or you can do it like the girls did and put them in little containers to keep them round. They put them in the freezer for about 10 minutes to harden the chocolate, then popped them out of the container with a spoon, put eggs in and put a chic— oops, I mean, a BIRD on top. Really, who ever heard of a little yellow chick sitting on a nest… of COURSE that’s a canary! :)
spring-nest1.jpg

spring-nest2.jpg
Uhhhh, is that what I think it is in Tiffany’s apron? How did part of her nest get there?!

spring-nest3.jpg

spring-nest4.jpg

Then, they took them in the dining room to eat some and Lexi in a very excited voice said, “Mom! Come look! If you’d ever make a river cake with beavers, this would make a PERFECT dam! See? Doesn’t that look just like a dam? All I did was flipped my nest upside down!” So, there you go… an idea for all those of you out there who are planning beaver cakes. :) Then, Tiffany flipped hers upside down on her chic-, uh, canary, and said, “Or, it would make a good hat too.” I think it looks more like a turtle shell, considering the size ratio of hat to bird. Wow, the possibilities are endless with this chocolate chow mein noodle combo! Ha.
spring-nest5.jpg
It tastes really good too. Could forget about the whole nest thing and just make these things and drop them on wax paper until they harden and you’d have a yummy snack. I’d double the amount of chocolate and peanut butter for that though. Meanwhile, Megan sits in her highchair, healthily eating peeled apple chunks.

—————————————————————————————————————–

Now, I want to add one more thing yet, even though it has nothing to do with Spring. It does, however, have to do with my sister Jan (who I mentioned up there) and playing with food (which I mentioned up there).
Once upon a time, Jan won a contest. It was a Make Real Food Look Like Something Else contest from a few years ago on my cooking blog. If you feel like checking out the entries, here’s the link: Contest
Jan won it fair and square, I might add… no rigging of votes by her big sister.
Here was her entry:
contest-jan-teacup-set.jpg
She has that miniature tea set  (in the back) as decor in her kitchen and made a little knock-off set from it. It’s all cake and frosting except the ‘coffee’ is chocolate syrup and the cup/pot  handles are piped chocolate covered with frosting. She had some truffles on hand, so she put 3 on a plate to go with the coffee. So, this lovely detailed 5-piece tea set coming from a lady who sees bird-shaped rolls and asks for progress pictures?! C’mon, Jan! :)

As I was looking at these contest pictures again, I saw this, so I’ll throw it in here because it DOES actually have to do with Spring. You could serve this for dessert at your garden-themed party…
contest-dirt-pudding.jpg
Dirt pudding, in which one of the ingredients is crushed Oreo cookies. I think this entry was submitted by Lavonne.

———————————————————————————————————————————————————————————————————————————————————————————————————————————————————————————————————————————————————————————————–

In other news, not really related to anything, but just something I’m excited about… I get to make a Lightning McQueen birthday cake tomorrow afternoon! I found this post with directions how to do it. ???? The one tomorrow will have cake under the racetrack and maybe a couple other differences. We’ll see how it all turns out, but the thing with having made it before is that I can learn from my mistakes. :)

Comments

7 Responses to “Think Spring with Food… aka playing with your food :)”

  1. Jan on April 18th, 2011 11:19 am

    Thanks, Kay! I’m honored.

  2. Beth on April 18th, 2011 11:31 am

    Neat-o! This being.awesome.in.the.kitchen obviously runs in the family! Loved the post & am looking forward to seeing how you could possibly improve on the Lightning McQueen cake! Have fun with it.

  3. Rosanne on April 18th, 2011 12:52 pm

    Have fun making the cake! And the garden meatloaf is so adorable!

  4. Liz on April 18th, 2011 8:46 pm

    If you would live closer a certain nephew would be begging for a Lightning McQueen cake. Well, he might beg anyway because he wouldn’t get the reasoning of not being able to transport a cake very good.

  5. Audrey on April 19th, 2011 8:33 am

    I remember when Jan won that competition and I was in AWE of her tea set. So pretty!

    I love that you are posting more often, Kay. I really enjoy the way you write and the pictures you take of your cooking and baking!

  6. Renita on April 19th, 2011 3:46 pm

    I didn’t realize the “greatness” in the kitchen runs so much in the family, WOW! The tea set is awesome. So when are you gonna show your brothers or dads’ work in the kitchen? Or did the girls “get it all”? :-) I enjoy the posts. Thanks.

  7. Kay on April 20th, 2011 7:21 pm

    Uhhh, Liz… the directions are right there! Make Lightning McQueen for his 3rd birthday! Worst case scenario, it would flop and you’d grab a DQ cake instead (did I just call a DQ cake ‘worst case scenario?!!!), but it would most likely end up great, and easier than you thought.

    Renita, my brother can make trifles that look like thick disks laying in the bowl. Seriously, they are so neat and perfect. He’s pretty handy with the grill and gourmet desserts and coffees.

Supper by a 6-yr-old — Cooks in Training #9

Posted on September 22, 2009
Filed Under Chicken and Turkey, Cooks in Training, Desserts, Side dishes

Lexi made supper tonight.

lexis-meal.jpg

Her menu was:
Crunchy Chicken Tenders
Easy Mac n Cheese
Trees with Cheese
Puddin’ Cones

There were only 4 ingredient spills. The only help Lexi accepted was finding some of the right ingredients and measuring cups/spoons and reading the recipe (“because it’s faster if you do it and I don’t know all the words”) and a couple times, handling hot stuff. I did tell her when to do stuff so it would all get done at the same time. I also gave her lots of tips and how-to’s, but she did the actual work. She did very well, actually better than I expected.

Now and then, Tiffany (3) crossed her arms, put on a scowl, and whined, “Mom, she won’t let me dump that in. I don’t have ANYTHING to do!”

I was planning to blog as it was going on, but I was kinda busy with damage control. :)

She loved doing this meal! I believe we have a cook in the making. ????

Crunchy Chicken Tenders … recipe from Betty Crocker Kids Cook cookbook

3/4 cup cornflakes cereal
1/2 cup flour
3/4 tsp. salt
1/2 tsp. pepper
1/3 cup buttermilk or milk
1 pound uncooked chicken breast tenders, not breaded

Heat the oven to 400. Line a 9×13 pan with foil.
lexi41.jpg

Spray the foil with cooking spray.
Put the cereal, flour, salt, and pepper in a plastic bag. Seal bag closed. Use a rolling pin to crush the cornflakes.
Pour the milk into a bowl. Dip chicken in milk.
lexi5.jpg

Drop milk-coated chicken, a few pieces at a time, into cereal mixture. Seal bag closed. Shake bag to coat chicken with cereal mixture. Put the coated chicken in the pan.
lexi6.jpg

lexi7.jpg

Spray chicken with cooking spray. Throw away any leftover cereal in the bag. Bake for 25-30 minutes or until coating is crisp and chicken is no longer pink in center. Makes 4 servings.

Dishing it up…
lexi8.jpg

lexi9.jpg 
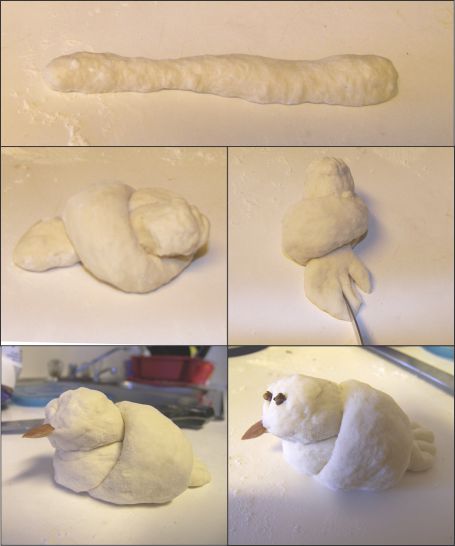
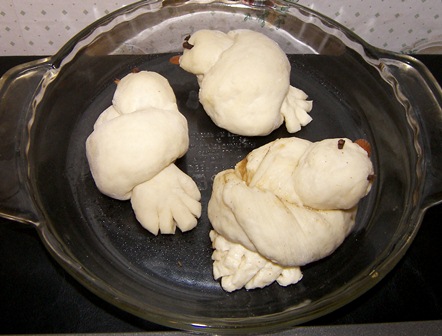
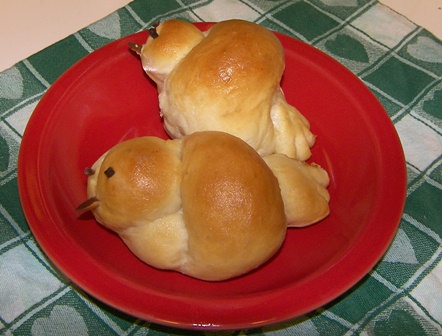
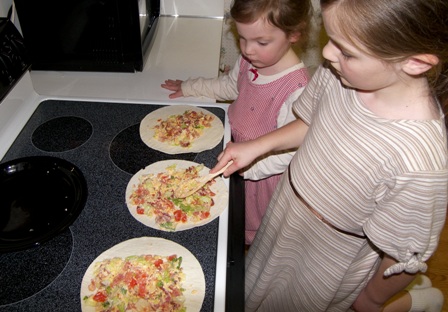
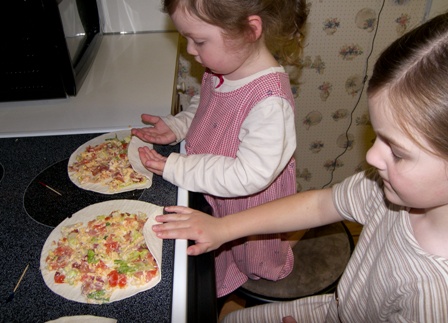
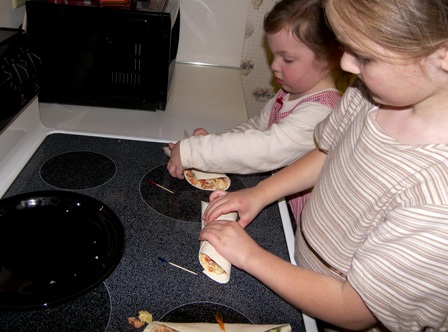
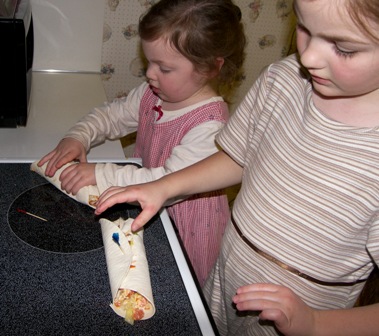
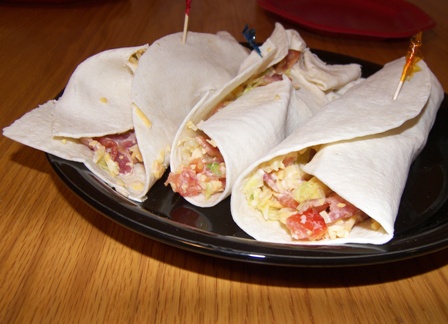
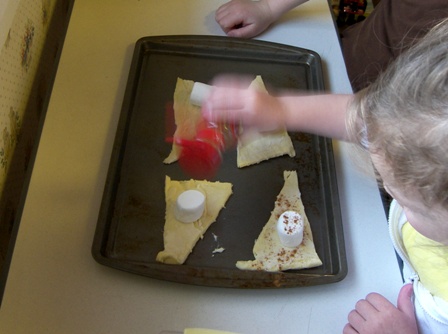
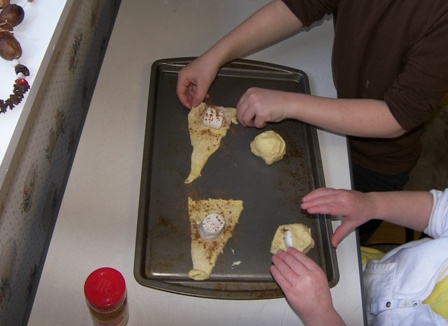
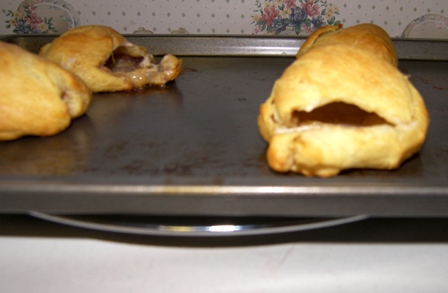
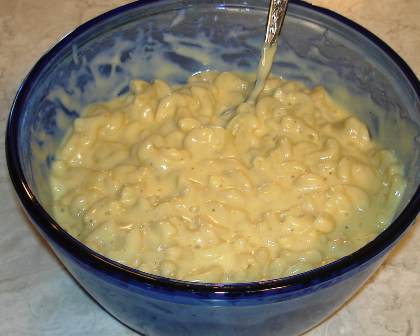
Good stuff! We ate them with bbq sauce. I realize I didn’t get a picture of the rolling pin part… they had great fun with that!

Easy Mac and Cheese …recipe from Betty Crocker Kids Cook cookbook

Water
2 cups uncooked elbow macaroni or small pasta shells
1 Tbsp. butter or margarine
1 cup milk
1 1/2 cups shredded cheddar cheese or American cheese
1/2 tsp. salt
1/2 tsp. ground mustard (I had to talk her into putting mustard in!)
1/4 tsp. pepper

Fill a 3-qt saucepan about half full with water. Bring to a boil. Add pasta to water.
mac1.jpg

Heat to boiling again. Boil uncovered for 8-10 minutes, stirring often with a wooden spoon. Drain pasta (put a colander in the sink and pour the pasta into it). Put drained pasta back into saucepan. Add butter, milk, cheese, salt, mustard, and pepper to pasta.
mac2.jpg

Stir with spoon until mixed. Cook over low heat for about 5 minutes, stirring a few times, until cheese is melted. Makes 4 servings.
mac3.jpg

Dishing up. This was a bit wild! Whoosh! and it was all in the serving bowl in about 2 seconds. Pretty amazing that some didn’t land on the floor!
mac4.jpg

mac5.jpg

Trees with Trees … recipe from Betty Crocker Kids Cook cookbook

1 1/2 pounds fresh broccoli (I just had her use a bag of frozen broccoli florets.)
3 Tbsp. water
6 oz process American cheese loaf
1/3 cup milk
1/4 onion salt
1 drop red pepper sauce, if you like (she didn’t like ???? )

Microwave the broccoli and water till hot and crisp-tender. Melt the rest of the ingredients in a saucepan or microwave. Stir with a wooden spoon until the cheese is melted and mixture is smooth. Drain broccoli and put it into a serving bowl. Pour hot cheese over broccoli. Makes 6 servings. I didn’t notice it at the time, but in all the photographing, I missed the broccoli, all except the dishing it up!
broccoli1.jpg

broccoli2.jpg

broccoli3.jpg

Puddin’ Cones … recipe from the 2003 Quick Cooking annual cookbook

This is what sparked the whole idea of making supper. Her cousin Krista made these for dessert when she made supper one time and Lexi saw a picture and wanted to make them too. Krista, you’re her hero!

1 1/2 cups cold milk
1 pkg. (3.4 oz.) instant vanilla pudding mix
3 envelopes whipped topping mix (when Lexi read this, she said “Envelopes?! What do envelopes have to do with cooking?”)
8 cake ice cream cones (about 3 inches) She used only 6.
Chopped nuts, jimmies and miniature colored baking chips or topping of your choice

lexi1.jpg

In a mixing bowl, beat milk and pudding mix on low speed for 2 minutes.
lexi3.jpg

Blend in whipped topping mix; cover and refrigerate for at least 1 hour. Spoon 1/4 cup into each cone; sprinkle with toppings. Yield: 8 servings. I just told her to fill the cones, not to measure. When the pudding mixture was gone, there were only 6 cones used, which I think is better because they look more like ice cream cones if they’re heaped a little.
puddin-cones1.jpg

puddin-cones2.jpg 
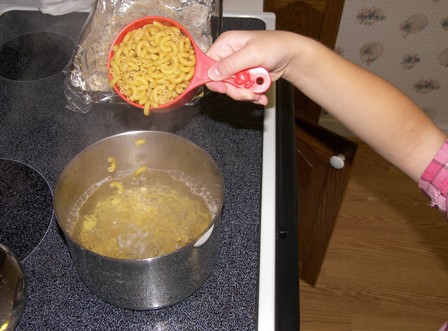
These were good, altho’ not as good as real ice cream. She made them right before she dished up the food and till we got done eating and were ready for dessert, the cones were starting to get a little soft already. So, they should not be made too much in advance!

Comments

9 Responses to “Supper by a 6-yr-old — Cooks in Training #9”

  1. Katrina on September 22nd, 2009 7:15 pm

    It all looks de-lish to me! Wow, great job daughter(s) and Mom!

  2. Aug on September 24th, 2009 10:45 am

    That is great that she is learning to cook and loving it! I think that letting them help with they are young goes a long ways towards them liking it later! And she has a great teacher to learn from, so that always helps!

  3. Ruth on September 24th, 2009 8:37 pm

    I’m impressed! She didn’t just open a box and stick it in the oven, but she made it from scratch. She did a great job. You deserve credit, too, because you let her do it even though you could have done it a lot faster and easier.

  4. Rhonda H. on October 2nd, 2009 8:50 am

    I love to see kids learning to cook – particularly since I’ve done a lousy job at teaching my own. Granted, I have 3 boys with pretty much zero interest in cooking, but it’s always good for them to know how to do the basics.
    Also, I made two pans of your pumpkin cream cheese squares this week and had requests for the recipes from two different people, so I sent them links to your site. So yummy!

  5. Marie on October 3rd, 2009 3:12 pm

    She did as good of a job as anyone! I’m very impressed – looks delicious!

  6. Stephaine @ Geezees on October 8th, 2009 12:51 pm

    Wow, i am so impressed…it’s so good to see kids cooking! And everything looked so yummy!

  7. Tilt on October 13th, 2009 3:31 am

    This dinner looks amazing!
    I especially love the ice creams!

    Congratulation to the little chef!

  8. Cheryl on November 7th, 2009 10:08 am

    I love that your kids help out! Do they enjoy doing so? Did you ask if they wanted to be involved or did they offer? The pics are making me hungry!! Tell them great job:)

  9. Linda on November 7th, 2009 10:02 pm

    Just curious if you have come across this site http://partycupcakeideas.com. I think your girls would have fun. :)

Burrito BLT Wraps – Cooks in Training #8

Posted on June 23, 2009
Filed Under Cooks in Training, Main dishes

blt-wrap2.jpg

I’m trying to decide if this should even be a Cooks in Training post.

Reasons it should be:
1. Lexi and Tiffany made them.
2. The recipe comes from the Kids Cook! cookbook.
3. There is no kettle or baking involved.

Reasons it should not be:
1. What. a. mess!!!!!!
2. There is a sharp knife involved.
3. Next time we have these, I’ll make them myself.

I don’t want to give the impression that the Cooks in Training posts aren’t usually messy. ???? It’s just that this one struck me as extra messy. Maybe it was because the floor around their chairs looked confetti-covered. Maybe it was because they were handling bacon (read: grease) twice. Maybe it was because when they wrapped their wraps up, the tortillas ripped and the filling was falling out and trying to fix the problem only made it worse. :)

Oh well, we all have our bad days in the kitchen. And these little cooks are no exception. The wraps tasted great, which is what matters. And it was a nice variation from a regular BLT sandwich. Which is not a bad thing either:
blt1.jpg   Mmmmmmmm! Yum.

This recipe has everything all diced up and mixed together, but it would probably be easier and quicker to just leave the ingredients whole and layer them in the tortilla.

Burrito BLT Wraps …from Betty Crocker’s Kids Cook! cookbook

8 slices bacon
1 large tomato
2 cups shredded lettuce
1 1/2 cups shredded cheddar cheese (6 oz)
1/3 cup mayo or salad dressing
6 flour tortillas (8″-10″ across)

Put a paper towel on a microwavable plate. Put 4 bacon slices on top of paper towel. Add another paper towel and put on 4 more bacon slices. Put another paper towel on top of bacon. Microwave on High for 4 – 6 minutes or until bacon is crisp. Break it into pieces (after it cools, of course).
blt-wrap4.jpg

blt-wrap3.jpg
Chop the tomato into small pieces.

blt-wrap5.jpg
Put the bacon, tomato, lettuce, cheese, and mayo in a bowl. Toss together. Spread the BLT mixture evenly over the tortillas.
blt-wrap6.jpg

Fold up the bottom 1/3 of each tortilla, then roll it up.
blt-wrap7.jpg

blt-wrap8.jpg

blt-wrap9.jpg

blt-wraps1.jpg
And here they are! In all their messy beauty. The pretty toothpicks were a bit hit. ????

Whenever I think of BLT wraps, I think of one time when one of my friends said that one day, the whole family was working outside and suppertime rolled around and she made BLT wraps and cut up some watermelon and took it out to the picnic table for them to come and get it whenever. I just thought that sounded so summer-y.

Comments

4 Responses to “Burrito BLT Wraps – Cooks in Training #8”

  1. Mary Faith on June 23rd, 2009 10:16 am

    These look so good and I’m sure will be a big hit with my boys. I’m off to make some for lunch! :)

  2. Freida on June 23rd, 2009 10:58 am

    Would it help to warm the tortilla shells before filling them? Don’t know- Just thought that might help to keep them from falling apart. I want to try these sometime. They look so delish! I LOVE BLTs!!!

  3. Michelle on June 23rd, 2009 12:24 pm

    Your girls are going to be awesome cooks some day! You are a great Mother to let them start cooking/making stuff so young. I’m afraid I’m going to be jealous of you when they are ten and all you have to do is say go make supper and it is made. :-) I guess I’ll have to do my homework… but I don’t like messes!

  4. Jan on June 23rd, 2009 1:59 pm

    looks good, think i’ll add this to leftover chicken noodle soup and suppers done!

Chocolate Chip Cookies – Cooks in Training #7

Posted on April 23, 2009
Filed Under Cookies and bars, Cooks in Training

Yeah, I know… as you scroll down this page, the posts look a little heavy to kid stuff. It wasn’t planned, it kinda just happened, but how fitting… because that’s pretty much my life. And I say that in a good way, I love my 2 little girls and I know they’ll grow up way too fast. But until then, they’ll be a part of my cooking blog.

Lexi is 6. She already loves doing stuff in the kitchen, especially if it involves using her mini cooking stuff. She has declared it her job to make the iced tea around here, if I just do the part of dumping the hot tea into the pitcher. And, on non-school days, she often makes lunch around here (nothing on the stove). I’d have her pack her own school lunch, except that it makes more sense for me to do it while she’s eating breakfast or getting ready. She does have opinions though… the other day, she said, “Mom, next time you pack my lunch, do you think you could think of something healthy to put in it like an apple or something? I don’t wanna get all weak and stuff.” Thing is, it wasn’t exactly unhealthy, it was a sandwich, chips, and grapes.

Tiffany is 3. She loves doing stuff in the kitchen too. But WHY can’t she dump a 2 1/2″ in diameter measuring cup full of flour into an 8″ in diameter mixing bowl without spilling it out over the side?!!!!! ????

We’ve got a chocolate chip cookie recipe to feature today, from the Kid’s Cook cookbook. Cute little chocolate chip cookies. I told them to make the dough into balls and (because of their little hands?) the balls ranged from the size of a marble to the size of a super ball. Instead of the usual 12 cookies that I bake on one sheet, we got almost twice that many on, no problem. I realized I kinda like little cookies… they’re bite-sized and easy to pop in your mouth. This is not my usual chocolate chip cookie recipe, but it’s actually pretty close. This recipe is a small recipe, which is nice because there’s less chance of the mom having to finish the cookies when they get tired of making them and run off to play. I usually copy the directions word for word, but I’m just gonna paraphrase these because it’s written kinda kid-like and detailed.

choc-chip9.jpg

Chocolate Chip Cookies

1 egg
1/2 cup sugar
1/2 cup packed brown sugar
1/2 cup butter, softened
1 1/2 cups flour
1/2 tsp. baking soda
1/2 tsp. salt
1 cup chocolate chips

Heat oven to 375. Stir egg, sugars, and butter with wooden spoon until mixed.
choc-chip1.jpg

choc-chip2.jpg

Add flour, soda, salt and stir with wooden spoon till mixed.
choc-chip3.jpg

choc-chip4.jpg

Stir in chocolate chips. Form into balls and put on cookie sheets.
choc-chip5.jpg

choc-chip6.jpg
Could I please have the cookie in the front on the left up there?

Bake for 10-12 minutes.

choc-chip7.jpg

choc-chip8.jpg

choc-chip11.jpg

choc-chip10.jpg

Comments

6 Responses to “Chocolate Chip Cookies – Cooks in Training #7”

  1. Shannon on April 23rd, 2009 2:30 pm

    Oh boy, now mine will have to make the cookies next time. :)

  2. Lorrie on April 24th, 2009 12:03 pm

    That’s the cutest thing. They are so sweet. I miss my daughter being that age.

  3. Rina on April 24th, 2009 8:45 pm

    I cannot WAIT till my son is old enough to help me in the kitchen!!! Great pics.

  4. liz on April 27th, 2009 10:44 am

    Okay, finally getting around to commenting. I usually have one arm full when I’m on the computer.
    The 3rd paragraph sounded like you were talking about my girl. Can’t complain about Kaitlyn wanting to help bake cause she also helps me clean and do the not so fun stuff. She is wanting to start breaking the eggs too. :{
    That one choc chip cookie that you spoke for definitely looks like the best one! After Kaitlyn saw the pics she wanted to go make cookies. Didn’t happen yet though.

  5. Katrina on May 5th, 2009 12:11 pm

    Awesome! Same issues I have with kids in the kitchen. That’s how they learn though, huh! Trial and error. Looks like you let them do WAY more than I do. What a fun pail full of cookies!

  6. Bonniejean on June 7th, 2009 12:14 pm

    Thanks for the recipe! Finally a fool proof chocolate chip cookie recipe. I made them yesterday and they are some of the best cookies I’ve ever made. Yummy!

Easter snack – Cooks in Training #6

Posted on April 13, 2009
Filed Under Breads Biscuits and Rolls, Cooks in Training, Holiday cooking

Ideally, I’d plan ahead and make Easter food to feature BEFORE Easter, huh? Well, sigh, that didn’t really happen this time.

I forget where I saw these little rolls… it was online last year sometime. The reason these are called an Easter snack is because they’re meant to symbolize the empty tomb. It’s pretty neat how it works. You wrap a marshmallow inside a crescent roll and while it bakes, the marshmallow melts and lines the inside of the crescent roll, leaving it empty inside!

I don’t have an actual recipe, but my little cooks will show you how it’s done…

Unroll refrigerated crescent rolls and separate into triangles. Butter the trianges.
easter1.jpg

Put a marshmallow on each crescent roll and sprinkle with cinnamon.
easter2.jpg

Fold the dough over and around till the marshmallow is all enclosed. Pinch seams to seal.
easter3.jpg

easter4.jpg

Bake at 375 for 12 minutes. And this is how they look! A couple of them were open, not sure if it was supposed to be like that or if the seams weren’t pinched shut well enough.
easter5.jpg

easter6.jpg

I hope you all had a happy Easter. We did. It started with an outdoor sunrise service at church. It was a perfect Easter morning… clear skies and a beautiful sunrise. The coffee, hot chocolate, donuts, and campfires were a nice addition too. :)

He is risen! Hallelujah!

Comments

2 Responses to “Easter snack – Cooks in Training #6”

  1. Sharon on April 13th, 2009 7:32 am

    Cute! The sunrise service sounds neat. We used to do that some where I grew up… would love to do it again. Maybe WI is too cold for that?

  2. Mom Martin on April 14th, 2009 11:28 am

    I didn’t know they are called Easter snacks. I have the recipe. They are delicious!
    Never went to a sunrise service…always wanted to do that. I guess it’s still too cold out here at Easter time.

Ants on a Log – Cooks in Training #4

Posted on January 15, 2009
Filed Under Cooks in Training, Side dishes, Snacks

Well, our little cooks are back! Actually, they never went anywhere and have been quite busy in the kitchen, it’s just that they haven’t been making recipes on their own lately. One reason I know they’ve been in the kitchen is because I’m often tripping over their little chairs that they stand on.

It seems like a hassle, the way they have to move their little chairs around while working in the kitchen… put them in front of the sink, climb up and wash their hands, get down, move the chair over to the cupboard, climb back up, etc. I do wonder how it would be to be working in the kitchen and the counter is at eye level though, so I guess it’s worth all the moving around.

The food I’m featuring here barely merits calling it a recipe. But, we got it out of a cookbook and it was in recipe form, complete with amounts. We got a kid’s cookbook (a Betty Crocker cookbook named Kids Cook!) for Lexi for Christmas. She loves it. She often gets it off of the cookbook shelf and sits around looking at it and saying, “Mom, we should try this!” So, one time I told her she could pick something to make sometime soon because we’re going shopping and we should see first if we need any ingredients. And THIS is the recipe she picked. It is called:

Ants on a Log (Gag! Who ever named them that?!)

Celery
Peanut butter
Raisins

I’ll spare you the recipe details and let the pictures and video show you how it’s done. Or how it WAS done anyway, maybe not how it oughta be done (there was a bit of licking fingers by the 2-yr-old). One nice thing about the mini cooks making this is that it didn’t involve the oven or stovetop or mixer. It did, however, involve a sharp knife for a little bit, but that was closely supervised, and when we were done with that step, everyone still had all fingers intact.

ants1.jpg

ants2.jpg

ants3.jpg

ants4.jpg

And here it is in action:

Comments

7 Responses to “Ants on a Log – Cooks in Training #4”

  1. Joanna on January 16th, 2009 6:50 am

    I love Lexi’s comment,” I can’t believe we are having peanut butter for supper!”

    I agree with the name???Ants on a log????

  2. Monica on January 16th, 2009 8:06 am

    I’m with you on the “tripping over chairs in the kitchen”!! Megan likes to be in on the action, too, and often wants to stand on a regular table chair and it’s so big that I can’t get to the counter!! I’m trying to teach her to use her “Dora” step stool, but it’s not quite as high and she can’t see as well!! Cute post with the videos!!

  3. denise weaver on January 16th, 2009 9:10 am

    Cute post! Loved the videos. Cody also loves to help me in the kitchen. But I’m not sure I would trust him too far with a jar of peanutbutter and a table knife. Who knows where the peanut butter would end up. His favorite part of helping me is when I’m finished mixing something up and I let him lick off the spoon or beaters before it goes in the sink or dishwasher. He’s always right there asking for a taste before I’m even done.

  4. Liz on January 16th, 2009 10:00 am

    Way to go with the videos!

  5. Janice on January 16th, 2009 10:14 am

    Cute videos!

  6. Lisa@The Cutting Edge of Ordinary on January 17th, 2009 7:51 am

    How adorable! Your girls are too cute. I remember making ants on a log with my Mom when I was young.
    What a great memory your making.

  7. Judi on January 21st, 2009 3:39 pm

    Too cute. I’m really looking forward to little Peanut helping me in the kitchen. She’s only 18 months old though and not quite old enough. Looking forward to it though cause I can see how much fun you’re having.

Microwave Mac ‘n’ Cheese – Cooks in Training #3

Posted on July 18, 2008
Filed Under Cooks in Training, Main dishes

Whenever there’s a microwave recipe, I usually shy away from it. Here’s the reason. It’s because of my microwave… sounds like a good reason, huh? My microwave is a half-pint. I can’t fit a 9×13 pan in it and when my girls were babies on bottles, I always had to lay the 8-oz bottles down to warm up the milk because they wouldn’t fit in there standing up. The size isn’t the only reason. The other reason is that it takes SO long to cook stuff in it. We joke that the microwave has only one setting and that’s DEFROST. True, it does have only 1 setting, but it is a bit hotter than defrost. It takes forever to boil water and it literally is faster to throw a pan of water on the stove rather than do it in the microwave, like when I make finger jello. But the microwave works great for warming up serving-sized portions and thawing meat, but other than that, I don’t use it for general cooking. Oh, I guess I do cook half a bag of frozen veggies in there sometimes.

But, you can’t beat the deal we got on it. We got married about 12 years ago (in fact our 12th anniversary is in a couple weeks) and a little bit after we got married, we realized we need a microwave, so we found one at a pawn shop for $25 and it’s still the same one we use today. Not sure why it doesn’t give out! Here it is:
microwave.jpg

Anyway, having said all that, I decided to try a microwave dish. For the Cooks in Training foods, I don’t like to use the stove because my little cooks might burn themselves, even with adult supervision, but the microwave is fine. So, here you go, a food that kids like… and made by them.

mac-n-cheese1.jpg

Microwave Mac ‘n’ Cheese  …taken from the 2000 Quick Cooking cookbook

Printable recipe

2 cups uncooked elbow macaroni
2 cups hot water
1/3 cup butter or margarine
1/4 cup chopped onion (I had to do some fast talking to get that in there because I couldn’t sneak it in! I said we wouldn’t put in as much as it says, we only put in a couple tablespoons)
3/4 tsp. salt
1/4 tsp. pepper
1/4 tsp. ground mustard
1/3 cup flour
1 1/4 cups milk
8 oz. process American cheese, cubed (we used Velveeta)

mac-n-cheese2.jpg
Hmmmm, I may have to outlaw the aprons! We don’t really plan ahead and suddenly decide to cook or bake and away they dash for the aprons, putting them over whatever clothes they already have on! In this cooking session, Tiffany’s combo clashes even more than usual. :(

mac-n-cheese3.jpg

In a 2-qt microwave-safe dish, combine the first 7 ingredients. Cover and microwave on high for 3 1/2 minutes; stir. Cover and cook at 50% power for 4 minutes or until mixture comes to a boil, rotating a half turn once. (I didn’t rotate at all because my fashionable microwave has a turntable, and it still works.)

mac-n-cheese6.jpg

Combine flour and milk until smooth; stir into macaroni mixture.

mac-n-cheese4.jpg

mac-n-cheese5.jpg  Yeah, I was watching this process very closely, and it was one of my duller knives. Velveeta is soft… a butter knife may have even worked.

mac-n-cheese8.jpg

Add cheese. Cover and cook on high for 6-8 minutes or until the macaroni is tender and sauce is bubbly, rotating a half turn once and stirring every 3 minutes.  Yield: 4 servings.

mac-n-cheese9.jpg

mac-n-cheese10.jpg

This was really good, although I’ve tasted better made-from-scratch macaroni and cheese. I missed the buttered crumbs that are usually on top of macaroni and cheese. This definitely beats the stuff from a box though and got rave reviews by the girls. Plus, Lexi thinks it’s more fun to eat food that they made themselves.

Comments

3 Responses to “Microwave Mac ‘n’ Cheese – Cooks in Training #3”

  1. Shannon on July 18th, 2008 7:10 pm

    Hum, wonder what all I could get them to eat if they cooked it by themselves! :)

  2. Freida on July 18th, 2008 8:17 pm

    You need a new microwave! :)

    Tucker saw this and says- “MMMM, that looks yum. I wish I could taste it. ” My kids love mac and cheese. I’ll have to try this one.

  3. Barb on July 20th, 2008 7:26 pm

    I am going to try this for sure. My children love macaroni and cheese. I usually just make it as I go so it will be good to have a recipe to go by, and to be able to do it in the microwave is even better.

Smiling Sugar Cookies – Cooks in Training #2

Posted on July 11, 2008
Filed Under Cookies and bars, Cooks in Training

I’m going to try to do this series without talking every time about big messes and me using a rag every 2 minutes before the mess takes over my kitchen. Hmmmm… now, I’m sitting here with nothing to say if I can’t talk about that…

Just kidding. We had fun. And now Lexi can finally stop sharply inhaling and saying, “Mom, let’s make these sometime!” whenever she sees these cookies in the 2004 Quick Cooking cookbook.

Smiling Sugar Cookies

Printable recipe

1/2 cup butter (no substitutes), softened
1/2 cup sugar
1/2 cup packed brown sugar
1 egg
1/3 cup milk
2 tsp. vanilla extract
3 cups flour
2 tsp. cream of tartar
1 tsp. baking soda
1/2 tsp. salt
About 24 popsicle sticks
1 cup vanilla frosting
Food coloring
Assorted small candies (we used M&Ms)

smiling11.jpg

smiling12.jpg

Cream the butter and sugars. Beat in egg, milk, and vanilla. Combine flour, cream of tartar, baking soda, and salt; gradually add to creamed mixture. Roll the dough into 1 1/2″ balls.
smiling1.jpg

Insert stick into the center of each. Place 2″ apart on lightly greased baking sheets; flatten slightly.
smiling2.jpg

Bake at 375 for 8-10 minutes or until lightly browned.
smiling3.jpg
That baking time is a problem for 2 little energetic cooks. Tiffany and I made frosting and Tiffany licked the beater while Lexi wrote stuff with popsicle sticks to pass the time. And they still kept peeking in the oven and asking if the cookies were almost done.

Remove to wire racks to cool. Divide frosting between bowls and tint them to desired colors. Put each frosting in a plastic bag and snip off a small corner of the bag. Pipe hair and mouths onto cookies. Use a small dab of frosting to attach small candies for noses and eyes.
smiling4.jpg

smiling5.jpg Ah, I just love that chubby little hand with a decorating bag. She actually didn’t do too bad at decorating for a 2-yr-old.

smiling6.jpg

Let dry for at least 30 minutes. Yield: about 2 dozen.

And here’s the finished product…
smiling8.jpg 
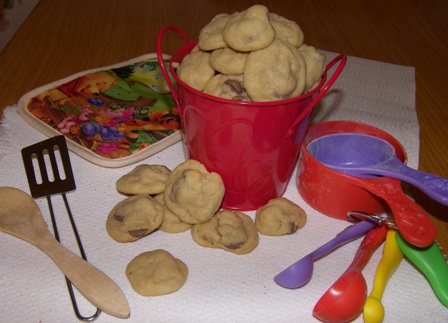
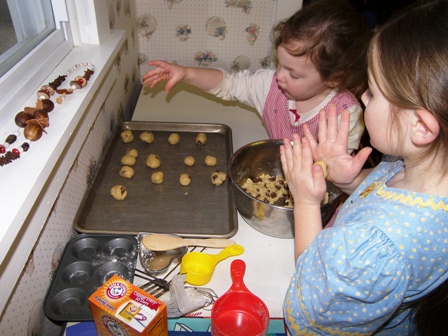
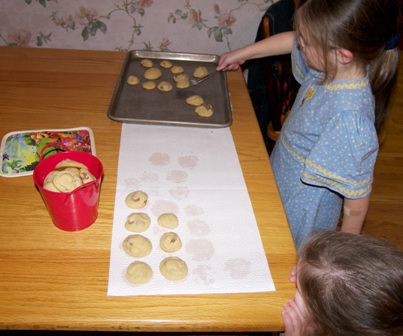
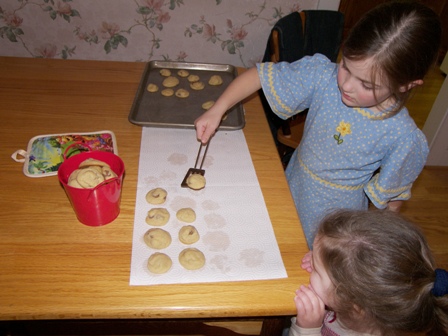
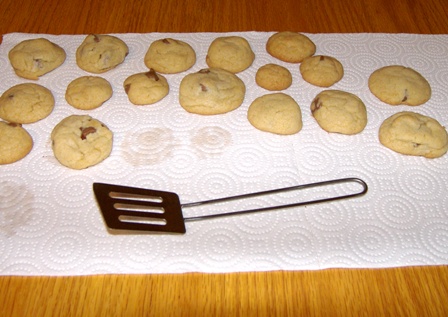
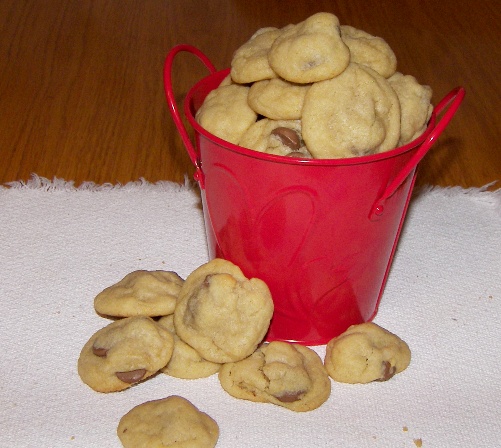
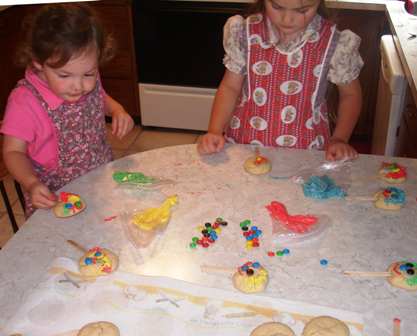
They would’ve been kinda cute poked into something and standing up, but I couldn’t think of anything around here that would work for that. 3 were eaten plain, we got 19 cookies out of the batch.

Here’s the smiley section. Alot of the food I take pictures of (if it’s for a meal) gets photographed while everyone is coming to the table or sitting down already and when I take more than 1 picture, there are jokes like, “Wasn’t it smiling the first time?” With these, the joke was, “Oh, now the food actually does have to smile!”
smiling9.jpg 
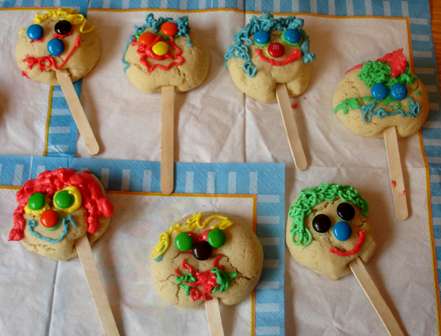
Yes, those are all smileys… use your imagination. Tiffany did that one by herself with the red mohawk. And the one with the yellow hair and green eyes has a beard… Lexi’s creation (before we even started decorating, she said she’s gonna make one with a beard, don’t know why she thought of that, she’s rarely around anyone with a beard). I made only one of these and I certainly hope you can tell which one. :)

Soon, Lexi got bored with smiley faces, so she switched to flowers and a butterfly…
smiling10.jpg

smiling7.jpg

Now, about making these with your kids… I just went back to check the time on my camera. The very first picture (dumping ingredients into the bowl) was taken at 2:54 p.m. The last picture taken (them sitting there holding cookies) was taken at 4:30 p.m. 1 1/2 hours… not alot of time. Skip storytime and spend 1 hour less on the computer someday (ouch, less computer time? that hurt. Let’s switch that one to ‘skip scrubbing the kitchen floor and weed the flowerbed some other day’). They will have a ball of fun and it’ll make memories for them. And hopefully not too bad of nightmares for you.

Oh, and by the way, this is actually a good sugar cookie recipe if you just want to make regular sugar cookies sometime. I don’t like sugar cookies because they’re always so dry and tasteless (that’s my opinion, I live with a couple of people who really like them), but these are better than most of the sugar cookies I’ve had.

Comments

3 Responses to “Smiling Sugar Cookies – Cooks in Training #2”

  1. Katrina on July 11th, 2008 9:53 pm

    Cute and how fun. I REALLY need to do this kind of thing with my kids more. (4 boys) Thanks for the reminder.

  2. Kelsie Hoover on July 12th, 2008 5:08 pm

    I might try these at out next girl’s club…I’m in charge of craft for the younger half (ages 4 or so-10)…it usually ends up being 15 girls. I will definetly have the cookies made before hand…hopefully we don’t mess up the entire gym! thanks for the idea.

  3. Suzanne on December 28th, 2008 6:15 pm

    I really love the fact you get your kids involved with the cooking. I find it really sad nowadays that girls my age (25) only know how to pull a box of mac n cheese out of the cabinet and that’s what they know how to “cook.” I think it is great your kids are learning the basics and more of how to cook!

Mini Cherry Pies – Cooks in Training #1

Posted on July 1, 2008
Filed Under Cooks in Training, Pies

Ok, we’re going to have 2 dessert posts in a row. But I’m fine with that… you know the saying, “Life is uncertain, eat dessert first”. And when Lexi tries to talk me into letting her have 2 cookies right before supper and I tell her to wait till after supper because she won’t be hungry and she reasons ‘But if I wait till after, I might not be hungry for the cookies and I’d rather eat the cookies now and not be hungry for the chicken and stuff for supper’, I see her point and actually agree with her. There are very few foods that I like better than cookies. So, yeah, she got that honestly… the willingness to ‘wreck’ a meal by eating dessert first. Which isn’t wrecking the meal at all because the cookies are better than the meal.

In case you’re getting worried, we don’t actaully eat dessert first around here. We just discuss it. I actually don’t usually even make dessert at mealtime because we’re often too full for it anyway. So our cookies and pies and milkshakes and stuff are more often an evening snack for us.

With this post, I’m starting a series called “Cooks in Training”. Guess what that is… anybody have little people in the house? Do our weekly recipe with them. They’ll love it! And you actually will too, just relax and picture the worst case scenario and hopefully you’ll be pleasantly surprised that it didn’t go too bad. :) My main job was using a rag before the messes took over my kitchen. Lexi (5) and Tiffany (2) did all the work except for the little bit that I did to show them how to do it. I’m not sure how long this will last as being weekly… hopefully I’m not burned out by the 3rd week!

We were grocery shopping one day and Lexi saw some cute little pre-made graham crusts in a pack of 6. She did a sharp inhale and exclaimed, “Mom, look at these sweet little pies! Can we get them?” They were really cute. And only $1.25 for 6 crusts, so I quite easily gave in. Here is what we ended up doing with them:

tarts1.jpg

Mini Cherry Pies

Printable recipe 

4 oz cream cheese, softened
1/4 cup sugar
1/4 tsp. vanilla
1 1/2 cups cherry pie filling (or filling of your choice)
1/2 cup chocolate chips, melted
6 Keebler mini ready-made graham cracker crusts

Beat the cream cheese, sugar, and vanilla till smooth. Spread on bottom and up sides of each crust.
tarts2.jpg

Between this step and the next step, “Oh! We forgot our aprons. Mom, just wait. We have to go get our aprons. C’mon Tiffany.” Their aprons were made for them by their Great Grandma, the one who makes THE BEST brown sugar pie

Put about 1/4 cup pie filling on top of cream cheese mixture.
tarts3.jpg

tarts4.jpg
And if any filling would happen to miss the crust and land on the counter, just lick it up. —————————————————————————
Melt chocolate chips and put in plastic bag. Cut off one corner and pipe the chocolate onto the filling.
tarts5.jpg

tarts6.jpg 
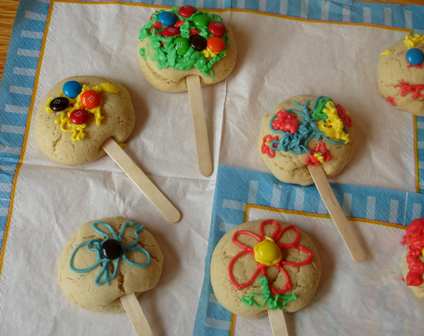
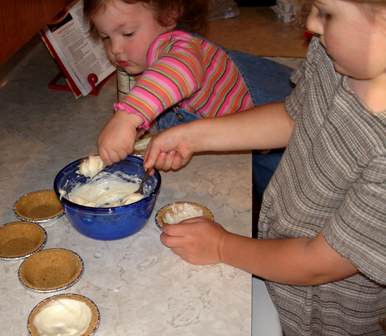
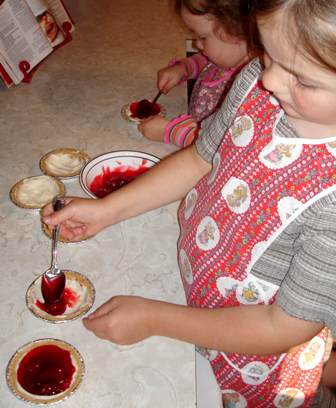
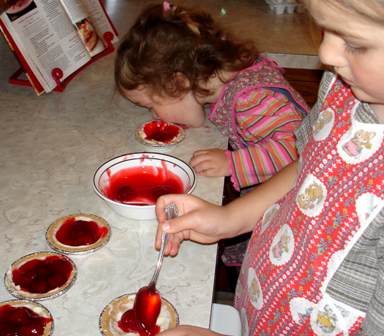
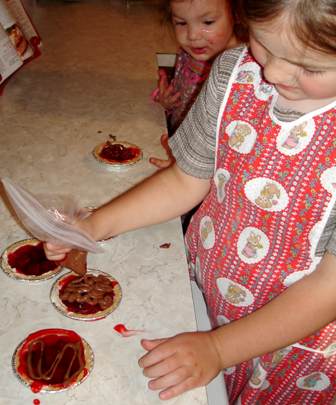
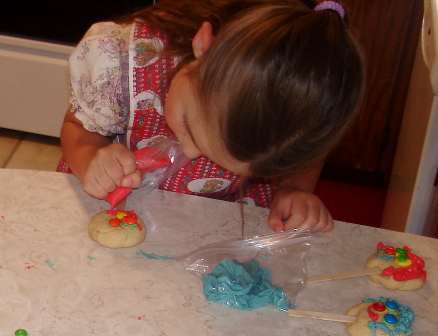
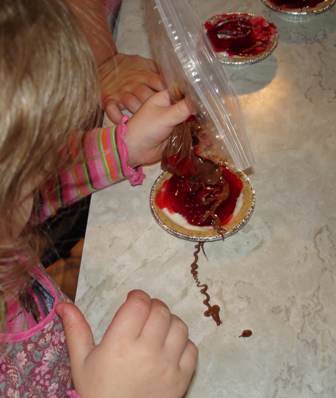
And, uh, try not to let the bag drop into the pie. That would get cherry filling on the bag and then might get your hand messy.

tarts7.jpg   tarts8.jpg

Chill for an hour or two. Eat. They tasted great!

Comments

3 Responses to “Mini Cherry Pies – Cooks in Training #1”

  1. Barb on July 2nd, 2008 12:08 pm

    I Love your website,I’m from Illinois and it sounds like we have a lot in common I Love baking I have a daughter Courtney 10 yrs old and likes to bake, although her idea is she does the baking and Mom cleans up. I’ve been up since 2 o’clock this morning and made 9 doz. cinn rolls a batch of cookies, my friends call me crazy i call it relaxing,I want to make these little pies with Courtney sometime,she is Daddy’s girl the next 2 days he drives truck. Hey keep the recipes coming I love it

  2. Sorina on July 3rd, 2008 6:05 am

    I like the sound and look of this. I shall mark this on my to do list.

  3. Jes on July 3rd, 2008 10:54 pm

    I get pretty frustrated when I try to cook with my kids (3 and 2yr. old boys!) but I need to do it more! I will be checking this often for some good, fun ideas to do with my little ones! Thanks so much for sharing! Love it!!