Posted on December 22, 2007
Filed Under Holiday cooking

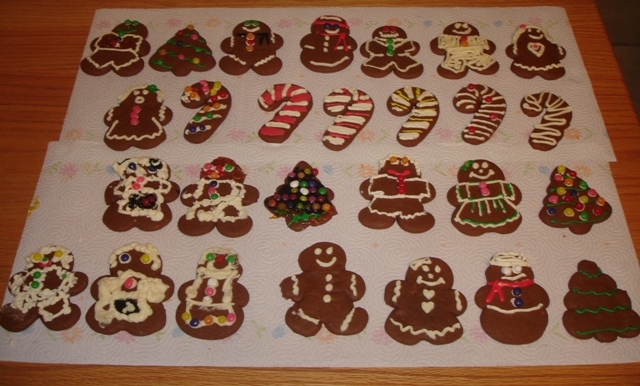
Making and decorating gingerbread men … plus! (We didn’t just stick to the men.) After the cookies were baked and cooled, but before we decorated them, I told Shannon that it never occurred to me that I don’t actually know how to do this! I hadn’t decorated cookies for YEARS!!! So anyway, don’t laugh too hard! Here are some of them…
My aunt Ruthie makes the best gingerbread cookies around, so I got the recipe from her. It actually comes from the Mennonite Community Cookbook.
Old Fashioned Ginger Cookies (Leb Kuchen) That’s how the recipe title is written… makes it seem authentic, doesn’t it?
2 cups shortening, melted
3 cups sorghum molasses
1 cup sugar
8 – 10 cups flour
1 tsp. salt
2 Tbsp. soda
1 Tbsp. ginger
1 Tbsp. cinnamon
1 1/2 cups buttermilk or sour milk
Heat molasses and sugar together. When sugar is dissolved, add shortening and stir until melted. Remove from heat. Cool to lukewarm. Sift flour, soda, salt, and spices together. Add sifted dry ingredients alternately with sour milk. Stir until a medium-soft dough is formed.
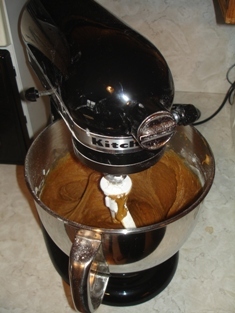
Work dough with hands for 5 min. Let chill in refrigerator for several hours. (They’re not kidding about that. It’s a soft dough. Ruthie said she usually lets it chill overnight.) Turn dough onto lightly floured board and roll 1/4″ thick. Cut with large round cookie cutter.
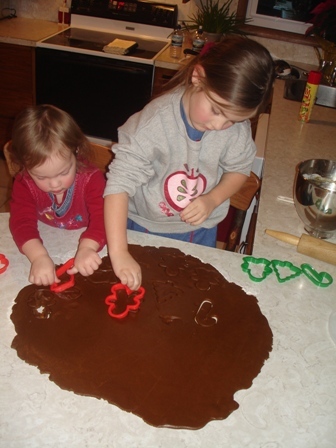
Glaze with a beaten egg; dip a small piece of cheesecloth in beaten egg and rub lightly over cookie. Place 1″ apart on greased cookie sheet. Bake at 350 for 20 – 25 min. (I didn’t bake them quite 20 min.) This is the soft chewy cookie that was a favorite of grandmother’s day. It is still very popular among many Mennonite families. (I didn’t write that, it says that right in the recipe.) Makes 8 dozen large cookies.
Then, let the decorating begin!
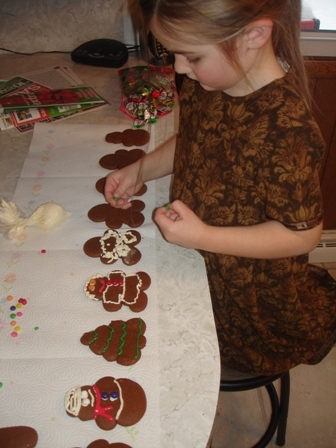

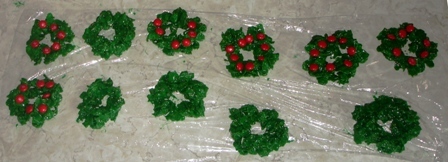
This recipe comes from the Derstine cookbook. I had forgotten about these cookies and happened to see the recipe while flipping thro’ the cookbook. I remember Mom making them when I was young. As Lexi (5) and I were making them, I told her that my mom made these when I was a little girl. And she said, “And now my mom is making them when I’m a little girl!” ![]()
Holly Cookies
32 lg marshmallows
1 stick margarine (I used butter)
1/2 tsp vanilla
1/2 tsp almond extract
1 1/2 tsp green food coloring
4 cups Cornflakes
Red cinnamon candies (I used M&Ms because I couldn’t find Red Hots at the store)
Melt marshmallows and margarine in saucepan over low heat. Mix in flavorings and food coloring. Pour quickly over cornflakes in large bowl. Stir until coated. Butter hands well. Working quickly, shape into cookies on wax paper spread on a cookie sheet. Decorate with cinnamon candies before cookies harden. Ok, so she got a little carried away with the decorating! ![]()
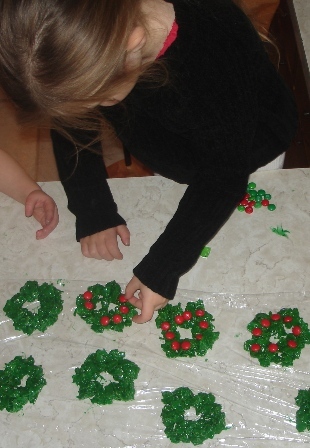
Allow 2 days (????????) to dry. Please tell me it’s a misprint that should say ‘hours’ instead of ‘days’. These cookies may not even live to see 2 days! And they definitely seem hard enough.
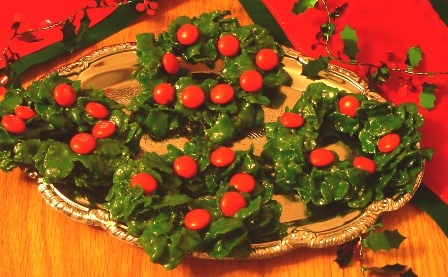
Change of subject… I was at our Walmart Supercenter today and was looking for 2 things that I couldn’t find: molasses and red hots. I looked in the baking aisle for molasses and there was a stocker there, so I asked her, and it was over with the syrup. Then I thought Duh, I should’ve thought of that. And the red hots, I looked in the candy section, the baking aisle, and the cake decorating aisle. Never did find them. Another thing that kinda surprised me a few years ago was the food coloring. I looked in the cake decorating section and in the cake mix/frosting aisle. Nope, over with the spices. That’s one thing nice about shopping online, you never have to look all over for exactly what you want… as my husband says, “Google knows everything”. ![]()

I saw Crayola candles while shopping one day last month and thought they were so cute, so this is how I decided to use them. ![]()
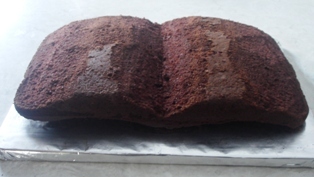
9×13 chocolate cake (pudding-in-the-mix cake mix)
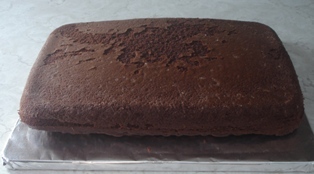
Book carved…
Frosted, but needs another coat…
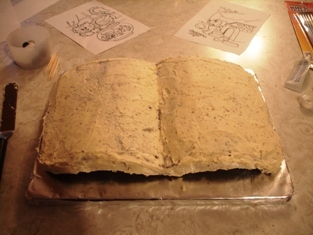
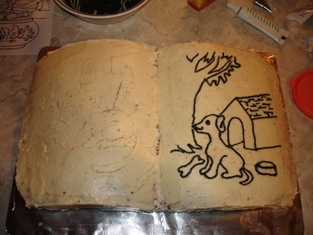
For the pictures, I looked off of those 2 pages in the picture above and toothpicked them on each side, then piped the outline with black frosting. In this picture, the one picture is already piped on and the other one is just ‘toothpicked’…
Done…
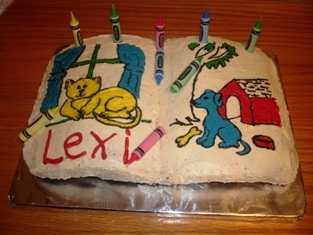
I wish I would’ve let it looking more half-colored instead of coloring in so much. Might’ve looked more like a coloring book that way. The crayons laying around are candles with the wicks cut off.
And here is the birthday girl…

One Response to “Coloring Book Birthday Cake”
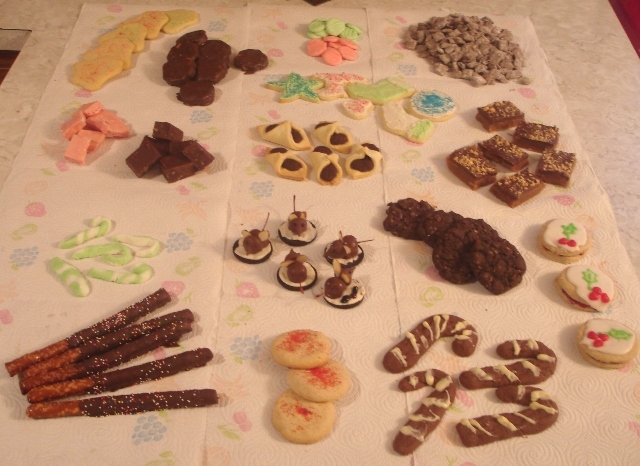
Liz, Lin, Ruthie, Sandra, Lourdes, and I all got together for a cookie/candy exchange. Ah, so fun!!!! All that good stuff sitting there. And it’s fun to see what everyone is making. And you take home a nice assortment of stuff for no more effort than you put into it. ![]()
I don’t even know what everything was called, but it’s all on the picture up there. There were 2 kinds of fudge (peppermint and chocolate). The chocolate fudge didn’t last long around here. ![]() It was my top pick of everything! I think Linda made it. There were several different kinds of cookies, some buttermints, choc covered Ritz sandwiches, caramel/chocolate candy, mice
It was my top pick of everything! I think Linda made it. There were several different kinds of cookies, some buttermints, choc covered Ritz sandwiches, caramel/chocolate candy, mice ![]() , and choc dipped pretzels.
, and choc dipped pretzels.
Lourdes and Liz making buttermints…
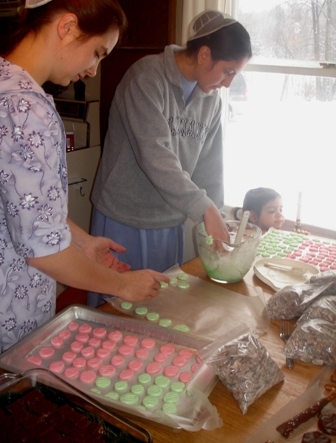
The best part… dividing it all up. Lourdes, Liz, and Sandra.
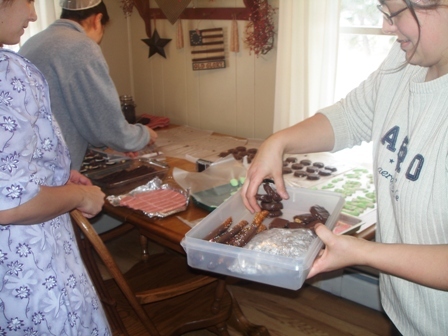
In the afternoon, Sandra and Ruthie made blended coffees for us all. I shared mine with Tiffany and then she didn’t want to give it up…

I’ll feature my 3 contributions to the cookie/candy exchange…
They are all taken from Taste of Home Christmas Cookies and Candies.
Envelopes of Fudge
1/2 cup butter, softened
1 pkg (3 oz) cream cheese, softened
1 1/4 cups flour
FILLING:
1/2 cup sugar
1/3 cup baking cocoa
1/4 cup butter, softened
1 egg yolk
1/2 tsp vanilla
1/8 tsp salt
1/2 cup chopped walnuts
In a mixing bowl, cream butter and cream cheese. Gradually add the flour. On a lightly floured surface, knead until smooth, about 3 minutes. Cover and refrigerate for 1-2 hours or until easy to handle. For filling, combine the sugar, cocoa, butter, vanilla and salt. Stir in walnuts, set aside. On a lightly floured surface, roll dough into a 12 1/2″ square; cut into 2 1/2″ squares.
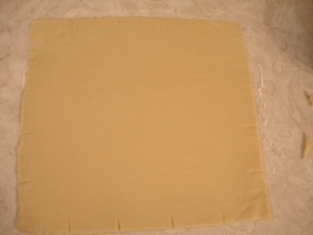
Place a rounded teaspoonful of filling in center of each square (I piped the filling on). Bring 2 opposite corners to center. Moisten the edges with water and pinch together.
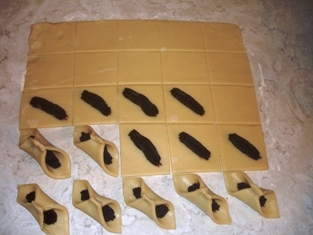
Place 1″ apart on lightly greased baking sheets. Bake at 350 for 18-22 minutes or until lightly browned. Remove to wire racks to cool. Yield: 25 cookies.
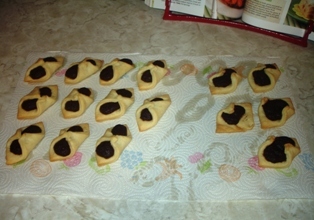
Yeah, there were a few flops! It works better to pinch the corners together, then fold them down and pinch again.
Christmas Eve Mice
24 Oreos
1 cup choc chips
1 tsp shortening
24 maraschino cherries with stems, well drained
24 chocolate kisses
48 sliced almonds
green decorating gel
red decorating gel
Everyone else was done, so they helped me do these. They were kinda fun to do and we got some laughs out of the deformities, but it does look easier than it is! Here are Lin and Ruthie working on them…
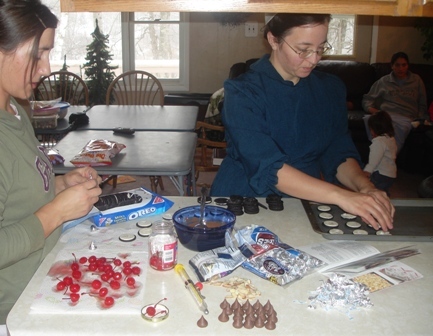 Carefully twist cookies apart; set aside the halves with cream filling. Save plain halves for another use. In a microwave, melt choc chips and shortening; stir until smooth. Holding each cherry by the stem, dip in melted chocolate, then press onto the bottom of a kiss. Place on the cream filling of cookie, with cherry stem extending beyond cookie edge. For ears, place slivered almonds between the cherry and kiss. Refrigerate until set. With green gel, pipe holly leaves on the cream. With red gel, pipe berries between leaves and pipe eyes on each chocolate kiss.
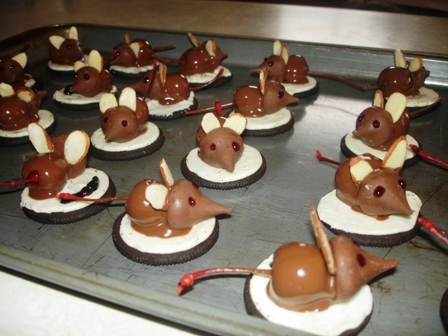 Store in an airtight container at room temp. Yield: 2 dozen.
Ice Cream Sundae Caramels
2 cups sugar
2 cups (16 oz) dark corn syrup
2 cups (1 pint) vanilla ice cream, melted, divided
1 cup butter
8 oz choc candy coating
1/2 cup peanuts, finely chopped
In a heavy 4-qt saucepan, combine sugar, corn syrup, 1 cup ice cream and butter. Cook and stir over low heat until mixture boils. Increase heat to medium; cook and stir until candy thermometer reads 242 (nearly firm-ball stage).
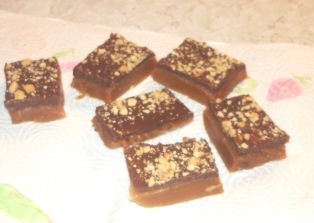
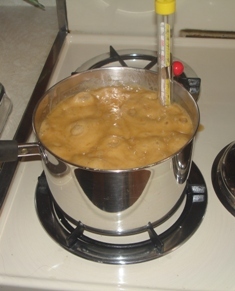 Remove from heat; gradually stir in remaining ice cream. Return to heat; cook without stirring to 244 (firm-ball stage). Immediately pour, without stirring, into a buttered 9×13 pan. Let cool until firm. Invert candy onto a baking sheet. Melt candy coating; spread over candy. Sprinkle with nuts. Cut into 1″ squares. Yield: About 3 1/2 pounds.
I love this site. I dream of entertaining someday to the extent of specially folding cloth dinner napkins (hmmm, wonder if you can be that elegant without owning a teacup, still serving hot beverages in mugs). Featured on that site is anything from
simple… 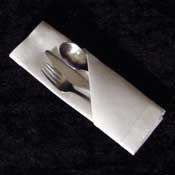 to deluxe…
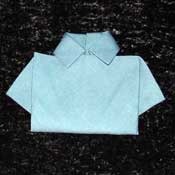

…Which brand are you cooking on Thanksgiving Day?
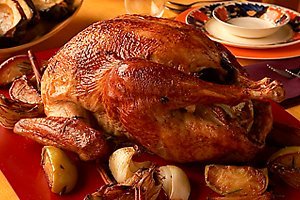
I was just in line at the grocery store and overheard this conversation:
Cashier, as she was ringing up a Butterball turkey: “Butterball. Good choice.”
Customer, who was a man that looked to be in his late 50s: “It’s the best.”
Lady customer (not me ![]() ), standing in line behind the man: “Butterball is better than Jennie-o?”
), standing in line behind the man: “Butterball is better than Jennie-o?”
I forget from there, but the male customer and the cashier were all but talking over each other, telling the lady customer how much better flavor Butterball is and how dry Jennie-o is compared to Butterball.
I have no clue which is better, but was surprised how strong both of them felt about Butterball. What’s your opinion? Do you feel strong about a certain brand being the best?
One Response to “Butterball or Jennie-o?”
I believe it’s more a matter of how it’s cooked regardless of brand. Locally here in MN Jenni O is on sale for .68 a pound. Butterball is 1.09 a lb. Now if the turkeys cooked in a roasting bag inside a roasting pan at a lower temperature I find they generally turn out moist and delicious regardless of brand. Bottom line get the one that’s on sale!
Tired of looking at roses? Me too! Time to dust off this site again and put something fresh on here.
I’m going to feature a full meal today, a napkin folding post soon, and hopefully some inspiration will come by the weekend for some Thanksgiving ideas! ![]()
This meal is taken out of the 2003 Quick Cooking Annual Cookbook on pages 8 & 9… I know, I’m like a broken record, Quick Cooking cookbook this, Quick Cooking cookbook that. I just love those cookbooks, and you know why? Because they have PICTURES!!!! ![]()
Pepper Jack Meat Loaf
1 egg or 1/4 cup egg substitute (I used an egg)
1 cup seasoned bread crumbs
1/4 cup chopped onion
1/2 to 1 tsp. salt
1/2 tsp. pepper
1 1/2 lbs lean ground beef
1 cup (4 oz) shredded pepperjack or monterey jack cheese, divided (I used all pepperjack cheese.)
In a lg bowl, combine the egg, bread crumbs, onion, salt, and pepper. Crumble beef over mixture and mix well. Press half of the beef mixture onto the bottom and halfway up the sides of a greased 8″x4″x2″ loaf pan. Sprinkle 3/4 cup cheese over meat to within 1/2″ of sides.
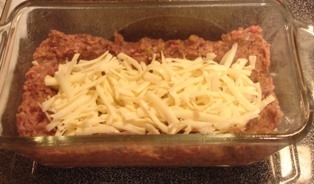
Pat remaining beef mixture over cheese.
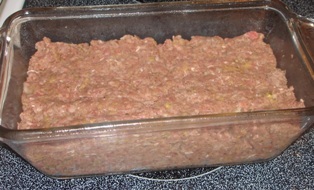
Bake uncovered at 350 for 50 – 55 minutes until meat is no longer pink and a meat thermometer reads 160. Sprinkle with remaining cheese. Bake 5 min longer or until cheese is melted.
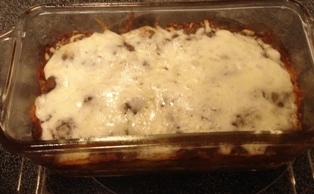
Let stand for 10 min before slicing.
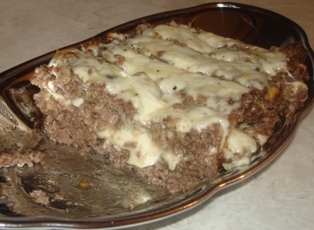 Yield: 6 servings. We really liked this! It was good for something different, although I still prefer meatloaf with ketchup stuff on top. That pepperjack cheese really gave it some kick. Lexi (who is 4 and a picky eater) said it’s too spicy. Tiffany (who is 19 mos and eats anything) chowed it right down. We ate it with ketchup.
Potato Chip Potatoes
6 medium potaoes, peeled and cut into 1/2″ cubes
3/4 cup crushed potato chips, divided
1/2 cup chopped onion
2 Tbsp butter or margarine, melted
3/4 tsp. salt
1/4 tsp. pepper
In a bowl, combine everything, except 1/4 cup of potato chips; toss to combine.Transfer to a greased shallow 2 qt baking dish. Sprinkle with remaining potato chips. Bake, uncovered at 350 for 40 – 50 min or until potatoes are tender.
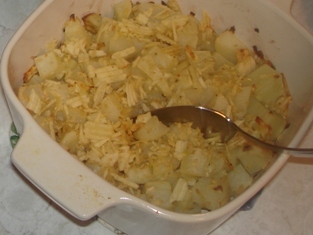 Yield: 6 – 8 servings. This was good, but nothing special. We ate it with ketchup because it was kinda blah without anything. It’s a good way to use up those last broken up chips at the bottom of the bag.
Creamy Pea Salad
2 pkgs (16 oz each) frozen peas, thawed
1/2 cup diced cheddar cheese
1/2 cup diced mozzarella cheese
1 medium onion, chopped (onion AGAIN!)
1 cup mayo or salad dressing
Salt and pepper to taste
4 bacon strips, cooked and crumbled
In a bowl, combine everything except the bacon; mix well. Refrigerate until serving. Sprinkle with bacon.
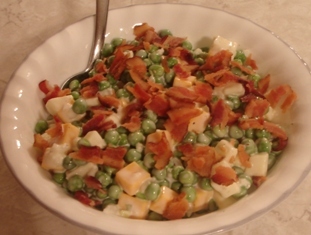 Yield: 6 – 8 servings. Ok, I’m not even gonna pretend… this was NOT at all good! I don’t like cold peas or raw onions, but I decided to be open-minded and give it a shot, thinking maybe the other ingredients would make it good. None of the others liked it either. I ended up fishing out and eating the cheese and bacon and threw the rest away.
Chocolate Cherry Angel Cake
1 pkg (16 oz) angel food cake mix
1/3 cup finely chopped maraschino cherries, well drained
1 square (1 oz) semisweet chocolate, grated I put an ounce (at least an ounce ![]() ) of milk choc chips in a food chopper.
) of milk choc chips in a food chopper.
GLAZE:
2 Tbsp. butter (no substitutes)
1 square (1 oz) semisweet chocolate Again, I used milk choc… I try to stick to the recipe, but with chocolate, whenever I use semisweet like the recipe says, I always end up saying ‘next time I’ll use milk chocolate’. So I’m just going to start always using milk choc the 1st time.
1 Tbsp. light corn syrup
1 cup confectioners’ sugar
3 to 5 tsp. maraschino cherry juice
Maraschino cherries and fresh mint, optional
Prepare cake mix according to directions. Fold cherries and chocolate into the batter. Pour into an ungreased 10″ tube pan.
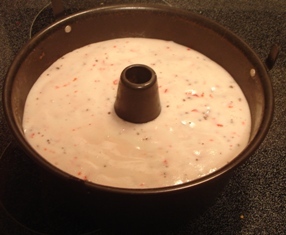 Bake at 350 for 40 – 45 minutes or until cake springs back when lightly touched. Immediately invert pan; cool completely. Run a knife around sides of cake and remove from pan. In a saucepan, combine butter, chocolate, and corn syrup. Cook and stir over low heat until chocolate is melted. Stir in confectioners’ sugar and cherry juice until glaze reaches desired consistency. Drizzle over cake.
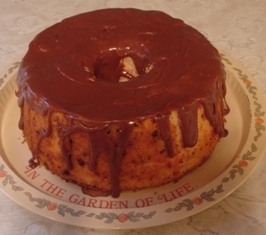
Garnish with cherries and mint if desired.
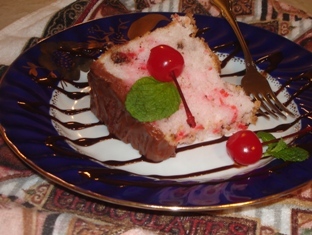
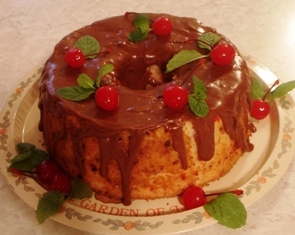 Yield: 12 servings. YUM!!!! This tasted as good as it looked! If you like chocolate covered cherries, you’ll like this! Shannon doesn’t like cherries and he even kinda liked it. It would be GREAT for around Christmas time too… doesn’t it look sorta Christmas-y?
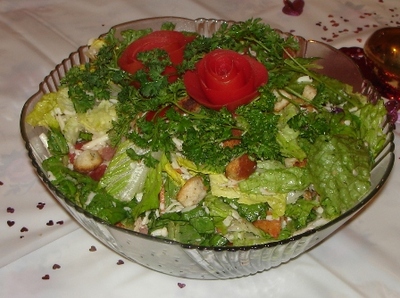
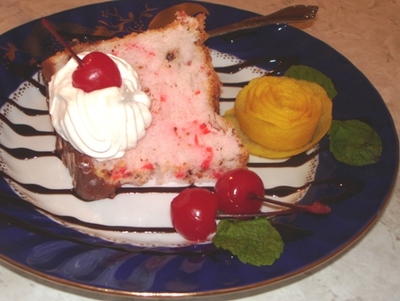
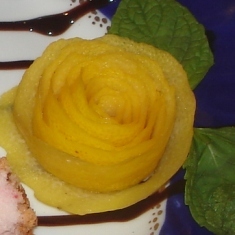
Featuring tomato roses, lemon roses, and orange roses
This is actually easier than it looks.
Starting at the end (whatever the opposite of the stem end is called), peel a tomato (or lemon or orange or whatever you feel like trying) in one long piece.
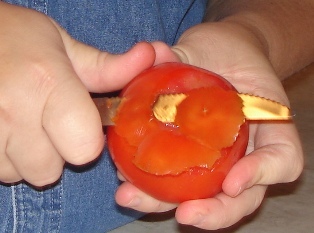
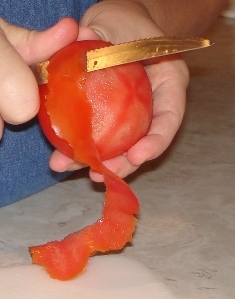
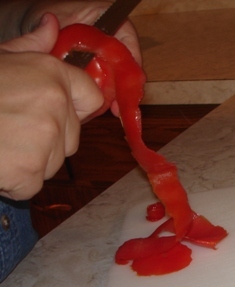
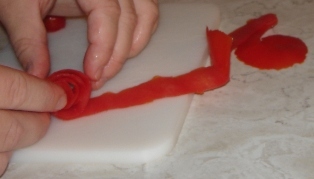
Lay the peeling out flat, skin side down. Now, as if you’re rolling up some left-over ribbon, start rolling it, starting at the end you cut last (the part closest to the stem).
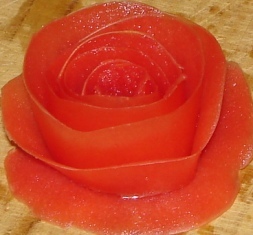
It’ll kind of slip around while you’re rolling it, so it’s helpful to keep a finger or 2 on each side. When you’re at the end, tuck the wide end underneath and set your rose down. If it looks weird, flip it over. If it still looks weird, unwrap it and try again.
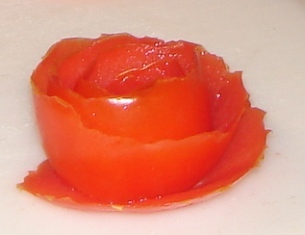
A couple tips:
— Use firm tomatoes; they cut smoother and the skins don’t wrinkle as easily. Note: The 2 roses above… the first one was a firmer tomato, the second one wasn’t and kinda wrinkled as I was cutting it, making the edges less smooth.
— The thinner you peel them, the easier they are to work with because they curl around easier.
— For oranges and lemons, I’ve found it’s easier to use a potato peeler than a knife… it gets it thin and doesn’t break off as easy.
— If a peeling breaks off before you’re done, just finish peeling, then overlap the pieces an inch or so when you roll it up.
Ideas:
Tomato roses
—Garnish a veggie tray
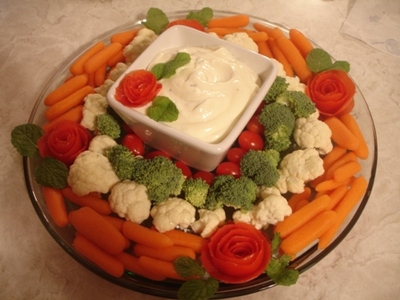
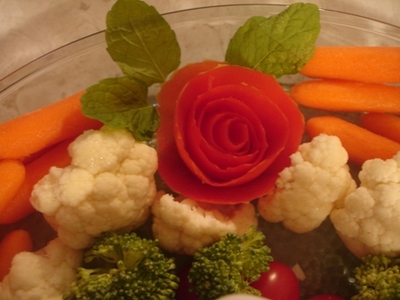
—Set a rose or 2 on fresh herbs on a flat tray or board for a table decoration
—Make a bouquet

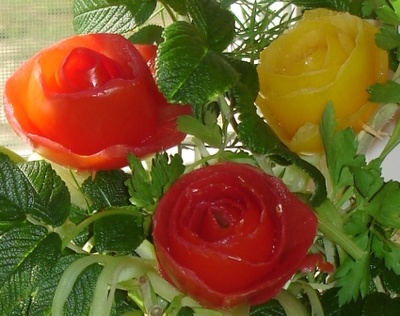
—Put on top of a salad (but you need to take them off before serving, or move them way over to the side)
Lemon and orange roses
—Garnish a fruit tray
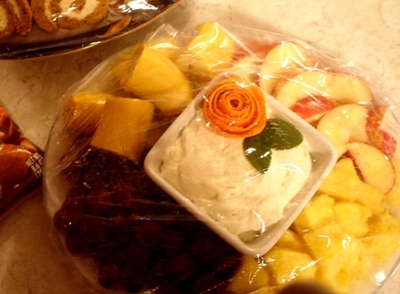
—Put on the side of a serving platter of meat or fish
—Dress up a serving of dessert
Chocolate roses and butter roses coming later… it’s a different technique to make them.
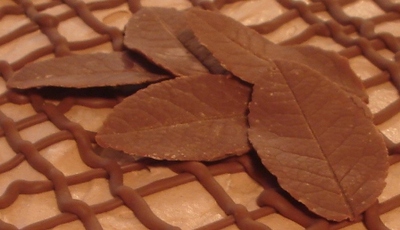
You’ll notice that I’m doing this because I get a kick out of it, not because I’m refined, elegant, and professional! ![]() First of all, I should’ve got my husband to do the photography instead of someone less than 4′ tall. But, I picked on the one who was sitting on a barstool with her face within a foot of my project, asking questions and wanting to help. Can’t blame her… at 4 years old, I’d have been dying to be turned loose with a paintbrush, melted chocolate, and leaves… paint, lick, paint, paint, lick…
First of all, I should’ve got my husband to do the photography instead of someone less than 4′ tall. But, I picked on the one who was sitting on a barstool with her face within a foot of my project, asking questions and wanting to help. Can’t blame her… at 4 years old, I’d have been dying to be turned loose with a paintbrush, melted chocolate, and leaves… paint, lick, paint, paint, lick…
I’ve made chocolate leaves only once in my life… just last weekend. So, if you’ve made them twice, you’re more experienced than me. ![]()
I went out to my rosebush (if you DON’T know me, you’re picturing something with beautiful pink roses hanging all over it, aren’t you? And if you DO know me, you’re thinking, “Huh?! You have an ALIVE rosebush?!”, aren’t you?)… anyway, I went out to my rosebush and picked 8 leaves off, brought them in and washed them under running water, and patted them dry with a paper towel. Then I took a paintbrush (everything else that’s actually a kitchen tool looked too big and cumbersome) and spread melted chocolate on the bottom side of the leaf.
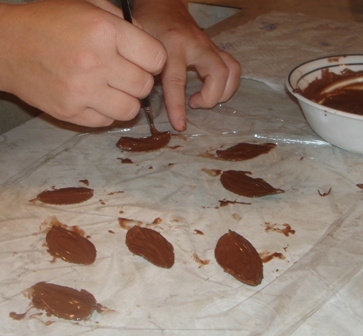
I just let them harden a little at room temp, then put another coat on and put them in the fridge to harden. Then, I got them out and peeled the leaves off…
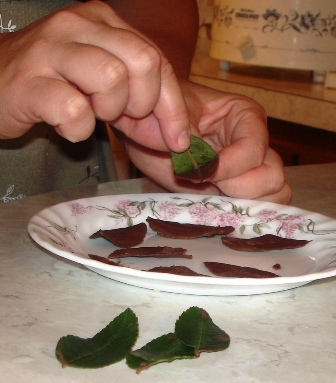
When they were done, we were awing over them and Lexi said, “Mom, they’re SO pretty! Can I eat them?” Um, let me think… “No!”
I put them back in the fridge till I was ready to use them.
Next time, I’d make them a bit thicker. It was kinda neat how thin and delicate they were, BUT I started with 8 leaves, had 3 casualties, and ended up with 5 because they broke when I was pulling the leaves off. It was fun and they looked so neat… I’ll definitely make them more often!
Have any of you made chocolate leaves before that you could give us all some more tips?
What I put the leaves on was a new recipe , so I’ll throw that in here too, while I’m at it.
German Chocolate Cream Pie …from the 2002 Quick Cooking Annual cookbook
1 pkg (4 oz) German sweet chocolate
1/3 cup milk
1 pkg (3 oz) cream cheese, softened
2 Tbsp sugar
1 carton (8 oz) frozen whipped topping, thawed
1 graham cracker crust (9 inches)
Whipped topping, frest mint and chocolate dessert decorations, optional
In a saucepan over low heat, cook the chocolate and milk until choc is melted; stir until smooth. In a mixing bowl, beat cream cheese and sugar until smooth.
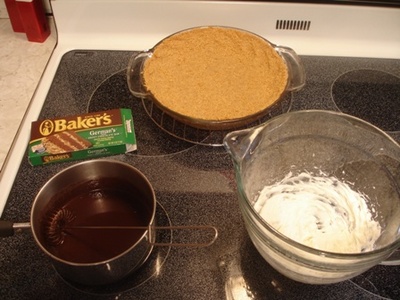
Stir in chocolate mixture. Fold in whipped topping. Spoon into crust. Freeze until firm. May be frozen for up to 3 months, just in case you could leave a chocolate pie alone for 3 months, knowing it’s right there in the freezer! ![]()
Remove from the freezer 10 minutes before serving. Garnish with whipped topping, mint and chocolate decorations if desired. Yield: 6-8 servings.
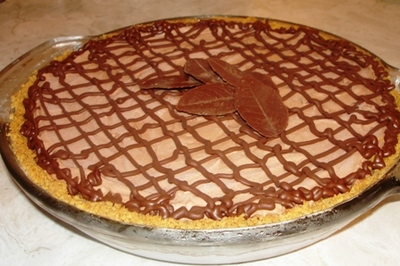
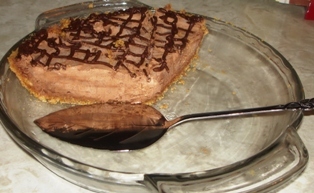 I had a bunch of melted chocolate left over and no more Cool Whip, so I just drizzled the chocolate over… it does need garnish of some sort, looks very plain without!
It was really good, except that I’m a milk chocolate fan, not semi-sweet. To me, this German sweet chocolate tasted just like semi-sweet. I want to try it again sometime and substitute 4 oz (or more ![]() ) of milk chocolate chips instead of the German chocolate.
) of milk chocolate chips instead of the German chocolate.
#15 ‘takes the cake’!
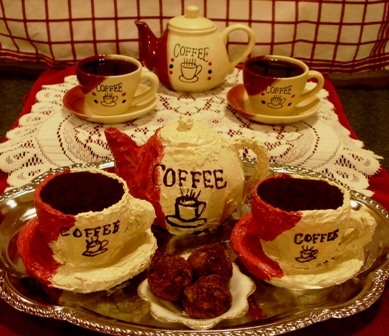
The congratulations go to Jan from MO. You will not be disappointed in how she made it! And the neat thing is that she asked someone to take progress pictures of the project… ah, progress pictures, a lady after my own heart! ![]() Another neat thing is that she is my sister. Her site is jan_n_dan.
Another neat thing is that she is my sister. Her site is jan_n_dan.
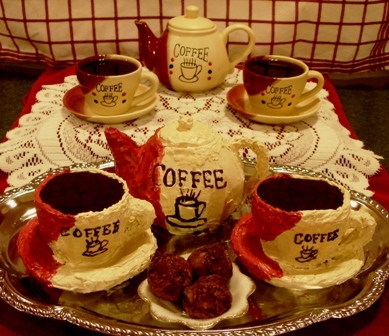
The real set is decor in her coffee-themed kitchen. It’s smaller than normal size… the tea set, I mean. ![]() (Someone else with a coffee-themed kitchen was wondering where you got that little set, Jan, and wants one like it for decor in her own kitchen.)
(Someone else with a coffee-themed kitchen was wondering where you got that little set, Jan, and wants one like it for decor in her own kitchen.)
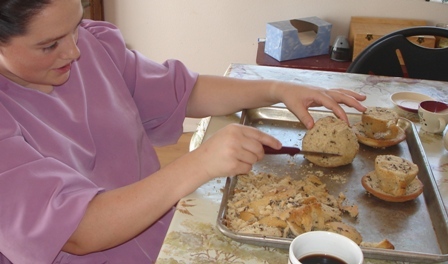
To make the cake, Jan wrapped plenty of tin foil around each piece, then gently pulled each piece out of the tin foil form, filled the forms with cake batter (not just ordinary cake batter, she used a mocha cake recipe so it would be more fitting when they eat it ![]() ) , then baked them. When she took them out of the oven, let them cool, and peeled the tin foil off, what she had was this…
) , then baked them. When she took them out of the oven, let them cool, and peeled the tin foil off, what she had was this…
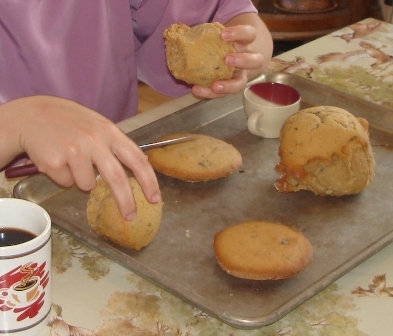
So, she set to work, carving…
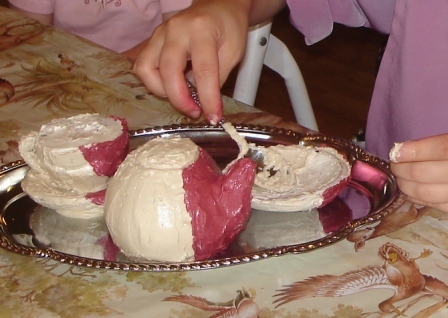
Then came the frosting…
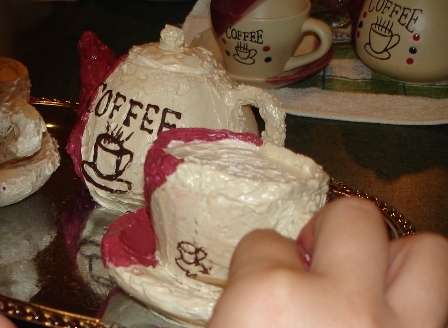
The lettering and drawing was tedious, esp on the little cups…
Done!…
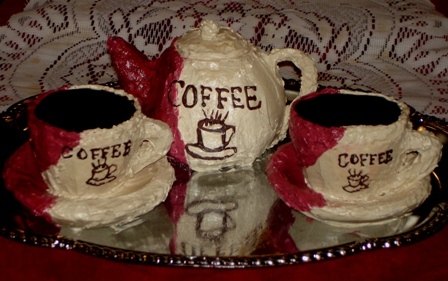
The ‘coffee’ in the cups is chocolate syrup. Everything else is cake and frosting except the lettering and decals were done with melted chocolate and the handle on the teapot was made with chocolate, then covered with frosting. Definitely a work of art!!!! Made just for the contest… and for fun and because she’s adventurous and likes to take on challenges. ![]() Nobody helped her. Completely edible. Very creative. Good job, Jan!
Nobody helped her. Completely edible. Very creative. Good job, Jan!
————————————————————————————————
One day last week, I decided to add a runner-up prize …
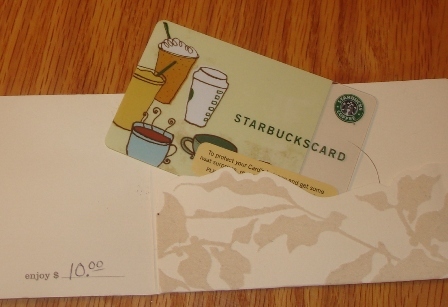 A $10 Starbucks gift certificate.
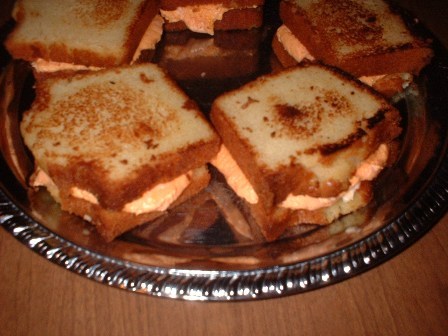
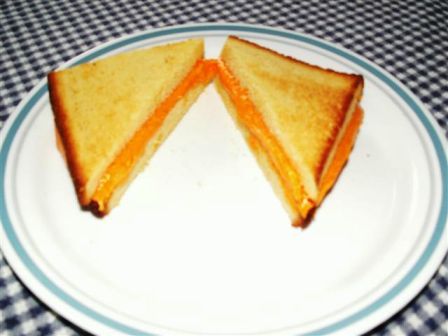
This prize was won by #7 , the ‘grilled cheese sandwiches’ made from pound cake and frosting…
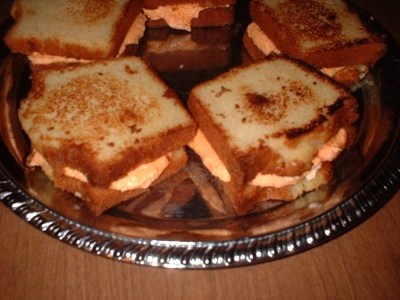 They really do look real! Great job, Evangeline !
———————————————————————————————–
And now, the top 4 honorable mentions…
#9, the teapot cake (for those of you who wondered, she shaped the handle and spout with rolled fondant that was tinted pink to match the frosting).
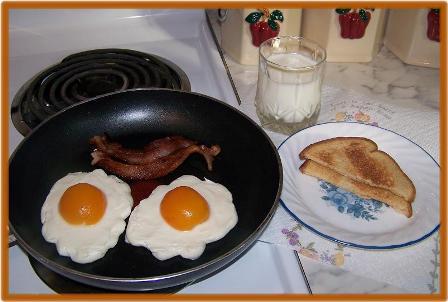
#2, the frosting and apricot ‘eggs’
#12, the kitty litter cake with appropriate props
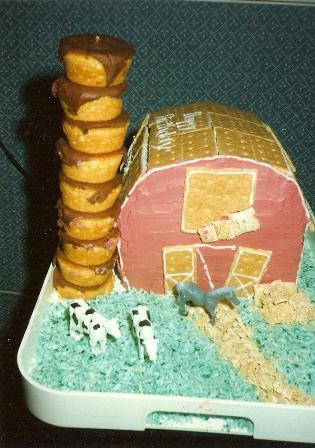
#19, the barn cake
————————————————————————————————-
Thanks so much to all of you who took the time and effort to enter something! You’re the ones who made it a success! I’m anxious to try some of your foods, esp ones that look like main course, but are actually a dessert. ![]()
And thanks to all the voters! Contagious enthusiasm and a surge of votes the first 2 days was exciting and fun! ![]()
And thanks to the 13 new subscribers who subscribed to seasoned_to_taste last week!
—————————————————————————————————
Next up on seasoned_to_taste:
A series of fun stuff to do for adding a bit of flair to entertaining and food presentation… tomato roses, lemon roses, chocolate leaves, napkin folding, place setting ideas, etc.
~ Make Real Food Look Like Something Else ~
——————————————————————————————–
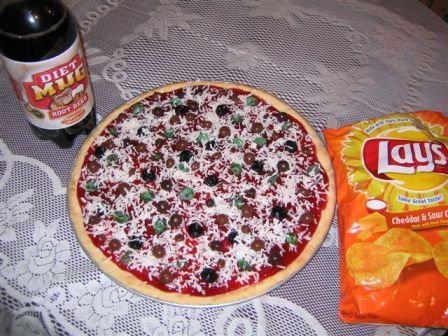
1. Dessert pizza
2. Eggs (frosting and apricots)
3. Dirt pudding (Oreo)
 ————————————————————————————————————————————————————————————————————————————————————————————————————————————————————————————————————————————————————————————————————————————————————————————————————————————————-
4. Kitty litter cake
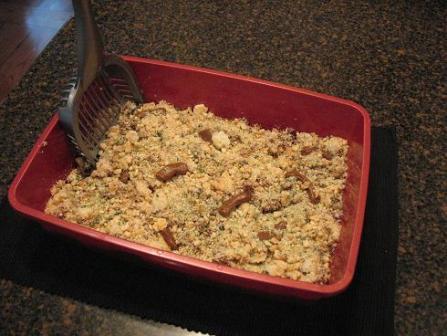
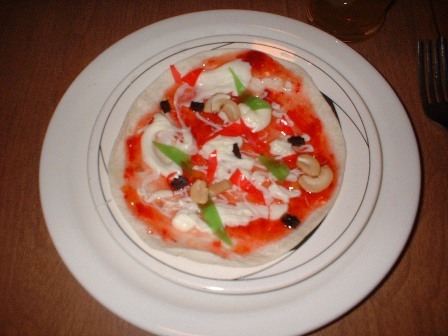
5. Dessert pizza
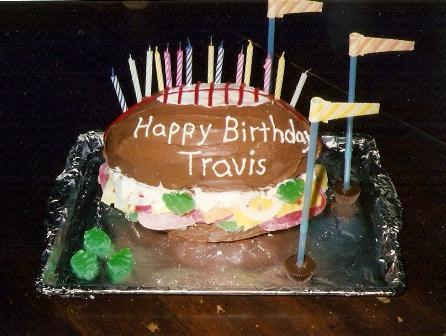
6. Hero sandwich cake
7. Grilled cheese sandwiches (pound cake and frosting)
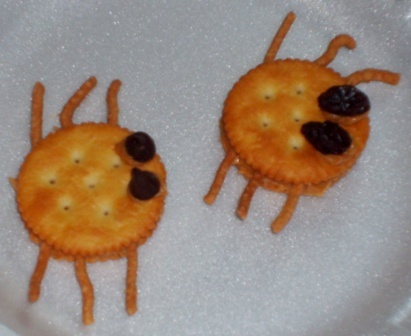
8. Ritz cracker spiders
 —————————————————————————————————————————————————————————————–
9. Teapot cake

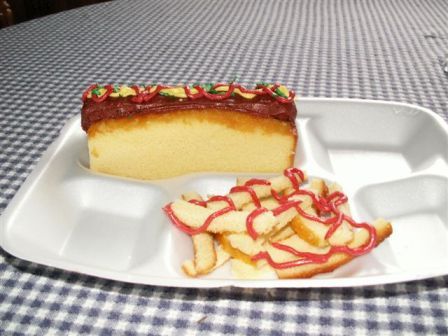
10. ‘ Hot-dog-in-a-bun and fries’ cake
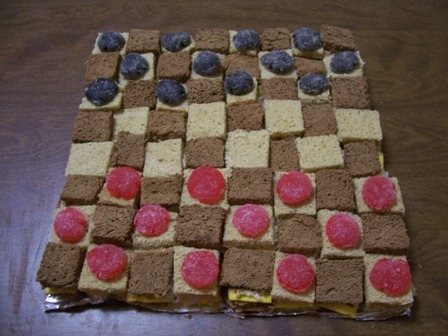
11. Checkerboard sandwiches
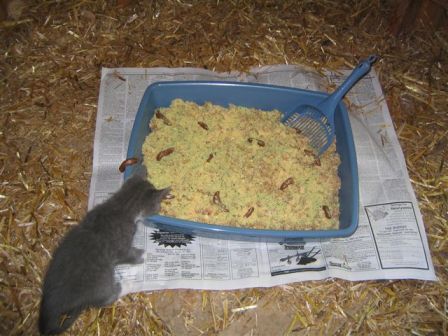
12. Kitty litter cake
13. Grilled cheese sandwiches (cake and frosting)
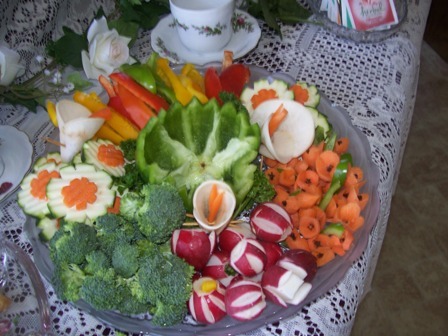
14. Veggie flowers
15. Tea set cake (in front)
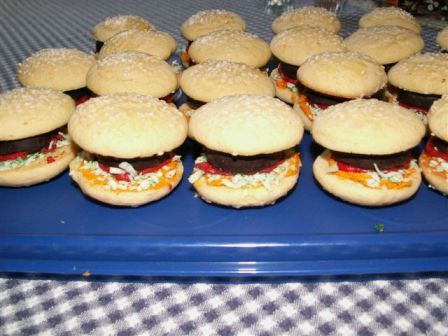
16. Hamburger dessert
17. Fairy castle cake
 ———————————————————————————————————————————————————————————————————————————————————————————————————————————————————————————————————————-
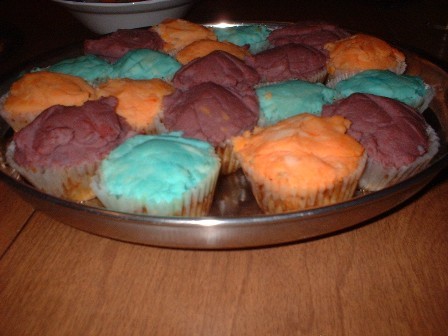
18. Meatloaf topped w colored mashed potatoes cupcakes
19. Barn and silo cake
 ——————————————————————————————————————————————————————————————————————————————————————————————————————————————————————————————————————————————————————————————————————————————————————————————————————————————————————————————————————————————————–
———————————————————————————————————
Ok, it’s all yours! Go ahead and vote, whether you entered anything or not! Please vote for only ONE entry. If one of them is yours, you are allowed to vote for it if you want to. ![]()
You can vote one of 3 ways:
a. leave a comment
b. send me a message
c. email ( kaylouann@gmail.com)
Oh yeah, in person would be fine too! ![]()
A BIG thank-you to those of you who entered and made it fun for the rest of us!!!! …hmmm, how do we give them a cyber round of applause? ![]()
Note to Kitchen Scrapbook readers: These posts were copied over to this Kitchen Scrapbook site from my old site and the comments didn’t come along. The votes came in for the contest in 89 comments, some emails, and some private messages.
Today is the deadline for the contest, so if you still want to submit something, today would be a good time. ![]() I’m really looking forward to posting the entries tomorrow morning!!!!! Glad I’m not judging because it would be hard to choose which to vote for!
I’m really looking forward to posting the entries tomorrow morning!!!!! Glad I’m not judging because it would be hard to choose which to vote for! ![]()
I actually made something, but am not going to put it in the contest after all. Seems weird to enter my own contest. ![]()
So, until tomorrow, I leave you with this…
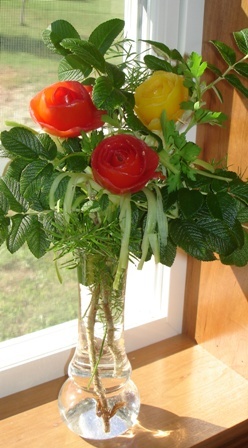 The roses are red and yellow tomatoes. There is some shredded celery and Italian parsley in there, but the main foliage is non-edible from one of my mom’s miniature rose bushes.
Posted on September 17, 2007
Filed Under Tidbits
Contest deadline comin’ up!
(Contest details in the post before this.)
Thanks to those of you who have submitted pictures already! And for those of you who are still planning to, the deadline is next Monday, the 24th . It’s so fun getting the pictures and I’m looking forward to showing them to you!!!!
Also, photos of things you’ve made previously are eligible! So, check your photo albums for parties, birthday cakes, deformed veggies, April Fools food, etc! ![]()
Let’s have FUN! Take a break from the hum-drum of canning and cleaning and casseroles! I have a few ideas I’d love to try and I think I might enter one… the rules didn’t say that I can’t. ![]()
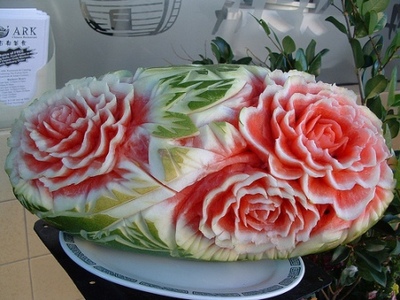
I’ll just leave you with a picture my aunt emailed to me awhile ago (she didn’t make it and it’s not for the contest). Isn’t it amazing? Now THAT’S talent!!!!!
Posted on September 7, 2007
Filed Under Tidbits
Ok, here we go.
My 2 questions I got hung up on are solved (sleeping over things is always a good idea)… who will be the judges and will I make everything to test it?
The answers: 1. Who will be the judges? YOU GUYS!!! 2. Do I make everything? Nope. YOU do!!! ![]()
Make Real Food Look Like Something Else
Yeah, that’s the name of the contest. ![]()
Rules:
1. It has to be edible, or at least most of it.
2. The idea doesn’t have to be original. (Should that be classified as a rule? ![]() )
)
3. YOU or someone in your house has to make it… no just scanning in a picture from a magazine or something!
4. All entries have to be submitted on or before September 24 by sending me a picture of it.
5. You can enter as many times as you want.
6. Anyone can enter… you don’t have to be subscribed to seasoned_to_taste or even have a xanga site. BUT, if you are subscribed, you will automatically get an extra point (vote from me) when counting up how many votes each picture got.
How it should work:
You make something, take a picture of it BEFORE your kids eat it, and send the picture to me. You can send it by email kaylouann@gmail.com (if you have my regular email address, go ahead and use it instead of the gmail one).
On September 25, I will TRY to get all the pictures loaded onto my site. They will be numbered, but anonymous. Then, you can look over them and vote only once for your favorite one, either by messaging me or in a comment (it’s up to you if you want your vote to be private or not). You can vote through October 1, then on October 2, I’ll announce the winner. If there is a tie of more than one winner, I’ll put the winning names into a hat and have my 4-yr-old pick one out.
If you win, I want to post:
1. A picture of you
2. Your first name
3. The state or province that you’re from
4. A little description of HOW you made what you made (if it’s not obvious)
5. A link to your site, if you have one
And, of course, in every good contest, there is a PRIZE :
The winner will get a
Pampered Chef Easy Accent Decorator !
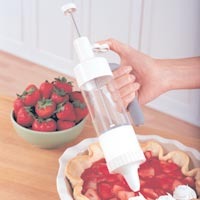 Comes with 6 different tips… 2 star tips, round tip (good for writing), half moon shell tip, drop flower tip, and a bismark tip (for filling bismarks). The ideas are endless! Decorate everything. Fill twice-baked potatoes and deviled eggs to make them look more attractive. If you were creative enough to win this contest, you should be able to think of lots of ways to use it!
 ![]() And if you already have one or don’t want one, enter anyway! It’s brand new in the box and would make a great birthday gift for your mom or a wonderful wedding gift!
And if you already have one or don’t want one, enter anyway! It’s brand new in the box and would make a great birthday gift for your mom or a wonderful wedding gift!
Now for those of you who like ideas, here are some…
1. A cauliflower bride (no, I’m not kidding). Carve a zucchini in to a cone shape, put cauliflower florets on with toothpicks. Her head is a small onion. her hair is carrot shavings, her arms…)
2. Meatloaf cake. This is an April Fool’s thing. Shaped like a two-layer cake, the meatloaf looks like chocolate cake and the mashed potatoes look like frosting. And it’s decorated!
3. Flower pot. Chocolate cake mix baked in a muffin tin. Take one muffin and wrap fruit roll-ups around it to resemble it being in a pot. Flatten gumdrops and cut out flower shapes and leaves and make them stand up in the “dirt” (choc muffin) with a pretzel as the stem.
4. Shaped cakes.
I know I have pictures of these things in a stash of stuff in my cupboard. I’ll go see if I can find them.
Found some…
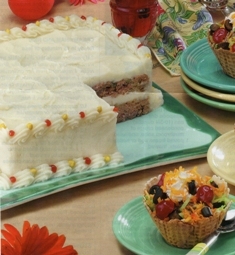 The meatloaf cake. And, by the way, that little taco salad is chocolate ice cream topped with yellow and green-colored coconut, marichino cherries, Cool Whip, and cut up black licorice, all in a waffle cup.
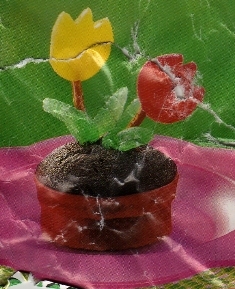 The flower pot. This picture is Lexi ‘s prized possession (because she wants to make them sometime) that Tiffany got ahold of and crumpled and ripped, causing some tears.
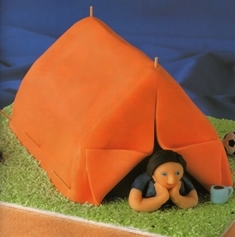 A shaped cake. Inside the tent is solid cake, the orange is marzipan… kinda fun stuff to work with, although I didn’t make this tent cake! The only time I used marzipan was on Lexi’s 1st birthday cake…
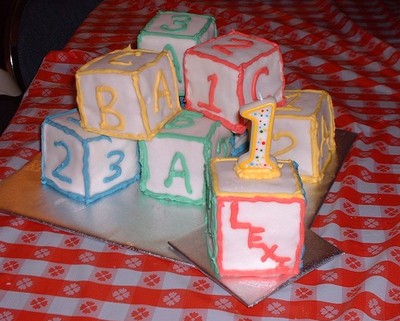
So, let’s have fun! I can’t wait to hear from you! If you have any questions, just ask… I’ll quick make something up. ![]()
Sigh! This site is sadly lacking in attention! Or maybe you noticed that. Or maybe your summer is busy enough that you didn’t notice it. Yeah, I hope that’s the case.
Maybe you put up a KITCHEN CLOSED sign over the summer. I might as well have done that!!!
I want to get back into cooking and baking more and just let the spiders and clutter and kids take over the house and just let stuff fall out of the closets when I open them and let the weeds grow in the garden… oops, I don’t have a garden, and let the fingerprints on the windows and throw dieting and exercise to the wind and just bake and cook and eat to my heart’s content!! Ahhhhhhh!
I haven’t made anything lately worth documenting!! And when it was worth documenting, I was in a tearing hurry (always in a hurry!) or my camera batteries were dead (that was some delicious moist cheddar biscuits that I made last week and I had no AAs in the house!) or I had already featured it. Like, the ham…
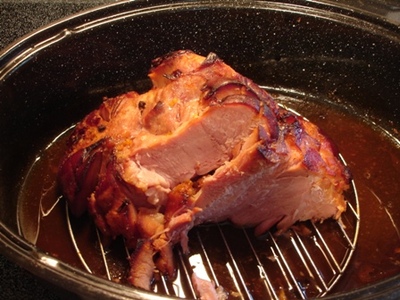 That is just the easiest thing to make and it makes a splendid meal. And one 6 lb. bone-in ham is big enough for 3 meals for us… Make the ham and cut slices off for the meal. Then after you’re done eating, cut as many more slices off as you can and that’s enough for another meal. Then, get the rest off (little pieces) and save them to throw in a casserole or soup (3rd meal). I just throw the frozen leftover ham slices in the crockpot with a bit of water and it’s good and moist and so handy… its already sliced!
Our most common supper is chicken breast, veggies, and either potatoes or rolls, but often both. The chicken breast is either done on the grill or in the frying pan. I don’t bread it, just thaw it in the microwave if it’s frozen and fry it or grill it (with seasonings), then we eat it with Famous Daves BBQ sauce. We have this at least once a week. And it’s so common that I never took a picture of it! Do you have a favorite or common meal that you often make? Or maybe you’re an adventurous cook who rarely makes anything twice. ![]()
——————————————————————————————–
I have a few contests in mind to choose from, but I need to figure out details like judges and if I’m gonna make each recipe to test it or what! For example, a ‘best cookie’ contest… if even 10 of you would participate, we’d have cookies sticking out of our ears around here! So, more contest info later.
I have a cookbook holder and always have an open cookbook on it. I change it now and then for a different view. The last while, it was open to this page:
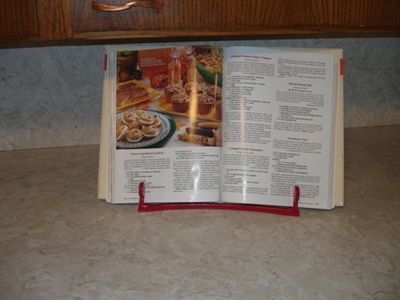
Those s’mores cookies were really grabbing me every time I looked at them. Finally, one day I made them. If I would’ve been paging thro’ the cookbook, they probably wouldn’t have grabbed me, but sitting on the counter every day for awhile, it grew on me. Then, I thought back and I remember doing that several times before… making something on the page that had been opened for awhile. Anyone know anything about psychology?!
My husband could use this… find a recipe he wants and change it to that on the cookbook stand. Who knows though, he might be after the Ranch Snack Mix and here I’d make the s’mores cookies!!!
S’more Sandwich Cookies …2002 Quick Cooking Annual cookbook

I’m gonna be lazy this time and see if it works to just ‘clip’ the recipe and put it in here. Hopefully you can read it. Part of the stand is covering a bit of the ingredient list… that’s 1 tsp vanilla extract under there.
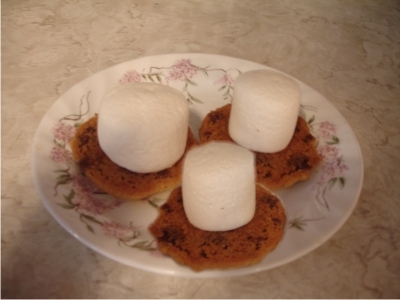
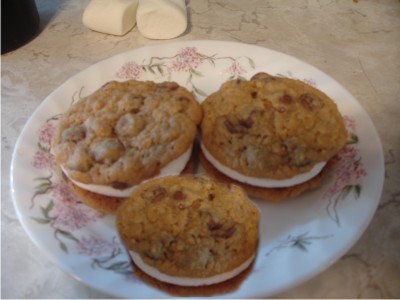
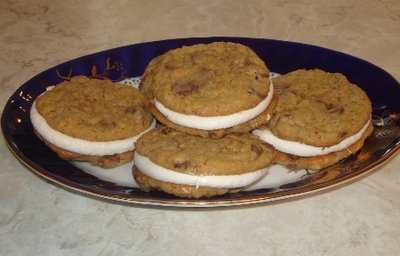 Side note: That oval plate they’re on is from a set of dishes that my brother brought home for me from Romania when he was over there for a few years. Very beautiful set! I’m almost scared to use them for fear I’ll break one.
These cookies were great, although not as good and gooey as real s’mores ! You could really taste the graham crackers. I might sub grahams for some of the flour in other cookie recipes sometime, just for something different. I made some bigger cookies and some smaller cookies… the bigger ones were best because the ratio of cookie to marshmallow was better (not as much marshmallow per cookie). Maybe your preference would be the other way. Mine made 18 sandwiches, the recipe says about 2 dozen.
On a more serious note…
This dish, on the other hand (as opposed to the last post), graces our table quite often.
Even the kids love it… at the end I’ll show you how to make it kid-friendly!

Did you ever have steaks on the grill?
They were just delicious, but you had 1 steak leftover… now, what to do with it.???? If you keep it, it might get tough when you reheat it. If you throw it away, it might bug you that something you spent good money one just went in the trash. Here’s what I do: Slice it thin and put it in a bag in the freezer. Then, the next time you make fajitas, pull it out and add it to the other meat.
Steak Fajitas
1 lb or so of thinly-sliced steak (I either buy it thinly sliced or slice a couple steaks up. If I have any left over from grilling, I add that too.)
1/3 each of a green, yellow, orange, and sweet red pepper, sliced into strips (Or 2 or 3 colors, whatever you have on hand.)
1/2 of an onion, sliced and separated
Tortillas
Shredded lettuce (I don’t keep shredded lettuce on hand, I just cut it thinly off of a head of lettuce.)
Tomatoes, cut up
Shredded cheese
Sour cream
Salsa
Spray the skillet with cooking spray or use oil, depends on if you want it more healthy or not. I’ve done it both ways. Add the steak, peppers, and onion. Sprinkle with some salt and pepper and seasoning. I use Chef Paul Prudhomme’s Meat Magic seasoning .
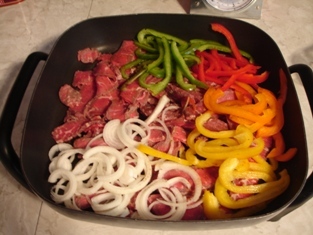
About 15 minutes before serving time, turn skillet to about 300. Cover. Stir about every 3 minutes. Fry for about 12 minutes total or until it looks done. While it’s frying, get the other things around… cut the tomatoes, shred the lettuce, etc. Stack tortillas on a plate with a paper towel between each one. Microwave until warm and soft, about a minute or so.
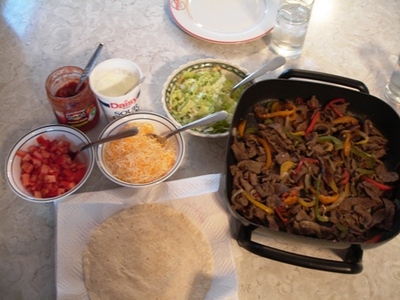
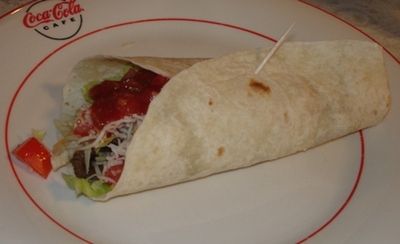
Now you’re ready to eat! How’s that for a ready-in-15-minutes meal! …which is one reason why I like it. If your supper time varies (like ours does), you can get everything cut up and in the skillet awhile, then it’s pretty fast from there. And now, for the kid-friendly version… Cut 3 1/2″ circles out of a tortilla.
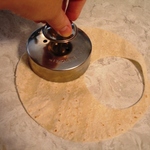
Fill it and roll up.
Fits in their hands nice and works great,

until they start playing with it!
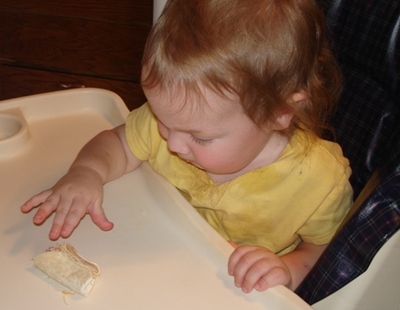
There are a bunch of different variations to making fajitas, I’m sure. We don’t have the fried rice and refried beans and guacomole (ok, I can’t make that word look right, where’s my dictionary?!). All that stuff would make it more complicated, plus we don’t really like 2 or 3 of those things.
Food becomes part of our culture…
There are foods that so many people like that they become an icon. For example, if I were to tell you to fill in the following blank with a food name, many of you would have the same answer. As American as_______ .
See, most of you said apple pie. Apple pie has somehow captured the taste buds of enough people through the generations to become something we are all aware is part of our culture. What other foods would meet this criteria? Cheeseburger? Fried chicken? BBQ? (not grilling, the real slow cooked over a fire kind). We are talking about foods that have stood the test of time. The food I am featuring today is not one of those foods.
In fact, I introduce to you an entree that barely rises to the level of food:
THE REDNECK DOUBLE PIZZA!
2 frozen pizzas (the thin kind)
Shredded cheese
Pepperoni
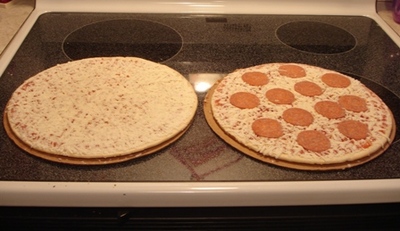
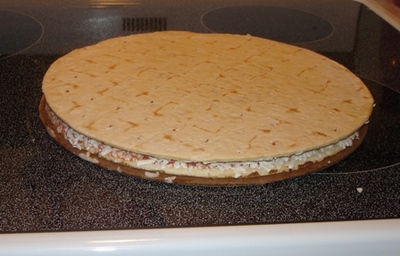
Flip the one pizza upside-down on top of the other one.
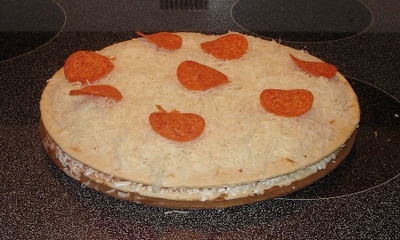
Top with cheese and pepperoni.
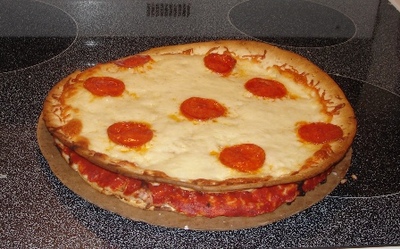
Bake at 450 till cheese is melted and edges are browning.
Slice and serve.
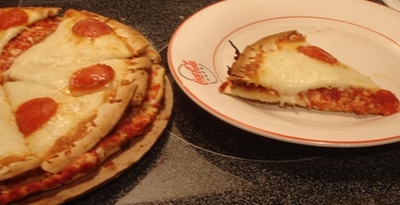
Yup, this one will definitely go in the “other” category. Right over there next to the moon pies and green ketchup.
P.S. I guarantee you that there is a guy in your household who has looked at those skinny frozen pizzas after you’ve baked them and has thought about taking both of them, flipping one on top of the other and making a sandwich…
…sit down for a cup mug of tea…let’s chat…
I’ve been tagged to list “7 things about me” by lovetocraftnread (don’t miss her site! She’s very creative and does beautiful work!!!).
I only know a fraction of the people who are subscribed to me, and I know a lot of you don’t know me, so I’ll tell you some about me. Then, because in a good chat, I don’t want to do all the talking, I want you to do your share of talking too. So I’m tagging ALL 197 of you who are subscribed to this site… tell me at least one thing about you, preferably 7, but in case that scares you off, I’ll settle with one… or five. ![]()
1. I’ve lived in WI all my life. It would feel weird to live anywhere else. I absolutely love Wisconsin… ok, yeah, I do complain about the cold during the winter, but even at 20 below, you could offer me a permanent home in the warm sunny south and I most likely wouldn’t take you up on it. Now a second home down there just for over the winter… that’s different… that’s my dream someday.
2. I married my highschool sweetheart… I wasn’t allowed to date until I was 18. The day before my 18th birthday, he asked me out on a date for ‘tomorrow evening’. Crazy how we knew each other so well, but suddenly on the first date, the air was changed somehow and it felt new and exciting and I was actually nervous. We now have 2 girls (a 4-yr-old and a 15-month-old), plus 2 babies in Heaven via miscarriage. We are just coming up on our 11th anniversary on August 3. This site is just for cooking, I also have a personal site… kaylouann
3. I am a Christian and go to a Mennonite church. If you’re not familiar with Mennonites and want to know more, message me and I’ll tell you about us. I’m very open.
4. I know for a fact that I’ve cooked more meals in the last 4 years of our married life than I did in the first 7. Before we had children, we both had full time jobs and we mostly ate out. That was so fun and relaxing. I didn’t like to cook and wasn’t confident about it, and when we’d get home after 5:00 or later, the last thing I felt like doing was cooking. We lived right in town too, so it was very handy.
5. My weakness is chocolate. MILK chocolate. I make a point to keep it out of the house if I’m trying to lose weight. If I’m not trying to lose weight, I make a point to keep it IN the house and my supply well stocked! I KNOW I could really floor you with how much I can eat at one time and still feel fine. Same with chocolate chip cookies. Just can’t leave ’em alone.
6. I have a part-time job doing design work… making brochures, ads, flyers, and maintaining our company website. I love it. I use Corel Draw. It’s such a perfect job for a stay at home mom. I can work in my pjs if I want to and I don’t need to get a babysitter. I have a dream that when the girls get older, we can have our own design firm. Neat thing about that is it wouldn’t have to disband when they leave home because it can be done from any computer in the world, thanks to email and internet.
7. I love scrapbooking. Wish I’d have more time for it, but that’s not something that’s screaming for attention to get done. My albums just silently get farther and farther behind when I have a scrapbooking lull. I’m working on an album for each of the girls, plus a family album. Also, sometime in the future, I want to do a cookbook that’s a combination of a scrapbook and this site… I’d put in only recipes I’ve done, complete with progress pictures, the recipe, and the finished product, and a review of what I thought about it, plus an excerpt here and there from you guys off of here (after you’ve made it and commented on what you thought of it). There would be one recipe per page in an 8 1/2″ x 11″ book. Not sure when that’ll happen, but it’s exciting to think about anyway.
Ok, your turn… Where do you live? What about your family? What’s your food weakness? What are your hobbies? Do you have dreams? Can’t wait to hear from you!!! ![]()
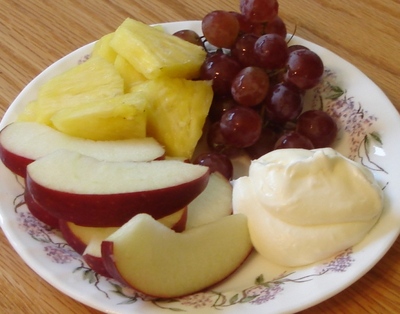
Dreamy Fruit Dip …from the 2004 Quick Cooking annual cookbook
1 pkg (8 oz) cream cheese, softened
1/2 cup butter or margarine, sftened
1/2 cup marshmallow creme
1 carton (8 oz) frozen whipped topping, thawed
Assorted fresh fruit
In a small mixing bowl, beat cream cheese and butter until smooth. Beat in marshmallow creme. This works too…
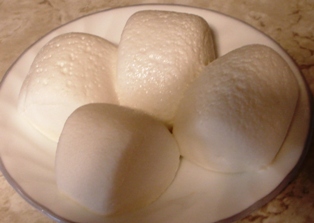 …I don’t usually have marshmallow creme on hand, so one time I put marshmallows in the microwave, then got them out when they puffed up, scraped them into the mixing bowl, and they beat in nicely. Just be sure to beat them in before they cool. Fold in whipped topping. Serve with fruit. Store in refrigerator. Yield: about 4 cups.
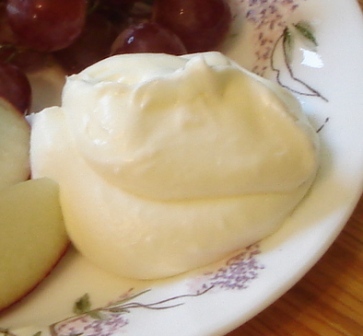 One thing I tried this last time that I made it was to put some of it in the freezer. It worked wonderfully! When I was ready to use it, I put it in the fridge the night before to thaw, then served it for lunch the next day. It was as good and creamy as it was when it was freshly made.
This is what we’re planning to grill this evening.
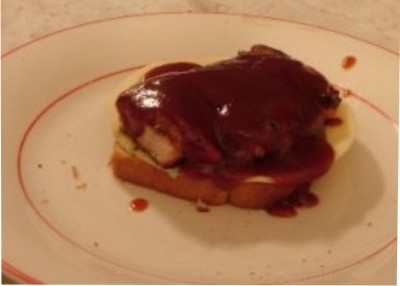
Open-faced pork chop sandwiches.
What are you grilling this evening?
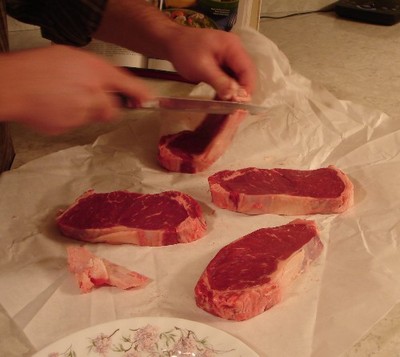
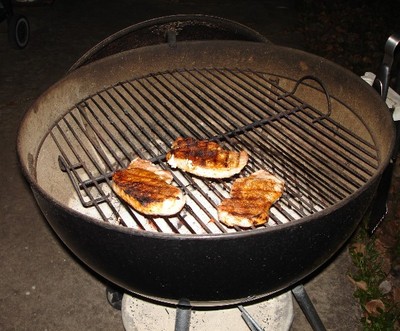
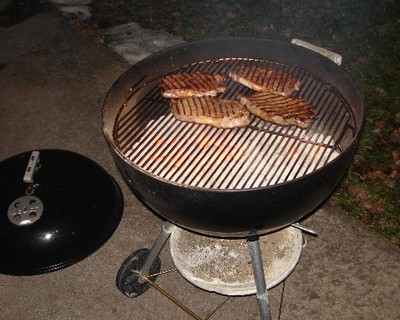
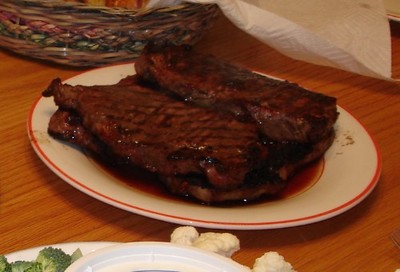

Our suppers last night… or maybe you call it ‘dinner’ (I am, after all, from the boonies in northern WI!) ![]()
That was so fun to get some supper ideas! Thanks!!!! You can leave that in a comment anytime… I’ll make it my header for awhile. ![]()
Just some comments on some of them…
There were a couple breakfast ones. I want to start doing that once every week or so, since we never eat breakfast together in the morning. Rufusannie gave me a breakfast haystack recipe that I’m dying to try. At home, we used to have a breakfast supper every Wed eve. We didn’t eat b-fast together either, so this way we still got to eat b-fast foods now and then. I wonder if Mom still does that.
I’ve never heard of fried zucchini patties. I like other squash and I like zucchini bread (I know, it’s nothing like bread ![]() ), so I might like them. Care to share your recipe, Twila?
), so I might like them. Care to share your recipe, Twila?
Those potatoes with sw cond milk & velveeta sounds good! Actually everything sounded good and some good quick summer ideas too… like leftovers. ![]() I also love the idea of just cutting up watermelon and making blt wraps and taking it out to the family!
I also love the idea of just cutting up watermelon and making blt wraps and taking it out to the family!
We had an easy meal last night too… very little prep time, but oh, so good!
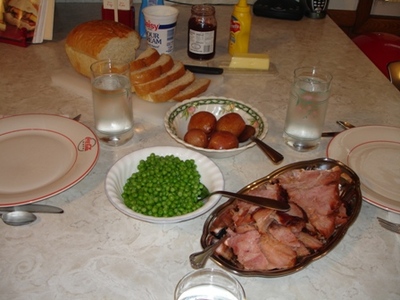
Apricot Baked Ham (recipe below)
Baked potatoes (just threw them in the roaster with the ham)
Peas (cooked in the microwave, then added S&P and butter spray)
Fresh bread (don’t let this fool you, it IS fresh-baked, but it was frozen dough bought from the store, NOT from scratch)
Apricot Baked Ham …recipe comes from Taste of Home 2nd Edition cookbook, one of my oldest cookbooks, I got it as a wedding gift almost 11 years ago)
1/2 fully cooked ham with bone (5 to 7 pounds)
20 whole cloves
1/2 c. apricot preserves
3 T. dry mustard
1/2 c. packed light brown sugar
Score the surface of the ham with shallow diamond-shaped cuts. Insert cloves in cuts.
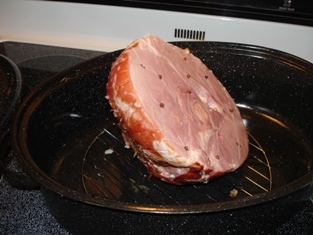
Combine preserves and mustard; spread over ham (I didn’t put all of it on) .
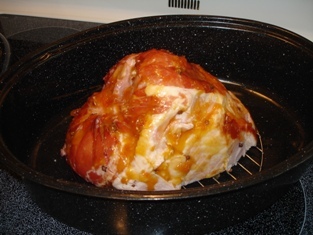
Pat brown sugar over apricot mixture.
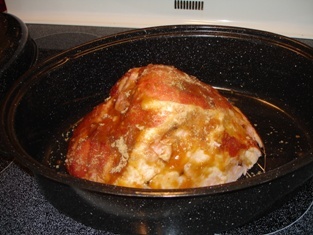 Place ham on a rack in a roasting pan. I also put about 1/4 cup water in the bottom of the pan. Seemed like it might keep it more moist. Bake at 325 for 20 min per pound or until ham is heated thro’ and thermometer reads 140. After about 1 1/2 hours, I got some of the liquid off the bottom of the pan and basted the ham with it. Yield: 10-14 servings.
 I forgot to take a picture till I had sliced some off already and got the potatoes out, but here it is anyway. I was a little worried about the apricot tasting ok on there because I don’t think I really like apricots, but the ham was delicious! I couldn’t have picked out the apricot flavor if I didn’t know it was in there. Nice and moist too!
———————————— First the old —————————————————–
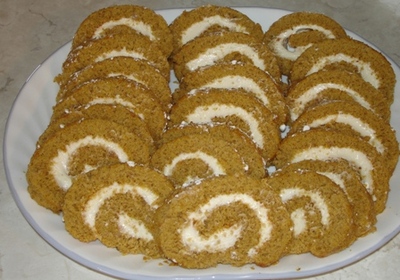
I have made this recipe so many times and it turns out great every time. I don’t know where it came from, it’s handwritten (by me) in my blank cookbook that isn’t so blank anymore!
Pumpkin Roll
3 eggs
1 c. sugar
2/3 c. pumpkin
1 tsp. lemon juice
1/2 tsp. salt
3/4 c. flour
1 tsp. baking powder
2 tsp. cinnamon
1 tsp. nutmeg
1/2 tsp. ginger
Beat eggs for 5 min. Gradually beat in sugar. Stir in pumpkin and lemon juice. Stir together dry ingredients. Fold into pumpkin mixture.
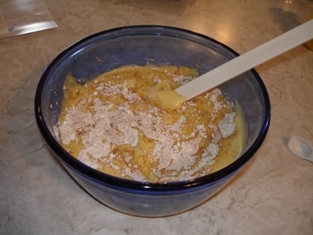
Spread in greased (I greased and floured it) 15″x10″ pan.
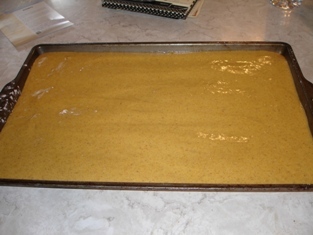
Bake @ 375 for 15 min. Turn out on towel sprinkled with powdered sugar. I usually run a pie server around under it to make sure it’s loose before turning it onto the towel.
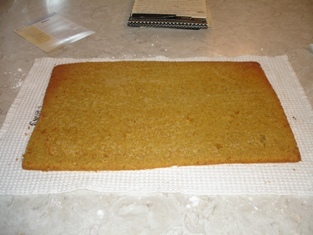
Roll towel and cake together. Cool.

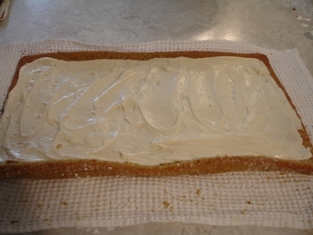
Unroll and spread with filling.
Filling:
1 c. powdered sugar
8 oz cream cheese
4 T. butter
1/2 tsp. vanilla
Beat until smooth and creamy. Spread over cake.
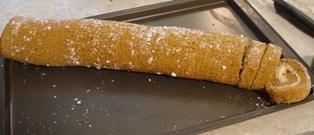
Roll and chill before slicing. I put it in the freezer to chill… the firmer it is to slice, the better. Well, I guess I’ve never had it frozen solid. It might not cut very easy then. You could roll it either way, it depends on how big you want the pieces to be.

—————————————- And now the new ———————————————–
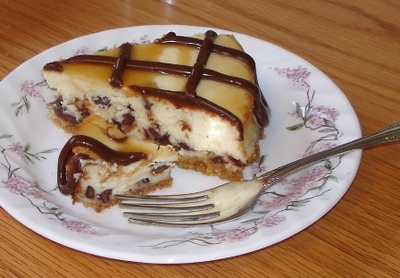
This recipe comes from an Easy to Bake Easy to Make recipe card. I did a bit of variation to it. Look at the pictures…I don’t ned to tell you if it was good or not! ![]()
Easy Chocolate Lover’s Cheesepie … I actually made it into a cheesecake instead of a cheesepie, so in this case, it’s Easy Chocolate Lover’s Cheesecake
3 pkgs (8 oz each) cream cheese softened
3/4 c. sugar
3 eggs
1 tsp. vanilla extract
2 c. (12 oz pkg) Hershey’s mini semi sweet chocolate chips (I use regular-sized chips and used milk chocolate)
2 T. whipping cream
1 extra-serving-size packaged graham cracker crust (9 oz) (I mixed 1 1/4 c. graham cracker crumbs, 3 T. sugar, and 1/3 c. melted butter together and pressed it in the bottom of a springform pan. Then I chilled it in the fridge until I was ready to pour the batter in.)
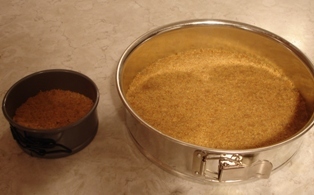
Heat oven to 450. Beat cream cheese and sugar until well blended. Add eggs and vanilla; beat well. Stir in 1 2/3 cups choc chips; pour into crust.
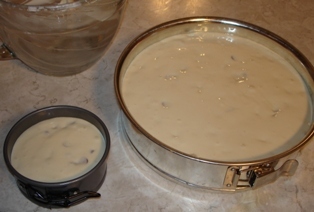 Note: I’m always asked to share some of my crust and batter when I use a springform pan because of my little helper in the kitchen with some of her own mini bakeware.
Bake 10 minutes. Without opening oven door, reduce temp to 250 (I don’t have a window in my oven. You wouldn’t believe how hard it was for me to simply turn the oven down and walk away!); continue baking 30 minutes or just until set. Remove from oven to wire rack.
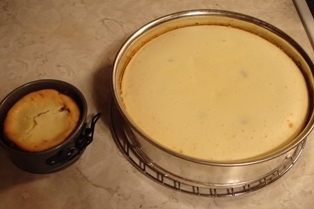
Cool completely. Cover; refrigerate until thoroughly chilled. Place remaining 1/3 cup choc chips and whipping cream in a microwave-safe bowl. Microwave on high 20 to 30 seconds or just until chips are melted and mixture is smooth when stirred. Cool slightly; spread over top of cheesepie. I put some caramel ice cream topping on, then piped the chocolate mixture on. I don’t know that it was really any better, just felt like doing it that way. ![]()
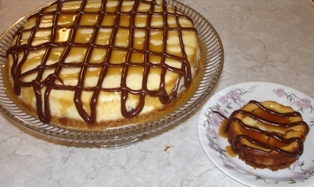
Refrigerate 15 min or until topping is set. Cover; refrigerate leftover cheesepie.

——————————————- This and that ——————————————————
I just paged down and it’s looking pretty desserty lately! Time to get some main dishes and side dishes on here again! We have not been just eating desserts!  Actually, all those desserts happened to be food to take away somewhere. Can tell what I like to make the best when I have to take food somewhere!
What are you having for supper tonight? Sometimes I’m stumped and I’m sure some of you are too. Let’s have some suggestions for us all! ![]()
I have a ham in the fridge and am planning to make that for supper tonight. Not sure what’s gonna go with it yet.
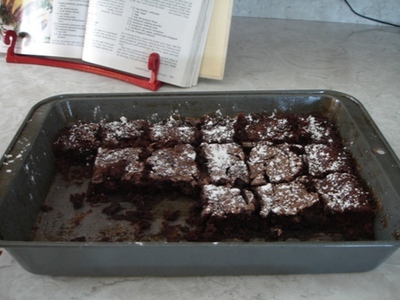
This evening, I tried to get fancy with something simple . Didn’t work. I was making finger foods for after the Bible School Program. I made layered finger jello (featured about 3 posts ago), then I thought I should take something else too. I had brownie mix in the cupboard, so I mixed it up, then to make it tastier and more attractive , I swirled melted caramel on top. I was picturing getting these bars out of the oven that were to die for… gooey, chocolate and caramel obviously swirled. I had decided that I’d better taste them before taking them because they’d definitely get all licked up at church!
Well, they came out of the oven and you couldn’t even see varigated color. Just brown. Totally dark brown. They looked very blah , like I would’ve just broke open a brownie mix box, threw in eggs and oil and baked it. So I sprinkled some p.sugar on them. Then I let them cool. When I went to get them out of the pan to put them on the plate, they majorly STUCK to the fork and I wrecked the first 5 pieces.
To make a long story short, caramel must be heavier than brownie batter because it all sank to the bottom. There was a layer of gooey caramel underneath. They are delicious though!!!! We’re inhaling the whole pan… ok, I’m not, but I am day-dreaming about doing it, and well, I had a couple small pieces.
And just to put a picture on, here they are. I know the picture is kind of a flop too, but at least it’s a picture.
Next time, I want to try baking it partially, then drizzling caramel on top, then finish baking it. I still think it sounds like a great idea to bake caramel on top of brownies! ![]()
oh my gosh that is SO CUUTE!