You’ll notice that I’m doing this because I get a kick out of it, not because I’m refined, elegant, and professional! ![]() First of all, I should’ve got my husband to do the photography instead of someone less than 4′ tall. But, I picked on the one who was sitting on a barstool with her face within a foot of my project, asking questions and wanting to help. Can’t blame her… at 4 years old, I’d have been dying to be turned loose with a paintbrush, melted chocolate, and leaves… paint, lick, paint, paint, lick…
First of all, I should’ve got my husband to do the photography instead of someone less than 4′ tall. But, I picked on the one who was sitting on a barstool with her face within a foot of my project, asking questions and wanting to help. Can’t blame her… at 4 years old, I’d have been dying to be turned loose with a paintbrush, melted chocolate, and leaves… paint, lick, paint, paint, lick…
I’ve made chocolate leaves only once in my life… just last weekend. So, if you’ve made them twice, you’re more experienced than me. ![]()
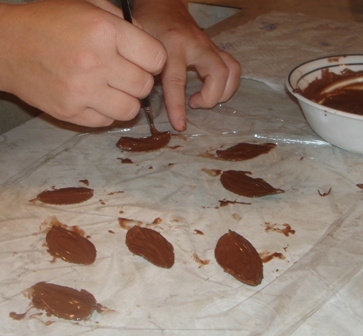
I went out to my rosebush (if you DON’T know me, you’re picturing something with beautiful pink roses hanging all over it, aren’t you? And if you DO know me, you’re thinking, “Huh?! You have an ALIVE rosebush?!”, aren’t you?)… anyway, I went out to my rosebush and picked 8 leaves off, brought them in and washed them under running water, and patted them dry with a paper towel. Then I took a paintbrush (everything else that’s actually a kitchen tool looked too big and cumbersome) and spread melted chocolate on the bottom side of the leaf.
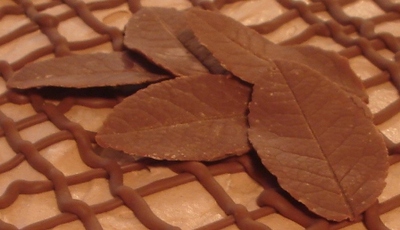
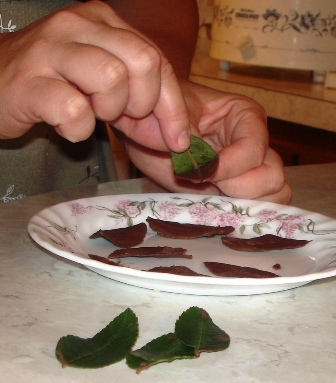
I just let them harden a little at room temp, then put another coat on and put them in the fridge to harden. Then, I got them out and peeled the leaves off…
When they were done, we were awing over them and Lexi said, “Mom, they’re SO pretty! Can I eat them?” Um, let me think… “No!”
I put them back in the fridge till I was ready to use them.
Next time, I’d make them a bit thicker. It was kinda neat how thin and delicate they were, BUT I started with 8 leaves, had 3 casualties, and ended up with 5 because they broke when I was pulling the leaves off. It was fun and they looked so neat… I’ll definitely make them more often!
Have any of you made chocolate leaves before that you could give us all some more tips?
What I put the leaves on was a new recipe , so I’ll throw that in here too, while I’m at it.
German Chocolate Cream Pie …from the 2002 Quick Cooking Annual cookbook
1 pkg (4 oz) German sweet chocolate
1/3 cup milk
1 pkg (3 oz) cream cheese, softened
2 Tbsp sugar
1 carton (8 oz) frozen whipped topping, thawed
1 graham cracker crust (9 inches)
Whipped topping, frest mint and chocolate dessert decorations, optional
In a saucepan over low heat, cook the chocolate and milk until choc is melted; stir until smooth. In a mixing bowl, beat cream cheese and sugar until smooth.

Stir in chocolate mixture. Fold in whipped topping. Spoon into crust. Freeze until firm. May be frozen for up to 3 months, just in case you could leave a chocolate pie alone for 3 months, knowing it’s right there in the freezer! ![]()
Remove from the freezer 10 minutes before serving. Garnish with whipped topping, mint and chocolate decorations if desired. Yield: 6-8 servings.
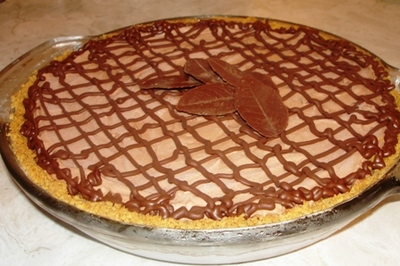
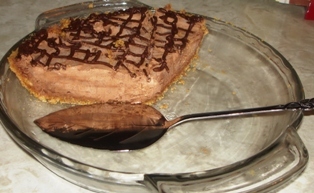 I had a bunch of melted chocolate left over and no more Cool Whip, so I just drizzled the chocolate over… it does need garnish of some sort, looks very plain without!
It was really good, except that I’m a milk chocolate fan, not semi-sweet. To me, this German sweet chocolate tasted just like semi-sweet. I want to try it again sometime and substitute 4 oz (or more ![]() ) of milk chocolate chips instead of the German chocolate.
) of milk chocolate chips instead of the German chocolate.