Recipes and Cooking Ideas for Homemakers and Amateur Cooks
 

Pepperoni Pizza Puffs

Pepperoni Pizza Puffs

Posted on April 3, 2014 
Filed Under Snacks

I hope this post will make sense. Right now, my computer screen is split, with me writing this post on half of it and my 3-yr-old Megan watching Dora on the other half (currently, Dora is singing a song about Winter turning to Spring and as she’s singing, all the snow around her is melting and the grass is greening up and flowers are starting to bloom… I wish finding Spring in real life would be that easy, sing a song and there it is, especially this year). Anyway, I’ll try not to accidentally drop little Spanish phrases here and there as I’m writing this.

Pepperoni Pizza Puffs. I discovered this recipe a couple years ago on Lick the Bowl Good and have made it SO many times! You can go from walking into the kitchen to serving in 30 minutes. They are great for snacks or lunches. They freeze well too… which means you can go from walking into the kitchen to serving in 5 minutes instead of 30! :)

I have been asked for the recipe multiple times after serving them. In fact, one time someone who had never had them asked for it. I was cleaning school with a group when I got a phone call from someone calling to get this recipe. I make it so often that I know it by heart, so I gave it over the phone while wiping down a desk. When I got off of the phone, one of the other cleaners said “I was listening and that recipe sounds good and easy. Could you write it down for me?”

I don’t make them exactly like Monica does on Lick the Bowl Good, but very close. I’ll post them here how I make them, which is basically with a little less kick because my kids prefer them that way.
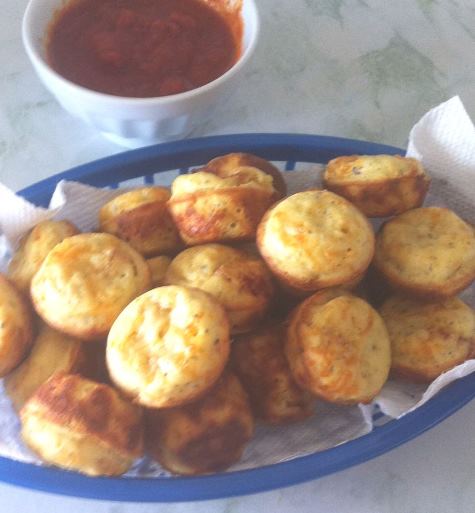
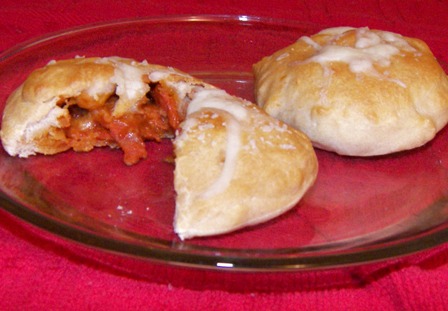
pepperoni pizza puffs
Hmmm, looks like I need to take a better picture next time I make them.

Pepperoni Pizza Puffs …adapted from Lick the Bowl Good

3/4 cup flour
3/4 tsp. baking powder
1/2 Tbsp. Italian seasoning
Pinch of salt
3/4 cup whole milk (I like to use whole, but it works great with any milk)
1 egg
1 heaping cup shredded mozzarella cheese
1 cup chopped pepperoni (if I don’t have pepperoni on hand, I skip it. They love em without it too. Tiffany actually prefers them without it, so sometimes when I’m making them with pepperoni, I fill a few muffin cups for her before adding the pepperoni to the batter)
Pizza sauce for dipping

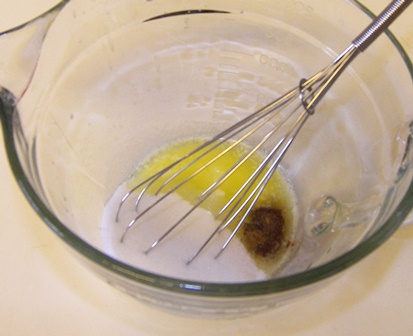
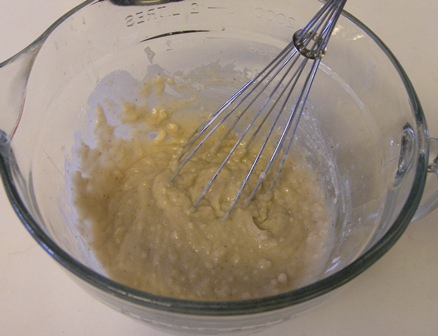
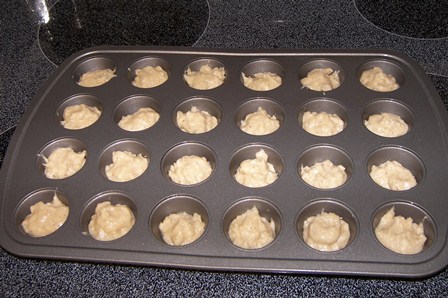
Whisk everything together, except the cheese and pepperoni. Then, stir them in. Divide the batter evenly between 24 greased mini muffin cups. Bake at 375 for 20 minutes. Warm the pizza sauce in the microwave and serve with the puffs for dipping.

I tried these one time in regular muffin cups instead of mini… aaaaaaaaand then went back to always making them mini. :) They seemed to not be quite as fluffy, and well, they lost some of their charm by being big.

I just heard something on Megan’s movie that was said in an annoying voice and I copied it in an exaggeratedly annoying voice and she said, “Mom, stop. You’re embarrassing me!”

If you pack lunches for your school kids, here’s an idea for you with these pizza puffs. Make a bunch of them, buy little 6″ paper plates and small condiment cups with lids. Package them in a sandwich bag like this and stack them in the freezer.
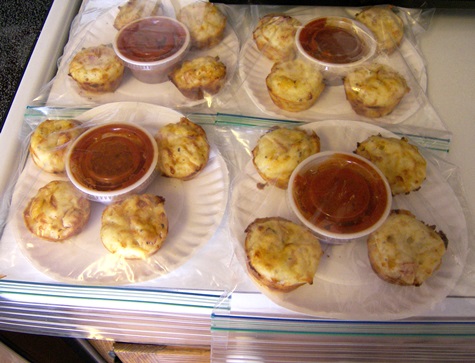
pepperoni pizza puffs lunch box
It’s so handy to whip them out and throw them into lunch boxes. If the kids have access to a microwave at school, they can take the lid off of the pizza sauce, and microwave the plateful for 30 seconds.

I hope you like these as much as we do! Have a good day.

Comments

2 Responses to “Pepperoni Pizza Puffs”
  1. Shannon on April 4th, 2014 7:22 am

    I am always on the look out for good lunch food. Sounds like one I need to try!

  2. Jan on May 26th, 2014 10:32 am

    For some reason I didn’t see this post until just now. My girls love stuff with pepperoni and anything made in a mini muffin pan is automatically a hit, so I think I’ll be making these very soon, like, for-
    today’s-lunch soon.

Puppy Chow, Monkey Munch, Muddy Buddies

Puppy Chow, Monkey Munch, Muddy Buddies

Posted on January 18, 2014 
Filed Under Holiday cooking, Snacks

It’s all the same thing… which do you call it? When I was a kid, we called it puppy chow. So, it will always be puppy chow to me. My kids seem to have heard it called monkey munch somewhere, in addition to me calling it puppy chow, because they call it monkey chow. Sometimes I wonder how foods get their names. This fun make-in-15-minutes-or-less snack has nothing to do with monkeys or puppies. Or buddies.

I’m going to post the regular recipe, but I’m also going to post a variation. It all ends up tasting pretty much the same. I tried it one time when we needed a puppy chow fix and we were out of chocolate chips. And it worked! Improvising when you need a chocolate fix and you’re out of chocolate chips reminds me of no bake cookies. Been there done that. I have a confession to make… I often don’t keep chocolate chips on hand for the sole purpose of not having to exercise as much self control. If it wouldn’t be for chocolate in my life, I fully believe I wouldn’t struggle with weight. Milk chocolate, that is. Why did they ever have to invent milk chocolate anyway? *she said, secretly thankful that they did because of the amazingness it has added to her life*. Dark or semi-sweet is about as tempting to me as, say, apples or something. Liz, I just now thought of you, my dark-chocolate-lovin’ sister-in-law. So anyway, having milk chocolate chips in my cupboard are as tempting as having a stash of candy bars in there. I’ve tried to switch to baking with dark chocolate chips, but my girls happen to not like dark chocolate very well. Hmmm, I wonder why.

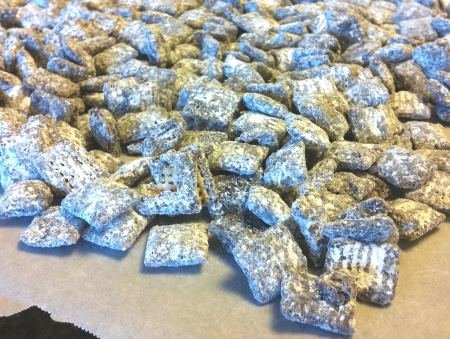
puppy chow

Puppy Chow

9 cups Chex cereal
1 cup chocolate chips (variation: melt 6 T butter and stir in 1/2 cup cocoa powder and 1/2 cup sugar)
1/2 cup peanut butter
1/4 cup butter
1 tsp. vanilla
1 1/2 cups powdered sugar

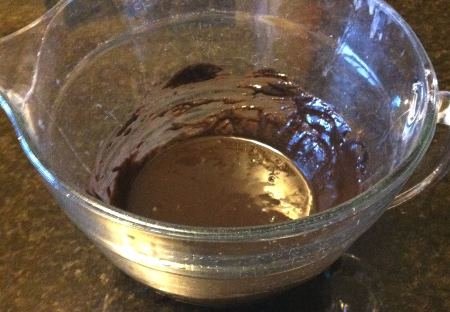
Put chocolate chips, peanut butter, and butter in a bowl and microwave for 1 minute. Stir. If it’s not all melted, put it back in the microwave for 30 seconds until it can be stirred smooth. Stir in vanilla.

puppy chow chocolate

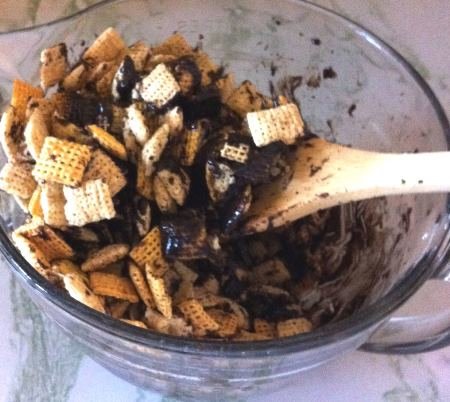
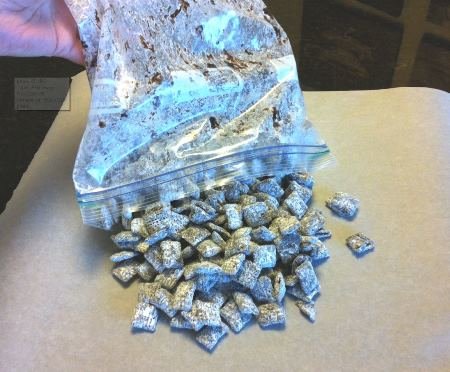
Dump Chex in and stir until coated.

puppy chow mix

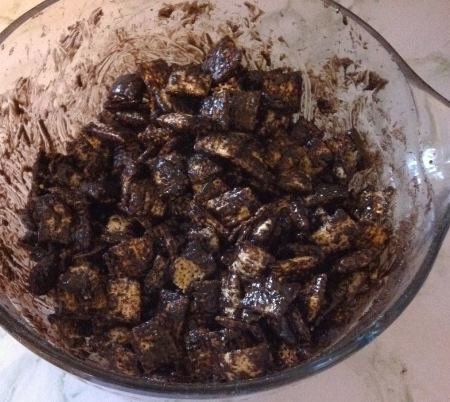
puppy chow mixed

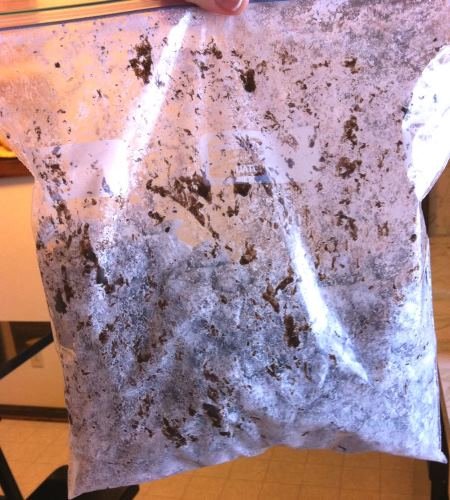
Pour into large ziplock bag, add powdered sugar, and shake to coat.

puppy chow coated

Spread on waxed paper to cool.

puppy chow cool

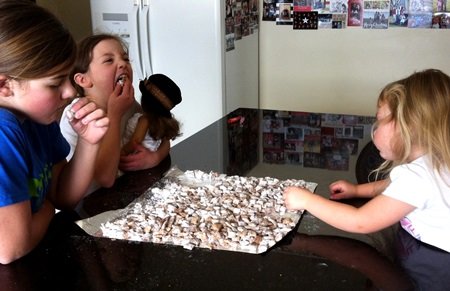
At this point, the puppy chow is dangerously vulnerable to kids, who magically appear in the kitchen while it’s cooling.

puppy chow eat

Liz and I were talking about puppy chow over the holidays because I was going to make it when she and a bunch of other family were here (but then didn’t because there were SO many snacks already sitting around) and she said she stores it in the freezer because it gives it extra crunch. Crunch is a good thing. So now I store mine in the freezer too.

If it makes it to the freezer, that is. (Refer to cooling picture above.)

Comments

9 Responses to “Puppy Chow, Monkey Munch, Muddy Buddies”

  1. Ali on January 19th, 2014 5:41 pm

    Kay – Somehow I lost your blog probably a year or two ago ? And just the other day I was thinking of it and I realized I needed to find it again. It was driving me crazy, every time I was checking out blogs I had it in the back of my mind that I needed to remember the name of yours! This afternoon I visited a blog that had a recipe I needed to make and I saw your blog listed on her blogroll and I yelled THAT’S IT! Hah :) Glad to have found you again! I hope you and the family are doing really well.

  2. Ali on January 19th, 2014 5:44 pm

    oh and we always called it Puppy Chow too. The last time I made it I kept it in the fridge and it is so much better chilled :)

  3. Kay on January 19th, 2014 11:31 pm

    Ali! Thanks for coming back. Your comment was like a breath of fresh air. :) And I’m glad there’s someone else who calls it puppy chow. Must go visit your blog now…

  4. Liz on January 24th, 2014 3:26 pm

    So you are training your girls wrong, huh? :) Well, that leaves more dark chocolate for the ones that like it in the family. I think one of the other SIL’s like it too, but I can’t remember if it’s Kara or JoAnn. We always call it Puppy Chow and my kids love it. The bag usually just stays open in the freezer. And it’s conveniently located right by the washer. So that’s my little highlight when doing laundry. :) But it’s gone now. :(
    And nice to know the variation. I wouldn’t have thought of doing that. I did substitute some chocolate baking squares one time. I had bought some over the holidays and still have a couple to use up.

  5. Jan on January 24th, 2014 11:20 pm

    I’ll eat your dark chocolate for you, Kay. I need to make this sometime soon. There are a few people in this house who would be delighted!

  6. Kay on January 25th, 2014 10:27 am

    Ha, Liz, training them wrong. :) Jan, I did not know you like dark! My own sister! Just shows that we must get together more often! So, do you mean you like it equally as good or prefer it?

  7. Viona Rieden on February 12th, 2014 4:49 pm

    Loved these recipes..I’m on ‘vacation’ ..have no cookbooks…they do lots of ‘pot lucks’ here @ this retirement village…dying for more ideas…can you help me out Kay? I don’t have a ‘supply’ of items as I would on hand IF I were @ home..so..maybe keep that in mind…
    Hope to hear from you personally!
    Thanks so much!!

    Where do you live? I know the feeling of being ‘mom’..with 3 little ones…doing a good job there gal!

    Viona Rieden

  8. Shannon on February 14th, 2014 10:23 pm

    Mom always made puppy chow when we were kids. I haven’t had it for a very long time. I have some chex right now that we aren’t using. I’m sure the kids would appreciate this. :) It’s a wee bit too much chocolate for me tho. :)

  9. Ronnica, Striving Stewardess on July 6th, 2015 8:43 pm

    Thank you! I had a desire for puppy chow, but no chocolate chips. I’m not buying anything this month that’s absolutely essential…I don’t think chocolate chips make the cut!

Drizzled Chocolate Fruit Kabobs, plus How to Keep Banana Slices from Browning

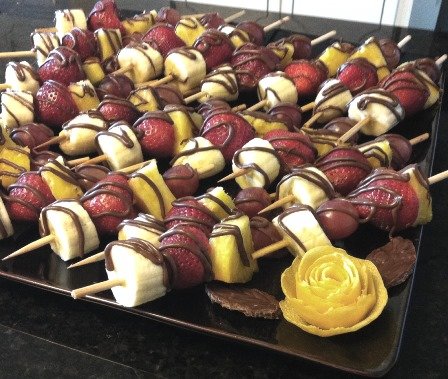
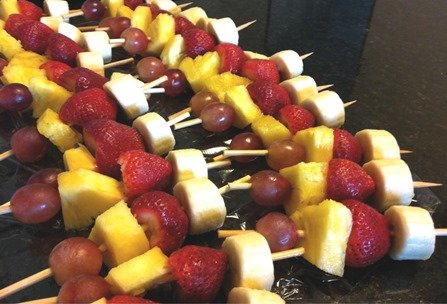
These fresh fruit kabobs drizzled with chocolate are the perfect item for adding a bit of beauty and pizzazz to the table without a lot of time-consuming work. You can’t beat that, right? So, keep it in mind next time you need to take food somewhere. It doesn’t even require a fork so it works for “bring finger food” occasions. These particular ones were made for my husband Shannon to take to a company potluck at his office at Keller Williams Real Estate.

chocolate drizzled fruit kabobs1

There is no recipe, just use any kind of fruit you want to… They all work great. Well, except apples. Apples sometimes split when you put them on the skewers. If you’re using apples, the thinner the skewer the better. Just for the record, apples and chocolate go together awesomely! Is awesomely a word? I figure as long as you know what a word means, it doesn’t really matter if it’s technically not a word. ????

Chunk up/slice all the fruit that gets chunked or sliced. Take stems off of fruit that gets de-stemmed. Toss fruits that get brown with lemon juice (more on that later).

In other words, before I start threading them on skewers, I like to have them all ready to go.
Then, start poking fruit on until: 1. Fruit is gone, 2. Skewers are gone, or 3. You have the desired amount.

fruit kabobs

After the fruit is all on the skewers, put about a half cup of chocolate chips or candy melts in a sandwich bag, but don’t seal shut. Put it in the microwave for 30 seconds. Flip it over and microwave it for 20 second. Work the bag with your hands and put them in for 10 seconds. Do this until all the chocolate feels smooth and no chunks are left.

I need to get back in my zone… that zone where I automatically remember to take pictures at each step! I was having too much fun and just kept rolling instead of stopping for pictures.

Now, you’re ready to drizzle. Put the kabobs all really close together so less drizzle lands on the table. Snip a little corner off of the bag and just scribble back and forth over the fruit. Then immediately separate them or else the chocolate will harden and pull drizzles off of its neighbor.

Put them on a plate. Garnish if you want to.
lemon rose chocolate leaves
Here are tutorials on the rose and leaves, in case you want to make some:
RoseChocolate leaves
The rose tutorial is actually for making a tomato rose, but it’s the same technique.

Now, about the bananas and keeping them from browning.

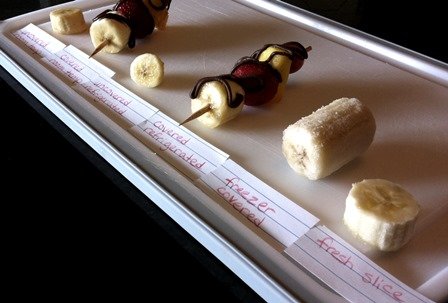
Lemon juice is the secret here. I did a little test where I checked them after 3 hours and after 6 hours. A little after the 6-hour mark, my girls came home from school and I let them eat my experiment for an after school snack… and then thought of it later that I should’ve tested the bananas longer, like 24 hours. But what I did learn is that lemon juice works its magic for at least 6 hours, and that was the info I needed because unless they have to set/freeze/marinate/etc, I rarely make things more than 6 hours ahead of time. Maybe that’s because I’m a procrastinator.

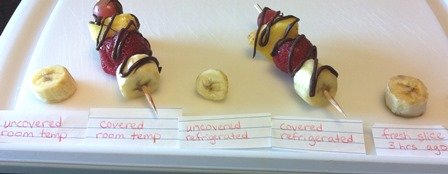
So here we go, the experiment. The pictures above were taken right after I made it, where even a fresh banana would still be looking good. The pictures below were taken 3 and 6 hours afterwards.

3 hours after being tossed with lemon juice:
banana slice browning2
From left to right: uncovered room temp, covered room temp, uncovered refrigerated, covered refrigerated, covered frozen, and a fresh slice.
The fresh slice is NOT 3 hours old, it’s just there for comparison. The frozen one is thrown in there for fun… it actually has no lemon juice on, it was peeled and put into the freezer right away and is probably more like 3 months old.

6 hours after being tossed with lemon juice:
banana slice browning3
The middles are starting to get a little brown, but are still fine.

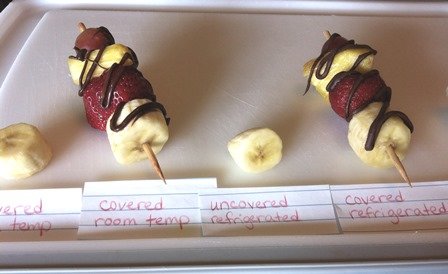
What I was surprised was that between all the lemon-juiced ones, there was pretty much no difference! I’m glad about this tidbit because it gives flexibility. Here is a closer up. They all stayed firm too, no mushiness.
banana slice browning1

chocolate drizzled fruit kabobs

Here come the Holidays… make some of these pretty things!  It’s a delicious, healthy snack to set out on the snack table (with the chocolate covered Ritz crackers, cookies, red-green-silver-foil-wrapped Hershey kisses, and party mix).

Comments

4 Responses to “Drizzled Chocolate Fruit Kabobs, plus How to Keep Banana Slices from Browning”

  1. Twila on November 22nd, 2013 11:30 pm

    These look yummy. I’m wondering where you found the short skewers, or did you cut skewers in half. If you cut them in half, what did you cut them with so the ends didn’t splinter?

  2. Kay on November 23rd, 2013 12:55 pm

    Twila, I get the short ones at Meijer, Hobby Lobby, JoAnns, or Michaels. Are you close to any of those stores? I was out of them at the moment, so for these I used the longer ones. I cut them with a wire cutter… makes a nice clean cut, no splinters. :)

  3. Shannon on December 5th, 2013 1:43 pm

    I miss your posts! :)

  4. Kathleen on September 17th, 2014 12:12 pm

    Can fruit kababs been frozen and them dipped. If so what is the shelf life in a freezer before the fruit gets mushy? Would it be ok to eliminate the lemon juice if the kababs were frozen?

Ice Cream Cone Cake Pops

There. I did 2 posts with meat in, so let’s get back to the fun stuff! ;) No, really, I am planning to keep it a little more balanced… I think anyway. Sometimes I think I should’ve named this site something like ”Chocolate Dipped Tidbits” or “Living for Chocolate, Dying for Some More” and do sweets only, what with that being my passion and all.

Speaking of which, I totally get Tiffany (my 5-yr-old) in this little conversation that happened one day last week:
Her: “May I have an ice cream cone?”
Me: “No, you already had one today.”
Her: “Pleeeeeeeeeeeeease? I REALLY need one.”
Me, feeling sorry for her, but sticking to my guns: “No.”
Her, pulling out the trump card in desperation: “I’ll give you all my money if you let me have one.”

If we run out of cones and ice cream around here, my girls think it’s a real crisis. Currently, we have sugar cones (the pointy ones that sorta look like waffle cones) and regular cones in 2 sizes (the ones that are flat on the bottom and taste like newspaper just plain). These cone cake pops use the mini size of the regular cones.

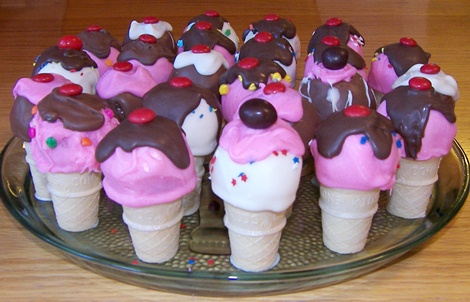
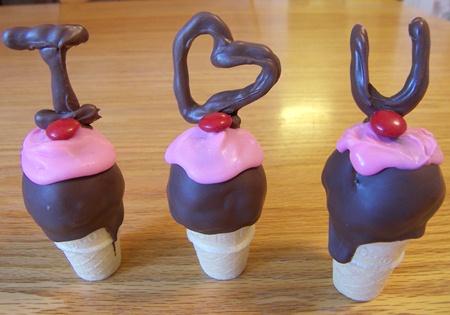
Awwww, aren’t they adorable?

ice-cream-cone-cake-pops.jpg

You really do need to see these in real life. The cuteness factor doubles from a picture to real life.

I know you can’t really tell the exact size because there’s nothing to compare it to. So, here’s one in a 13-month-old pudgy hand, if you know what size they are in real life. This is a real ice cream cone, but the same size cone.
ice-cream-cone-megan.jpg

Yeah, we’re getting Megan hooked on ice cream cones already. This size is so perfect for her because she’s done eating it by the time it starts melting and dripping.

I got this Ice Cream Cone Cake Pops idea from Bakerella’s website and her Cake Pops cookbook (which my friend Ruthie gave to me for my birthday last year… it was on my wish list, and I never told her, how cool is that?!) Bakerella used sawed-off sugar cones, but I decided to just use mini regular cones so I wouldn’t have to do all that cutting.

ice-cream-cone-cake-pops-done.jpg

So here’s what you do. Take a baked cake and crumble it up and add a bought can of frosting and mix it together.

Or…

Get the leftover cake out of the freezer from a graduation cake you made earlier, thaw it, crumble it, mix up some frosting and mix a few dollops into the cake crumbs. That’s what I did. So, these cake pops were white cake mixed with cinnamon cake.

By the way, next time you’re buying cake mixes and you’re undecided on the kind, please buy a cinnamon one. This is the first time I tried it and it was SO good! You’d think I would’ve already thought to try that, what with having married into a we-love-cinnamon family. I want to make one sometime with cream cheese frosting. Mmmm mmmm mmm!!! You can use cream cheese frosting in these cake pops, but then you should refrigerate them, which is why I used regular frosting.

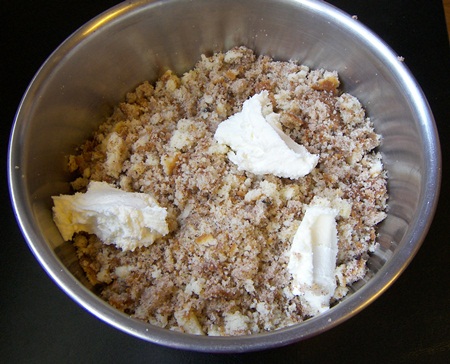
Here are the cake crumbs and dollops of frosting. I forgot to take a picture after it was mixed…
ice-cream-cone-cake-pops-crumbs.jpg

Roll the cake mixture into balls about the size of a golf ball, maybe a little smaller. Don’t make all those little dents in it like a golf ball has, though. Put the cake balls in the freezer for 15 minutes, then transfer them to the fridge if you’re not ready to dip yet. They should be chilled, but not frozen.

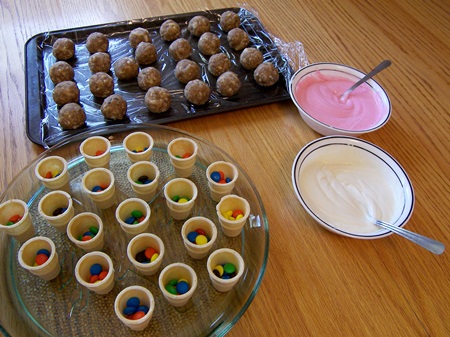
Here is when I was just ready to start. Those bowls are both melted white chocolate, but the one has pink food coloring in it. The melted milk chocolate is missed on the picture. I put some M&Ms in the bottom of the cones just for a fun surprise.

ice-cream-cone-cake-pops-starting.jpg

Dip a skewer in the melted chocolate, then into a cake ball. You can take a spoon and spoon some chocolate over to get it fully covered if the chocolate isn’t deep enough to fully immerse the cake ball, but don’t spin or stir or twist it around in the chocolate because crumbs may fall off or it might come apart. Then, put the drippy chocolate covered cake ball on one of these mini cones and pull the skewer out. It will kind of start to drip over the sides to make a melty look. That is a good thing.

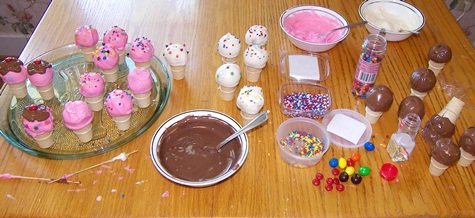
This is after the process is underway…
ice-cream-cone-cake-pops-making.jpg

After the cake pops are dipped and put on the cones, take another color of melted chocolate and put on top, letting it start going down the sides a bit. Put on sprinkles if you want to. Put a red M&M or peanut M&M on top for a cherry.

ice-cream-cone-cake-pops-top.jpg

To make tipped over ones, put the cake ball on a flat surface instead of on a cone, then put the cone slanted on top of it. Bakerella calls this a “happy accident on purpose”. I love that term! 🙂

Now, we leave Bakerella and go on to an extra tip and idea for these from me:

1. These little things are top-heavy. So if you’re taking them somewhere, put a little bit of melted white chocolate on the bottom of the cone, then set it on the plate. In no time, it is hardened and you can move the plate around at will… without ice cream cones landing on the floor.

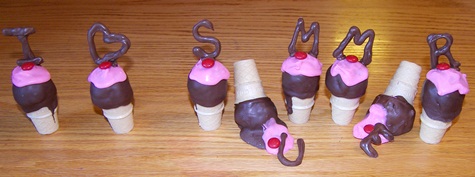
2. Pipe thick chocolate letters on plastic wrap or wax paper, put them in the fridge till they’re hard, and stick them to the top with a dollop or two of melted chocolate… and you’ve just personalized your cake pops to the season/event/occasion!

ice-cream-cone-cake-pops-summer.jpg

Here are some specific ideas:
– Write “Welcome Home” on them and put them on the counter, ready for someone coming home. That’s actually the very thing that made me think of putting letters on top of these… around the time I was making these for a church picnic, some friends of ours were coming home from a trip and I had intentions of doing that with the extra ones, but with a combo of a change of plans in my day and procrastination, they got home before I got it done. But at least I’m glad for the idea now, to use in other ways.

– Use them for the cake at a birthday party and write “Happy Birthday (insert birthday person’s name)” 

– Write your kids’ names.

– Make the entire alphabet, with extra A’s, E’s, T’s, M’s, S’s, and whatever other letters are used more often. Then, let your kids play with them, writing words and phrases or even complete sentences.

And last but not least, if you love someone, do this…
ice-cream-cone-cake-pops-love.jpg

Comments

8 Responses to “Ice Cream Cone Cake Pops”

  1. Shannon on July 21st, 2011 2:41 pm

    These are so cute!! Any birthday girl would love them. I love the Megan picture! She looks so adorable with the tongue hanging out for a lick! :)

  2. Beth on July 21st, 2011 2:59 pm

    Cuteness! Wish I could have one about now. I got a kick out of the phrase “Don’t make all those little dents in it like a golf ball has, though.” You are goofy! :)

  3. Jan on July 21st, 2011 3:51 pm

    That picture of Megan would win a prize! I think the cute cones could, too. I have leftover birthday cake in my freezer that I’ll probably end up throwing out to the wild animals in the woods after a few months. Maybe I should do this instead!

  4. Renita on July 22nd, 2011 3:03 pm

    love Megan’s pic! Cute! Jordan wants these…right now. :-)

  5. Janice on July 25th, 2011 11:48 am

    Oh dear, I made the mistake of looking at these with three little people. Now, they all want some! I’ll have to put cones on my shopping list.

  6. amber on September 5th, 2011 8:27 pm

    KAY!!! i was trying to think of something cute and fun for emma’s bday next week and i think i just might have found it.. now, if only YOU’D come make them for me??? ;) not sure mine will turn out as well, but i think i’ll give it a shot.

    you’re inspiring~

  7. Christy on September 8th, 2011 7:36 pm

    Hey, just wondering if you’ve ever seen any cute dinosaur cakes. Cute and dinosaur in the same sentence? I’m really not into them, but Zachary is VERY MUCH all about anything dinosaurs, especially triceratops, and anything green. I found a triceratops cake I can make i need to. I was really hoping to do more of a scene kind of cake, so I can buy a pack of little dinos and pop them on top–not up to too much work right now. His birthday is the 18th, so I have a little time to figure it out.

  8. Janice on October 26th, 2011 9:34 pm

    Love the site

Apple Nachos – Gooey Sticky Yummy

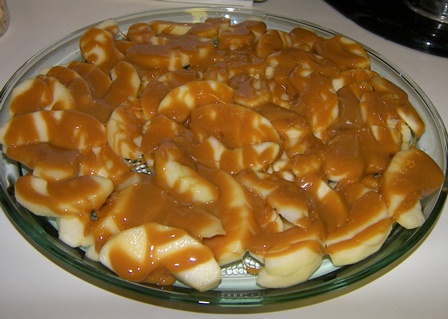
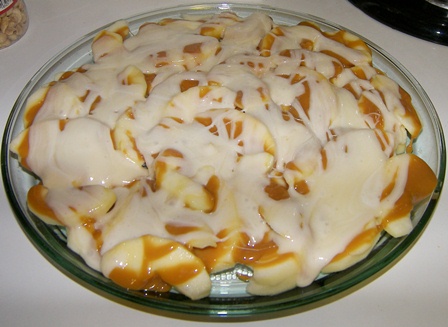
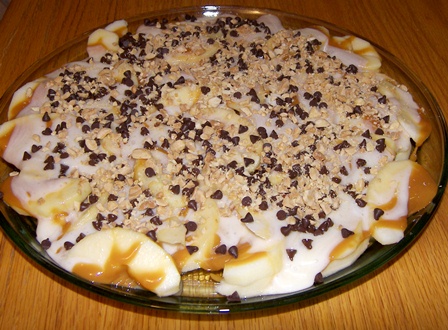
This is a perfect summer snack. It’s easy to throw together and it’s cool. Perfect summer snack, as in, if you’re going to make it, summer would be the perfect time to do it. Not everything about the snack is perfect…. the taste and flavor combo is just amazing, BUT the. kids. had. sticky. e.v.e.r.y.w.h.e.r.e. I mean, when you’re talking melted caramels and marshmallows, it’s pretty much a given that it’s gonna be sticky.

And it’s also pretty much a given that it’s gonna be yummy. ;)

So, consider the ’sticky’ a warning and the ‘yummy’ a recommendation, and then you decide from there. :) Maybe the time to serve it would be while the kids are out running thro’ the sprinkler or on the Slip ‘n Slide… think all mess outside and then getting washed off. Now we’re talkin’!

The main thing is that we all kept coming back for more, and they are SO good… which is why I’m posting them and will definitely make them again!

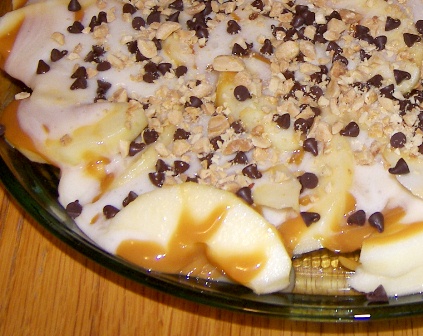
apple-nachos-yum.jpg

Apple Nachos …recipe taken from Taste of Home Oct/Nov 2010 magazine (and going by the picture they have with it, they only put on about an 1/8 of the topping quantities and their apples aren’t peeled)

36 caramels
1 Tbsp. water

30 large mashmallows
1/3 cup butter, cubed

4 medium tart apples, peeled and cut into 1/4″ slices
1/3 cup chopped dry roasted peanuts
1/3 cup miniature semisweet chocolate chips
3 Tbsp. Halloween sprinkles (I skipped this)

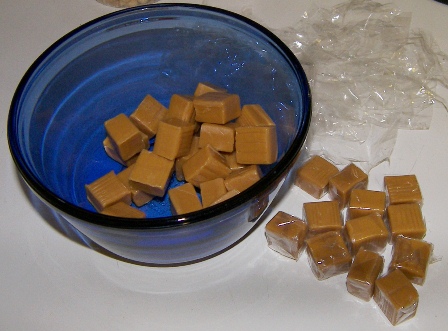
In a microwave-safe bowl, melt caramels with water; stir until smooth. You could probably use caramel ice cream topping, but I think melted caramels would taste way better. ;)
apple-nacho-caramels.jpg

Meanwhile, in a large saucepan, melt marshmallows and butter. I think next time I’ll do these in the microwave too… I do it in the microwave when I make rice crispy treats, so why not for this? I also want to try just putting a a jar of marshmallow creme in the microwave and see if it melts and becomes pourable.
apple-nachos-marshmallows.jpg

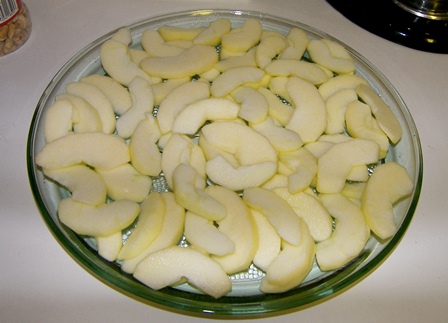
Arrange apple slices on a large platter.
apple-nachos-apples.jpg

Drizzle with caramel. Love that phrase, the word ’drizzle’ bumps it up a level. “Put the caramel on” just wouldn’t have the same ring to it.
apple-nachos-step2.jpg

Top with marshmallow mixture.
apple-nachos-step3.jpg

Sprinkle with peanuts, chocolate chips, and sprinkles.
apple-nachos.jpg

Serve immediately. Not kidding about serve immediately… we didn’t eat the entire thing and a couple hours later, it was kind of milky and liquidy between the apples and caramel and the marshmallow stuff firmed up. It was fine, just not as easy to eat because huge chunks of toppings wanted to come along with each bite. Still tasted great, though! ;)

Comments

3 Responses to “Apple Nachos – Gooey Sticky Yummy”

  1. Beth on June 23rd, 2011 2:19 pm

    Hey, you posted THREE times before I finally checked this? I really need to have more of a pattern to check your blog. The salad looks yummy, the cake is fabulous (as always) & that apple dip looks to.die.for! Now I’ll have to go eat some ice cream & peanut butter to satisfy the sweet tooth craving you gave me. :)

  2. Beth on June 23rd, 2011 2:23 pm

    And one more thing…love your new profile pic!!

  3. Mom on June 28th, 2011 12:25 pm

    Yeah, I was going to comment on your very good-looking profile picture and description, and adding Megan to your delicious mix of little girls – at least, they sound delicious after eating this snack before the sprinkler wash!

Mini Donut Muffins

Posted on April 22, 2011
Filed Under Snacks, Sweet rolls and Coffee cakes

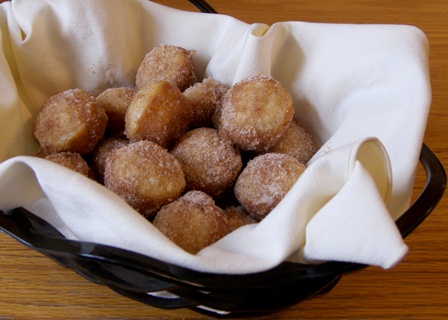
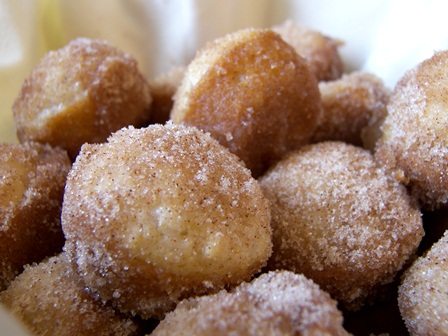
If cooking was basketball, this would be a slam dunk! Seriously, these little things are aWeSOmE!!! (I only put 3 exclamation marks there because I know some people get annoyed when bloggers go wild with exclamation marks, but in my mind, I’m adding about 30 more.) You’ve gotta try them… your taste buds will love you. They won’t take much of your time… 40 min from walking into the kitchen to popping one in your mouth.

STOP.

What was it that you could be doing 40 minutes from now?

Ok, just wanted to be sure you caught that.

Here’s a little unnecessary tidbit… I made these with one hand. I was going to quickly get them into the oven before putting Megan down for a nap. Well, just as I was ready to start, she got crabby and clingy, it was over, naptime was NOW.
Unless I was holding her.
So, I thought ‘oh well, no age is too young to start training a little cook’. Actually, I didn’t think that, I just thought it right now, but it would’ve been a cool reason to hold her while making these! So, yeah, from measuring the first ingredient to spooning the batter into the pan (including taking pictures), I had a 24-lb 10-month-old on my hip. She was tired enough to just lazily watch and not grab stuff. Then, while they were baking, I put her to sleep. Yep, I rock my babies to sleep. My babies were never trained to just lay down and go to sleep on their own. Not saying it’s for everyone, but it’s definitely for me. It’s 18 months out of each of their little lives that I rock them to sleep and that’s some cozy little moments that I’ll never regret. And it gives me plenty of time to try to memorize the feel of them in my arms in hopes that when they’re all grown up, I can reach in and grab those memories again… and remember.

Ok, where was I? (Yeah, I know this is a cooking blog, but I don’t do a personal blog, so I like to (and my mom likes me to) stir bits of life into here sometimes.)

donut-muffins2.jpg

Donut Muffins …taken from here, but I’d have probably never found and tried them if my friend Diane hadn’t alerted us to them on a message board I frequent. So, Diane, if you’re reading this, thanks a ton! :)

1/2 cup white sugar
1/4 cup margarine, melted (I used butter)
3/4 tsp. ground nutmeg
1/2 cup milk
1 tsp. baking powder
1 cup flour

1/4 cup margarine, melted (it’s up to you… you can either add a few Tbsp more right away or you can melt more butter when you’re running out halfway through dipping them ???? )
1/2 cup white sugar
1 teaspoon ground cinnamon

Preheat oven to 375. Grease 24 mini-muffin cups. Mix 1/2 cup sugar, 1/4 cup margarine, and nutmeg in a bowl.
dm1.jpg

Stir in the milk, then mix in the baking powder and flour until just combined.
dm2.jpg

Fill the prepared mini muffin cups about half full. Yeah, I know these aren’t all evenly filled, but I was never a perfectionist, and probably never will be. Plus, I was holding a baby and by this time, my left arm was starting to kill me.
dm3.jpg

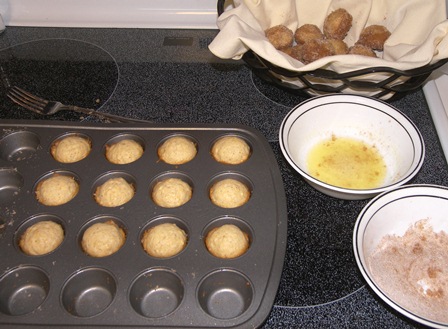
Bake until the tops are lightly golden, 15 to 20 minutes. During this time, a mouth-watering nutmeggy smell will be wafting throughout your house. While muffins are baking, place 1/4 cup of melted margarine in a bowl. In a separate bowl, mix together 1/2 cup of sugar with the cinnamon. Remove muffins from their cups, dip each muffin in the melted margarine, and roll in the sugar-cinnamon mixture.
donut-muffins1.jpg

Let cool and serve. I don’t know WHY it says ‘cool and serve’! I say ‘serve warm’! I only had one and that was a warm one and it was such incredible melt-in-your-mouth awesomeness that I’d try to serve them warm on purpose, if possible.
donut-muffins3.jpg

I don’t know what category to put these in. They’re so versatile.
— Make them for an after school snack.
— Take them to a ‘bring food’ church function.
— Make them for brunch.
— Serve them for dessert.
— Make them this evening for a bedtime snack.

Coming up next… a Lightning McQueen cake. ????

Comments

14 Responses to “Mini Donut Muffins”

  1. Cindy on April 22nd, 2011 1:53 pm

    note to self: never read kay’s blog when this hungry!!!!!!!!!! (using lots of exclamation points because i like to. and they don’t annoy me, i have kids that do that. so excessive punctuation does not.)

    these sound wonderful. i already printed off the recipe and am going to make ’em instead of folding laundry. :) yum.yum. only 40 minutes till heaven. and btw. i like how you stir bits of life here in your kitchen blog. you have a way of “seasoning” it just right.

  2. Shannon on April 22nd, 2011 2:37 pm

    They look marvelous! Might have to give them a shot (if I have nutmeg). :)

  3. Cindy on April 22nd, 2011 2:39 pm

    my laundry is still in heaps…
    but my taste buds are.so.happy.

    these are what we call in our family, make-again-good!!!!!!!!!!!!!!!!!

  4. Kay on April 22nd, 2011 3:01 pm

    CINDY!!!!!!!!! You totally made my day! Honestly, the best thing anyone could do for me in the comment section is say they’re gonna make what I posted RIGHT NOW and then come back in less than an hour and give a review on it. :) Love ya!

  5. Wilma Troyer on April 22nd, 2011 6:00 pm

    Unfortunately I cannot make these muffins right now, but I WILL make them sometime very soon. And btw, I like the life bits you share. I also rocked my babies ~ all six of them. I know, too, that it’s not for everyone, but I sure don’t regret it. I cherish the memories now.

  6. Beth on April 22nd, 2011 6:42 pm

    I also like the life bits…keep ’em coming! These things look good — we had cinnamon rolls around here today, so these will need to wait for another day, but I already know I’ll LoVe them. So…may I ask what a serving size was this time? Ok, I won’t ask. :)

  7. Mary Gingerich on April 22nd, 2011 8:17 pm

    This is very similar to a recipe my mom used to make…that we called french breakfast puffs! I haven’t made them for quite awhile and my boys have been asking for them. Maybe it will be tomorrow morning!

  8. Kay on April 22nd, 2011 10:06 pm

    Beth, in this case, serving size was one…. until I needed another one, then 1 suddenly morphed into 2. :) No really, I justified it because I could’ve made these into 12 reg-sized muffins and had a whole one (which would’ve been the same mass as 2 little ones) AND I really needed to try a room temp one to see if they were still good after they cooled.

    So, here I am with an “after they’re cooled” opinion… good and still could’ve eaten half the batch, but not NEAR as good as warm. Not near. When they’re warm, they just melt in your mouth; when they’re cooled, they taste exactly like a donut hole (a cake donut, that is).

    Wilma, glad to hear of another rocked-my-babies mom… I’ve always been in the minority in that dept. :)

  9. Twila on April 23rd, 2011 8:58 am

    Oh my!! I made these for brunch this morning and 4 of us ate almost all of them!! I couldn’t remember what they were called because yesterday I just jotted the recipe on a sticky note, so we just kept saying, “pass whatever those things are called!” I think there were about 5 left which I just put on a plate because I knew they’d get eaten as people walk through the kitchen. I will definitely be making them again. Often!!!!

  10. Amy Burkey on April 23rd, 2011 9:19 am

    We’ve been making these here for a few years too and we love them….but I never thought of doing them in a mini muffin pan! I’ll bet they’re even batter that way. So that’s what I’ll try next! After I lose these next few lbs…..Ha Ha!

  11. Chandrima Pal on April 25th, 2011 1:55 am

    Hi there,
    I have recently started a saturday morning baking session with kids – all for fun and teaching ourselves some team spirits and ways to have fun. I was searching for some new ideas and saw your blog. It is very nice resource and specially you have done a lot of kids friendly stuff. Stories behind the food you cook are very good read too I will keep coming to you!

  12. Mom on April 26th, 2011 1:02 pm

    Hey! How did I miss this one? – must have been off to AK at the time! Yes!! that’s the “sugary spice” I like “stirred” into your posts! And yes! the recipe will have to be tried, maybe next Sunday (40 minutes from start to finish!) when we have company here for breakfast – they’ll be warm!! Count my exclamation marks!!!

  13. Kay on April 26th, 2011 1:21 pm

    Mom, I just knew you like it because you said that when I make a cookbook, I need to put that ‘extra’ stuff in there too, not just the recipe. :)

  14. Evangeline on May 1st, 2011 3:39 pm

    I made these and they were very good! Has anyone tried these, rolled in powdered sugar? I think I’ll try that next time. I’m not real fond of crunching white sugar, so thought that might be a nice alternative. Thanks for sharing this delicious recipe!

Mini Lemon Meringue Pies

Posted on September 22, 2009
Filed Under Pies, Snacks

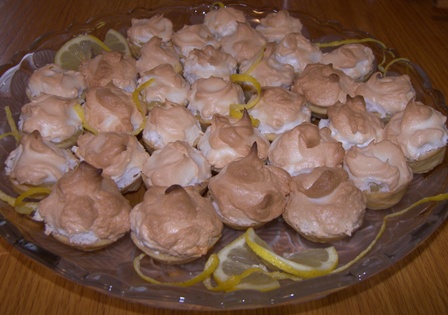
Really mini. Not 4″ pie pans.

Smaller.

Not cupcake pans.

Smaller.

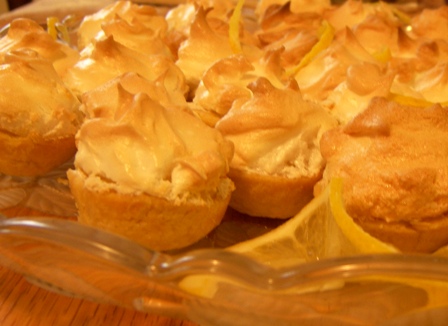
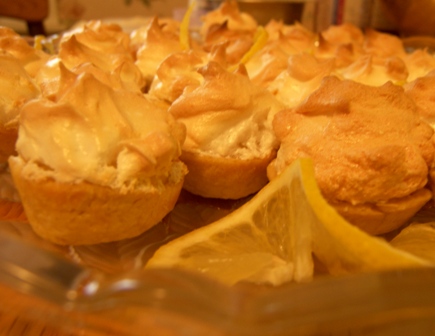
These were made in mini muffin pans.

mini-lemon2.jpg

These are perfect for a bring-a-salad-or-dessert church gathering. You know, there are 20 desserts to choose from and you have a hard time narrowing it down to 5 and one of the desserts calling to you is pie cut into 8 pieces. A piece of pie is a complete dessert, so there goes the rest of the selections. I decided to try making little individual pies instead of a couple big lemon meringue pies to take to the Fall Praise Social picnic this past Sunday evening. And it worked! With these little things, you can have a taste of lemon meringue pie without passing up the pecan bars, eclair dessert, monster cookies, and fresh peach delight.

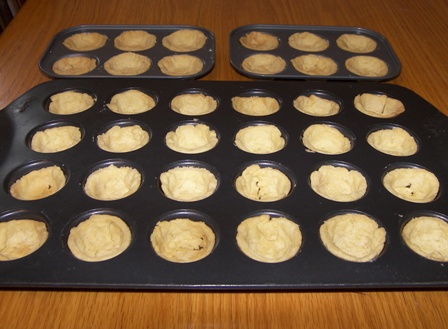
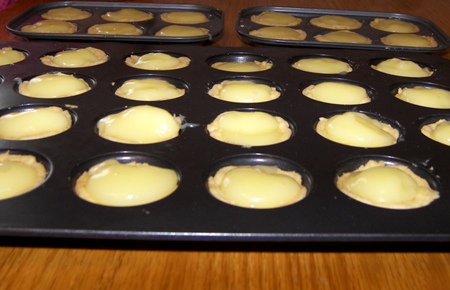
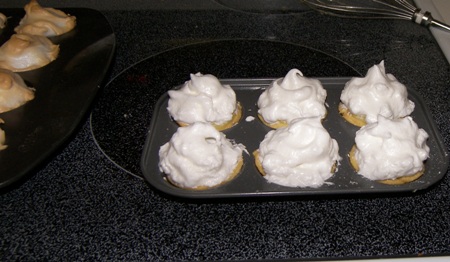
Use your regular lemon meringue pie recipe or use my favorite recipe featured here. Roll the crust a bit thinner than usual, then cut out circles. The tube of my Pampered Chef Measure-All Cup was the perfect size for circle-cutting. Then, press them into the mini muffin pan and bake at 375 for about 10 minutes. Make the filling and spoon into crusts. Make the meringue and spoon on top of filling. Bake at 375 for about 10 minutes. Should be easy to remember… everything to bake gets baked at 375 for about 10 minutes. :)

Here’s the process in pictures:

mini-lemon7.jpg

mini-lemon6.jpg

mini-lemon5.jpg

mini-lemon4.jpg

mini-lemon3.jpg

mini-lemon1.jpg

They tasted exactly like lemon meringue pie. I guess that would make sense, what with using that recipe and all. They’re long gone, and I just feel like snitching one off the picture and inhaling it in 2 bites.

—————————————————————————————-

In other news, you may want to stay tuned. I think I might blog live this evening for a couple hours. Lexi is planning to make supper. She’s 6. She feels quite capable and wants me to leave her alone in the kitchen with her cookbooks. Tiffany and I are allowed to help her by setting the table and we also may carry things to the table like bbq sauce and salt & pepper. I think she’s in for a bit of surprise and will end up needing more help than she thinks she will. Here is the menu she picked out (going by pictures in cookbooks): Easy Mac n Cheese, Crunchy Chicken Tenders, Trees with Cheese, and Puddin’ Cones. She gets home from school around 4:15. Supper is scheduled for 6:30.

Oh, and did I mention that she doesn’t know the difference between a teaspoon and a Tablespoon?

Comments

6 Responses to “Mini Lemon Meringue Pies”

  1. Arla on September 22nd, 2009 9:26 am

    Jenny was nine when I could leave the bread and cookie baking entirely up to her and I did, too, many times. Her baking was perfect most of the time. I’m not saying this just because I’m a prejudiced mom…she really could bake and soon surpassed my abilities. I’d say Lexi’s talent runs in the family. You might find out as I did that you find yourself asking your ten year old daughter how SHE does it sometimes. I trained in Lisl and Jenny at the same time…turned out that Lisl could; but preferred other work as I do.

  2. Katrina on September 22nd, 2009 7:18 pm

    Great lil’ pies!

  3. Sharon on September 23rd, 2009 11:48 pm

    Thanks for the reminder that I used to make granola all the time and the family loved it. Will be making your recipe.

    Off the subject, but I am recently interested in using the modified corn starch called Clear Jel. Does anyone have any experience using it in Lemon Meringue Pie. I would love, love, love to figure out how to prevent the pie from “weeping” and thought the Clear Jel might work. I appreciate any input about it, or, any other solutions that you know about….happy cooking

  4. Jan on September 28th, 2009 12:10 pm

    What happened to the printable recipes? I need to take a finger food to the church “apple schnitzing” tonight and have been longing for lemon meringue pie ever since you first posted it, so now I have a good excuse to make these little things.

  5. Kay on September 28th, 2009 12:40 pm

    Hmmm, yeah, Jan, I wonder too what happened to the printable recipes! :) They seem to have disappeared, huh? Actually, I’m glad to know someone misses them. They take extra time to do, so I’ve been slacking off. So thanks for the little nudge… I’ll start doing them again and as I have time, I’ll go back and catch up.

    Another thing that works is to highlight the entire post, pictures and all, and then copy and paste it into Notepad (Start > Accessories > Notepad). The pictures don’t copy into there along with the writing, so when you hit print, you get words only printed out and you don’t even have to dodge around all the pics when you copy and paste. Maybe you could do that for now since I won’t have a printable recipe for you before you make them for tonight.

  6. Jan on September 28th, 2009 4:00 pm

    I made them, but they don’t look as nice. I think my crust was still too think and it shrank in some places and puffed in others, making the place for the filling rather small, but they’re still cute now that they’re done. I got tired of carefully putting meringue on with a spoon, so I piped it on. Worked great and was fast and fun!

After School Snack Ideas… and Biscuit Donuts

Posted on September 2, 2009
Filed Under Snacks

Well, it’s that time of the year again. School has started, or is starting soon (unless you’re in Peru, where I just found out that ‘summer vacation’ is in the winter).

The kids come home from school,
school1.jpg

school2.jpg

…and they are STARVING!!!!! Or so they think.

I remember that when I was a schoolgirl too. I NEEDED a snack. I was starving. We lived 1/2 mile from school and half of that distance was our 1/4 mile long lane. We’d often walk to school and sometimes Mom would put the snack on a platter and walk out to meet us, disperse the snacks, and we’d all walk together to the house, munching away. Good memories. My favorite snack of all is when she’d mix peanuts, chocolate chips, and marshmallows and put them in little cups.

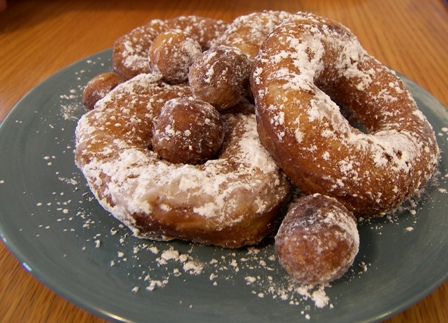
Renita was telling me about an after school snack that she makes sometimes for her boys. So, yesterday I stole her idea and made it too. Here it is.

donut6.jpg

Biscuit Donuts

1 can refrigerated biscuits
Oil or shortening for frying
Powdered sugar

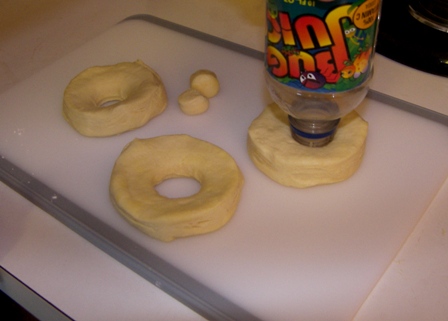
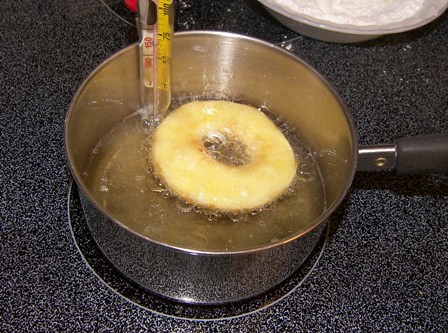
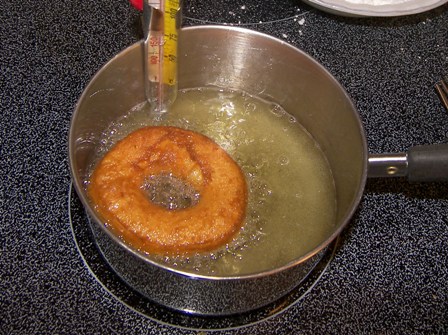
I put about a cup of shortning in a small pan and heated it to about 375 degrees. Take each biscuit and make a hole in the middle with something round.
donut1.jpg

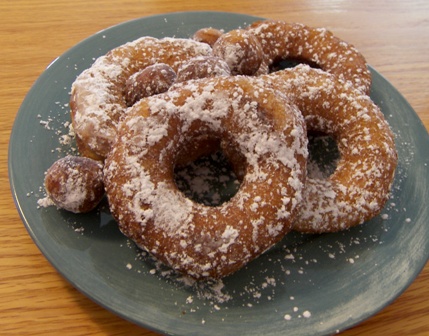
If you use the Grands biscuits with flaky layers, split them in half (where 2 of the layers meet)… makes so they aren’t doughy in the middle when the outside is done. And it also makes twice as many donuts that way. ???? Is donuts spelled ‘donuts’ or ‘doughnuts’? I’ve seen it both ways, not sure what the difference is except that one way is shorter, so I’ll stick with that one. Fry the donuts in oil for 45 seconds – 1 minute per side.
donut2.jpg

donut3.jpg

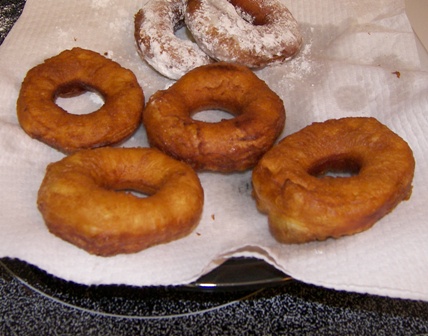
Drain on paper towel.
donut5.jpg

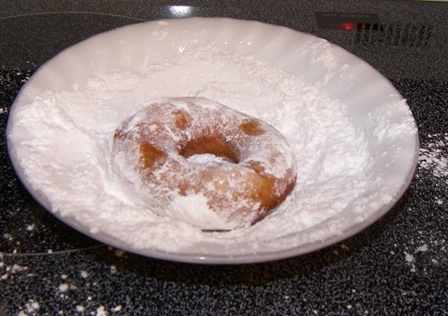
Coat with powdered sugar.
donut4.jpg

donut7.jpg

Easy.
Yummy.
Only 3 ingredients.

Other after school snack ideas:
— Apples with peanut butter
— Cookies and milk
— Their leftover lunch ????
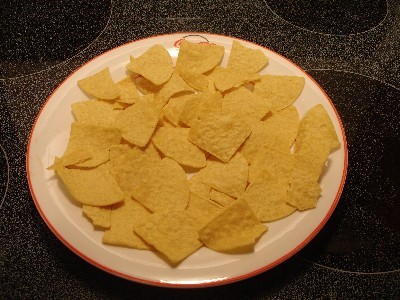
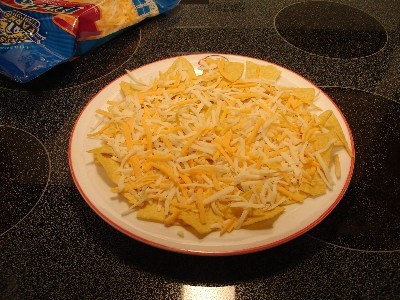
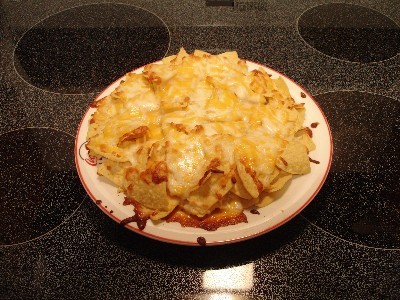
— Nachos with salsa (serving of tortilla chips spread out on plate and sprinkled with shredded cheese and microwaved for about 20 seconds to melt the cheese)
— Fruit
— Pudding
— Graham crackers with milk
— Reeses Puffs ????
— Popsicles
— Salties (chips, pretzels, Cheetos, party mix, etc.)

That’s all that came to my mind right now. What do you give your kids for an after school snack? Or do you say, “Go look in the kitchen, see what you can find.”? :) Today, I was in the middle of doing laundry, so I said that and they found goldfish crackers and drank chocolate milk.

Comments

13 Responses to “After School Snack Ideas… and Biscuit Donuts”

  1. Aug on September 3rd, 2009 7:37 am

    Glad you posted on this topic, because I was thinking that I would like to do after school snacks for the kids on the days that I am home. Yesterday I made these little strips of bread that you dip in butter and then make a sugar/cinnamon coating for and bake for about 5 minutes. They were really yummy. Those donuts look easy and good. And thanks for the other ideas too.

  2. Freida on September 3rd, 2009 7:55 am

    Ohhhh, Jasmine would be thrilled with the donuts. I’ll have to try these!

  3. Lanita on September 3rd, 2009 9:12 am

    Yummy they look so good! we’re going camping and planning to do these in a large pot over the fire.

  4. Jan on September 3rd, 2009 9:27 am

    my kids would love these and it’s something i often have on hand

  5. Lynn on September 3rd, 2009 10:18 am

    Wow this is funny – I am making these today for my kids when they come home from school! I can relate to your story we also had a very long lane to walk after school about 1/3 mile. I was raised on a mennonite farm also – those were days I would love to go back to.

  6. JoAnn on September 3rd, 2009 2:45 pm

    I think these are what you can often find on Chinese buffets. I’ve never tried making them, but I will, soon!

  7. Kelly on September 3rd, 2009 7:34 pm

    Yum!! Those look super easy and delicious — I might need a “weekend snack” of those this weekend :-)

  8. Angela on September 4th, 2009 3:53 pm

    These donuts are especially yummy over the campfire! =)

  9. Loretta on September 5th, 2009 8:55 pm

    OOhhhh can’t wait to try these-the children were just asking about donuts today!!!Thanks

  10. Shannon on September 9th, 2009 10:05 am

    We often had these but mom would roll them in cinnamon sugar instead of powdered sugar.

  11. Katie Seamons on November 18th, 2009 5:54 pm

    I have tried these and they sure are yummy, but I have also tried using the pizza dough and it works even better. Not as stong of a baking powder taste. Great blog!

  12. Katie Seamons on November 18th, 2009 5:54 pm

    Sorry that was supposed to be strong not stong…

  13. Paola on June 16th, 2010 9:03 am

    Hi, nice recipe! One note: in Peru summer vacations are actually in the summer because we are in the south hemisphere :)

Stuffed Mushrooms

Posted on August 21, 2009
Filed Under Snacks

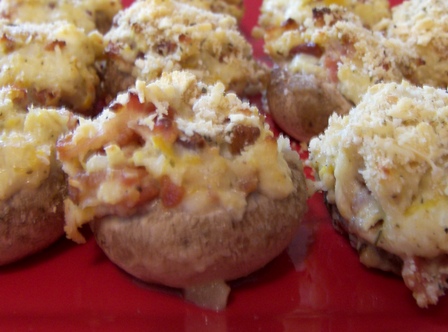
I just realized I don’t have an ‘Appetizers’ category on here! What’s up with that?! Shows how often I serve an appetizer before a meal. Actually, I think I did it only one time so far this year. It was a couple Sundays ago. I called everyone to the table and set the appetizer down for them to eat while I dished up the meal. The appetizer was…
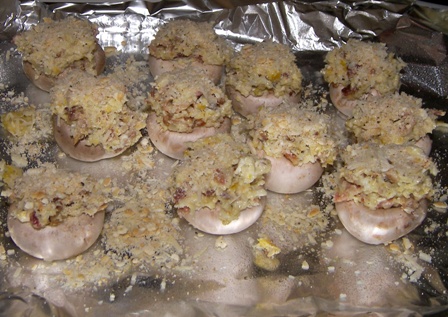
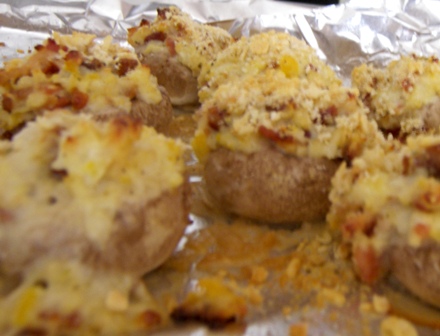
these Stuffed Mushrooms. ????

mushrooms4.jpg

I love stuffed mushrooms, but have never made them before. Seems like every time I see a recipe, they always have crabmeat or are tomato-y or something. Not that there’s anything wrong with that, it’s just not my favorite kind.

Then, one day, as I was browsing Tasty Kitchen, I found a cheesy, cream cheesy, bacon bits recipe. Perfect! Here it is.

Stuffed Mushroom Caps

25 whole mushrooms
½ of a small sweet onion
1 Tbsp. minced garlic
½ of a bell pepper
5 Tbsp. grated parmesan
1 tsp. fresh or dried sage
4 oz. cream cheese
3 Tbsp. seasoned bread crumbs (I used cracker crumbs with some Italian seasoning mixed in)
2 Tbsp. shredded mozzarella
¾ cup hamburger or sausage or bacon (I used bacon)

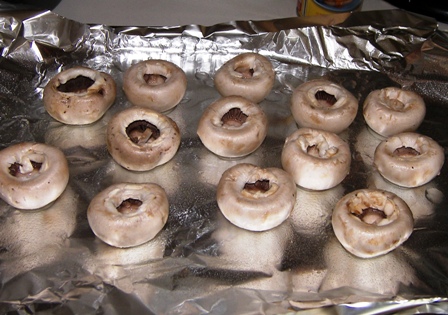
Clean and stem the mushrooms. Preheat oven to 375 degrees and grease a foiled cookie sheet.
mushrooms1.jpg

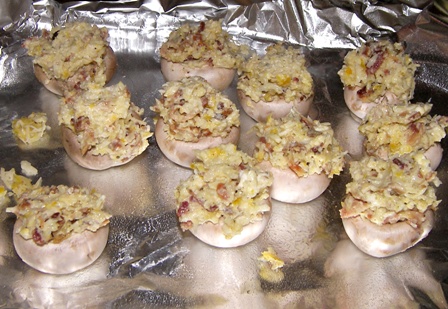
Dice the bell pepper, mushroom stems and onion and toss in a food processor with the garlic and sage. Process until all is mixed together well and remove. Heat a pan or skillet with a little bit of olive oil and cook the meat (of your choice) with the bell pepper and onion and garlic mix. When the meat is browned, remove and pour into a mixing bowl. To the bowl with the meat mixture, add three tablespoons of the parmesan, the mozzarella, and cream cheese. Season with salt and pepper to taste. With a melon scooper, fill each mushroom cap with the mix.
mushrooms2.jpg

Mix the remaining parmesan and bread crumbs and sprinkle on top of stuffed mushrooms.
mushrooms3.jpg

Drizzle a little olive oil on each one and bake for 15 minutes in the oven.
mushrooms5.jpg

Mmmmm! These were rated ‘Definitely make again’. I was afraid they’d be too garlicky because I could smell the garlic while they were baking. But… they weren’t.

Comments

4 Responses to “Stuffed Mushrooms”

  1. Shannon on August 21st, 2009 1:54 pm

    Oh those look scrumptious!!!

  2. Monica on August 21st, 2009 4:33 pm

    Oh how yummy!! I LOVE stuffed mushrooms!

  3. Geneva on August 21st, 2009 5:26 pm

    i love stuffed mushrooms and these look really yummy

  4. Paul on October 1st, 2009 5:40 pm

    Looks amazing! Mushrooms has got to be my favorite snack…would be interesting to spice it up a little. Gotta try this…

No-Drip Popsicles

Posted on July 6, 2009
Filed Under Holiday cooking, Snacks

So… how many moms perked up at the ‘no drip’ part? :)

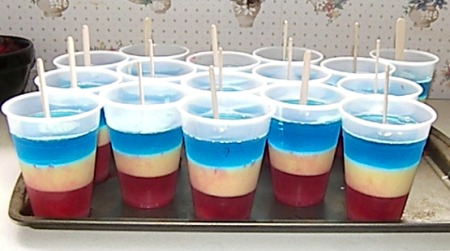
I was just going to freeze Koolaid into popsicles, but then I saw this recipe and had to try it. Really, how can there be a no-drip popsicle?!

popsicles-jas-chl.jpg
These are my friend Carrie’s twins, Chloe and Jasmine. Aren’t they just adorable? They are 2 1/2. You oughta hear them talk.

When I started thinking of how to make these popsicles, there was one problem… how to get the white part. The red is cherry, the blue is blueberry; both kinds are in the Koolaid dept and the jello dept. Well, what about white? The lightest thing I saw in the Koolaid was lemonaide, so I got that. And the lightest thing I saw in the jello section was pineapple, so I got that. When I mixed them together, it was yellow. Way too yellow. I still hadn’t put all the water in, so I thought of evaporated milk and replaced some of the water with that. Worked great! And that layer actually tastes good too. That’s always a plus. ;)

No-drip Popsicles …recipe comes from here

1 3oz pkg jello, any flavor
1 pkg kool-aid, (same flavor as jello)
1 cup sugar
2 cups boiling water
2 cups cold water
Popsicle molds (I used 9 oz. plastic cups and popsicle/craft sticks)

Pour boiling water over jello, kool-aid and sugar. Stir till completely dissolved. Pour into molds; freeze. I did this recipe 3 times (once in red, once in white, and once in blue) and it made 16 popsicles. Freeze between each layer. When the middle white layer gets thick enough, put popsicles sticks in. Making these took all day (poured the first layer in around 9 am, and the popsicles were ready to eat by 7:30 pm).
4thpopsicles.jpg

And here is our test crew to see if the popsicles are actually no-drip or not. :)

popsicles-girls.jpg

They, of course, did drip some, but I was pretty impressed. I’ve seen popsicles make alot bigger messes! I think the jello in there made it thicker… the juice didn’t run too much. They’re easy and quick to make (especially if you make them all the same color instead of layered).

What a great summertime treat! Send your kids outside with some!

Comments

4 Responses to “No-Drip Popsicles”

  1. Sharon on July 6th, 2009 10:30 am

    cute! These bring back memories of my childhood–my best friend’s Mom used to make these. And you can suck on ‘em and the juice doesn’t all suck out like the plain koolaid ones…

  2. Katrina on July 6th, 2009 11:39 am

    I’ll have to try these for sure! We’re pretty drippy over here.

  3. Shy on July 7th, 2009 3:36 pm

    These are cool. I’m making them right now…a layer in the freezer…for our garage sale this weekend. Thought it would be fun for the children as there are several of us getting together and I’m making lunch. But, the middle layer is indeed, yellow. :)

  4. Berneice on July 11th, 2009 1:33 pm

    These are the popsicles I was raised on all my life, and now my kids are eating them too. But I sure didn’t know that they were No-drip! lol, anything drips in this heat!

Fried Peanut Butter & Jelly Sandwich

Posted on March 19, 2009
Filed Under Easy meals, Snacks

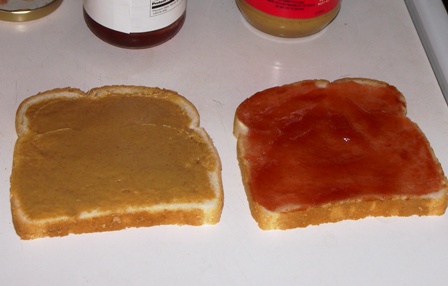
Have you ever tried that? Yesterday, while we were making fry pies, Renita and I were talking about quick lunches or something (I forget exactly how we got on the subject) and she said that her son likes his pb&j sandwiches fried, like a grilled cheese sandwich. I had never heard of it, so I decided I’d have to try it.

Fast-forward to a couple hours later… I got home around 1:00 p.m. and hadn’t had lunch yet, so I was staring in the fridge when suddenly I remembered the fried peanut butter and jelly sandwiches. So, I made 2, one for me and one for Tiffany (Lexi was at school). Then, after eating that one, I made another one for me. They are good! The peanut butter gets all warm and melty and gooey and the sandwich is crispy to bite into. It just kinda bumps plain ol’ peanut butter and jelly sandwiches up a level. ????

So, here you go, no recipe, just the process in pictures…

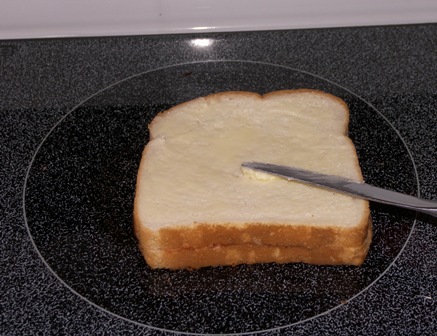
pbj1.jpg

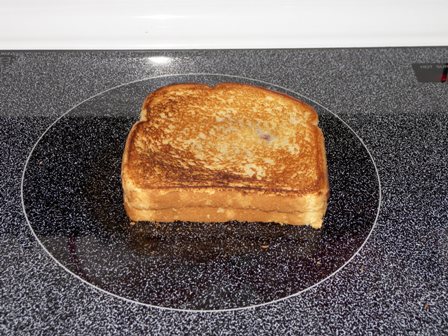
pbj2.jpg

pbj3.jpg

pbj6.jpg

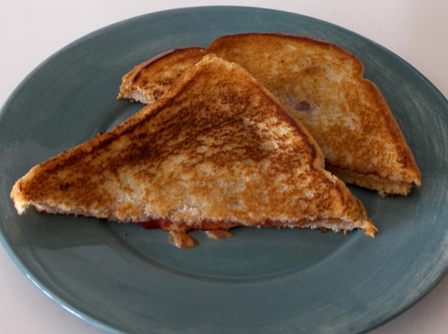
Peanut butter & Jelly…
pbj5.jpg

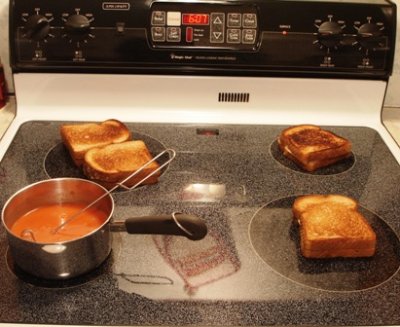
Grilled cheese and tomato soup…
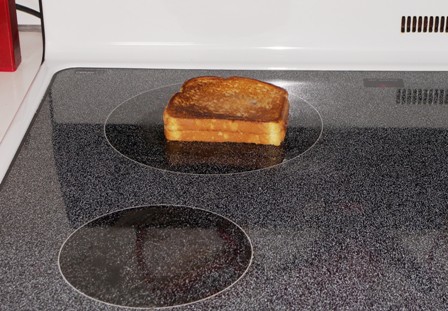
smooth-top.jpg

Yup, I don’t use a frying pan for this type of thing, mostly which is grilled cheese sandwiches. And that reminds me of this post, which was written on my old blog before I started Kitchen Scrapbook. And when the posts were transferred to Kitchen Scrapbook, the comments didn’t come with them, so here are a couple other ideas that people had for doing right on a smooth top burner and skipping the frying pan: warm tortillas up, make quesadillas, and someone knew of someone who fries onions and sausage right on the burner! I haven’t tried that one! Someone also said this, “Something to try next time you have tomato soup.  Hard-boil 3 or 4 eggs, then grate or shred into soup just before serving.  Yummy!

I LOVE my smooth top stove! Not just for this, but because it’s easier to clean too.

Comments

12 Responses to “Fried Peanut Butter & Jelly Sandwich”

  1. Shannon on March 19th, 2009 1:33 pm

    Oh we love these, well the girls and I do. Eric ate them last year when he was sick and can’t handle them anymore. :) I’ll have to make them again, kinda forgot about them.

  2. Monica on March 19th, 2009 2:26 pm

    I just might have to try those!! Sounds interesting. That’s cool how you grill them on your stove top–that would be the only reason I would want one like that……….I like my gas stove!! :)

  3. Traci on March 19th, 2009 4:31 pm

    Yep….I do this all the time….try it w/ bananas and not jelly….YUMMY!!!

  4. Christy on March 20th, 2009 2:27 pm

    If we’re going to fry them and make them less healthful, why not make it peanut butter and chocolate? I bet that would be good!

  5. Kay on March 20th, 2009 7:21 pm

    Traci, I’ve heard of p.b. & banana sandwiches… I’ve gotta try it, never did.

    Christy, you are SO my kind o’ girl!!!! I oughta try that combo too. ????

  6. Msclovy on March 21st, 2009 1:26 pm

    You must like to clean a stove more than I do…I did think though that you really arent supposed to do that to a smoothtop???

  7. Michelle on March 23rd, 2009 11:49 am

    Tried the fried p&b and jelly sandwich today. Was very good. Much better than eating it cold.

  8. Shannon H on March 26th, 2009 2:19 pm

    Still frying pb&j? ???? Just had to ask! :)

  9. Kay on March 26th, 2009 4:23 pm

    Msclovy, I actually never asked anyone if it was ok to do that. Seems like you shouldn’t, but I’ve had my stove for 11 1/2 years and the burners still clean up good as new!

    Shannon, ha, yeah, the loaf of bread is about gone now, so we’ll switch to something else soon. ????

  10. Jessica on March 30th, 2009 1:42 pm

    Egg in soup? Well after going to a certain Bible school establishment a certain year (namely the one you came engaged) I just can’t handle eggs in soup. Too much like breakfast leftovers in my lunch. ugh.

  11. Jennifer on April 4th, 2009 9:22 am

    My daughter and son just loved these. They thought I was crazy at first when I suggested it. Now they won’t eat them cold anymore. Thanks!

  12. Tiffany on April 24th, 2009 9:46 am

    That looks so good. But, i have a gas stove at home. But i’m still going to try that today.(:

Granola, with normal ingredients

Posted on March 16, 2009
Filed Under Breakfasts, Snacks

I’ve never made granola before. Or granola bars. They always call for bran or wheat germ and those are 2 ingredients that keep me flipping thro’ the cookbook and thinking, “Well, I guess I won’t make granola this time”.  (*whisper* I’ve never even seen bran and wheat germ or know what they are.) So, I buy my granola at the bulk foods store (only on rare occassions because it’s pricey) and buy my granola bars at the grocery store.

Then, just lately a few of my friends started raving about this granola and when I looked at the recipe, I was glad to see that it took ‘normal’ ingredients! So, I made some. It is SO good! Like one of my friends said, it’s good at any stage of the making process… you can’t help but sampling it here and there while mixing, baking, and stirring it.

Eat it with milk in it, put it on top of yogurt, eat it plain as a snack, or sprinkle it on top of a dessert.

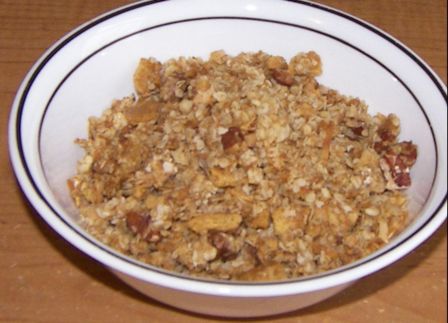
granola8.jpg

Granola

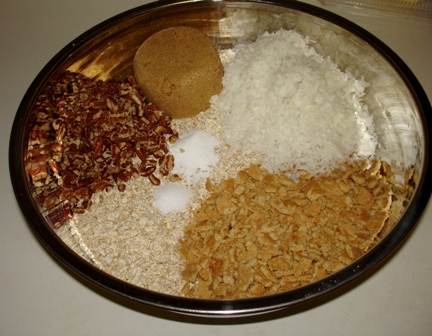
10 cups quick oats
3 cups graham cracker pieces (this was 1 1/2 packs of Honey Maid)
1 cup brown sugar
2 cups coconut
2 tsp. soda
1 tsp. salt
1 cup chopped pecans
3 sticks of butter (1 1/2 cups)
1 cup peanut butter chips (I tried some with chocolate chips… it was better ???? )

granola1.jpg

granola2.jpg

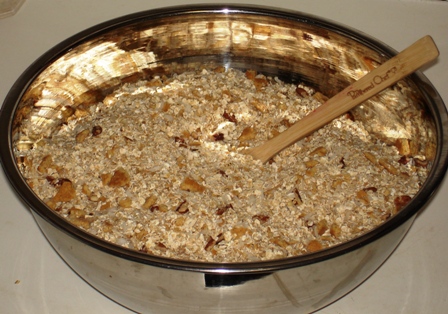
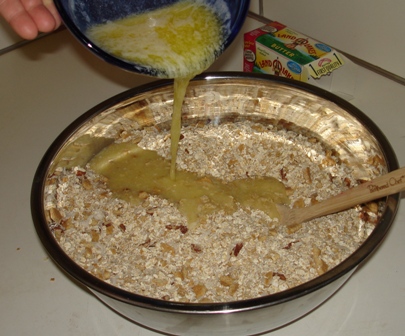
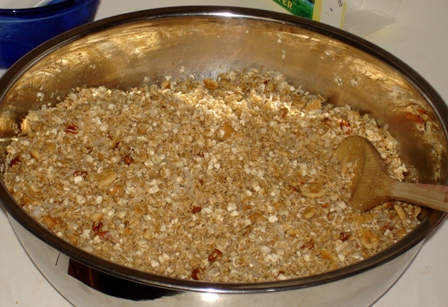
Melt the butter and mix with dry ingredients.
granola3.jpg

granola4.jpg

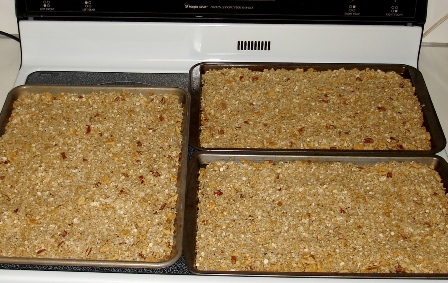
Divide between 2 large baking sheets. I did it on 3 baking sheets… the vertical one is chocolate chips and peanut butter chips mixed, the horizontal one in the back is peanut butter chips and the one in front is chocolate chips.
granola5.jpg

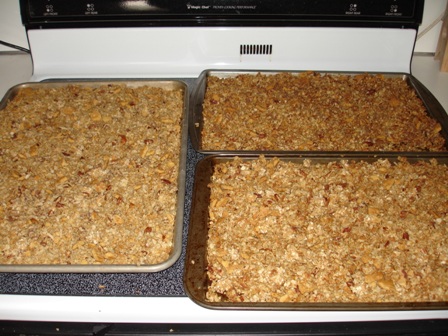
Bake at 300 for 40 min or until golden brown. Stir every 15 min the 1st 30 min, then every 5 min. Add peanut butter chips in the last few minutes of baking time.

granola10.jpg

I sampled all 3 varieties and liked the one with just chocolate chips the best. I thought the next best was the one with chocolate and peanut butter chips mixed. The one with peanut butter chips was good too, but I will from now on just use chocolate chips and maybe put some peanut butter chips in too if I have some on hand.

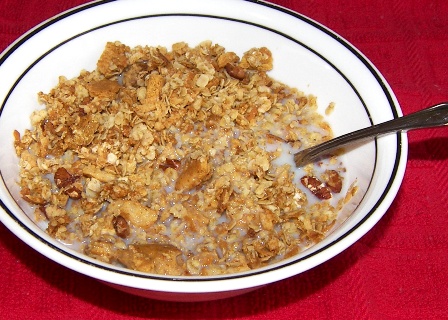
And this is how I like to eat it the best: with milk and a spoon…
granola9.jpg

Comments

10 Responses to “Granola, with normal ingredients”

  1. Freida on March 16th, 2009 9:57 am

    Glad you like it. I still want to try the choc. chips sometime, but it will have to be at someone else’s house. The peanut butter chips get the rave reviews here.

  2. Berneice on March 16th, 2009 10:00 am

    Grr. i still don’t have all the “normal” :) ingredients. I bought some tiny cinnamon chips last week that I want to try.

  3. Lisa@The Cutting Edge of Ordinary on March 16th, 2009 4:27 pm

    I make granola all the time. I love mine with coconut and almonds. Yours looks great!

  4. Fran on March 16th, 2009 6:51 pm

    We like granola too, and I make it occasionally, but I’m not sure about the chocolate chips in it. Maybe it would be better than I think. I like the idea of graham crackers, I’ve never heard of that. It sounds wonderful.

  5. Beth on March 16th, 2009 6:56 pm

    Glad you’re telling the “world” about this awesome stuff! Seriously…this granola is so simple & makes a person want to quit dieting. I ate it for breakfast & again for lunch one day. :)

  6. Twila on March 17th, 2009 7:37 am

    That recipe is almost identical to mine. Except I use 2 packs of graham crackers, and the original recipe called for 4 sticks of butter, which I can hardly bear, so I’ve cut it back to two. I don’t usually add the nuts, and I use miniature butterscotch chips. I stir them in after I take it out of the oven. I also started adding vanilla to the butter before I stir it into the rest of the stuff. Your right, is is good. In fact, I just made some yesterday.

  7. Heather on March 17th, 2009 1:24 pm

    That granola does look delicious! My family used to make breakfast cereals to sell so I’ve been making granola almost forever! :) Anytime you see wheat germ in the recipe you can eliminate it and just add a bit more of one of the other dry ingredients. I always add it because I know it’s good for me and all the bulk food stores in this area have wheat germ at a very reasonable price. The granola that I make currently I’m sure is not as tasty as yours but I’m going for the ‘dieting’ aspect of things. :) Very little butter & sugar….

    BTW, my sister in law recently told me about your site and I love it! I live in Ohio and have two little kids, almost 4 and almost 2.

  8. Mariann on March 27th, 2009 12:03 pm

    I haven’t made granola for a long time, this makes me hungry for it! The dry ingredients sound similar to my recipe, but mine says oil instead of butter. I think butter would give even more yummy flavor to it. [I tried putting wheat germ in it once & did NOT like the taste of that stuff.:(]

  9. Sherilyn on March 27th, 2009 1:41 pm

    That looks alot like the recipe I sometimes use only it had rice krispies in it. We loved it and now when I try new recipes I just use rice krispies when it calls for anything I don’t like or don’t have. I think the krispies kinda lighten it up when you’re eating a whole bowlful.

  10. Elmina on September 1st, 2009 12:39 pm

    I made some of this granola today, and it’s da bomb! I just hope we don’t get “high” on all that butter!! Thanks for sharing the recipe my sister Freida uses, and reminding me to try it.

Petite Pizza Puffs

Posted on February 23, 2009
Filed Under Main dishes, Snacks

Once again, I’ve attacked my pile of loose recipes, which grew since the last time I got it out back when I did this post. I went thro’ and categorized them all and am planning to be cooking alot from them the next while and will either paste them into my ‘blank’ cookbook or pitch them. In order to keep them, they’ve gotta be ‘would definitely make again’ quality. If it tastes good, is easy to make, and looks good, then it’s a keeper. If only two of those three qualities are true, then I make a decision of whether those two outweigh the other one and still keep it.

So, here’s the recipe I chose out first and I’ll tell you at the end if I kept the recipe or threw it away. Yeah, I chose a recipe that starts with the word ‘petite’!!!???!! When I think of ‘petite’, I think of things like little dainty delicate teacups with little BREAKABLE saucers under them. And I usually shy away from anything like that because I get all thumbs when I’m around those types of things.

petite1.jpg

Petite Pizza Puffs …recipe comes from a card that came with my Pampered Chef Cut-N-Seal.

Printable recipe

12 slices pepperoni
1/4 cup shredded mozzarella cheese
2 Tbsp. chopped mushrooms
2 Tbsp. pizza sauce
1 pkg. (10 oz) refrigerated pizza crust

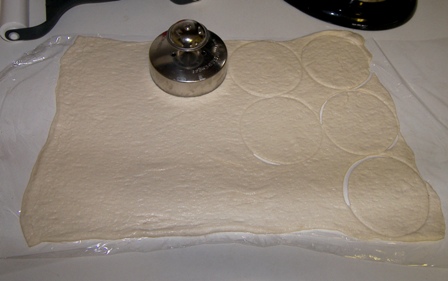
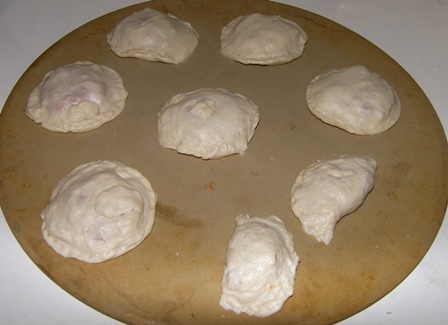
Preheat oven to 375. In Small Batter Bowl, combine pepperoni, cheese, mushrooms, and pizza sauce. Roll out pizza dough to 11″x15″ rectangle, using Dough and Pizza Roller. Cut 12 circles in dough using Cut-N-Seal.
petite6.jpg

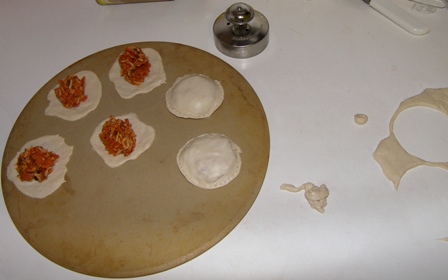
Using Medium Scoop, place 1 scoop (2 Tbsp.) pepperoni mixture in center of 6 circles, spreading slightly.
petite5.jpg

Place second dough circle on top. Lightly seal edges with fingers; seal with Cut-N-Seal.
petite4.jpg

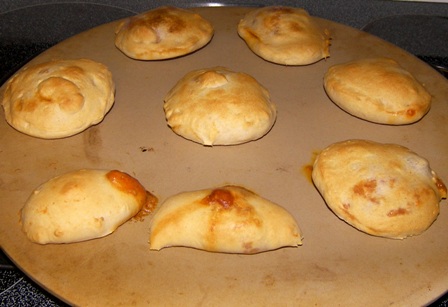
Place on flat Baking Stone. Bake 15-17 min or until light golden brown.
petite3.jpg

Serve with additional warm pizza sauce, if desired. Yield: 6 pizza puffs
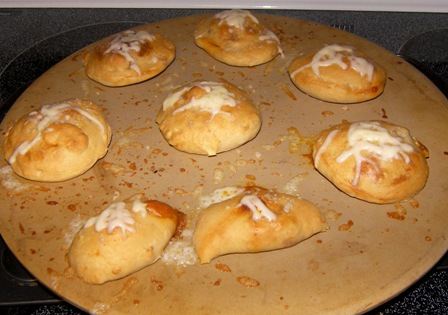
I put a little more cheese on top and put them back in the oven for a couple minutes. Not sure why, I guess I just thought the tops looked a little plain or something. And more cheese is a good thing. ????
petite2.jpg

And there you go. Petite Pizza Puffs. Simple as that.

Or not!

So, the question: Will I keep this recipe? Yes, and decide for sure after I make them again. I saw afterwards how I should’ve done it to make it easier. How I did it was quite time-consuming and what a mess! I tried to assemble them on the stone and you cannot pick up a circle of thin sticky pizza dough and keep it from shrinking or ripping or losing its round shape. I should’ve assembled them right where I cut out the circles (which is how I think the recipe means that it should be done), then the whole puff may have been easier to move onto the stone. I should’ve also used some flour underneath the dough before rolling it out.

The taste was all there (I mean, really, how can you go wrong with those ingredients?). And the finished look was great.

So, here is the recipe. They really are perfect for something snacky or a lunch. Go ahead and try it and let me know some tips if you have any. If you don’t have a Cut-N-Seal, a round cookie cutter and a fork or your fingers oughta work fine.

Comments

5 Responses to “Petite Pizza Puffs”
  1. Andrea on February 23rd, 2009 12:48 pm

    MMMmmm! Those look like a tasty lunch item! I am always up for new lunch ideas!

  2. newlyb on February 23rd, 2009 2:21 pm

    These look so yummy! What a great alternative to regular pizza night.

  3. Katrina on February 26th, 2009 3:48 pm

    Yum! My boys would love these!

  4. linda on March 2nd, 2009 3:17 pm

    Thought I might as well comment here since your kaylouann site is badly neglected! Your comments made my day! I love getting comments from you. And, btw, Thankyou Thankyou foy the b-day money. I am properly horrified that I never told you sooner. Belated Thankyous are by far one of my worst traits. I saved it for that perfect thing “just for me” and after freezing our ____ off at the Birke we walked Mn. Street where I stumbled onto this really cool “coffee” sign at the Pavilion. Ever go in there? I love the store but they are usually a little pricey. Well, it was marked down to $8 so I nabbed it, brought it home and set it on my dining room ledge and now love it! Would love to sit and blab with you. Ever coming up here again? Heard you’re liking it really good down there. Am so glad you do but still miss you up here. We can’t even get motivated to scrapbook w/out you.

  5. Roxanna on March 9th, 2009 3:58 pm

    Hope everything is okay with you-haven’t had an update for awhile! I can’t say much cause I’ve let mine go, but you are much more dedicated so just worried about you and yours!

Ants on a Log – Cooks in Training #4

Posted on January 15, 2009
Filed Under Cooks in Training, Side dishes, Snacks

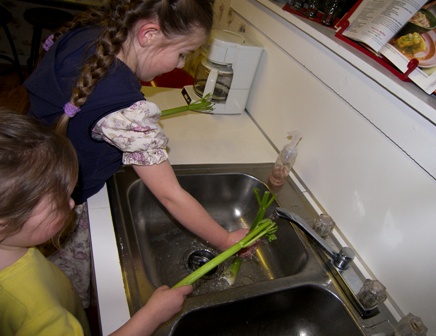
Well, our little cooks are back! Actually, they never went anywhere and have been quite busy in the kitchen, it’s just that they haven’t been making recipes on their own lately. One reason I know they’ve been in the kitchen is because I’m often tripping over their little chairs that they stand on.

It seems like a hassle, the way they have to move their little chairs around while working in the kitchen… put them in front of the sink, climb up and wash their hands, get down, move the chair over to the cupboard, climb back up, etc. I do wonder how it would be to be working in the kitchen and the counter is at eye level though, so I guess it’s worth all the moving around.

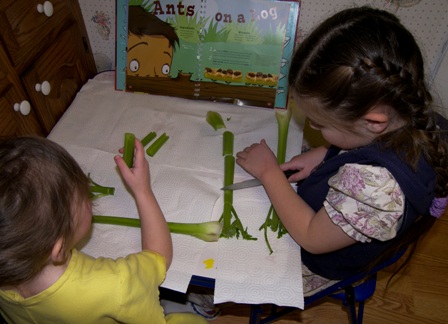
The food I’m featuring here barely merits calling it a recipe. But, we got it out of a cookbook and it was in recipe form, complete with amounts. We got a kid’s cookbook (a Betty Crocker cookbook named Kids Cook!) for Lexi for Christmas. She loves it. She often gets it off of the cookbook shelf and sits around looking at it and saying, “Mom, we should try this!” So, one time I told her she could pick something to make sometime soon because we’re going shopping and we should see first if we need any ingredients. And THIS is the recipe she picked. It is called:

Ants on a Log (Gag! Who ever named them that?!)

Celery
Peanut butter
Raisins

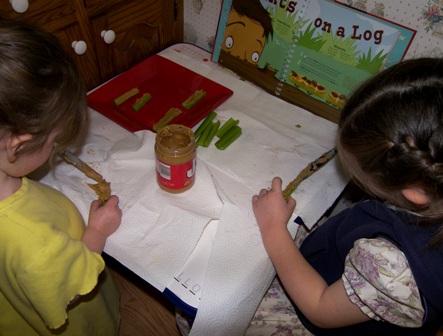
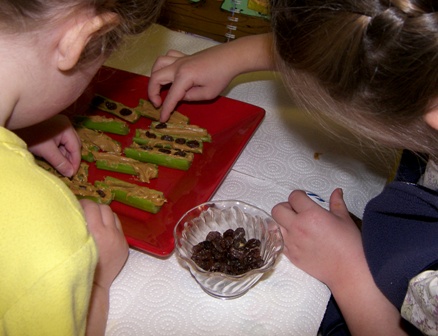
I’ll spare you the recipe details and let the pictures and video show you how it’s done. Or how it WAS done anyway, maybe not how it oughta be done (there was a bit of licking fingers by the 2-yr-old). One nice thing about the mini cooks making this is that it didn’t involve the oven or stovetop or mixer. It did, however, involve a sharp knife for a little bit, but that was closely supervised, and when we were done with that step, everyone still had all fingers intact.

ants1.jpg

ants2.jpg

ants3.jpg

ants4.jpg

And here it is in action:

Comments

7 Responses to “Ants on a Log – Cooks in Training #4”

  1. Joanna on January 16th, 2009 6:50 am

    I love Lexi’s comment,” I can’t believe we are having peanut butter for supper!”

    I agree with the name???Ants on a log????

  2. Monica on January 16th, 2009 8:06 am

    I’m with you on the “tripping over chairs in the kitchen”!! Megan likes to be in on the action, too, and often wants to stand on a regular table chair and it’s so big that I can’t get to the counter!! I’m trying to teach her to use her “Dora” step stool, but it’s not quite as high and she can’t see as well!! Cute post with the videos!!

  3. denise weaver on January 16th, 2009 9:10 am

    Cute post! Loved the videos. Cody also loves to help me in the kitchen. But I’m not sure I would trust him too far with a jar of peanutbutter and a table knife. Who knows where the peanut butter would end up. His favorite part of helping me is when I’m finished mixing something up and I let him lick off the spoon or beaters before it goes in the sink or dishwasher. He’s always right there asking for a taste before I’m even done.

  4. Liz on January 16th, 2009 10:00 am

    Way to go with the videos!

  5. Janice on January 16th, 2009 10:14 am

    Cute videos!

  6. Lisa@The Cutting Edge of Ordinary on January 17th, 2009 7:51 am

    How adorable! Your girls are too cute. I remember making ants on a log with my Mom when I was young.
    What a great memory your making.

  7. Judi on January 21st, 2009 3:39 pm

    Too cute. I’m really looking forward to little Peanut helping me in the kitchen. She’s only 18 months old though and not quite old enough. Looking forward to it though cause I can see how much fun you’re having.

Baked Mozzarella Sticks

Posted on January 8, 2009
Filed Under Side dishes, Snacks

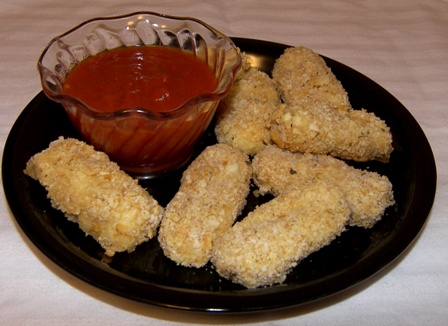
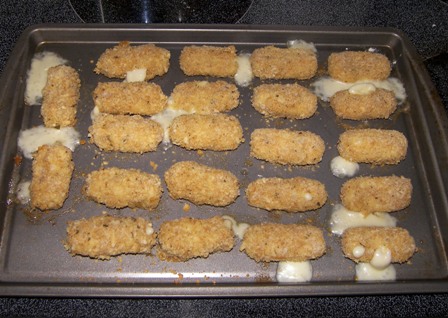
Ok, so I get an F on making mozzarella sticks! About half of them had melted cheese running out. The taste, though, gets an A+!

I’ve had an eye on this recipe for awhile and I’d buy string cheese and before I got them made, the string cheese got eaten, so I’d buy another pack of string cheese, and it would get eaten again, and so on. String cheese is a great snack, especially if you need a snack on the run… the pieces are individually wrapped, so you don’t have to waste time putting it in a snack bag or anything.

Just to clear the air a bit, in case you’re wondering why I’m posting non-diet things, I did figure out how many calories these little things have… it’s 80. 80 calories each and they’re only about 2″ long! And you can eat one in 2 bites. :( But it is a really yummy 2 bites!

mozz-sticks6.jpg

Baked Mozzarella Sticks

2 packages (5 oz each) string cheese
1/2 cup flour
1/4 cup cornstarch
2 large egg whites
2 Tbsp. water
1 1/2 cups bread crumbs (I used cracker crumbs)
1 tsp. dried oregano (I think next time I might try Italian seasoning instead)
1/2 tsp. salt
2 Tbsp. melted butter

Marinara sauce

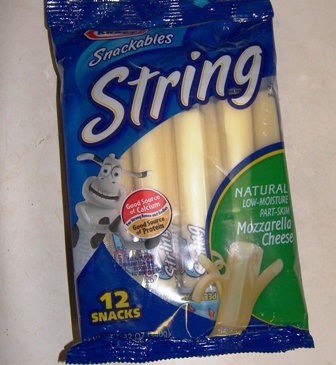
This is the cheese I used…
mozz-sticks1.jpg

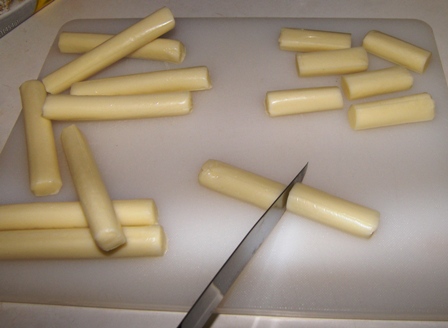
Remove cheese from packages; cut each cheese stick in half crosswise.
mozz-sticks2.jpg

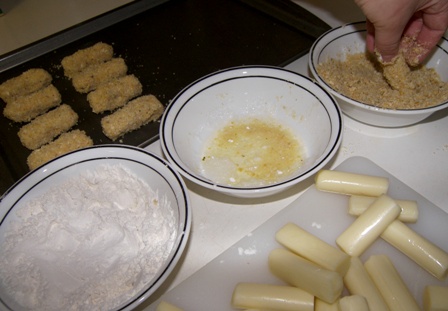
Combine flour and cornstarch in a shallow dish. Beat egg whites and water in another shallow dish until well mixed. Combine bread crumbs, oregano, and salt in a third shallow dish. Coat cheese with flour mixture. Dip into egg white mixture, being sure to coat thoroughly, including ends. Coat with bread crumb mixture.
mozz-sticks3.jpg

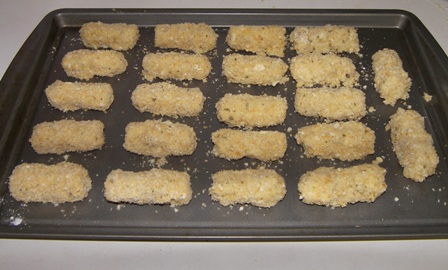
Dip into egg whites and bread crumbs a second time, being sure ends are coated. I ran out of the egg white mixture AND the crumb mixture and had to make more. The flour mixture looked like it barely had a dent in it! Place on ungreased baking sheet.
mozz-sticks4.jpg

Freeze at least 1 hour. Preheat oven to 400. Drizzle cheesesticks with melted butter. Bake until crumbs just begin to brown, 5-7 minutes.
Oh, no!!! Cheese all over the place!
mozz-sticks5.jpg
Here is what happened: I totally forgot the ‘drizzle melted butter over them’ part and took them out of the freezer and put them in the oven. When they were in for about 5 min, I suddenly remembered the butter! So, I got them out and drizzled butter over them. At that point, no cheese was showing. I put them back in for another 5 min so they could brown and this is what they looked like when I got them out again. I thought of waiting and making them again before featuring them, but decided you might as well know that I make plenty of mistakes (some of which I can hide though ???? ).
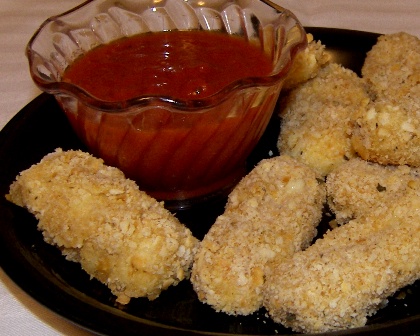
Serve warm with marinara sauce.
mozz-sticks7.jpg

This recipe came from an Easy to Bake Easy to Make recipe card. A tip on there is: “Since these must be frozen before baking anyway, keep several batches in the freezer and bake them whenever you need a quick snack.” Sounds like a great idea for spur-of-the-moment company! Or if you need a quick side dish to go with a meal. Last night, I served them with Hearty Hamburger Soup (to be featured later) and biscuits.

Comments

12 Responses to “Baked Mozzarella Sticks”
  1. Mama Bear on January 8th, 2009 11:29 am

    Oh I don’t even care if cheese leaked…I LOVE mozzarella sticks, great recipe, I’m bookmarking!!!

  2. Rosalyn on January 8th, 2009 1:12 pm

    Yummy! Mozzarella sticks are one of my favorite appetizers! ???? In the past I’ve just taken the easy way out and bought them in the box (TGI Friday brand is delicious)

    But…now I can make them w/o spending alot of extra money on them! :)

  3. Freida on January 8th, 2009 1:53 pm

    Oh wow, these look fabulous!! You may make these sometime when we come. ???? hehe.

  4. Shannon on January 8th, 2009 2:24 pm

    ummmm, I love mozerella sticks. I never have cheese sticks on hand but I think I’ll get some and make these, esp if you can just bake them instead of deep fry them!!

  5. Monica on January 8th, 2009 7:21 pm

    Yummy!! I could eat some right now. I love the idea of keeping them in the freezer for a spur of the moment snack. I’ll have to try that!!

  6. Berneice on January 8th, 2009 9:29 pm

    Another cheese stick lover here. You know that day you are planning to come here… you could bring these! :) I also like the baking instead of deep frying! Healthier ????

  7. Marilyn on January 9th, 2009 5:20 am

    oh those look so good, am defintely going to make some! :-)I also like the idea of baking the cheesesticks instead of frying ’em. :-)

  8. Melissa K on January 9th, 2009 6:11 am

    Kay,
    These look yummy! I make cheesesticks here too, but my recipe actually uses Bisquick and ends up being more like a breadstick with cheese inside. We all love them!! If you’re interested in that recipe, I’ll be happy to pass it on. It’s also not low calorie so I’m thinking maybe you want to wait on this one and, like me, try to avoid those types of foods for a while!!

  9. My First Kitchen on January 10th, 2009 7:38 am

    Hi, Kay! Thanks so much for stopping by! I love mozzarella sticks and have always heard that freezing them is the key. Looks like you have it all covered! I wanted to answer your question about flax seed. I’d definitely grind it before you sprinkle it on things; it’s tough to chew, at least for me. :) Enjoy the PBJ, and I hope to see you again!

  10. Katrina on January 11th, 2009 9:17 pm

    Yum. Great idea!

  11. Judi on January 21st, 2009 3:41 pm

    Gotta love the oozing cheese. mmmm

  12. Terra on April 16th, 2009 6:42 pm

    If you put the string cheese in the freezer until you’re ready to make them, the cheese doesn’t melt so fast, so it won’t leak out like that. I’m gonna try your recipe. Sounds great.

Chex Party Mix

Posted on December 18, 2008
Filed Under Holiday cooking, Snacks

I love party mix! For me, it is another ‘must’ for the holiday season! As much as I like it, I oughta make it year-round. It freezes well, so I could make a big batch and get a small bag out of the freezer as needed. Do any of you do that? Or is it more of just a holiday snack for you, too?

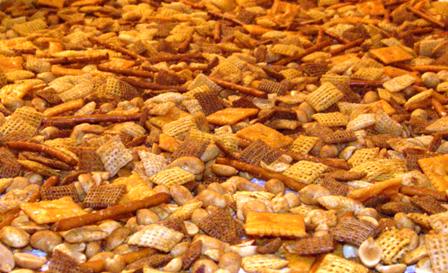
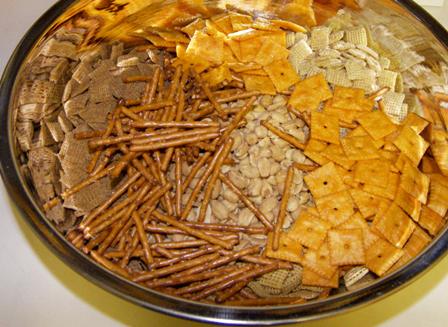
One thing about party mix is that is so variation-friendly. You can replace some of the Chex for other unsweetened cereal, you can use mixed nuts or peanuts, you can use different shapes of pretzels, and then the cracker part can be any kind of small cracker, cheesy crackers, bagel chips, or whatever. I don’t think I’ve ever made it the same twice.

I do use a recipe to get the total amount of cups about right for the amount of sauce, then follow the sauce recipe exactly. And where this recipe comes from is… the back of the Chex cereal box, but I bake it instead of microwave it.

partymix1.jpg

The Original Chex Party Mix

Printable recipe

3 cups Corn Chex cereal
3 cups Rice Chex cereal
3 cups Wheat Chex cereal
1 cup mixed nuts
1 cup bite-sized pretzels
1 cup garlic-flavor bite-sized bagel chips or regular-size bagel chips, broken into 1″ pieces (I used Cheezits)
Or about 12 cups of any combo of the type of things listed above

6 Tbsp. butter or margarine
2 Tbsp. Worcestershire sauce
1 1/2 tsp. seasoned salt
3/4 tsp. garlic powder
1/2 tsp. onion powder

partymix2.jpg
In a large bowl, mix cereals, nuts, pretzels, and bagel chips; set aside. In small microwavable bowl, microwave butter uncovered on High about 40 seconds or until melted. Stir in seasonings.
partymix3.jpg

Pour over cereal mixture; stir until evenly coated.
partymix4.jpg

Microwave uncovered on High 5 – 6 min, thoroughly stirring every 2 minutes OR spread mixture out onto baking sheets and bake at 250 for 1 hour, stirring every 10-15 minutes.
partymix5.jpg

Spread on paper towels to cool.
partymix6.jpg

Store in airtight container.

So… what all do you put in your party mix? My sister, Jan, is looking for new ideas too. We just talked about it a couple days ago. And neither of us gave each other any good inspirations.

Comments

19 Responses to “Chex Party Mix”
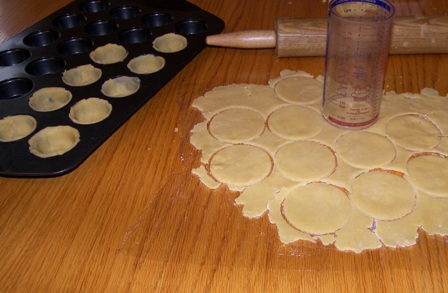
  1. Fran on December 18th, 2008 1:14 pm

    I always put Life cereal in my party mix. It gives it just a little bit of sweet mixed with the salty. I will never make it without Life again.

  2. Roxanna on December 18th, 2008 1:15 pm

    Party Mix is our favorite snack at this house! It is a staple on any vacation, campout, christmases, etc.! I put Life cereal in it to add a bit of sweet to the salty. I have also used honey nut chex and honey nut cheerios. I am actually getting ready to go make some right now! That and some yummy ranch pretzels! I can’t seem to get in the mood to make sweet stuff this year-just the salty! That isn’t like me at all!!!!

  3. Fran on December 18th, 2008 1:24 pm

    A tip about baking party mix. Just leave it in that stainless steel bowl tou mixed it up in. Put the whole bowl in the oven and bake. It is so much easier to stir. It maight take a little longer to bake this way. The recipe I use says to bake for 2 hours and stir every 30 minutes, but it is a much bigger batch.

  4. Audrey Miller on December 18th, 2008 1:31 pm

    Very cool that you did this post right now because I have to take party mix to our Kilmer gathering and didn’t have a recipe to use. Was gonna go hunting, but now I don’t have to! Thanks! Aug

  5. Michelle on December 18th, 2008 1:53 pm

    I my party mix consists of rice chex, honeycomb, pretzals, goldfish, and bugels. I used to add several different kinds of chex and got tired of it. It was too many chex. So I cut back on the chex and started adding honeycombs. The goldfish I added this year are in Christmas shapes-a stocking and hat. The pretzals I added were in the shape of a christmas tree. I thought it made it look festive.
    I leave my party mix in the bowl I mixed it up in and stick it in the oven like that. It seems to bake fine thatway. I also leave it in that bowl to cool.
    I normally only make party mix around Christmas but I always think I’m going to make it other times too but for some reason I never do.

  6. Kelly on December 18th, 2008 2:20 pm

    I’m no help — we make ours the exact same way! And it never occurs to anyone to make it any other time but Christmas, LOL

  7. JoAnn on December 18th, 2008 3:30 pm

    Someone already gave this idea, but thought I’d add my voice, too. When we visited my inlaws in Africa last summer, my SIL made party mix and had Honeycomb cereal in it. I normally don’t care much for party mix, but the Honeycomb cereal REALLY made it good! I couldn’t leave it alone!

  8. Jessica on December 18th, 2008 4:19 pm

    I bake mine in the 13 qu stainless steel bowl I mix it in. I stir it every 10 minutes for 45 minutes or so. I use any chex, pretzels, cheez-its, deluxe nuts (no peanuts) I want. I sometimes like honeycomb in it. m&m’s are not bad too. Just don’t bake them. :)

  9. Elvida on December 18th, 2008 8:41 pm

    I make mine exactly like you …complete with cheese-its.I guess I do leave out the garlic and onion powder. I’ve tried it other ways and personally enjoy the sweet versions, but my family likes it best this old way…straight off the chex box!

  10. Ruth on December 18th, 2008 11:03 pm

    My party mix has come a long way from the original recipe. I make it only at Christmas, so I like to make it christmassy. No chex, no sauce, no baking … just all my favorite snacks. The base is nuts … peanuts, chashews, almonds, pumpkin seeds, pecans, whatever … add cereal, cocoa puffs, Capn Crunch, whatever floats your boat … pretzels, I like something delicate. I used to put in the christmas tree shaped pretzels, but I haven’t been able to find them for years. This year I used the cheddar Tiny Twists … Crackers, I love the gold fish, last year I used the Christmas colors, but couldn’t find them this year. Sometimes I use bugles and/or cheez-its. And last, but not least, Christmas M & M’s … lots of them, all kinds, peanut, almond, milk chocolate. The mix never turns out the same, it just depends what you find when you go shopping. This year I added a bag of cajun party mix to give it just a little kick. It’s not exactly cheap, I guess that’s why I only do it at Christmas.

  11. Carmen on December 19th, 2008 11:52 am

    I pretty much follow the recipe for the dry ingredients. I do use Cheezits and usually use pecans, almonds and peanuts. I adjust the amounts until it looks right. I make about 1 1/2 times the sauce, using more Worcestershire sauce, no seasoning salt, lots more garlic powder and some good shakes of Tabasco or some form of hot sauce. I scored a great deal on Chex. $1.56 per box and I had a coupon for $3 off on 3. Three boxes of Chex for $1.68. Woo Hoo!!

  12. Kay on December 19th, 2008 12:37 pm

    Wow, I love all the ideas! I hope my sister Jan is reading them too!

    So, it is actually ok to put sweetened cereal in party mix?! And M&Ms?! I thought the sweet taste would clash with the worcestershire/garlic/onion taste! I will have to try it!!!!!

  13. Twila on December 19th, 2008 6:36 pm

    I guess I like to make certain things like party mix, caramel corn etc.In the winter,keeps it more special.I have recipes I only make in the summer too.I haven’t made party mix yet. I have a cajun one I like to make.

  14. Suzanne on December 20th, 2008 9:05 am

    I usually follow the recipe, but I don’t buy all the ingredients. I use what I have at home. I do put in Lawry’s garlic salt as an addition though. I don’t typically buy garlic chips. I’ve never heard of putting sweet stuff in the mix, and I honestly don’t think I will be trying that. Sorry. Corn Nuts might be good though. I like the Bugles idea.

  15. Christy on December 21st, 2008 2:04 pm

    I’m in the process of making some. I’d copied this recipe a long time ago, but have never made it. Just came to check if I had the butter amount right–it seemed sparse. Maybe as it bakes it mingles. I did use the beagle chips instead of cheese nips since we prefer them. I added honey comb, skipped the nuts, and will add m&m’s once it comes out of the oven. (I love salty and sweet together–like French fries and ice cream.) I forgot about adding bugles. I think the next time I’ll replace one kind of cereal w/ the honey comb, and the other w/ bugles. I didn’t really like opening that many boxes of cereal that we’re not crazy over.

  16. Jo H. on December 21st, 2008 6:00 pm

    I love your site! I couldn’t resist adding a comment this time.:) I have a Taste of Home recipe I like that calls for barbecue sauce, worcestershire sauce, seasoned salt and the melted butter. Its especially good with Famous Dave’s. :) But then, I love anything barbecue!

  17. Lisa Feather on December 22nd, 2008 11:05 pm

    Oh yum! Who doesn’t like Chex mix? I think it’s great fun to have a sort of unusual shape or ingredient or two. And I never really thought about freezing it. What a great idea.

  18. Connie on December 23rd, 2008 11:21 am

    Bugles are a must in mine, too. I use Krispex cereal usually. That way you get two kinds of cereal in one. I mix and bake mine uncovered in a roasting pan. Saves on washing dishes. Enjoy your site!

  19. Cordy on December 24th, 2008 10:07 pm

    I just wanted to wish you and your family, Kay, a very blessed and joyous Christmas. I have appreciated you so very much for all the recipes and accompanying pictures! I feel so blessed to have “found you!!” :) Christmas morning I plan to make your egg breakfast! I can hardly wait! (You have a kindred spirit in enjoying food!)

Rice Crispy Treats

Posted on June 23, 2008
Filed Under Snacks

Back again. I survived the week of the 4-yr-olds. There were 7 of them… you know the McCaugheys that had septuplets around 10 years ago? Now I know a little bit of what the mom was going through when they were 4. Only, she couldn’t send them home mid-afternoon and then go home herself and take a nap.

The week actually went good though. The first day, they were all low-key, then they got progressively roudier each day as they learned the ropes a little better and we got used to each other. By the end of the week, there were more sommer-saults going on and more ‘falling’ off the bench during assembly and bringing an inchworm to class. Do you want proof of an inchworm in class? Here you go:
inchworm.jpg

It’s the light green thing on the leaf. It was Sammie’s worm and she’d rip up little leaves for it to eat. That’s what she’s doing on the picture.   ——————————————————————————————————————————————————————————–

Teaching these little people was definitely more like being a mom than a teacher. For example, at lunchtime: “Can you open my juice/yogurt/pudding/lid for me?” “I don’t like this green stuff on my sandwich (lettuce). Can you get it off?” “I spilled my chocolate milk on my dress.” “Do you have a napkin? Look at my hands.” “I’m gonna go play now” as the lunch bag is thrown down beside me and on and on.

We had snacktime every afternoon… cookies, finger jello, rice crispy treats, pretzels, fish crackers, chocolate milk, juice, iced tea, etc. So, in honor of this post, I’m posting a rice crispy treats recipe. It’s nothing special, just the usual, probably what you’d get off of the rice crispy box.

rice-crispy6.jpg

Rice Crispy Treats

Printable recipe

1/4 cup butter
10 oz bag of marshmallows
5 1/2 cups rice crispy cereal

Melt the butter and marshmallows in the microwave.
rice-crispy1.jpg

rice-crispy2.jpg

Stir cereal in.
rice-crispy3.jpg

Press into a greased 9×13 pan. I spray cooking spray on a sandwich bag and put my hand inside to press the mixture into the pan.
rice-crispy4.jpg

Let sit for awhile till it cools and firms up. Cut into squares. If you’re making squares for 4-yr-olds, take extra time to cut the squares as evenly-sized as possible… this cuts down on the “Hey! She got the biggest piece!” and pawing through them, touching every piece, looking for the biggest one.
rice-crispy5.jpg

Serve with pretzels and chocolate milk.
rice-crispy8.jpg

rice-crispy7.jpg

Comments

5 Responses to “Rice Crispy Treats”
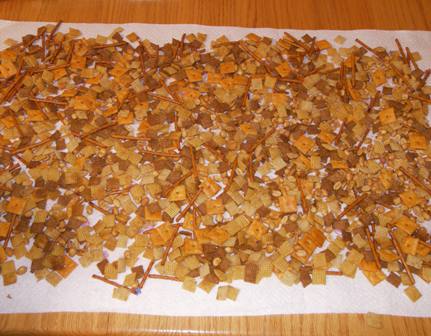
  1. Michelle on June 23rd, 2008 8:11 am

    It’s good to have you back! I missed the posts last week.

  2. Shannon on June 23rd, 2008 9:10 am

    Looks like you had your hands full. :) Good to hear from you again.

  3. Jo on June 23rd, 2008 12:09 pm

    Your rice krispie treats look like the kind I’d like—plenty of marshmallow goo! The only thing that would improve them would be to melt one cup of milk chocolate chips w/ one cup of butterscotch chips & spread it over top. :-) That’s the way my best friend used to make them…mmmhhmmm…

  4. Jo on June 23rd, 2008 12:10 pm

    I’ve been meaning to tell you…I tried your Zesty Mozzerella Chicken & your Glazed Carrots last week…they were a huge hit! Thanks for the new faves!!

  5. Rene on June 23rd, 2008 5:09 pm

    Welcome back! I’m in the throes of vacation bible school this week so I’m feeling a little bit kid overwhelmed myself! It sure was nice to walk out of church at noon knowing that I didn’t have to keep the peace any longer today. More to come tomorrow! BTW…I’ve made the finger jello a couple times now and it keeps turning out better each time. Thanks for that recipe!

Simple, delicious, refreshing!

dip1

Dreamy Fruit Dip   …from the 2004 Quick Cooking annual cookbook

1 pkg (8 oz) cream cheese, softened
1/2 cup butter or margarine, sftened
1/2 cup marshmallow creme
1 carton (8 oz) frozen whipped topping, thawed
Assorted fresh fruit

In a small mixing bowl, beat cream cheese and butter until smooth. Beat in marshmallow creme. This works too…
dip2…I don’t usually have marshmallow creme on hand, so one time I put marshmallows in the microwave, then got them out when they puffed up, scraped them into the mixing bowl, and they beat in nicely. Just be sure to beat them in before they cool. Fold in whipped topping. Serve with fruit. Store in refrigerator. Yield: about 4 cups.
dip3  One thing I tried this last time that I made it was to put some of it in the freezer. It worked wonderfully! When I was ready to use it, I put it in the fridge the night before to thaw, then served it for lunch the next day. It was as good and creamy as it was when it was freshly made.

Finger Jello fits any occasion!

I saw layered finger jello on misssteph101’s site awhile ago, so I asked her for the recipe. We have our school program/picnic today, and I made it for that. It’s fun and easy and very pretty! Thanks Steph!

Layered Finger Jello

Printable recipe

For each colored layer:
1 3 oz pkg of jello
1 pack (or Tbsp) unflavored gelatin
1 cup boiling water

For the white layer:
1 14 oz can sweetened condensed milk
4 packs (or 4 Tbsp) unflavored gelatin
2 cups boiling water

Mix each layer separately in containers. Let stand till room temperature, stirring occasionally.
jello2
Put 1st color in. Put in fridge until firm.
jello3 ———————————————————————————————————————————————————————————————————————————————————————————————————————————————

Put a third of the white layer in next. Refrigerate until firm.
jello4 ——————————————————————————————————————————————————————————————————————————————————————————————————————————————————
Repeat layers until done.
jello5—————————————————————————————————————————————————————————————————————————————————————————————————————————————————–

jello6——————————————————————————————————————————————————————————————————————————————————————————————————————————————————-

jello7——————————————————————————————————————————————————————————————————————————————————————————————————————————————————–

jello8——————————————————————————————————————————————————————————————————————————————————————————————————————————————————–

jello9When all mixtures are at room temp, it takes about 7 minutes till it’s firm enough to put the next layer on. As you can see below, I didn’t let the green get quite hard enough before putting the white on, or the white was still too warm, or both.
Mix and match and have fun!
jello1

Diabetic?… To make a sugar-free version, use sugar-free jello for the colored layers. For the white layer, use evaporated milk and 6 packets (or however sweet you want it) of Equal or other sweetener instead of the sweetened condensed milk.

This jello can be so fun! Use it for any occassion…

13jellovalentines.jpg Valentine’s Day: red and white. You can even cut it out with a heart-shaped cookie cutter.

13jellochristmas.jpg

Christmas…red and green (and white). ——————————————————————————————————————————————————————————————————————————————————————————————————–

–St. Patrick’s Day… green and white.
–4th of July… red, white, and blue.
–Easter or Spring… pastels (4 colors of jello, and instead of having a white layer, mix 1/4 of the white part with each color, making them a more pastel color).
–School colors… if your school has colors.
–Or to make it more colorful, you can make 2 pans and make sure that the top and bottom colors are all different, then have some flipped over so all 4 colors show. Like this:
finger-jello-at-picnic.jpg

Comments

10 Responses to “Finger Jello fits any occasion!”

  1. lalaine on May 26th, 2008 11:39 am

    Your recipe shows it takes only a bit of creativity to turn regular things such as jello into something spectacular! I will be experimenting with this soon!

  2. Lakshmi on June 18th, 2008 3:07 pm

    Hi Kay, this is a wonderful recipe. I am planning to make it for a party at my son’s school too. One question – do I need to have a white layer between 2 color layers. Have you tried that? If not, I will try it regardless, and let you know how it goes…

  3. Kay on June 18th, 2008 3:31 pm

    Lakshmi, you don’t have to have that white layer in there. It is just for contrasting looks and some people prefer the taste with that layer included. I hope the jello is a hit! :) Yeah, let me know how it turns out!

  4. lorie on January 1st, 2011 3:20 pm

    Hi Kay, your recipe is great. A co-worker of mine brought these in and I loved them. Every time I asked her for the recipe she could never remember the ingredients. I searched on the internet and found your recipe. I made it and turned out great.

  5. STACY J on February 11th, 2011 11:35 pm

    OH MAN IT WAS SO GOOD BUT HOW DO U GET IT NOT TO MIX TOGETHER LOL I DID SOME TONIHGT AND THE EDGE OF MY PAN WASNT AS PERTY AS YOURS…. BUT THE JELLOW IN THE INSIDE LOOKED AWSOME … I WANA TRY TO DO THICKER LAYERS AND ADD SOME FRUITS TO IT LIKE PINAPLE AND SOME NUTS MAYBE,,,

  6. Jeannie Hilbers on December 17th, 2013 7:09 pm

    How long can the finished product be stored in the refrigerator? Thank you.

  7. Kay on December 17th, 2013 11:52 pm

    Jeannie, if you keep it covered, it lasts awhile, not sure how long because I don’t think I’ve ever had it longer than 3 or 4 days before it got all eaten, and it was still great at that point. If it’s not covered, the edges get hard after about 2 days.

  8. Janice Stiller on November 6th, 2014 6:11 am

    love the red, green n white for christmas…..so you put the white down first, then add red n white n green n white n red again??????? how many pkgs for the christmas one

  9. Kay on November 6th, 2014 8:55 am

    Janice, the recipe for the white layer makes 3 layers, so I usually do 4 colored layers to sandwich the white inside. For the Christmas jello, I do 2 boxes of red and 2 boxes of green… red white green white red white green. And then when you put them out on a plate, flip some so the green is on top and some so the red is… you can get a festive look that way from only one pan of jello. Hope that helps! This jello is always a hit! So yes, please make it! :)

  10. Janice StillerT on November 7th, 2014 7:02 am

    Thank you!! YOUR AWESOME! have a great Day!

Snack Time!

Here is the perfect snack. We make it alot! And we have also made it for company. It’s a knock-off of an appetizer we had at a restaurant. We call it…

Nachos

Turn the oven to 400.
No measuring here… Cover a plate with tortilla chips (not more than 1 or 2 chips thick).
nachos1

nachos2  Then cover the chips with a layer of cheese (we use pizza cheese or mozzarella cheese).
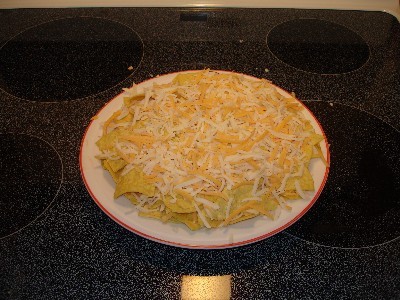
nachos3  Repeat the layers.

nachos4Whether the oven is preheated or not, put the nachos in the oven. Leave in till cheese is melted to your liking. This is how it looks after about 7 minutes.
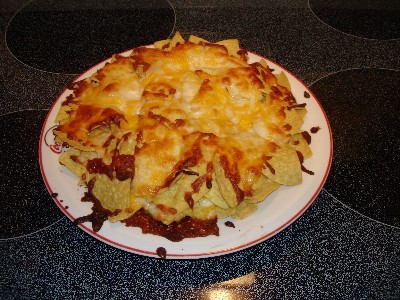
nachos5And this is how it looks after about 10 minutes.
Serve with salsa and sour cream.

Sometimes we do these variations: Add sliced jalapeno peppers on top. Sprinkle crushed red pepper on top.

If you’re doing it for a group , use a cookie sheet instead of a plate. Also, we have Corelle plates, but we don’t use them in the oven. Our Coke plates are about twice as thick and it was an experiment the first time to see if it would break or melt but it works fine… why don’t we just use a small baking sheet? I don’t know.

I have a meat and potatoes meal done, pictured, and ready for posting, so you can expect that later this week.

And, as usual, thanks so much for your encouraging, fun, helpful, humorous, and interesting comments! You guys are great!!!

Delicious! Licked clean! A winner! Must have! Double the recipe! Fans are everywhere!

Posted on November 26, 2006
Filed Under Snacks

That describes this new recipe. It comes from a ’95 Taste of Home magazine. My mom-in-law planned dinner and supper for T-giving Day, then assigned us to bring stuff. This Hot Pizza Dip was one of my things to bring for supper. She had never tried it before, but thought it looked good. And it was!!!!! It’s so easy to make too. I don’t have progressive pictures because I was hurriedly putting it together because people were already in the kitchen snacking and it still had to bake for 20 min.   Then, while it was baking, I thought, ‘Hey, that’s a new recipe’. So the only picture is after I took it out of the oven.

s pizza dip

  Hot Pizza Dip

1 package (8 oz. ) cream cheese softened

1 teaspoon Italian seasoning

1/4 teaspoon garlic powder

2 cups (8 oz. ) shredded mozzarella cheese

1 cup ( 4 oz. ) shredded cheddar cheese

1/2 cup pizza sauce

1/2 cup finely chopped green pepper

1/2 cup finely chopped sweet red pepper

Tortilla chips or bread sticks

In a bowl, combine cream cheese, italian seasoning and garlic powder;

spread on the bottom of a greased 9-in. pie plate. This was easier AFTER I greased my spatula. Otherwise, it sticks to the cheese mixture.

Combine cheeses; sprinke half over the cream cheese layer.

Top with the pizza sauce and peppers. Sprinkle with the remaining cheeses. I saved some peppers to sprinkle on top, just for looks.

Bake at 350 for 20 minutes.

Serve warm with tortilla chips or breadsticks. We used tortilla chips.

Yield:  about 3 1/2 cups.

The “hot” in the title means because it was in the oven… it has no ‘zip’ to it. When (yeah, when ) I make it again, I’m going to try adding some chopped pepperoni, jalepenos, or crushed red pepper seasoning to it. When we were talking about making supper, there were some groans and comments about still being full from the main meal. But, it still got licked clean and raved about anyway! Just delicious! Definitely going in my not-so-blank-anymore cookbook!

Comments

One Response to “Delicious! Licked clean! A winner! Must have! Double the recipe! Fans are everywhere!”

  1. Beth on December 18th, 2010 12:29 am

    I was thinking about making a pizza dip for our family Christmas & found this in your recipe file. I realized that you posted this one before I even knew you. :) You didn’t join the board until December 13, 2006 (I looked). You have TONS of recipes on here…my goodness, girl. I’m going to need to come here for inspiration some more. Why don’t you just give me a meal plan for a month? hehe. jk. I have no clue if you get this comment from such an old post, but I’ll submit it anyway.