Recipes and Cooking Ideas for Homemakers and Amateur Cooks
 

Deviating from the Norm in Baking

Posted on May 19, 2011
Filed Under Cakes, Cookies and bars, Pies

You bake cookies. You could do it on autopilot. Your kids even know the drill… one time, Tiffany came out to the kitchen as I was starting cookie baking and said, “Can I help you bake cookies?”
“How did you know I’m gonna bake cookies?”, I asked.
“Because I saw you open the mixer and get that *pointing to the shortening* and the sugar out of the cupboard, and that’s how you always start baking cookies.”, she confidently said.

Sometimes I feel in such a rut with cooking and baking. When we have cookies around, 90% of the time they’re either monster or chocolate chip. When we have cake around, 90% of the time, it’s chocolate with peanut butter icing. When we have pie around, 90% of the time it’s either peanut butter or lemon meringue. And it looks like when I get into a percentage rut, it’s usually 90%. Seriously, though, if I make something other than the things listed above, you pretty much always see it on here. Sometimes I feel too predictable and want to change things up a bit…

We can still have our favorites, but in a different way.

Take chocolate chip cookies, for example. I was making some for an after school snack, so you know, for kids. Instead of using the same ol’ Pampered Chef cookie scoop, I just used a spoon and made teeny little scoops. The teeny little scoops turned into adorable 1-and-a-half-inch-in-diameter cookies. The adorable cookies, placed in a little bucket, turned into an after school snack that was a huge hit… little cookies, huge hit. They thought it was great that they could have TEN cookies for after school snack! ????
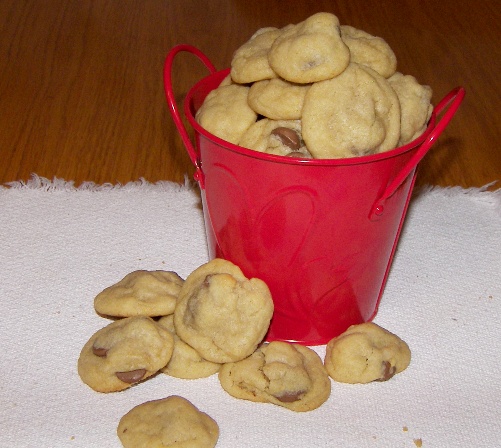
chocolate-chip-cookies-in-bucket.jpg

Awwwwwww.

And now, not to wreck the fun I’m-SOOOOOO-gonna-bake-cookies-this-afternoon-and-do-that-cuz-the-kids’ll-love-it mood or anything, but just let me warn you: the dough goes down v.e.r.y slowly, it takes way longer to put them on and get them off the cookie sheet, and the yield is dozens and dozens, do not even try to count.

*WHIPLASH ALERT*

We’re now going to switch from baking dozens of little time-consuming mini cookies to 1 pan of bars.

Let’s say you’re baking cookies and you mix the dough up and while the first panful is in the oven, you realize you’re not really in the mood to bake cookies after all… not in the mood to drop them onto the cookie sheet every 10 minutes, not in the mood to be setting your laptop down and jumping up 5 times an hour.

But, you’ve got a batch of dough sitting there.

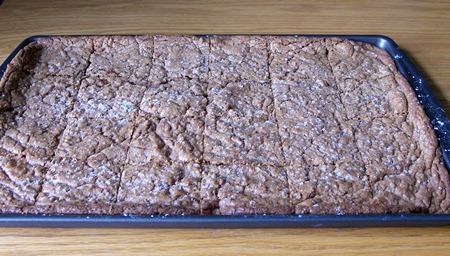
No problem. Just spread the dough in a sheet cake pan and bake it for 25 minutes… and ta-da, bars made from your favorite cookie recipe. I just tried this for the first time about 3 weeks ago and thought it was really great that I thought to do this on my own UNTIL some of my friends said, “Oh, yeah, I do that all the time.” :roll:
bars-from-cookie-recipe.jpg
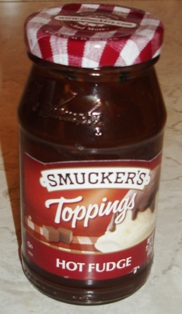
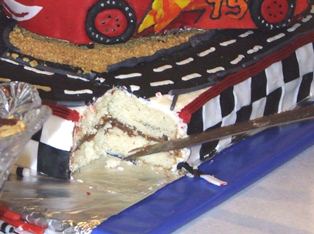
Side note here: that’s my chocolate chip cookie recipe, except that I substituted FUDGE + 1 cup of flour for the chocolate chips. I had about 5 cups of fudge on hand from when I made this cake.
cut-view-lightning-mcqueen.jpg

I was going to use the fudge in the middle layer between the 2 cakes, but then when I started spreading it on, I was afraid it would be too soft and squish out from the weight of the cake plus car on top of it (I used melted-then-hardened chocolate instead). So, I used the fudge up in those cooki— uh, I mean bars.

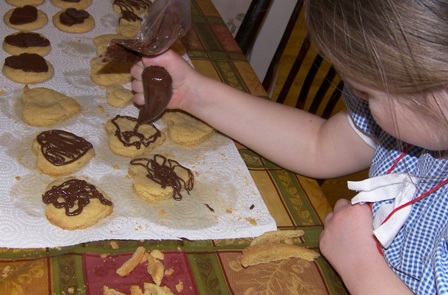
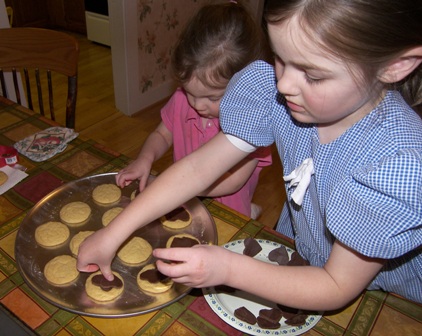
Another way to change up chocolate chip cookies is to mix them up and bake them, leaving out the chocolate chips. Then, melt the chocolate chips, spread them on something metal to harden and make cutouts. Or just drizzle the melted chocolate over the cookies. After they’re baked, you can cut out some of the baked cookies into heart shapes… the girls (and I) did these 2 years ago for Valentines Day and we shipped them to WI to their 2 grandmas.
valentine-cookies1.jpg

valentines-cookies2.jpg

For cake: sometimes I do chocolate cake with peanut butter icing in a 9×13, sometimes I do it in a sheet cake pan, and once in a great while, into cupcakes. I know, exciting. ???? Next time, I’m going to do mini ones. I made mini cupcakes for the first time last week. If you ever want to do this, one cake mix made exactly 6 dozen… I filled the wells about 3/4 full with batter. And it takes double the frosting. ???? Pile it up even more than this… it’s part of what makes minis fun. I only made a single batch, so I couldn’t put as much on as I wanted to AND I ran out.
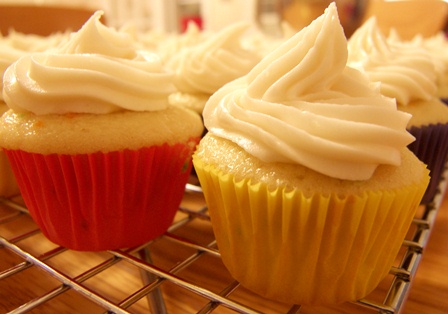
mini-cupcakes.jpg

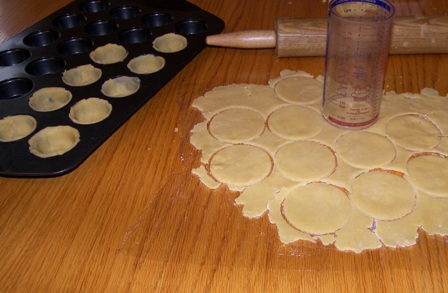
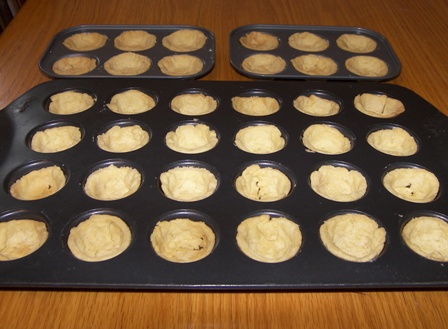
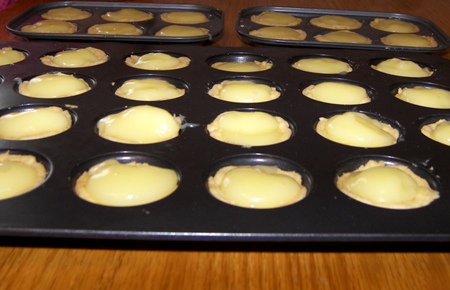
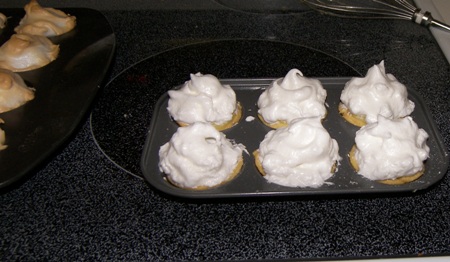
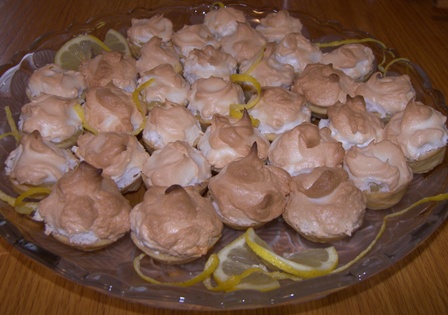
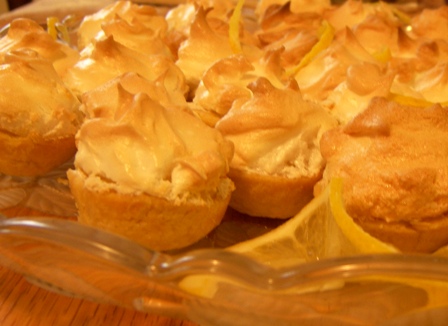
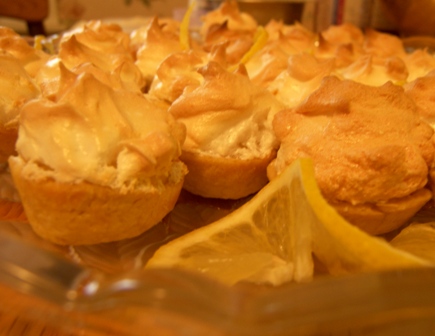
For pie… if you want lemon meringue pie, but not in big piece form, do this: make pie crust, cut 3″ circles, press them into mini muffin pans, and bake. Make your regular lemon pie filling and fill the crusts. Make regular meringue and pipe or dollop it on, brown it in the oven, and you’ve got these sweet li’l thangs…
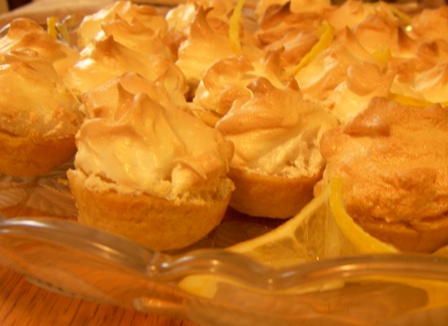
mini-lemon-pies.jpg

You could do that with probably any kind of pie. It’s great for potlucks or snacks.

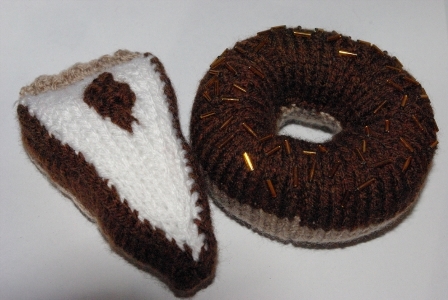
And now, still on the pie subject, the grand finale to this whole ‘switching things up’ thing… how about calorie-free… ????
knitted-pie.jpg
I ran across this website (April Cottage Ramblings) one day as I was surfing and immediately saved the link. Absolutely amazing!!! Seriously, this lady is talented… she KNITTED a piece of pie and a donut!!! She knits and crochets other stuff too… I fell in love with a little short-sleeved ruffly purple sweater that she made for her granddaughter. I don’t know her, and I don’t knit, but I’m very impressed. And it sounds like she’s going to knit more cakes, so I’m going to stay tuned. :)

Coming up next… Lately, I’ve been hungry for lettuce salad with craisins and pecans in it, so I’m going to look for a recipe like that. I don’t have one in mind, so if you have a slam good one that you’re bursting to share, let me know! :)

Comments

9 Responses to “Deviating from the Norm in Baking”
  1. Kay on May 19th, 2011 8:37 am

    Every time I see the title, I think “Who’s Norm?” Hmmm, maybe I should’ve worded it differently…
    :)

  2. Beth on May 19th, 2011 9:29 am

    Love this! And I think the title is fine – my ‘normal’ is chocolate chip cookies, but I sure don’t make cakes or pies often enough to call that normal. If I make them, I’m the one who ends up eating it…can’t let that good stuff go to waste! :) I like making dessert though, so I often choose that if I need to take something to family or church activities.

    Hey, do you have the small Pampered Chef scoop? I wonder how that would compare to your method of using a spoon. Also, their large scoop is perfect for filling muffin tins.

  3. Amy on May 19th, 2011 10:47 am

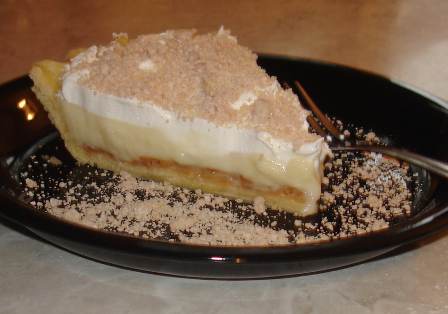
    LOL… That pie slice looks like a skunk tail! I had to read what you said it was, look at it again and then.. AHhh!! Now I see it! ????

  4. Connie Stoll on May 19th, 2011 11:14 am

    Festive Tossed Salad
    12 c mixed greens, 3/4 c dried cranberries, 4 oz feta cheese. Saute 1 c chopped walnuts (or pecans) with 3 T butter, cool and toss with 1/4 c sugar, 1 tsp pepper and 1/4 tsp salt. Toss salad with dressing just before serving. Dressing: 1/4 cup red wine or cider vinegar, 1/2 cup loose fresh parsely, 1/4 cup chopped red onion, 2 cloves garlic, 1/3 cup sugar, 1/2 tsp oregano, 1/8 tsp salt and 1/2 cup olive oil. Puree in food processor or blender, regrigerate until serving. Just had this salad last weekend and it is absolutely delicious!

  5. Shannon on May 19th, 2011 2:34 pm

    Now who did you say Norm was? ???? jk!

    I think my cookie scoop is too small. It always takes forever to get to the bottom of the bowl. I just love that “bar” idea more and more!!

  6. Michelle on May 20th, 2011 8:13 am

    My mom makes those tiny cookies and I LOVE eating them, but since I often feel as though I’m being poisoned in the kitchen (slight exaggeration, of course), I’m a bar kind of girl. :) So I am very happy to know that I can do that with cookies dough, too!

  7. Jolene on May 23rd, 2011 3:04 pm

    I just recently got a wonderful salad recipe with craisins, pecans, sesame sticks, purple onion, red pepper and grated cheese. It’s so good!!! I posted it on “A page in the life of a mom” if your interested.

  8. Beth on June 11th, 2011 6:35 pm

    Isn’t it about time to eat some cheesecake? Ha! I’ll take that back, but I’d welcome a new post. :)

  9. Kay on June 13th, 2011 10:07 am

    Thanks Beth. :) Yeah, cheesecake eaten… new post coming up soon. Actually, it’ll be salad next, not cheesecake.

Mini Lemon Meringue Pies

Posted on September 22, 2009
Filed Under Pies, Snacks

Really mini. Not 4″ pie pans.

Smaller.

Not cupcake pans.

Smaller.

These were made in mini muffin pans.

mini-lemon2.jpg

These are perfect for a bring-a-salad-or-dessert church gathering. You know, there are 20 desserts to choose from and you have a hard time narrowing it down to 5 and one of the desserts calling to you is pie cut into 8 pieces. A piece of pie is a complete dessert, so there goes the rest of the selections. I decided to try making little individual pies instead of a couple big lemon meringue pies to take to the Fall Praise Social picnic this past Sunday evening. And it worked! With these little things, you can have a taste of lemon meringue pie without passing up the pecan bars, eclair dessert, monster cookies, and fresh peach delight.

Use your regular lemon meringue pie recipe or use my favorite recipe featured here. Roll the crust a bit thinner than usual, then cut out circles. The tube of my Pampered Chef Measure-All Cup was the perfect size for circle-cutting. Then, press them into the mini muffin pan and bake at 375 for about 10 minutes. Make the filling and spoon into crusts. Make the meringue and spoon on top of filling. Bake at 375 for about 10 minutes. Should be easy to remember… everything to bake gets baked at 375 for about 10 minutes. :)

Here’s the process in pictures:

mini-lemon7.jpg

mini-lemon6.jpg

mini-lemon5.jpg

mini-lemon4.jpg

mini-lemon3.jpg

mini-lemon1.jpg

They tasted exactly like lemon meringue pie. I guess that would make sense, what with using that recipe and all. They’re long gone, and I just feel like snitching one off the picture and inhaling it in 2 bites.

—————————————————————————————-

In other news, you may want to stay tuned. I think I might blog live this evening for a couple hours. Lexi is planning to make supper. She’s 6. She feels quite capable and wants me to leave her alone in the kitchen with her cookbooks. Tiffany and I are allowed to help her by setting the table and we also may carry things to the table like bbq sauce and salt & pepper. I think she’s in for a bit of surprise and will end up needing more help than she thinks she will. Here is the menu she picked out (going by pictures in cookbooks): Easy Mac n Cheese, Crunchy Chicken Tenders, Trees with Cheese, and Puddin’ Cones. She gets home from school around 4:15. Supper is scheduled for 6:30.

Oh, and did I mention that she doesn’t know the difference between a teaspoon and a Tablespoon?

Comments

6 Responses to “Mini Lemon Meringue Pies”

  1. Arla on September 22nd, 2009 9:26 am

    Jenny was nine when I could leave the bread and cookie baking entirely up to her and I did, too, many times. Her baking was perfect most of the time. I’m not saying this just because I’m a prejudiced mom…she really could bake and soon surpassed my abilities. I’d say Lexi’s talent runs in the family. You might find out as I did that you find yourself asking your ten year old daughter how SHE does it sometimes. I trained in Lisl and Jenny at the same time…turned out that Lisl could; but preferred other work as I do.

  2. Katrina on September 22nd, 2009 7:18 pm

    Great lil’ pies!

  3. Sharon on September 23rd, 2009 11:48 pm

    Thanks for the reminder that I used to make granola all the time and the family loved it. Will be making your recipe.

    Off the subject, but I am recently interested in using the modified corn starch called Clear Jel. Does anyone have any experience using it in Lemon Meringue Pie. I would love, love, love to figure out how to prevent the pie from “weeping” and thought the Clear Jel might work. I appreciate any input about it, or, any other solutions that you know about….happy cooking
  4. Jan on September 28th, 2009 12:10 pm

    What happened to the printable recipes? I need to take a finger food to the church “apple schnitzing” tonight and have been longing for lemon meringue pie ever since you first posted it, so now I have a good excuse to make these little things.
  5. Kay on September 28th, 2009 12:40 pm

    Hmmm, yeah, Jan, I wonder too what happened to the printable recipes! :) They seem to have disappeared, huh? Actually, I’m glad to know someone misses them. They take extra time to do, so I’ve been slacking off. So thanks for the little nudge… I’ll start doing them again and as I have time, I’ll go back and catch up.

    Another thing that works is to highlight the entire post, pictures and all, and then copy and paste it into Notepad (Start > Accessories > Notepad). The pictures don’t copy into there along with the writing, so when you hit print, you get words only printed out and you don’t even have to dodge around all the pics when you copy and paste. Maybe you could do that for now since I won’t have a printable recipe for you before you make them for tonight.

  6. Jan on September 28th, 2009 4:00 pm

    I made them, but they don’t look as nice. I think my crust was still too think and it shrank in some places and puffed in others, making the place for the filling rather small, but they’re still cute now that they’re done. I got tired of carefully putting meringue on with a spoon, so I piped it on. Worked great and was fast and fun!

Fresh Strawberry Pie

Posted on June 25, 2009
Filed Under Pies

I just thought it would be ideal if I’d post this BEFORE the strawberries are completely over! You know, that way you could still try the recipe without having to go to the grocery store and buy some. How many of you have fresh strawberries in little square boxes in your fridge right now? Me! *raises hand*

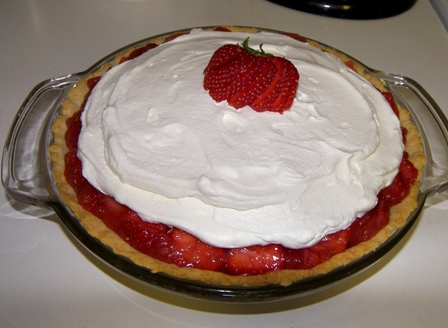
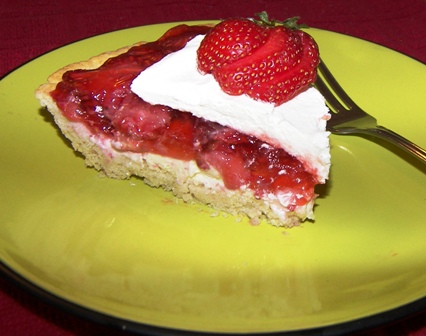
I made this pie last evening and it lasted only about 24 hours. We have 2 big people and 2 little people here. And we all like strawberry pie! So… I’m gonna make another one this weekend! :) It is just so refreshing and bursting with juicy-berry flavor and so pretty!

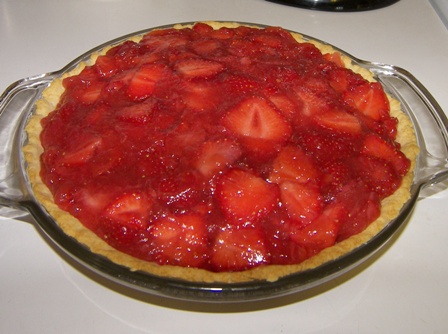
str-pie10.jpg

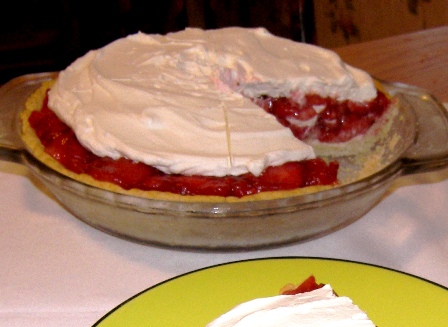
This recipe comes from my mother-in-law. There is something about this strawberry pie that makes it stand head and shoulders above regular fresh strawberry pie. You can’t tell it by looking at it. It’s a hidden feature, until you cut it and serve a piece…

It has a cream cheese layer hidden under those strawberries! Mmmmmmm!

Fresh Strawberry Pie

Crust:
1/4 cup butter
3 Tbsp. boiling water
1 cup Bisquick
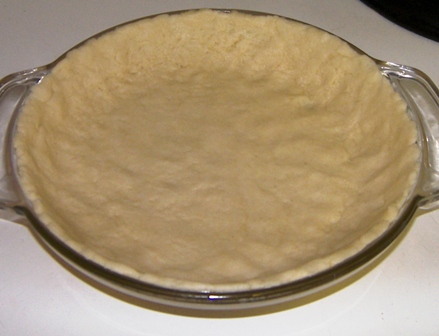
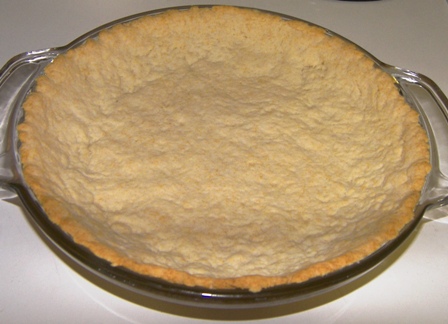
Mix and press into a 9″ pie plate. Bake at 375 for 15 minutes.
str-pie4.jpg

str-pie7.jpg

Cream cheese layer:
1/4 cup powdered sugar
4 oz. cream cheese
3/4 cup Cool Whip
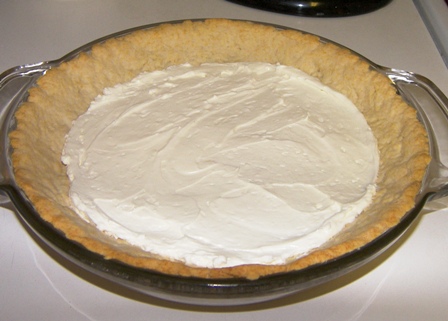
Mix and spread on cooled crust.
str-pie8.jpg

Strawberry layer:
1/4 cup instant Clear Jel
3/4 cup sugar
4 cups sliced fresh strawberries
1/2 cup water
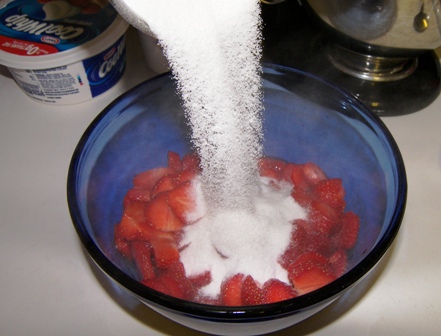
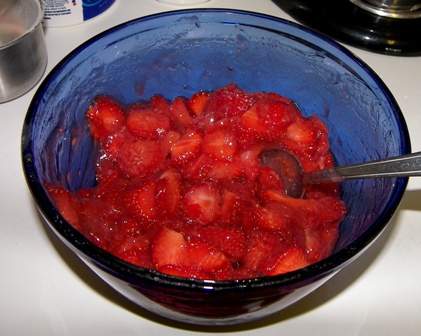
Add the water to the strawberries. Mix sugar and Clear Jel together. Sprinkle over the strawberries and mix in.
str-pie5.jpg

str-pie6.jpg

Pour over cream cheese mixture.
str-pie9.jpg

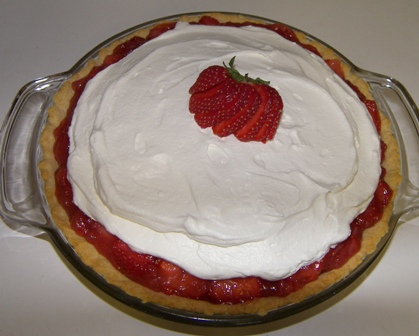
Top with more Cool Whip.
str-pie11.jpg

Chill. It sort of sets up right away, but it’s best if it chills for a couple hours.

str-pie2.jpg

str-pie3.jpg

Important note ???? :When peaches are in season, please remember this recipe… it works great to substitute the strawberries for sliced fresh peaches. I wonder if it would work to substitute other fruit too, like blueberries or raspberries.

Comments

9 Responses to “Fresh Strawberry Pie”

  1. Sharon on June 26th, 2009 12:29 pm

    oh this has got to be good. We LOVE!!!!! fresh strawberry pie. I always do the cooked clear jel version, but this sounds much faster and easier. And the cream cheese–oh wow. It sure does sound like a cut above the rest.

  2. Sharon on June 26th, 2009 12:31 pm

    oh i forgot…a question about the crust. Does the boiling water kinda soften the butter so it mixes in okay. Or do you have to kinda cut it in?

  3. Kay on June 26th, 2009 2:25 pm

    I’m not sure how it’s supposed to be done (I guess we’d know who to ask ???? ), but I mixed softened butter and the Bisquick, then added the water.

  4. Arla on June 26th, 2009 5:42 pm

    Good idea, Kay. I picked strawberries again today FROM MY OWN PATCH. I now have three pies tucked in the frig for the weekend. There really is nothing quite like fresh strawberry pie.

  5. liz on June 27th, 2009 2:29 pm

    one coming up for supper tomorrow night. to bad i don’t have to make two…

  6. Jenny on June 28th, 2009 4:51 pm

    Hi Kay! I woke up from my nap and all the sudden got an urge for some fresh strawberry pie so I’m off to make some for after church!

  7. Rina on June 29th, 2009 9:37 pm

    Hi Kay – this looks FANTASTIC…am going to see if I can still get some local berries and make this on Wednesday. Do you think I could use Knox Gelatin instead of the Clear Jel? Couldn’t find it (actually never heard of it!) but I have Knox Gelatin…maybe if I cooked up the gelatin first and then added it with the sugar?

  8. Rhonda H. on June 29th, 2009 10:03 pm

    I had picked up some strawberries last week, thinking it would be a shame if June passed by and I hadn’t made a single strawberry pie. Then I found your recipe and quickly whipped it up between ball games tonight. We had it for a bedtime snack, and it was delicious; we all loved it! I’ve never made a Bisquick crust before, but it was very easy and tasty.

  9. Talita on July 8th, 2009 5:20 pm

    This looks really delish! Seems not to hard to prepare!

Lemon Meringue Pie

Posted on June 9, 2009
Filed Under Pies

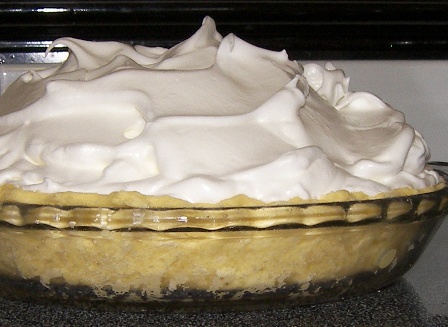
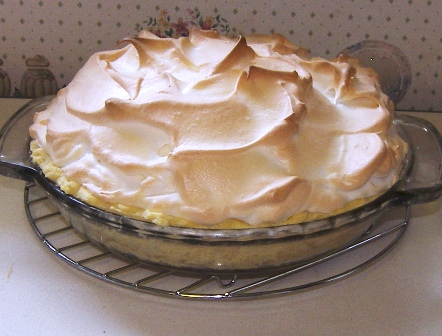
I’ve been making this pie since before I started this cooking blog. Every time I’d make it, I’d toy with the idea of featuring it. But I never did… here’s why: I don’t have meringue down to a science yet. Sometimes it turns out, sometimes it doesn’t. I was planning to have this detailed ‘How to Make the Perfect Meringue’ tutorial when I feature it. But, instead of waiting until I’m a meringue expert, I decided to feature it now and get tips from you for making the perfect meringue. ???? So, I made this lemon pie this past weekend and the meringue happened to turn out well… which was kinda handy because it’s not as much fun to feature flops!

lemon-pie1.jpg

I think this pie has just the right amount of lemon flavor, just the right amount of yellow color, and just the right amount of meringue. It’s adapted from the A Taste of the Country cookbook. In there, it’s called ‘World’s Best Lemon Pie’. And so far, in my opinion, it’s held true to its name. When I say it’s adapted from there, I mean that I follow the recipe, but made a few little changes:
1. Deleting the 1 tsp. of grated lemon peel
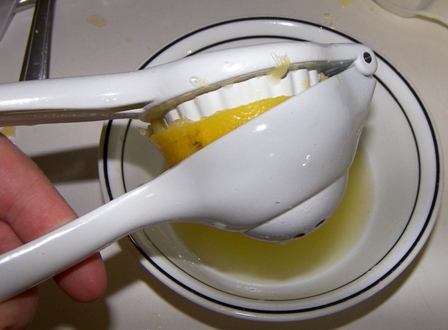
2. Insisting on fresh-squeezed lemon juice as opposed to any lemon juice
3. Adding a 4th egg white to the meringue to make a higher pile of it
4. Adding 1/4 tsp. cream of tartar to the meringue
I’ll post the recipe how I make it…

Lemon Meringue pie

1 cup sugar
1/4 cup cornstarch
3 Tbsp. flour
1/4 tsp. salt
2 cups water
3 egg yolks, beaten
1 Tbsp. butter
1/4 cup fresh-squeezed lemon juice
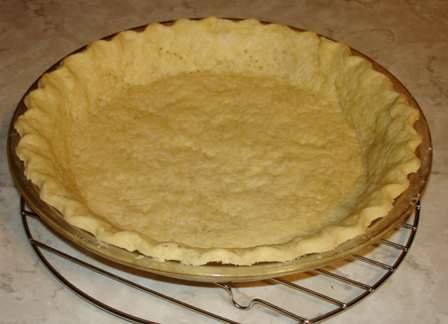
1 9″ baked pie crust (for a pie crust tutorial, go here)

Meringue:
4 egg whites
1/4 tsp. cream of tartar
1/2 cup sugar

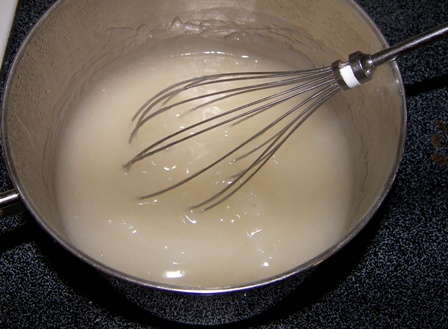
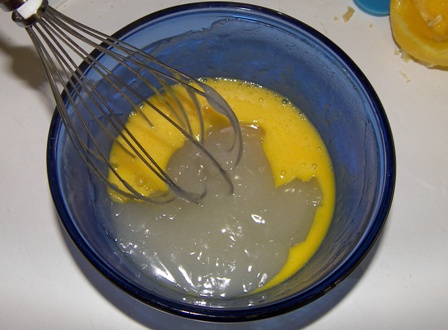
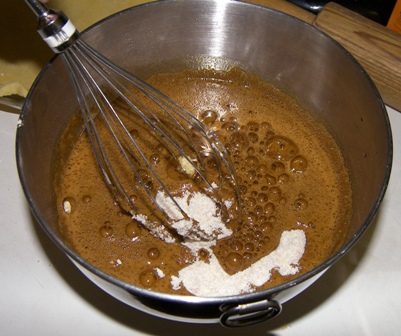
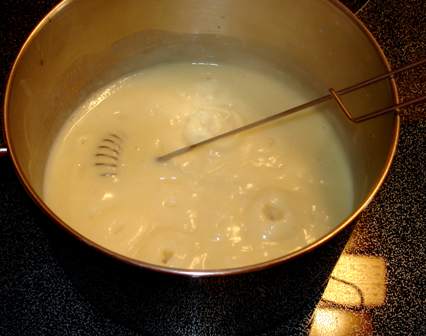
In a saucepan, combine sugar, cornstarch, flour, and salt. Gradually stir in water. Cook and stir over medium heat until thickened and bubbly. Reduce heat; cook and stir 2 minutes more.
lemon-pie3.jpg

Remove from the heat.
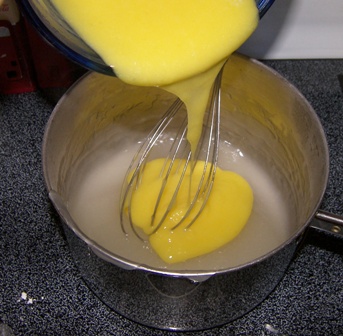
Gradually stir 1 cup into egg yolks.
lemon-pie4.jpg

Return all to saucepan.
lemon-pie5.jpg

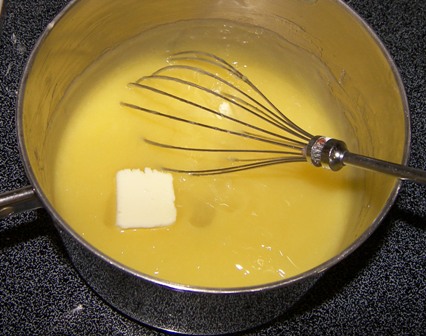
Bring to a boil. Cook and stir for 2 minutes. Remove from the heat. Stir in the butter and lemon juice.
lemon-pie2.jpg

lemon-pie6.jpg

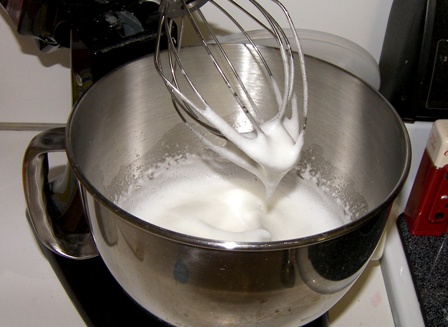
Beat egg whites and cream of tartar until soft peaks form.
lemon-pie7.jpg

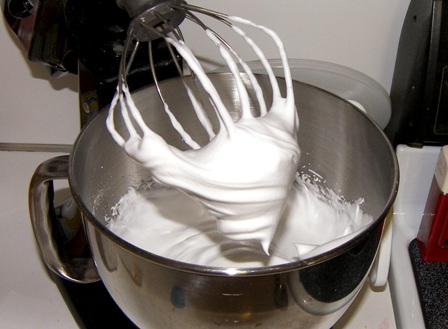
Gradually add sugar and beat until stiffer peaks form and sugar is dissolved (if you rub a bit of meringue between your thumb and finger, it will feel smooth as opposed to gritty).
lemon-pie8.jpg

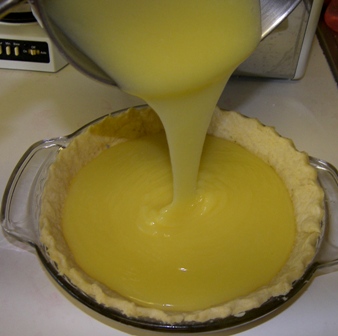
Pour lemon filling into pie crust
lemon-pie9.jpg

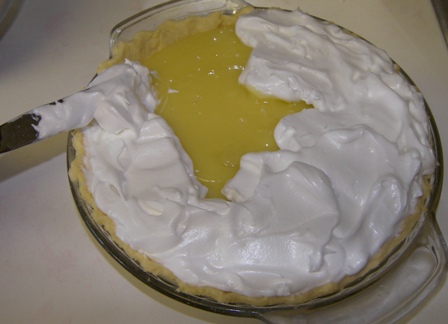
and immediately spread the meringue on, making sure to seal it to the edges of the crust. I start by taking a knife and sealing the edges, then pile and swirl the rest of the the meringue on.
lemon-pie10.jpg

lemon-pie11.jpg

lemon-pie12.jpg

Bake at 375 for about 13 minutes. Cool.
lemon-pie13.jpg
Store in refrigerator.

Tiffany (3) says she LOVES lemon pie… she eats the meringue off, then suddenly she’s ‘full and can’t eat the rest’. Hmmm, never thought meringue would be so filling. ???? I oughta make a meringue only pie for her sometime.

lemon-pie14.jpg

Want a piece?

Comments

18 Responses to “Lemon Meringue Pie”

  1. Elsie on June 9th, 2009 10:51 am

    I recommend making the No Weep Meringue, it turns out nice everytime. 1 tablespoon cornstarch, 6 tablespoons white sugar, 3 egg whites.In a saucepan, cook cornstarch, sugar and a half cup of water until thick. Cool, then add unbeaten egg whites. Beat until satiny and in peaks, this can take 15 to 20 minutes. Spread on warm pie filling. Bake at 350 for 15 to 20 minutes or until brown.
    I don’t remember where I got this recipe, but it is the best in our minds!

  2. Berneice on June 9th, 2009 11:56 am

    Maybe Tiffany and I should share a piece of pie. I love the lemon but don’t care for the meringue. or maybe I should just stick with lemon fry pies!

  3. Sharon on June 9th, 2009 12:34 pm

    oh my! I want a piece! This is my favorite pie, and my recipe is pretty close to yours. I always leave out the lemon peel too, ’cause it makes it too strong. And I’m like you–sometimes the meringue turns out, sometimes it doesn’t. I’ll have to try Elsie’s recipe.

  4. Kay on June 9th, 2009 12:42 pm

    Elsie, thanks SO much for the No Weep Meringue recipe! I’m definitely going to try it next time! Sounds like a bit more work, but you had me at ‘turns out nice every time’ and ‘satiny’. :)

  5. Rosalyn on June 9th, 2009 2:33 pm

    Lemon pie is something that is not our favorite, but using a fresh squeezed lemon…now THAT sounds lovely! ????
    I might have to try this sometime I have a lemon on hand!

    The peanut butter pie was delicious!!! :)

  6. Rina on June 9th, 2009 2:49 pm

    This looks FANTASTIC!!!!!!! Bookmarking for sure.

  7. kri on June 9th, 2009 8:38 pm

    i make lemon mer. pies at the restaurant i work…they are my favorite kind to make..at first i had a hard time with the meringue…but now i love it! in fact i made 3 this morn! :)

  8. Elsie on June 10th, 2009 5:06 am

    Yes Kay, it is more work but it is well worth the extra time!

  9. sandra on June 10th, 2009 5:45 am

    I DREAMED of Lemon Meringue Pie last night! I was looking over your site before I went to bed. Looks very yummy. WIll have to try it.

  10. coleensr on June 10th, 2009 1:41 pm

    Lemon pie is one of our family’s favorites. As for the meringue. We love them to “weep”! The little drops of syrup on top are an added bonus!

  11. Bethany on June 10th, 2009 3:41 pm

    Oh that pie looks fabulous!!! I am going to have to make this very, very soon. Yours turned out absolutely beautiful!!

  12. Bobbi on June 10th, 2009 8:51 pm

    This is my favorite kind of pie. I’m going to try making this friday. Yum.

  13. Dorothy on June 14th, 2009 2:13 pm

    Hi Kay,
    I’m enjoying following your posts. I had to stop being a silent follower and tell you I was asked to make a Raisin Cream Pie for a customer and my thoughts went to the meringue. Then I thought of your lovely looking pie and said I’m going to look that up again and see how Kay did it. I thought the pie turned out lovely. Thansk for your timely post.

    PS we are enjoying the little Northwoods shed for our baking sales.

  14. Roxanna on June 14th, 2009 2:29 pm

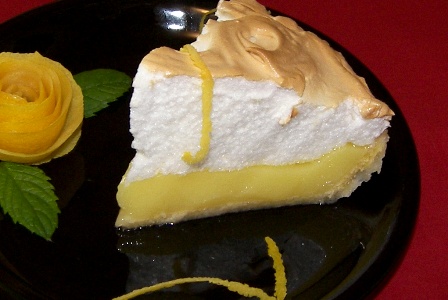
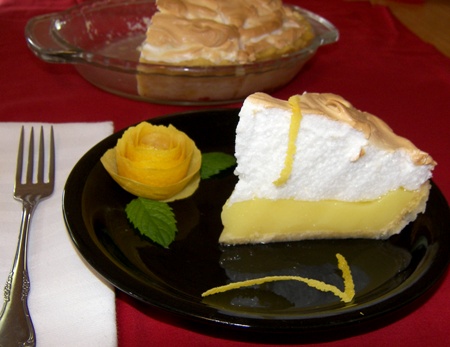
    Okay. I can’t believe no one else asked about that pretty flower in picture? Did you do that and how? that is so cool! It looks like it is made from the lemon. Am I right? BTW, the pie looks wonderful too! ????

  15. Katrina on June 20th, 2009 1:29 pm

    That is a perfect looking lemon meringue pie! Love your first picture with the plating and flower.

  16. Rick Peterson on August 8th, 2009 3:01 pm

    Hi, everytime I make merengue I
    beat the eggwhites on high on my Kitchenaide until stiff peaks after adding 6 Tbsp. Sugar and 1/4 tsp. Cream of tarter with 3 egg whites. The merengue always falls once it cools. Should I increase the amount of cream of tarter?

  17. Kay on September 22nd, 2009 7:35 am

    Rick, try beating the egg whites and cream of tartar till soft peaks form, then very slowly add the sugar while it’s beating. After the sugar is added, let it beat another minute or so, and it should be perfect.

    Having said that, I’m not a meringue expert. ????

  18. Kay on September 22nd, 2009 7:41 am

    Roxanna, you asked about the rose. Yes, it’s made out of lemon peel… peel a lemon in one big long strip with a vegetable peeler. Then simply roll it up like you would roll up some leftover ribbon and tuck the end underneath and set it on the plate. Add some mint leaves or real rosebush leaves. I also put these roses on fruit trays for garnish, either among the fruit or in the corner on top of the dip.

ShooFly Pie – a Pennsylvania Dutch specialty

Posted on January 20, 2009
Filed Under Pies

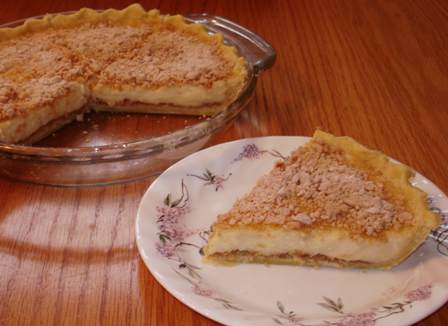
Did you ever have it? I’m pretty sure I did before, but I’d never made it. Shannon grew up with it. He mentioned it awhile ago and I couldn’t think what it looked like or tasted like, so I decided to try it. It was good!

About the only thing I’ve ever made with molasses is Gingerbread cookies at Christmastime. If you like molasses, you’ll love this pie.
I got the recipe from my friend Charlene.

Wet Bottom Shoo-Fly pie

Crumbs
1 cup flour
2/3 cup light brown sugar
1 Tbsp. butter

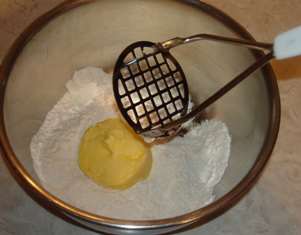
Combine all ingredients and mix until uniform Set aside 1 cup.

Liquid
1 egg beaten
3/4 -1 cup golden molasses ( Charlene said, “I always use 1 cup”, so I did too)
3/4 cup boiling water
1 tsp. baking soda

Stir soda into water. Combine all ingredients and mix thoroughly. Stir in remaining crumbs.
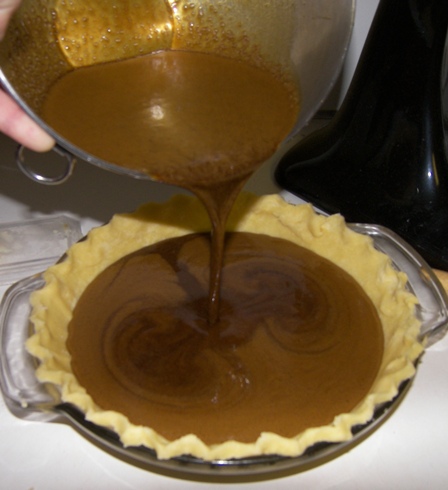
shoofly1.jpg

Pour into unbaked pie crust.
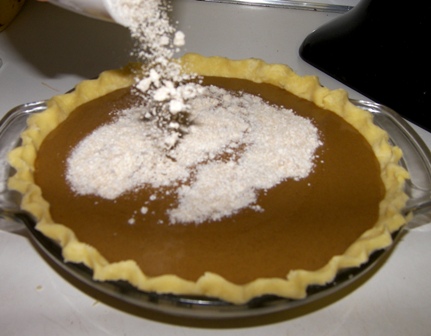
shoofly2.jpg

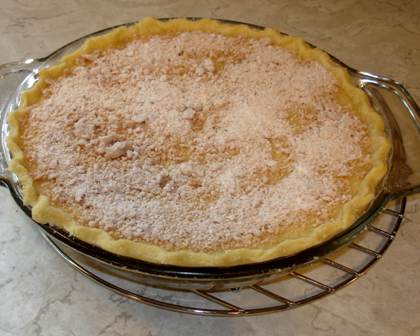
Top with 1 cup of crumbs.
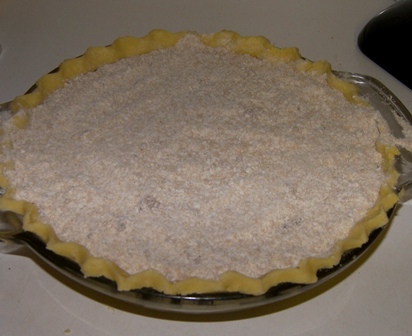
shoofly3.jpg

shoofly4.jpg

Bake at 375 for 10 min and then 350 for 30 min.
shoofly5.jpg

shoofly6.jpg

Yum! Make one for yourself! This one didn’t last long around here.

Comments

10 Responses to “ShooFly Pie – a Pennsylvania Dutch specialty”

  1. Marylou on January 20th, 2009 12:27 pm

    I love shoo-fly pie! Especially served warm with ice cream! Thanks for sharing the recipe.

  2. JoAnn on January 20th, 2009 9:03 pm

    Ha! That’s my SIL’s comment up there, and I was going to write the exact same thing! I always bring home an extra pie when we visit Lancaster!

  3. Cordy on January 21st, 2009 8:22 am

    I’m so glad it turned out delicious for you! I live in the heart of Lancaster Co. :) so these are very available at every market you shop! I’ve found from our own church cookbook that this shoofly pie recipe varies as much as a potato salad recipe (well, maybe not quite!) Thanks for all your recipes! I just love coming to your “kitchen!”

  4. Ann on January 21st, 2009 10:12 am

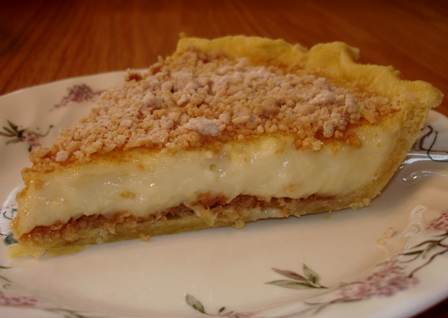
    I was eager to see the sliced piece of pie to see how much of a “wet-bottom” this recipe has. I also live in the heart of Lanc. Co. and have enjoyed this pie many times esp. since it is my dads favorite. :) My mom makes a kind that everything is beaten together – no crumbs on top; which is also very delicious! I love the “wet” kind and think I will try this recipe – thanks for sharing!

  5. Kay on January 21st, 2009 11:51 am

    Thanks for your input! :)

    I wonder what a ‘dry-bottom’ shoo fly pie would be like. More like cake?

    Also, just since I made this one, I saw a recipe that said you could substitute some corn syrup for some of the molasses. I’d like to try that sometime… this was borderline too rich of a molasses flavor for me.

  6. Judi on January 21st, 2009 3:34 pm

    any pie sounds good to me. I’ll have to give this one a try. Every recipe I’ve gotten from you has been great.

  7. stirling on February 2nd, 2009 9:16 pm

    my mom RIP. used to love this but down south they called it molasses pie. you can well believe that I’ll try this one.

  8. Debbie on February 10th, 2009 5:33 pm

    Wow, now that looks like a wet bottom. I drive Amish in Lancaster and Chester County Pa so I see and eat lotsa shoo fly pies and this one sure looks great. My daughter makes ours at our house and does something a little different. Instead of using molasses she uses King Syrup which is lighter than molasses and is considered table syrup. Thats how my grandmother used to make them so we do too.

  9. Debbie on February 10th, 2009 5:37 pm

    Thought I’d share the link for King Syrup

    http://www.carriagehousebrands.com/kingsyrup.html

  10. sharan on May 4th, 2009 10:48 am

    Hi There, I am looking for a recipe for shoofly cake. It has buttermilk in it. Makes for a wet bottom cake. Very good. If anyone can help I would really appreciate it. Thanks.

How to make a Pie Crust

Posted on August 4, 2008
Filed Under How to…, Pies

Ok, I’ll just show you how I do it, but don’t expect alot of tips and all. Who knows, after this post, you might be giving me a lot of tips! ???? That would be great, it would make us all better pie crust makers. And you might laugh at how I do it, for example, I use Saran Wrap in the pie-crust-making process. *Huh?!*

Warning: Eyes may glaze over… there are lots of pictures and it got a little wordy. :)

First, the recipe. This is the only pie crust recipe I use and I don’t even try others because this one works great and has only 4 ingredients and it gets compliments now and then:

Pie Crust

1 1/3 cups flour
1/2 tsp. salt
1/2 cup butter-flavored shortening (Does shortening have an ‘e’ in it? I keep adding then erasing it. I should go look on the can.)
3 Tbsp. ice water

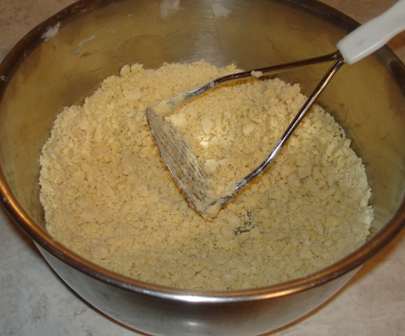
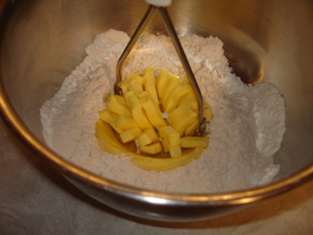
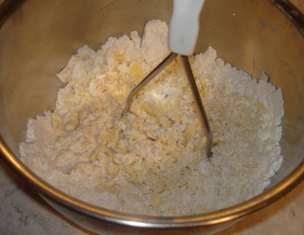
I put the flour and salt into a bowl and give it a few stirs w the teaspoon that I measured the salt with. Yeah, I about always measure stuff, I’m not one of those ‘just dump it in’ people. Then, I mix the shortening in with a potato masher…
pie-crust2.jpg  I’ve tried a pastry blender, two knives, a fork, and nothing works quite as good as a potato masher.
pie-crust3.jpg

pie-crust4.jpg

pie-crust5.jpg
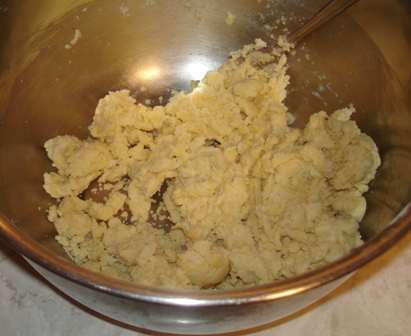
When it looks about like this, pour the water in all at once and quickly stir it with a fork. More like pourthewaterinallatonceandquicklystiritwithafork. Not sure why, but I feel some urgency to get it stirred in, maybe because I’m afraid it would soak into the part where it’s pooled, then not get evenly dispersed. Anyway, I think that little tidbit might fall under the category of ‘Weird Quirks’ instead of ‘Pie-Crust-Making Tips’.

When it looks like this,
pie-crust6.jpg
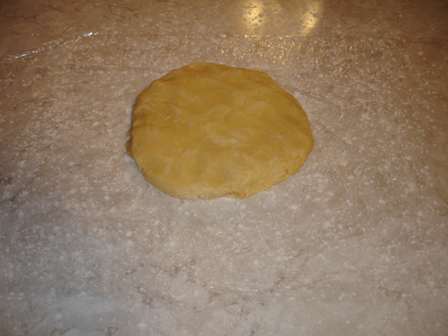
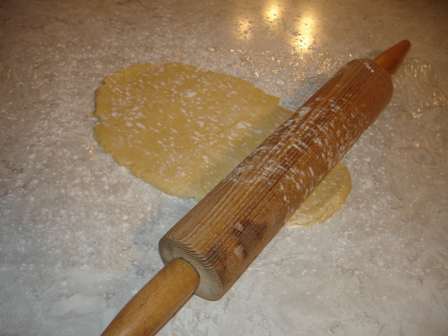
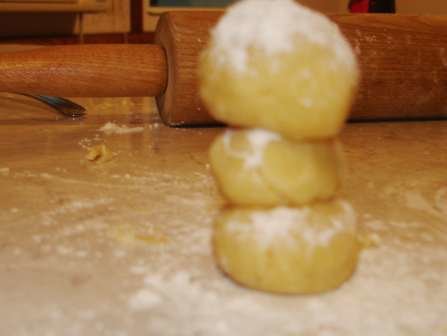
stop stirring and get a piece of Saran wrap, lay it on the counter, and sprinkle it with flour. Then, with your hands, get all the dough and squeeze it together into a ball, then flatten it a bit and put it on the floured Saran wrap.
pie-crust7.jpg

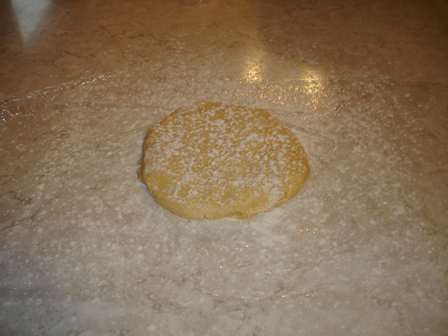
Sprinkle flour over the top.
pie-crust8.jpg
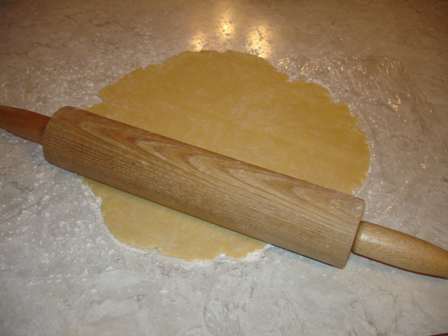
Take the rolling pin and roll it this way,
pie-crust9.jpg
then that way.
pie-crust10.jpg
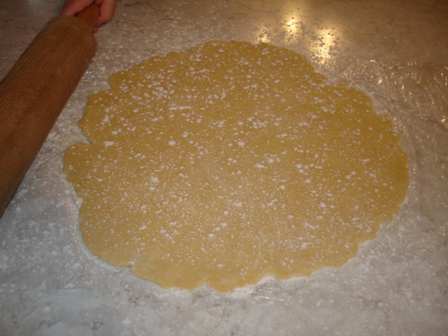
Sprinkle some more flour on because the rolling pin will be starting to stick a little.
pie-crust11.jpg
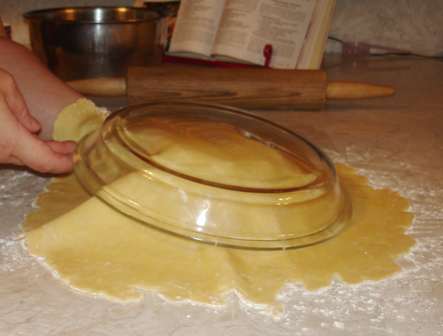
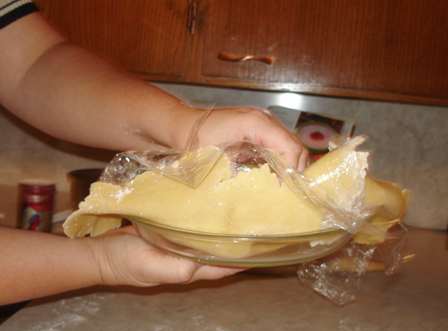
Roll it out some more till it’s a couple inches bigger than the pie plate all the way around. Put one hand under the Saran wrap and the other hand on the back of the pie plate, and flip the whole works over.
pie-crust12.jpg

pie-crust13.jpg
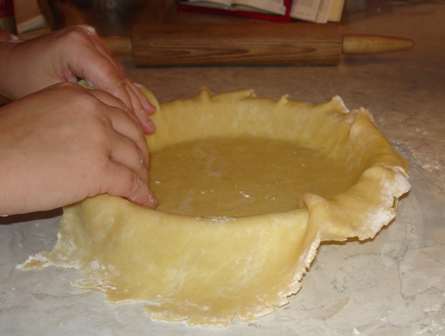
Peel off the Saran wrap. Now, here’s an actual tip: Instead of just pressing the crust down into the pan, lift it up off the edge and let it line the pan without pushing down on it. Otherwise it will stretch the dough, then it’ll shrink when it bakes. I don’t really know how to explain it, but just DON’T make the dough stretch by pressing it down into where the side and bottom of pan meet.
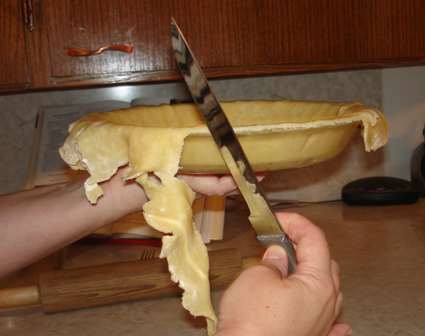
pie-crust14.jpg You can’t really see it, but I’m not just pressing the dough down in with my fingertips… I’m lifting up the edge and putting it down in to line the ‘corner’. Once it’s all in there, press down a little around the top edge, this’ll make it easier to cut the extra dough off. Take a knife and cut it off.
pie-crust15.jpg

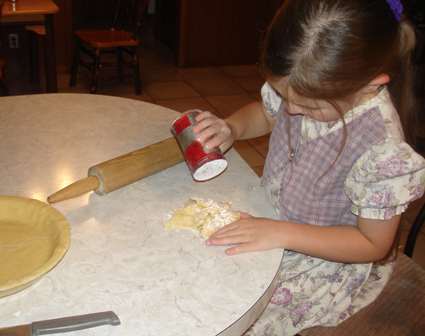
Here’s where my extra dough always goes…
pie-crust16.jpg
And she’d get my camera and take pictures of her own pie dough creations. Close up pictures. And the camera would focus on stuff behind the subject being photographed…
pie-crust20.jpg

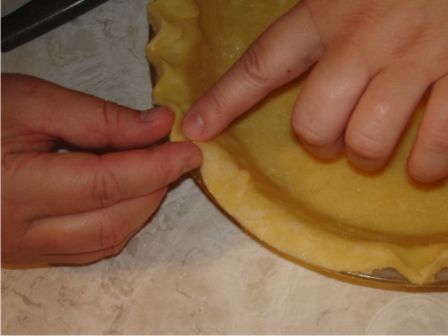
I usually crimp the edges of the dough between my thumb and finger.
pie-crust17.jpg

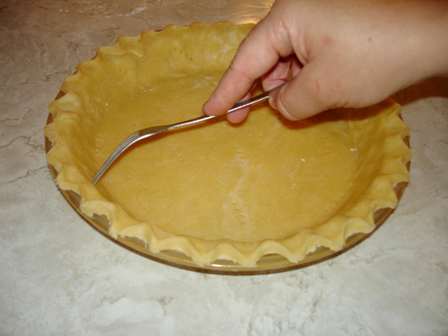
Poke the bottom and side of crust with a fork.
pie-crust18.jpg

pie-crust19.jpg

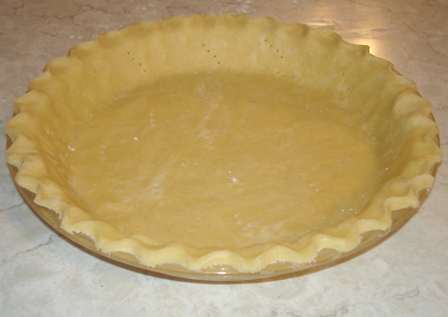
Bake at 375 for 12-15 minutes. And you’ve got a pie crust.
pie-crust21.jpg
Yeah, it does shrink just a tiny bit, but it’s good enough for me. I’d rather have that than mess with putting beans in it to bake it.

And, last but not least, the famous pie crust question… Is it flaky? I think so…
pie-crust1.jpg

Now, let’s hear from you… I know alot of you out there make pies. Please give us some more tips! :)

Comments

10 Responses to “How to make a Pie Crust”

  1. Traci on August 4th, 2008 5:00 pm

    Oh my, I LOVE you!!! I have needed this like you don’t even know…..THANK YOU THANK YOU THANK YOU.

  2. Michelle on August 4th, 2008 5:13 pm

    Maybe I can make my own pie crust now. I’ve tried to make pie crusts in the past and I’ve always had trouble with rolling them out and getting them in the pan. So I gave up and I buy them at a bulk food store where they’re in the pan ready to go and all you have to is bake them. Very convenient!! I’ll have to give this a try sometime. Thanks for the good tips!

  3. Shannon on August 4th, 2008 7:38 pm

    Hum, I like that saran wrap deal. I always had trouble dealing the dumb stuff off the counter. The last pecan pie I made, the crust SOME HOW lifted off the bottom of the pan while baking and all the filling went underneath, so the crust was right up against the top… explain that one to me. I was mad! I am going to try this again. I really am. Maybe soon you can just make all my pies for me. Please?

  4. Freida on August 4th, 2008 7:44 pm

    I’d say you got it pretty good. The saran wrap is defintely not a quirk. I do that too, altho I use wax paper. Probably not much difference. Looks good. Puts me in the mood for pie again. I should do your peanut butter pie.

  5. Kay on the farm in Neb on August 5th, 2008 4:51 am

    Do you have trouble with the dough developing gluten by mixing the water in quickly? I was taught to always “gently” toss the flour/shortening (yes an “e”) with the water, a tsp at a time. Next time I’ll just dump and stir.
    Peaches are coming into the stores now. Colorado peaches…mmmmmmm

  6. Jan on August 5th, 2008 5:52 am

    Thank-you! I’ve been wondering how to make a buttery pie crust, like I’ve had elsewhere. Bingo: butter Crisco! I’ve been getting hungry for pie and will try this one out. My crust recipe works, but I never was quiet satisfied b/c it wasn’t buttery.

  7. Cordy on August 6th, 2008 8:07 pm

    Your kindness just blesses me! Thanks SO much Kay!

  8. Suzanne on December 28th, 2008 6:12 pm

    I don’t know if you guys have done this, but with the extra pie crust clippings, my grandma always (and to this day still does), takes the leftovers and rolls them out into an oval-type shape. She then sprinkles cinnamon sugar on it and rolls it up. She calls them “roly-polies.” They are almost as good as her pie!

  9. Rhoda on June 16th, 2009 7:54 am

    I used to work at a bakery and we would always insert another pie pan on top of the crust and then bake it…an easy alternative to the ‘beans’ you were talking about. i never heard of using the beans. what do the beans do? I still use the extra pie pan inserted on top of the crust when i bake my own crusts.

  10. Ashley Nicole on August 25th, 2009 7:45 am

    Hey SuzAnne. I always do that w/ my pie crust. Thats my favorite part when it comes to making pies. Thankyou Kay for this recipe. I used it last night and it turned out perfect. It was easy too.

Peanut Butter Pie!

Posted on August 2, 2008
Filed Under Pies

I get cravings for this pie. And it’s so easy to make. And you can make it and put it in the fridge and it cools down and firms up in less than 3 hours. I’ve already got the craving in the morning, made it, and had a piece for lunch. Mmmmm, now I’m thinking afternoon snack today…

This recipe comes from the Derstine cookbook. But I skip the meringue. Meringue on peanut butter pie?! No way! What’s crazy is that most regular peanut butter pie recipes have meringue. One time I tried it and it just seemed really weird. Maybe because Mom always made it without the meringue. I guess people put it on because the filling takes egg yolks and then what do you do with the eggs whites?

I should actually study up on eggs a bit. When I make something that takes yolks only, I throw away the whites. When I make something with whites only, I throw away the yolks. I do wonder how long yolks or whites would last in the fridge if I’d save them. And I also wonder about freezing them… on that laminated substitution chart that I have (part of it is posted here), for the “when you’re out of eggs” part, one of the substitutions is 3 Tbsp + 1 tsp thawed frozen egg. Probably they would only work in baking or cooking. I’m out of eggs right now and couldn’t even make pancakes this morning! And I can’t even make that peanut butter pie that I’m craving! Oh, hey, speaking of peanut butter pie…

pb-pie6.jpg

Peanut Butter Pie

Printable recipe

1/3 c. peanut butter
3/4 c. powdered sugar
1 9″ baked pastry shell

Filling:
1/3 c. flour
1/2 c. white sugar
2 c. milk (always use whole milk, it turns out much better)
2 tsp. butter
1 tsp. vanilla
1/8 tsp. salt
3 egg yolks, slightly beaten

Combine filling ingredients and cook in heavy saucepan over medium heat until thick, stirring often.
pb-pie1.jpg

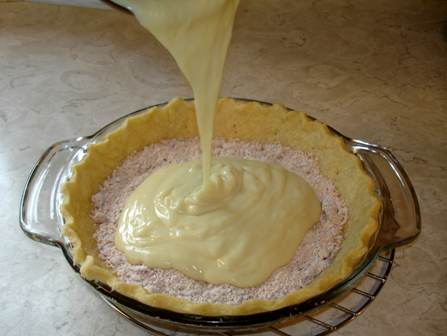
Blend peanut butter and powdered sugar. Sprinkle 2/3 of mixture into baked shell. Pour filling on top.
pb-pie2.jpg

Sprinkle with remaining peanut butter crumbs.
pb-pie3.jpg
I think I’ll just leave the meringue details off of here because I’m afraid then you’d be tempted to make it with the meringue.

Note of interest: That picture up there where I’m pouring the piping hot filling into the crust was taken at 8:54 a.m. on July 10. And this picture was taken at 11:39 a.m. on July 10. That’s how fast it cools down and sets up!
pb-pie5.jpg 

I won’t clutter this post with it, but sometime I want to feature making a pie crust, how I do it anyway. I’m not a pro and don’t really have secret tips and techniques, but they don’t shrink and they taste fine. I counted up what I can remember and I’ve rolled out about 20 pie crusts in the last 2 months, and enjoyed every minute of it. Most of those pies were for bake sales, we don’t eat THAT much pie! Two of those pies were peanut butter pies, um… not for bake sales. But I did give one of them away. I made one to go with a meal for a new mom and then got home and was feeling like I had slighted myself by not getting to eat any (I could not figure out a way to take a piece without her noticing it, that’s what’s nice about bars… you can bake a panful, put them out on a plate, snitch a few, and the recipient will never know ???? ). So, anyway, this no-peanut-butter-pie-for-me thing was still bugging me the next day, so I made one for me… the very one that’s featured above.

———————————————————————————————-

Edit: (This will make more sense if you’ve read the comments on this post.) I tried peanut butter pie with Cool Whip…
pb-pie-cool-whip.jpg

It was great. It added something to the looks of it. I still prefer the taste of it without the Cool Whip though. I’ll put it on now and then, especially if I’m taking it away somewhere. But if I’m making it to settle a craving for me, it’ll be without. Richer-looking: WITH. Richer-tasting: WITHOUT. That is, of course, just my opinion. :)

Comments

15 Responses to “Peanut Butter Pie!”

  1. Nancy on August 2nd, 2008 11:13 am

    I’m not sure about egg yolks but I did freeze egg whites. Then I make angle food cakes. I do enjoy your recipes and trying then out. Thanks! Nancy

  2. Shannon on August 2nd, 2008 11:19 am

    I’m hungry for pb pie! Maybe I should make one for tomorrow. Can’t wait for the pie crust details. I’m a looser on that one!!!

  3. Michelle on August 2nd, 2008 12:51 pm

    Hmm… I’ve never heard of putting meringue on peanut butter pie. I think that would ruin it. I noticed that you didn’t top the pie with Cool Whip. Around here peanut butter pie always has cool whip on top. You should try it sometime. It’s delicious!

  4. Lisa@The Cutting Edge of Ordinary on August 2nd, 2008 1:51 pm

    That looks great. I’m surprised that the peanut butter didn’t make it look more, well peanut buttery. The paleness of the pie wasn’t what I was expecting. Oh well, as long as it tastes good!

    Speaking of tasting good, I’m getting ready to make your Butter Pecan Turtle Bars in a bit. Check my blog later to see how I did! Thanks for that recipe. My husband can’t wait to try them.

  5. Amber on August 2nd, 2008 2:48 pm

    I was going to say, “you missed the Cool whip”, but someone’s beaten me to it. :) Definitely needs cool whip under those top crumbs! Awesome!

  6. Kay on August 2nd, 2008 4:55 pm

    Hey, c’mon you guys! I cannot believe you wreck peanut butter pie w Cool Whip! :) Really though, wouldn’t that kinda dilute the wonderful peanut butter/vanilla pudding taste?

    I’m actually going to make one this weekend (it is about time for another one around here, the last one I had was nearly a month ago! :)) and I’m gonna put Cool Whip on it, then taste it with an open mind. ????

  7. Angela on August 3rd, 2008 12:35 pm

    It looks delicious, but I’ve stopped copying new dessert recipes awhile ago. Jeff doesn’t care for sweet things (he’s missing a gene somewhere I think . . !) so I’m the one that ends up having to eat most of it. I guess we’re better in the long run; I am a meat and veggies kind of girl.

  8. Monica on August 3rd, 2008 6:10 pm

    Mine’s gotta have Cool Whip, too! Then top with crumbs. Yummy! Wish I had some right now!

  9. Carmen on August 3rd, 2008 6:42 pm

    This was a specialty of my Mom’s, although she did always put the meringue on it. It is also a favorite of one of my cousins. I want some now!!

  10. Cordy on August 3rd, 2008 6:49 pm

    Sounds wonderful…..I’ll wait until the pie crust instructions come! Please don’t wait too long!!

  11. Katrina on August 4th, 2008 7:56 am

    My husband is a peanut butter pie finatic! Another quick tip is to just use 1 large box of instant vanilla pudding. (I never tried making my own, but I can only imagine it flopping.) I add the cool whip as well and then garnish the top with chopped/broken peanut butter cups along with the crumbs.

  12. JoAnn on August 4th, 2008 2:34 pm

    I’ve never had it without the Cool Whip, either. Trust me, it’s really good! That’s my favorite kind of pie–right up there with Shoo Fly Pie!
  13. Jo on August 4th, 2008 6:20 pm

    I’ve frozen egg yolks and whites and they’re fine. The first thing that comes to my mind to make with them is noodles and angel food cake. And by the way, whites will last a looong time in the freezer. My mom-in-law had some in the freezer for quite a few years and made some angel food cakes and they were fine.
  14. Twila on August 5th, 2008 6:36 am

    Oh, please don’t throw those egg whites away! I freeze mine, too, until I have enough for an angel food cake. Maybe you could mail them to me! We love angel food cake, and the mixes just aren’t as good as from scratch.

  15. Elaine on September 28th, 2008 4:20 pm

    I’ve made a version of this peanut butter pie for about 40 years. My recipe differs in that I use cornstarch, not flour, in the filling…….. and I always top it with meringue!! That’s what makes this version so delicious. I cannot imagine serving a homemade cornstarch pudding-style pie without homemade meringue. Some of the remaining peanut butter/10X sugar mixture gets sprinkled on the meringue before baking…..beautiful when it comes out of the oven. When I make this again, I’ll remember your suggestion of sprinkling part of the pb/sugar mix on top of the custard. Thanks for such an interesting blog.

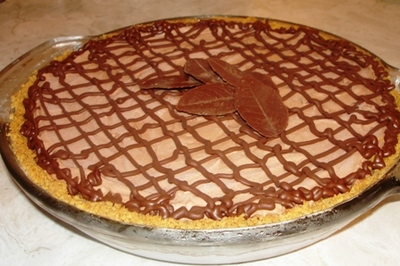
Silk Chocolate Pie with Chocolate Curls

Posted on July 21, 2008
Filed Under Garnishing, How to…, Pies

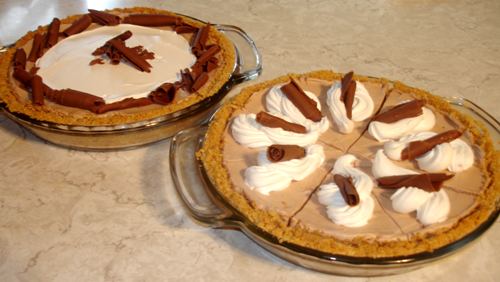
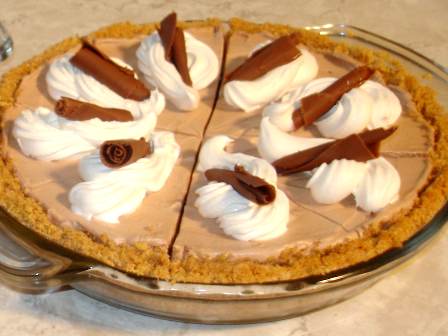
Silk is right. I wonder whoever came up with that term for pie. But it fits this one. Smooth as silk. And creamy and light. Light as in not heavy, not light as in diet. Far from it!

My grandma always said that she likes to make pies better than she likes to eat them. That doesn’t mean that she doesn’t like pie! Sometimes while I’m making pie, I wonder if I have reached that same status now. Then, I eat a piece and decide I’m not quite there yet. BUT, this pie may have been an exception. Not that the pie itself was so fun to make. The fun was in the garnishing… chocolate curls.

silk1.jpg

This recipe is taken from my newest cookbook… Simply with Taste. I got it about a week ago. I love it! Sometime, I’ll tell you more about it and its nice features. This silk chocolate pie is the first recipe I tried from it.

Silk Chocolate Pie

Printable recipe

1 pkg. (4 oz) Bakers German sweet chocolate
2 Tbsp. milk
6 oz. cream cheese, softened
1/4 cup milk
3 Tbsp. sugar
4 cups whipped topping
2 baked or graham cracker pie crusts

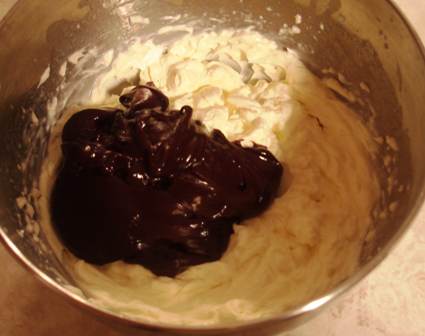
Microwave the chocolate along with the 2 Tbsp milk on high at 20-30 second intervals until chocolate is melted, stirring frequently. Beat the cream cheese, sugar, and 1/4 cup milk until smooth; add the chocolate
silk3.jpg
and mix until well blended.
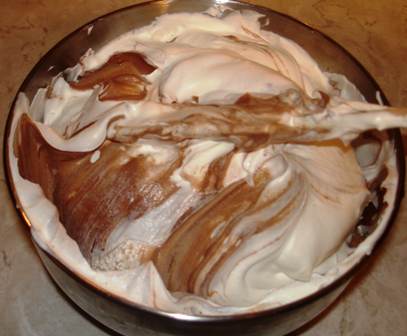
Refrigerate for 10 minutes. Fold in the whipped topping.
silk5.jpg

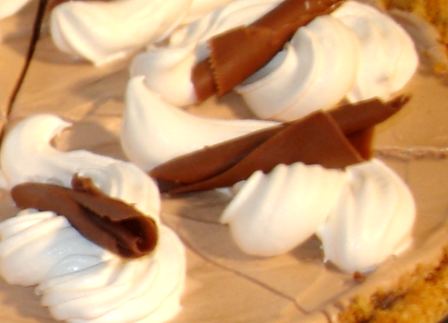
Spoon into the prepared crusts. May freeze if desired, or use within a day. Top with whipped topping and chocolate curls for garnish.
silk13.jpg

silk2.jpg

silk12.jpg

And now for the fun… How to Make Chocolate Curls

silk9.jpg

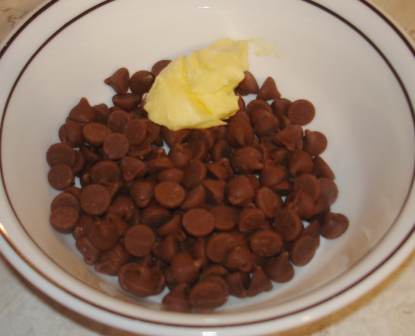
Melt about a 1/2 cup chocolate chips w about 1 Tbsp. of shortening.
silk7.jpg

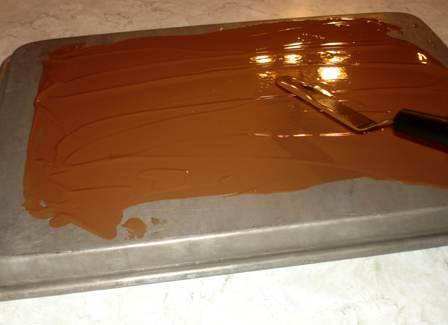
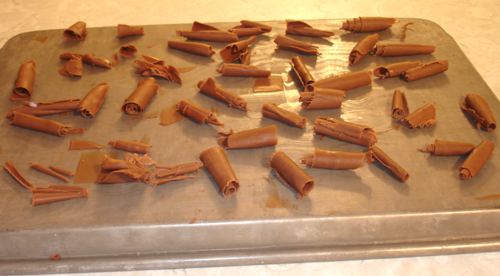
Spread into a thin layer on the back of a metal cookie sheet.
silk8.jpg
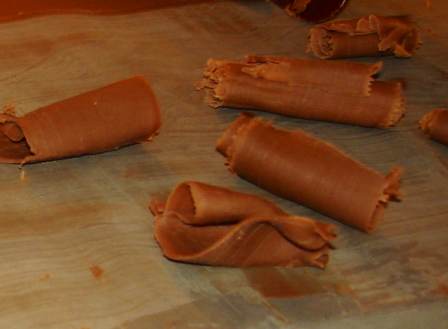
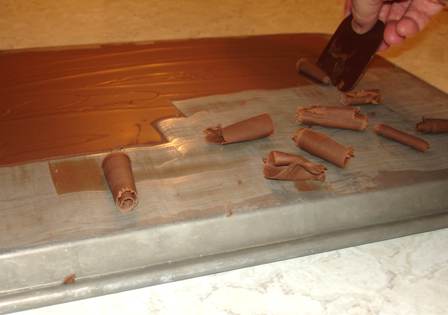
Put in the freezer for 3 minutes. Take it out of the freezer. Immediately, take a flat tool of some sort (I used my Pampered Chef little square scraper that’s actually for cleaning stoneware, I use that little thing for alot of stuff!) and hold it at about 45 degrees and push down and across the baking sheet. The chocolate should curl right up.
silk10.jpg

silk11.jpg

If it just breaks, wait a minute or 2 to let the chocolate soften, then try again. If it doesn’t curl, put it back in the freezer for another minute or so. Depending how long it takes to curl all the chocolate, you may have to put it back in the freezer to harden up again before you’re done. Use a toothpick or utensil of some sort to move the rolls to a plate and put them in the refrigerator. When they’re good and hard again, you can put them in a plastic bag and store in the refrigerator. Or you can just put them on the pies like I did.

Comments

5 Responses to “Silk Chocolate Pie w Chocolate Curls”

  1. Shannon on July 22nd, 2008 7:52 am

    Oh those look good even if I’m not sure I would eat them. :)

  2. Rosalyn on July 22nd, 2008 10:00 am

    This is making me really hungry right now! think I’ll have to make it for supper! ????

  3. Michelle on July 22nd, 2008 11:13 am

    Looks delicious!

  4. Katrina on July 22nd, 2008 5:47 pm

    YUM!

  5. Barb on July 23rd, 2008 9:50 am

    This pie looks really good, and the chocolate curls look fun to try.
    I don’t think I have ever tasted or made silk pie so I will have to try this.

    P.S. I finally updated my blog.

Mini Cherry Pies – Cooks in Training #1

Posted on July 1, 2008
Filed Under Cooks in Training, Pies

Ok, we’re going to have 2 dessert posts in a row. But I’m fine with that… you know the saying, “Life is uncertain, eat dessert first”. And when Lexi tries to talk me into letting her have 2 cookies right before supper and I tell her to wait till after supper because she won’t be hungry and she reasons ‘But if I wait till after, I might not be hungry for the cookies and I’d rather eat the cookies now and not be hungry for the chicken and stuff for supper’, I see her point and actually agree with her. There are very few foods that I like better than cookies. So, yeah, she got that honestly… the willingness to ‘wreck’ a meal by eating dessert first. Which isn’t wrecking the meal at all because the cookies are better than the meal.

In case you’re getting worried, we don’t actaully eat dessert first around here. We just discuss it. I actually don’t usually even make dessert at mealtime because we’re often too full for it anyway. So our cookies and pies and milkshakes and stuff are more often an evening snack for us.

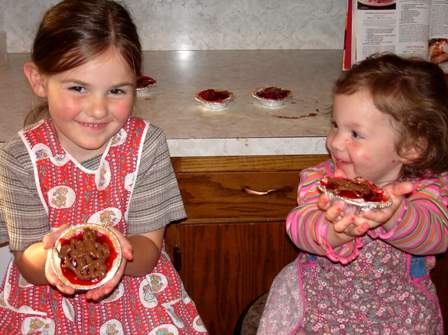
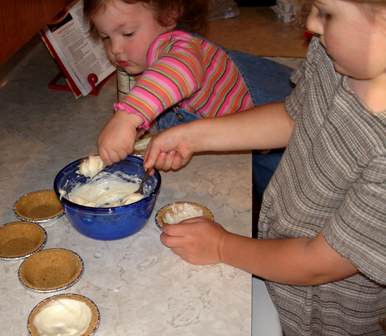
With this post, I’m starting a series called “Cooks in Training”. Guess what that is… anybody have little people in the house? Do our weekly recipe with them. They’ll love it! And you actually will too, just relax and picture the worst case scenario and hopefully you’ll be pleasantly surprised that it didn’t go too bad. :) My main job was using a rag before the messes took over my kitchen. Lexi (5) and Tiffany (2) did all the work except for the little bit that I did to show them how to do it. I’m not sure how long this will last as being weekly… hopefully I’m not burned out by the 3rd week!

We were grocery shopping one day and Lexi saw some cute little pre-made graham crusts in a pack of 6. She did a sharp inhale and exclaimed, “Mom, look at these sweet little pies! Can we get them?” They were really cute. And only $1.25 for 6 crusts, so I quite easily gave in. Here is what we ended up doing with them:

tarts1.jpg

Mini Cherry Pies

Printable recipe 

4 oz cream cheese, softened
1/4 cup sugar
1/4 tsp. vanilla
1 1/2 cups cherry pie filling (or filling of your choice)
1/2 cup chocolate chips, melted
6 Keebler mini ready-made graham cracker crusts

Beat the cream cheese, sugar, and vanilla till smooth. Spread on bottom and up sides of each crust.
tarts2.jpg

Between this step and the next step, “Oh! We forgot our aprons. Mom, just wait. We have to go get our aprons. C’mon Tiffany.” Their aprons were made for them by their Great Grandma, the one who makes THE BEST brown sugar pie

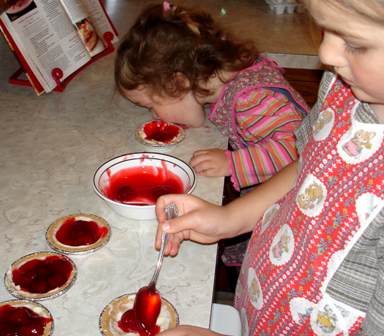
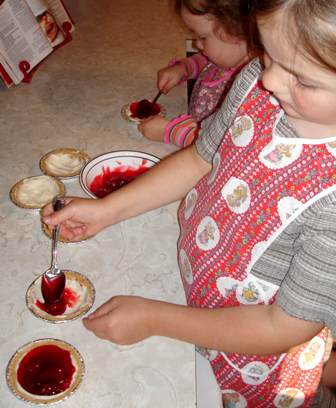
Put about 1/4 cup pie filling on top of cream cheese mixture.
tarts3.jpg

tarts4.jpg
And if any filling would happen to miss the crust and land on the counter, just lick it up. —————————————————————————
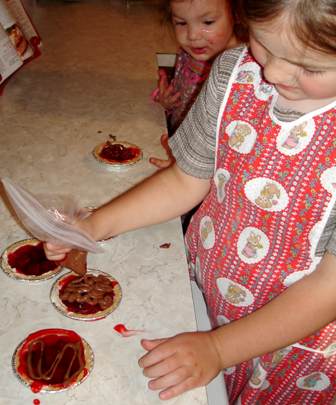
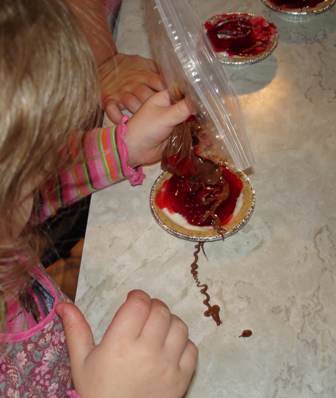
Melt chocolate chips and put in plastic bag. Cut off one corner and pipe the chocolate onto the filling.
tarts5.jpg

tarts6.jpg And, uh, try not to let the bag drop into the pie. That would get cherry filling on the bag and then might get your hand messy.
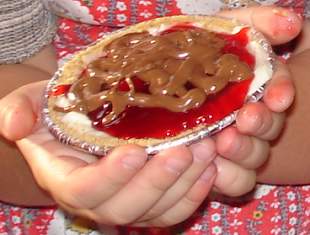
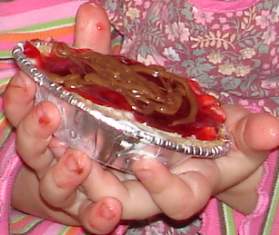
tarts7.jpg   tarts8.jpg

Chill for an hour or two. Eat. They tasted great!

Comments

3 Responses to “Mini Cherry Pies – Cooks in Training #1”

  1. Barb on July 2nd, 2008 12:08 pm

    I Love your website,I’m from Illinois and it sounds like we have a lot in common I Love baking I have a daughter Courtney 10 yrs old and likes to bake, although her idea is she does the baking and Mom cleans up. I’ve been up since 2 o’clock this morning and made 9 doz. cinn rolls a batch of cookies, my friends call me crazy i call it relaxing,I want to make these little pies with Courtney sometime,she is Daddy’s girl the next 2 days he drives truck. Hey keep the recipes coming I love it

  2. Sorina on July 3rd, 2008 6:05 am

    I like the sound and look of this. I shall mark this on my to do list.

  3. Jes on July 3rd, 2008 10:54 pm

    I get pretty frustrated when I try to cook with my kids (3 and 2yr. old boys!) but I need to do it more! I will be checking this often for some good, fun ideas to do with my little ones! Thanks so much for sharing! Love it!!

Desserts just don’t get much better than this…

Posted on March 23, 2008
Filed Under Desserts, Pies

I’m featuring a fudge sundae pie today that is just tops. One glance at the ingredients and you’ll see why you can’t go wrong here. There are not alot of recipes that each separate ingredient would be good by itself. I am, in fact, eating a piece right now. I’ll be taking a bite every couple sentences. I don’t usually eat at the computer, but I make exceptions now and then.

I remember Mom making this when I was still at home. And I’ve seen this recipe now and then in different cookbooks. The cookbook I used for it this time is Cooking with the Horse and Buggy People. It says the recipes were shared by Amish ladies from Holmes County and Wayne County. So, you readers from there, here you go, a recipe from your neck of the woods…

Fudge Sundae Pie

1/4 cup corn syrup
2 Tbsp. brown sugar
3 Tbsp. oleo (oops, what I said about each ingredient tasting good by itself, I take that back here, forgot about the butter when I said that!)
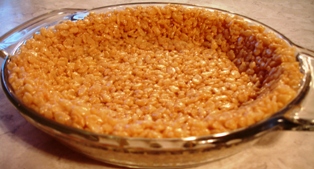
2 1/2 cups Rice Krispies

Combine syrup, sugar, and oleo and cook over low heat until mixture begins to boil. *Another bite* Man, this stuff is good!!!
fudgepie1.jpg
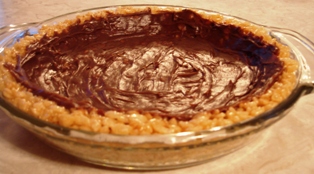
Remove from heat and add Rice Krispies. Press evenly in greased pie pan.
Mix:
1/4 cup peanut butter
1/4 cup fudge sauce
3 Tbsp. light Karo (I used the same stuff as the corn syrup above)

fudgepie9.jpg I actually didn’t know what they meant by fudge sauce, but I thought I couldn’t go wrong with this, so this is what I used.

fudgepie2.jpg
Spread half of mixture over crust.
fudgepie3.jpg
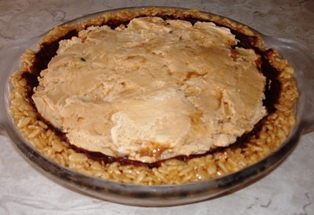
Spread 1 quart vanilla ice cream over mixture. Ok, I usually try to follow recipes exactly so I can feature them accurately, but once in awhile, I just can’t help but substitute, like now… Caramel Collision ice cream won over boring vanilla ice cream here.
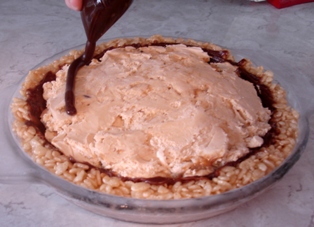
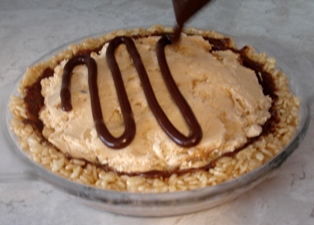
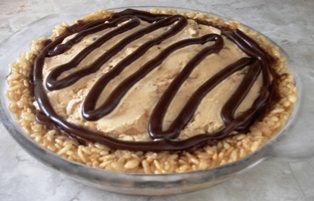
Freeze. Before serving, warm remaining sauce and drizzle over the top.
fudgepie4.jpg It didn’t exactly drizzle (and I warmed it till it was bubbling), so I put it into a baggie and snipped the corner off and piped it on. Maybe I used the wrong ‘fudge sauce’.

fudgepie5.jpg

fudgepie6.jpg

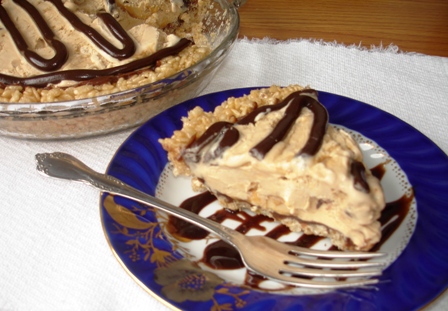
fudgepie7.jpg

All I can say is YUM!!!
fudgepie8.jpg

Comments

8 Responses to “Desserts just don’t get much better than this…”

  1. Shannon on March 23rd, 2008 7:07 pm

    I think I might try it and leave out half the chocolate. :) I know, call me crazy! :)

  2. Sharon on March 23rd, 2008 9:29 pm

    “and I’ll take a bite every couple sentences…” Do you have insurance to cover all the ruined keyboards from the drool? !! I even felt like licking the screen–don’t tempt me like that! ????

  3. Christy on March 24th, 2008 8:38 am

    Yum, I love ice cream pie! I have one recipe that has a little peanut butter in the crust and in the fudge sauce. My mom sometimes makes it w/ out the chocolate and tops it w/ fruit. I prefer the chocolate, though.

  4. Carol on March 24th, 2008 10:25 am

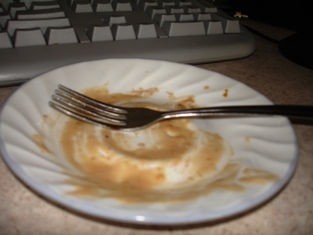
    So perfect to have the empty plate by the keyboard at the end of the post!!!

  5. Heidi on March 24th, 2008 9:15 pm

    yumm this looks so good! where do you find oleo? is that with like the shortenings and stuff? can you get it at walmart?

  6. Kay Martin on March 24th, 2008 9:20 pm

    I actually substituted butter for the oleo. I should look and see if I can find oleo at the store. Hmmm, wonder what the difference is. Research project for me… :)

  7. Marilyn Martin on March 27th, 2008 7:06 pm

    That looks wonderful! Can’t wait to make it!

  8. Andy Lawrenson on March 29th, 2008 7:27 am

    Hey,

    I’m making this one very very soon! Looks great!!

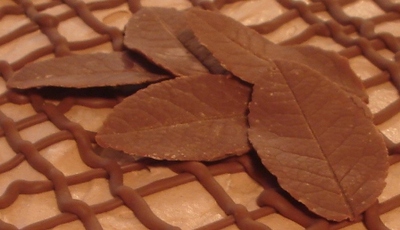
Let’s make some Chocolate Leaves!

chocleaves3

You’ll notice that I’m doing this because I get a kick out of it, not because I’m refined, elegant, and professional!   First of all, I should’ve got my husband to do the photography instead of someone less than 4′ tall. But, I picked on the one who was sitting on a barstool with her face within a foot of my project, asking questions and wanting to help. Can’t blame her… at 4 years old, I’d have been dying to be turned loose with a paintbrush, melted chocolate, and leaves… paint, lick, paint, paint, lick…

I’ve made chocolate leaves only once in my life… just last weekend. So, if you’ve made them twice, you’re more experienced than me.

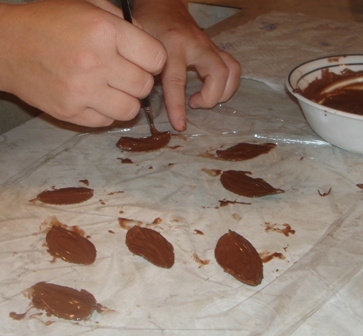
I went out to my rosebush (if you  DON’T know me, you’re picturing something with beautiful pink roses hanging all over it, aren’t you? And if you  DO know me, you’re thinking, “Huh?! You have an ALIVE rosebush?!”, aren’t you?)… anyway, I went out to my rosebush and picked 8 leaves off, brought them in and washed them under running water, and patted them dry with a paper towel. Then I took a paintbrush (everything else that’s actually a kitchen tool looked too big and cumbersome) and spread melted chocolate on the bottom side of the leaf.
chocleaves1
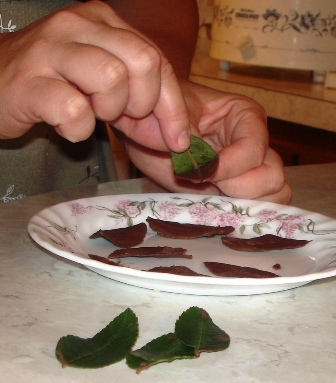
I just let them harden a little at room temp, then put another coat on and put them in the fridge to harden. Then, I got them out and peeled the leaves off…
chocleaves2
When they were done, we were awing over them and Lexi said, “Mom, they’re SO pretty! Can I eat them?” Um, let me think… “No!”
I put them back in the fridge till I was ready to use them.

Next time, I’d make them a bit thicker. It was kinda neat how thin and delicate they were, BUT I started with 8 leaves, had 3 casualties, and ended up with 5 because they broke when I was pulling the leaves off. It was fun and they looked so neat… I’ll definitely make them more often!

Have any of you made chocolate leaves before that you could give us all some more tips?

What I put the leaves on was a new recipe , so I’ll throw that in here too, while I’m at it.

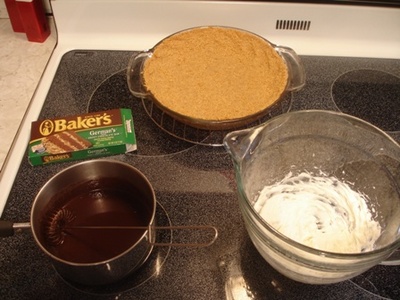
German Chocolate Cream Pie …from the 2002 Quick Cooking Annual cookbook

1 pkg (4 oz) German sweet chocolate
1/3 cup milk
1 pkg (3 oz) cream cheese, softened
2 Tbsp sugar
1 carton (8 oz) frozen whipped topping, thawed
1 graham cracker crust (9 inches)
Whipped topping, frest mint and chocolate dessert decorations, optional

In a saucepan over low heat, cook the chocolate and milk until choc is melted; stir until smooth. In a mixing bowl, beat cream cheese and sugar until smooth.
chocleaves pie1
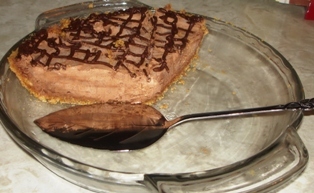
Stir in chocolate mixture. Fold in whipped topping. Spoon into crust. Freeze until firm. May be frozen for up to 3 months, just in case you could leave a chocolate pie alone for 3 months, knowing it’s right there in the freezer!
Remove from the freezer 10 minutes before serving. Garnish with whipped topping, mint and chocolate decorations if desired. Yield: 6-8 servings.
chocleaves pie2
chocleaves pie3 I had a bunch of melted chocolate left over and no more Cool Whip, so I just drizzled the chocolate over… it does need garnish of some sort, looks very plain without!

It was really good, except that I’m a milk chocolate fan, not semi-sweet. To me, this German sweet chocolate tasted just like semi-sweet. I want to try it again sometime and substitute 4 oz (or more ) of milk chocolate chips instead of the German chocolate.

Meal of recipes

I haven’t been taking much time to cook lately… just stuff like open-faced pork chop sandwiches, ravioli and applesauce, stromboli, and tonight we had baked sweet potatoes and grilled ham and salad. No new recipes and no good ones that haven’t been already featured. I’m a very sporadic cook, so I’m going into my reserve of meals that I made in a cooking streak and didn’t have time to post. Here’s one of them…

Pigs in Blankets

There are different ways of making these, but here’s how I did it…

1 can refrigerated crescent rolls
24 Li’l Smokies

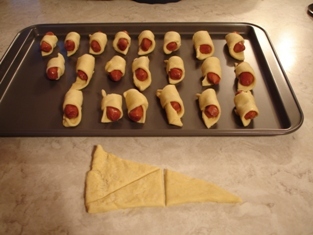
Separate rolls and cut each roll into thirds (you can also cut them in half if you like more bread per weiner, then it would be 16 Li’l Smokies instead of 24).
mealpigs1
Starting at a wide edge, roll a Li’l Smokie up in it. Put on ungreased cookie sheet. Bake at 375 for about 12 minutes.
mealpigs2 

Very good! Quick snack if company is coming. Children love ’em, too!

———————————————————————————————————————-

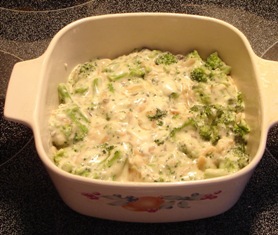
Broccoli Casserole

2 pkgs (16 oz each) frozen broccoli florets
1 can (10 3/4 oz) condensed cream of mushroom soup, undiluted
1 cup (8 oz) sour cream
1 1/2 cups (6 oz) shredded sharp cheddar cheese, divided
1 can (6 oz) french-fried onions

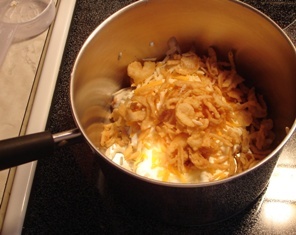
Cook broccoli according to package directions; drain well. In a large saucepan, combine the soup, sour cream, 1 cup cheese, and 1 1/4 cup onions.
mealbroc1
Cook over medium heat for 4-5 minutes or until heated through. Stir in the broccoli. Pour into a greased 2 qt baking dish.
mealbroc2
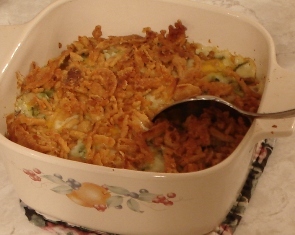
Bake, uncovered, at 325 for 25-30 minutes or until bubbly. Sprinkle with the remaining cheese and onions. Bake 10-15 minutes longer or until cheese is melted. Yield: 6-8 servings.
mealbroc3 

I made a half batch for us. This stuff is SO good!!!! I went a little heavier on the french-fried onions and also used mozzerella and reg cheddar in place of the sharp cheddar (sharp cheese is NOT my thing!).

———————————

Pudding Pumpkin Pie

1 egg white, beaten
1 reduced fat graham cracker crust (8 inches)
1 cup cold fat-free milk
1 pkg (1 1/2 oz) sugar-free instant vanilla pudding mix
1 can (15 oz) solid pack pumpkin
1 tsp. pumpkin pie spice
1/2 tsp. ground cinnamon
1/2 tsp. ground nutmeg
1 1/2 cups reduced fat whipped topping, divided

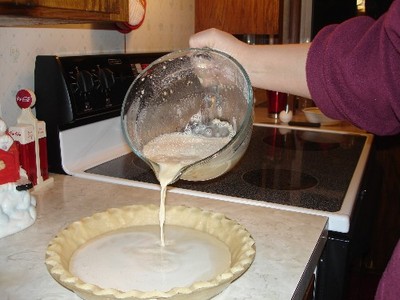
Brush egg white over crust. Bake at 375 for 5 min. or until lightly browned. Cool on a wire rack. In a large bowl, whisk milk and pudding mix. Stir in the pumpkin, pumpkin pie spice, cinnamon, and nutmeg. Fold in 1 cup whipped topping. Pour into crust.
mealpie1
Refrigerate for 4 hours or overnight. Cut into slices; dollop with remaining whipped topping. Refrigerate leftovers. Yield: 8 servings. 1 piece = 180 calories.

mealpie2(That color change is the difference between no flash and flash… it doesn’t change colors once it’s refrigerated! LOL) I couldn’t have told this was a diet pie. Could probably be made though with non-diet ingredients. It was really good! Nicely spiced. Will definitely make again!

Comments

3 Responses to “Meal of recipes”

  1. Ali on April 18th, 2008 2:17 pm

    A twist on the traditional pigs in a blanket is to use a sheet of puff pastry, cut it into thin rows, then cut from the other angle to make small rectangular pieces. Wrap around a little smokie and bake at 400-f degrees for about 17 minutes. :)

  2. Marie on April 22nd, 2008 11:06 am

    Do you think I could use asparagus instead of broccoli for the broccoli casserole?
    I stumbled on your site and love it!I love recipes.Quick,easy,and healthy ones especially.I hope you dont mind.I am going to subscribe to you right now.LOL

  3. Kay on April 23rd, 2008 1:31 pm

    Marie,
    I very seldom cook with asparagus, but it seems like it would work. Worth a try anyway! If you try it, let me know how it turned out. :)

Grandma’s Pie

Here is my dear Grandma…
grandma

…and here is her delicious pie recipe…

Brown Sugar Pie

1 egg
1 cup brown sugar
2 heaping Tbsp flour (Grandma says by heaping, it means to heap it so much that you have about another whole Tbsp on top!)
2 cups whole milk (Grandma says ‘whole’ is VERY important!)

Beat egg good. (That’s an understatement, one of Grandma’s tips is to beat it like crazy.)  Add sugar and flour and beat some more. Gradually add milk. Pour into 9″ unbaked pie crust. As you can see, it’s very thin batter.
brnsugpie1     Bake at 350 until set, about 45 min -1 hour. Middle will be shaky. Not kidding when it says shaky… we’re talking nearly making waves when you get it out! No, but I always think ‘This will never set up!’ and sometimes it never has .
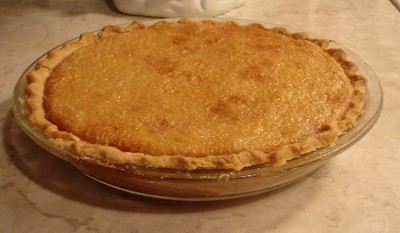
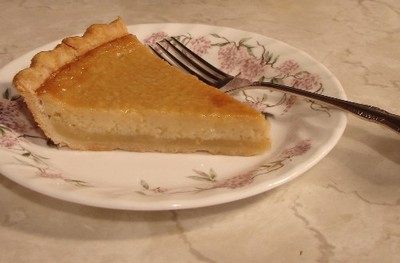
brnsugpie3Grandma’s brown sugar pies always seem so much better, just the fact that she made them and they came from her kitchen. This pie actually turned out pretty good though. It’s supposed to turn into 2 layers like you see in the piece below, that’s not a mistake! The top lighter layer melts in your mouth and the bottom darker layer is about the consistency of fudge.
brnsugpie4

So delicious! I ate one piece, then within 10 minutes, I went back for another . You should really try this… it takes very common ingredients and doesn’t take long to make. You can add Whipped Cream if you want, but that’s actually against the rule… one time at a Graber get together, one of my aunts, I think it was, was putting whipped cream on pies and put some on a brown sugar pie and got alot of hassle for it! 

Adding an edit here: Someone asked in a comment about storing it in the fridge… yes, you do. Grandma usually bakes them the same day and they cool, then we eat them at room temp. I actually think it tastes better cold, so I put it in the fridge after it cools… but I have a room temperature piece first! Oh, and you may have caught on already, but this recipe is for one 9″ pie.

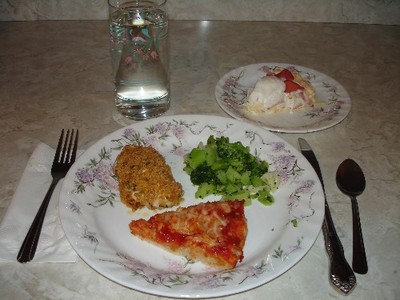
Anybody on a diet? This meal is for you!

445 calories… including dessert! Not bad!

diet meal

Garlic Chicken Kiev
Chewy Pizza Bread
Cauliflower and Broccoli
Strawberry Pie

These recipes (except the caul and broc, that’s just cooked frozen veggies) all come from Betty Crocker’s Eat and Lose Weight Cookbook . After each recipe is a chart with as much info on it as you’d find on a nutrition label. I’ll just list the calories, carbs, and protein. If you want more info than that, let me know.

Garlic Chicken Kiev

3 Tbsp reduced calorie spead, softened (I used low-fat butter, half the calories of reg butter)
1 Tbsp chopped fresh chives or parsley (I used 1/2 Tbsp of each)
1/8 tsp garlic powder
6 skinless boneless chicken breast halves (1 1/2 lbs)
2 cups cornflakes, crushed (about 1 cup)
2 Tbsp chopped fresh parsley
1/2 tsp paprika
1/4 cup low-fat buttermilk or skim milk

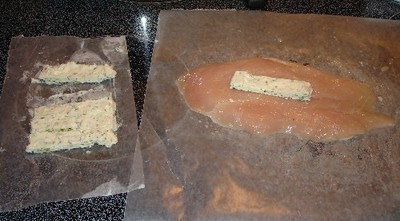
Mix spread, chives, and garlic powder, shape into rectangle, 3 x 2 inches. Cover and freeze about 30 min or until firm.     Trim fat from chicken. Flatten each chicken breast half to 1/4-inch thickness between wax paper or plastic wrap.     Heat oven to 425. Spray square pan, 9 x 9 x 2 inches, with non-stick cooking spray. Cut chives mixture crosswise into 6 pieces. Place one piece on center of each chicken breast half.
diet chic1  Fold long sides of chicken over chives mixture; fold up ends and secure with toothpick.
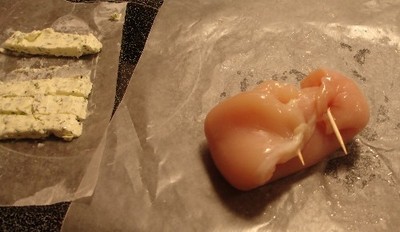
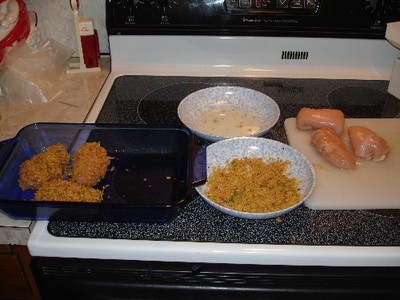
diet chic2  …yeah, as simple as that! Ha! It took me a long time to make these things and I used up to 4 toothpicks per piece! In a perfect world, chicken breast halves would all be shaped the same and be 4 ounces each!      Mix cornflakes, parsley, and paprika. Dip chicken into milk, then lightly and evenly coat with cornflake mixture.
diet chic3  Place chicken, seam sides down, in pan. Bake uncovered about 35 min or until chicken is no longer pink in center.
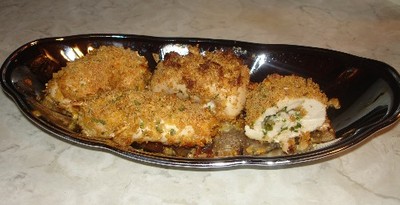
diet chic4   6 servings. Per serving: 190 calories; Carbohydrates, 9g; Protein, 25g        These tasted great! Nice and moist chicken! The fresh spices (or is it herbs?) give it lots of flavor! I’ll know more what I’m doing next time and hopefully the whole folding thing will go smoother and faster!!! Will definitely make again!
Chewy Pizza Bread

1 1/2 cups flour
1 1/2 tsp baking powder
1/2 tsp salt
3/4 cup regular or non-alcoholic beer (Since I didn’t have beer on hand, I used Diet Coke)
1/2 cup speghetti sauce
1/3 cup shredded reduced-fat mozzarella cheese
Chopped fresh basil leaves, if desired (I didn’t do that)

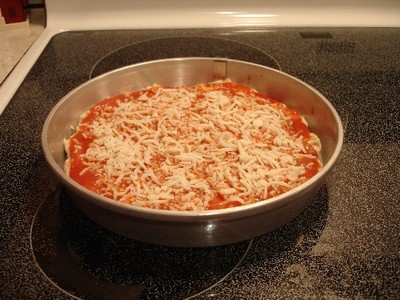
Heat oven to 425. Spray round pan, 9 x 1 1/2 inches, with non-stick cooking spray. Mix flour, baking powder, and salt in medium bowl. Stir in beer just until flour is moistened.    Spread dough in pan. Spread speghetti sauce over dough. Sprinkle with cheese.
diet bread1  Bake 15-20 min or until toothpick inserted in center comes out clean. Sprinkle with basil. Serve warm.
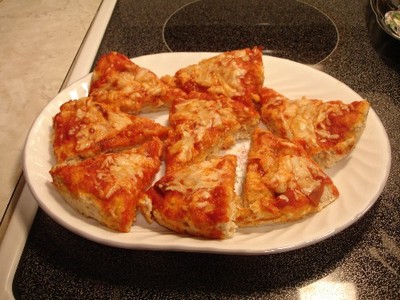
diet bread2    6 servings. Per serving: 145 calories; Carbohydrates, 29g; Protein, 4g      If you keep in mind that this is a diet dish, it’s actually very good! The problem was that there was too little cheese, but that’s diet for ya! I guess we’re just too used to stuff loaded with cheese… refer to previous post! I was surprised about this bread. I thought it would be biscuity, but it was actually more like regular raised bread, only more dense. It’s very filling, too. By the way, the Diet Coke seemed to work great as a substitute!
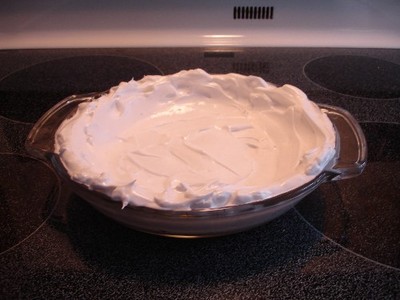
Strawberry Pie with Meringue Crust

2 egg whites
1/8 tsp cream of tartar
1/4 cup sugar
1 pkg (1.1 oz) vanilla fat-free sugar-free instant pudding and pie filling
1 cup skim milk
1 1/2 cups frozen (thawed) reduced-fat whipped topping
1 pint strawberries (2 cups), sliced

Heat oven to 275. Spray pie plate, 9 x 1 1/4 inches, with non-stick cooking spray. Beat egg whites and cream of tartar in medium bowl with electric mixer on high speed until foamy. Beat in sugar, 1 tablespoon at a time; continue beating until stiff and glossy. Do not underbeat. Spread mixture evenly on bottom and halfway up side of pie plate. I put it to the top of the pie plate instead of halfway up.
diet pie1  Bake 40 min. Turn oven off; leave meringue in oven with door closed 1 hour. Finish cooling meringue at room temperature.
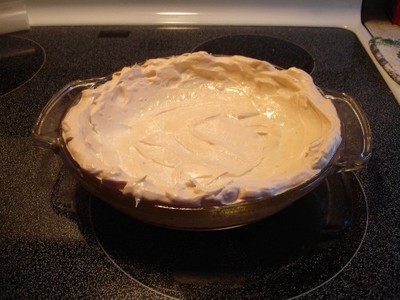
diet pie2     Beat pudding and pie filling with milk about 45 seconds, using wire whisk. Fold in one cup of the whipped topping. Layer half of the pudding mixture and half of the strawberries in crust; repeat.    Cover loosely and refrigerate till firm, at least one hour, but no longer than 8 hours. Run knife around edge to loosen crust. Top each serving with some of the remaining 1/2 cup whipped topping. I put the 1/2 cup Cool Whip on top right away and garnished it with a strawberry so that it would look more attractive sitting on the table during supper.  Cover and refrigerate any remaining pie.
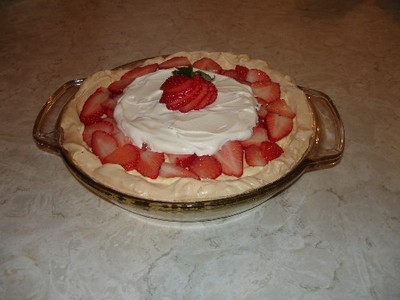
diet pie3  8 servings. Per serving: 85 calories; Carbohydrate, 16g; Protein, 2g       This is just tops (for a low-cal dessert). The crust is great (meringue goes good with this pie), but it’s not too sturdy when you try to get pieces out of the pan. It kind of crumples up with the pie server sliding under it, so you don’t really end up with a picture-perfect piece. But the taste with fresh strawberries makes up for it! Yum!
By the way, one serving of the veggies was 25 calories . Not sure of the other specs on it.

Totally “off the wall” recipes (sorry to those of you who don’t like puns… I couldn’t help myself)

Posted on January 8, 2007
Filed Under Breakfasts, Main dishes, Pies, Soups

Blueberry Muffins
Farmer’s Market Soup
Chicken Pot Pie
Apple Pie

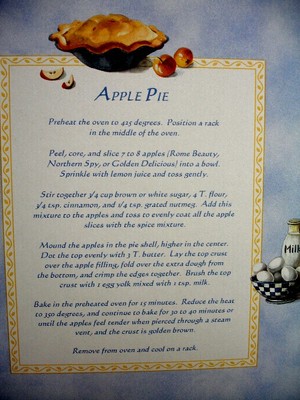
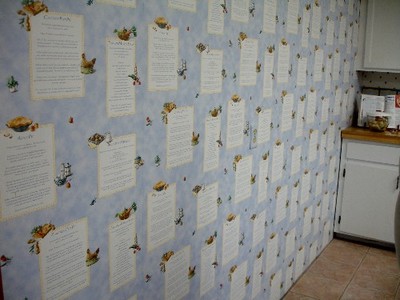
If you remember my cookie baking/candy making post, the kitchen that we were at had the neatest wallpaper!!!!
recipe wall   It was in the kitchen at Sandra’s (xsenergyo5) church. Sandra, have you guys ever tried them? The wallpaper has 4 recipes repeated on it. So, I took pictures of each recipe and made them. I hope you can read them ok… I’ll see how it looks after it’s uploaded and if I can’t read them, I’ll type them out. *Edit*…I just checked to see if I could read them and it’s a little hard, but if you click on the picture, it opens a new window that it’s bigger and more readable in.
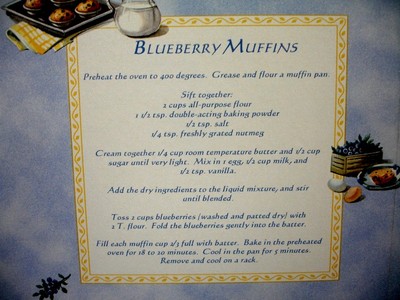
Blueberry Muffins

recipe muffins

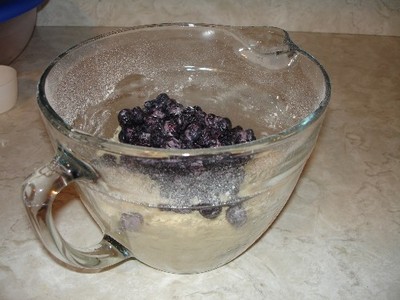
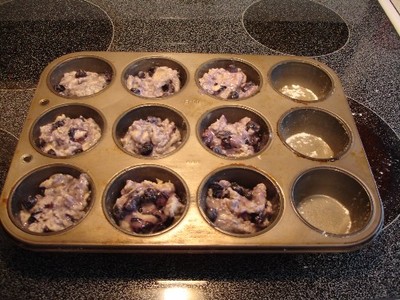
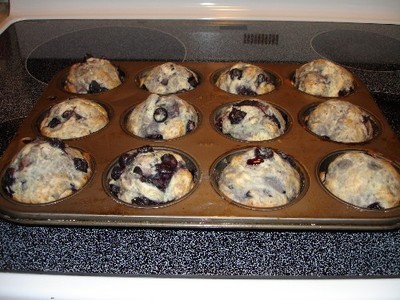
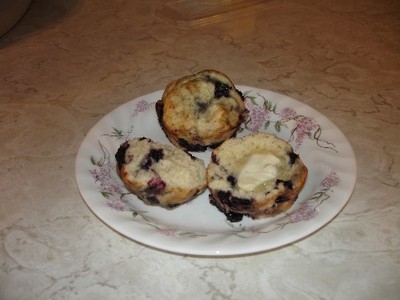
Some notes: I didn’t know what double-acting baking powder was, but my baking powder in my cupboard said ‘double-acting’ on it, so maybe all baking powder is?????    I also just used my regular nutmeg from my spices instead of getting a nutmeg and grating it for ‘freshly grated’. I used frozen blueberries, not fresh, but I think fresh would be better and not as juicy, so I want to make it sometime with fresh. The batter was more of a cookie dough consistency, which kind of surprised me, but the muffins were great!!! Some of the best I’ve had! They were moist and dense, which I like! We loved them!!! I will definitely make these again!!! Now for the pictures…
muffins1

muffins2

muffins3

muffins4

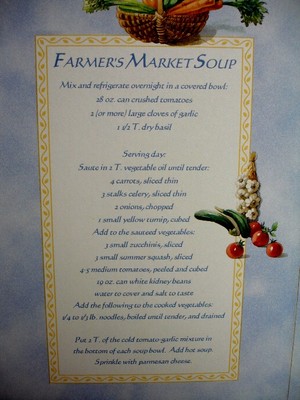
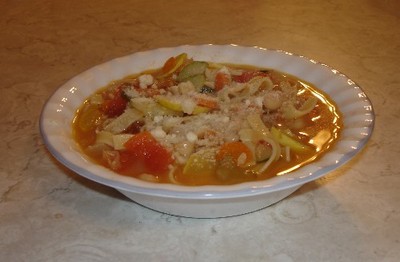
Farmer’s Market Soup

recipe soup

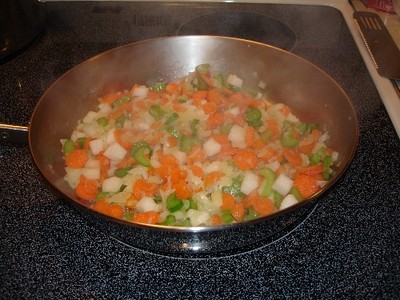
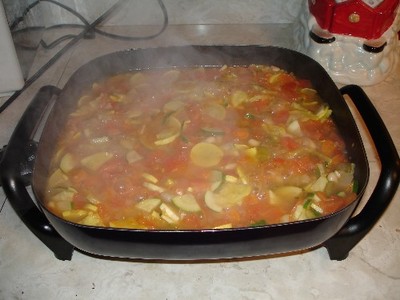
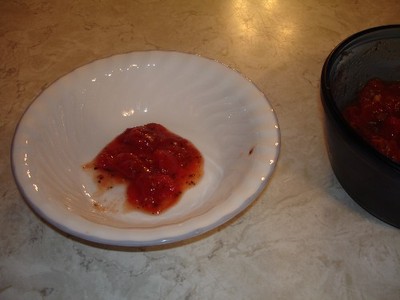
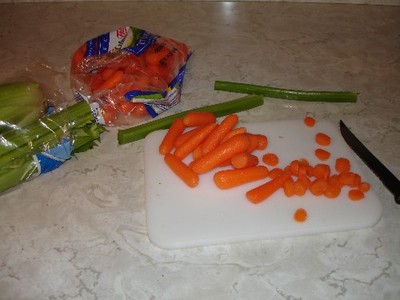
Some notes: I used baby carrots and figured 9 would equal one big one. I’ve never in my life peeled a tomato before! What a juicy mess! I put just enough water in to come up to the level of the veggies, they weren’t totally covered… that way it wouldn’t make alot of broth.  Um, now for what we thought of it… I thought it was good in a but-I’d-never-make-it-again way. I made a half batch and was glad I did because I had the whole thing to myself! It sure is healthy though!!!! It took a long time to cut up all those veggies!

soup1

soup2

soup3

soup4

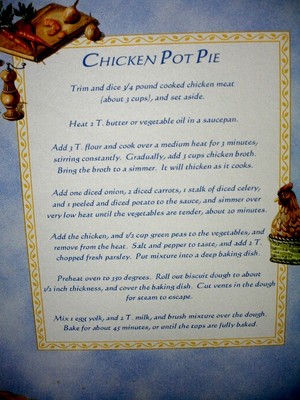
Chicken Pot Pie

recipe potpie

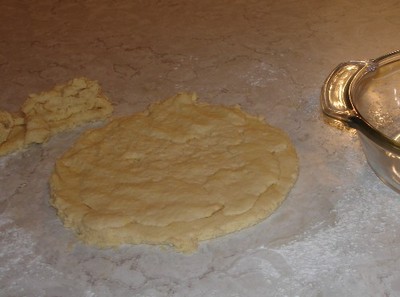
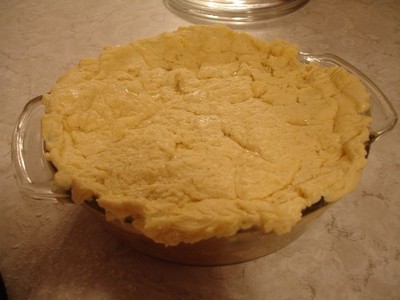
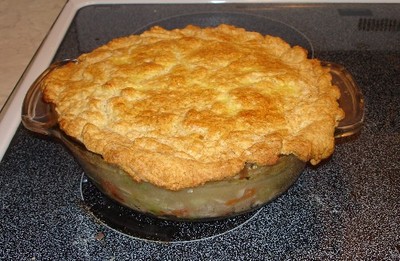
Some notes: After it simmered for 20 minutes, I thought the broth didn’t seem thick enough, so I put in an extra tablespoon of flour. I missed a picture of the chicken/veggie part of the pot pie before putting the dough on top. For the biscuit dough, I used a recipe that was very good, but it ended up sort of limp and sticky and hard to work with, so the pot pie ended up looking pretty messy. I used all but about 5 biscuit’s worth of the dough (the recipe took 2 cups of flour to give you an idea of the size batch it was), so then I just baked those biscuits and served them with the meal. We really liked this! It was good and flavorful. Not sure if I’d make it again, just simply because it took awhile to make and we don’t do much in the way of casserole-type dishes. But I would definitely recommend it!!!!

potpie1

potpie2

potpie3

potpie4   

Apple Pie

recipe pie

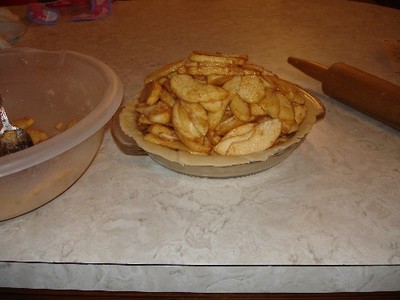
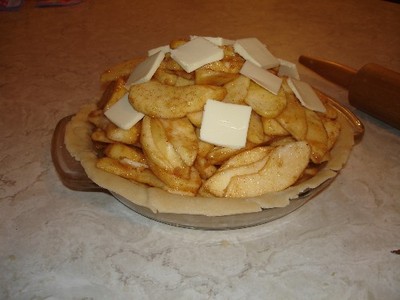
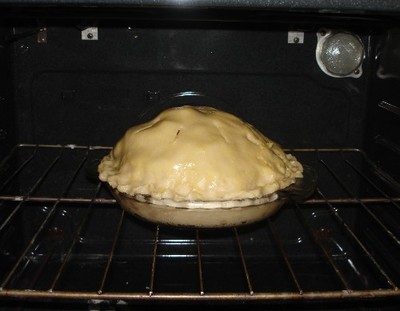
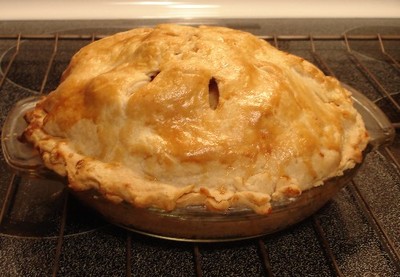
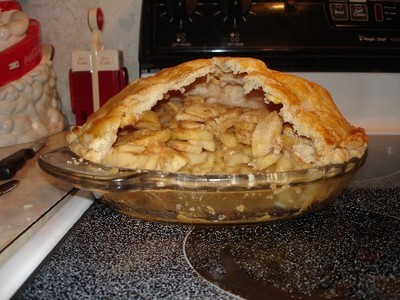
Some notes: Too many apples! I used a 9″ deep dish pie plate and as you will see, it was piled high! I cut up 8 and used probably 6 apples, and they were medium sized, not huge. I used Golden Delicious mainly because that’s the only kind I recognized (and I used to live on an apple orchard! ). I used brown sugar. Before the height of this pie scares you off, it’s not actually that huge. The crust stays up and the apples settle, as you can see in the last picture after we took a couple pieces out. This pie was absolutely tops! The winner of all the “wall” recipes! I will definitely make it again. Great flavor and so perfect warm with a serving of ice cream!!!

pie1

pie2

pie3

pie4

pie5   

subs-dessert.jpg