Wooden Baskets with Daisies Cake
Posted on March 7, 2014
Filed Under Cakes
I’m in the mood to feature a cake. I have a bunch that I’ve never put on here. Sometime, I’m going to make a separate cake section on this site. I think at some point, it could merit its own section because that’s what I picture doing in 5 years or so… cakes. Between now and then, I plan to have fun doing a few hit n miss and taking classes and tripling my cake-decorating tools/gadgets/pans supply. I want to take classes so I can prevent mistakes instead of learn from my mistakes. ???? Right now cake-making is pretty much a “wing it” deal, and while that’s worked out pretty well so far, there’s also been a lot of wincing-then-sighs-of-relief involved too. And well, yeah, some wincing-then-starting-over moments, too.
This particular cake was quite an honor. It was the FIRST wedding cake I’ve ever done. The bride-to-be knew I’m not a pro, but she trusted me anyway… uhhhh, in case you wonder, that spells p-r-e-s-s-u-r-e!!! 
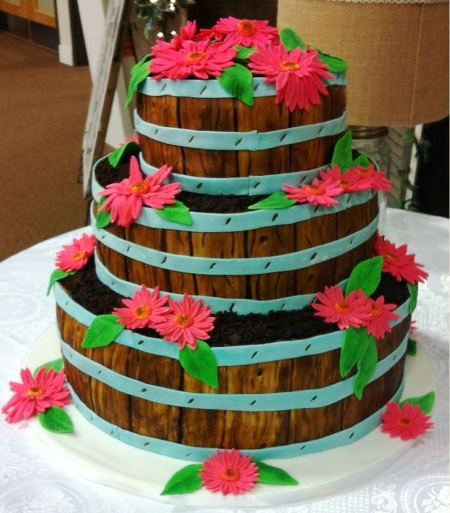
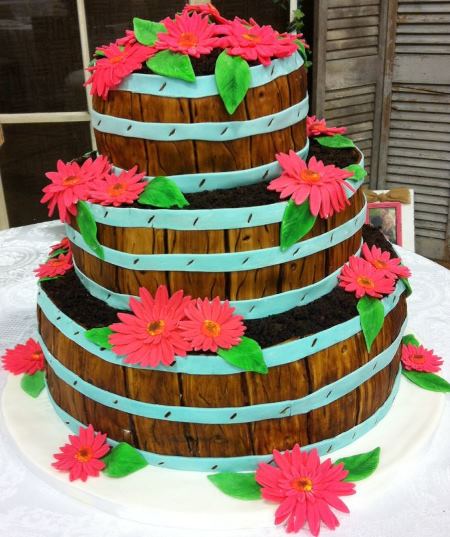
You know that whole “wing it” thing I was talking about earlier? Well, I had never done wood grain before. Nor had I ever made a cake this big (the biggest pan size I owned up to this point was a 12″ and I had to go get a 16″ pan for this cake). The bottom layer is 16″, middle layer is 12″, top layer is 8″, and each layer is roughly 6″ tall.
I didn’t take very many step-by-step pictures because I was in the cake-decorating zone and well, simply forgot. But in case you’re interested, here is the construction, then I’ll get to the fun part… the wood and flowers. ????
The bottom layer is a 3″ chocolate cake with chocolate buttercream and a 3″ vanilla cake with vanilla buttercream, each split with frosting between. When they were frosted, I put the chocolate layer on the cake board and put four 3″ dowels in it so the weight of the rest of the cake wouldn’t be on it, then set the white layer (which was on cardboard) on top. Here is a (very bad) picture of that, quickly taken before all the fondant was on.
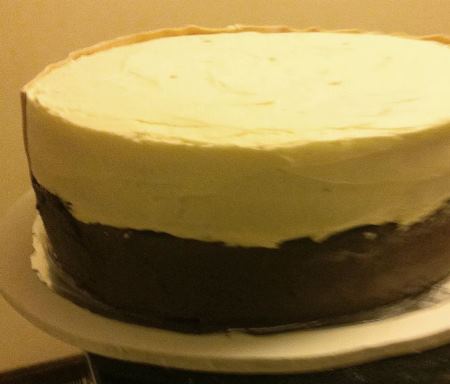
Then I put four 3″ dowels thro’ the white cake and one sharpened 6″ dowel down thro’ both cakes and the cardboard layer between them.
The middle basket is all chocolate with chocolate buttercream and is on cardboard. No cardboard between the layers, but the cake does have dowels in it for holding the weight of the top basket.
The top basket is all vanilla with vanilla buttercream and is on cardboard. No cardboard between layers and no dowels.
Now for the fun part!
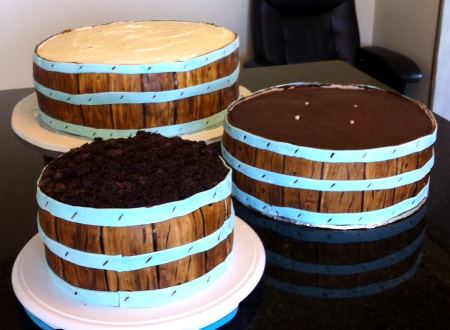
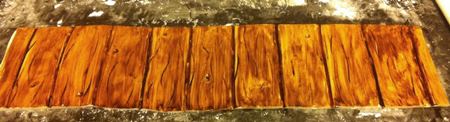
First is the wood grain. The slats may look like individual pieces, but it’s actually larger sections with multiple slats per sections. I started with white fondant and mixed in some cocoa powder to make it a light tan. In hindsight, I don’t think I would’ve had to do that step though because the “stain” would’ve covered it fine without leaving white spots when wiping it off.
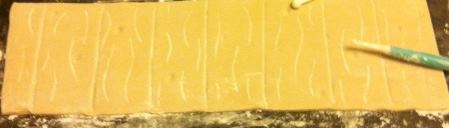
Roll out fondant. Cut it to a rectangle… length doesn’t matter, but try to get the height as close to correct as possible. Take something about 1/8″ wide and indent lines from top to bottom, these are the slats. I said “take something 1/8″ wide” so you know you can make wood grain without a well-I-don’t-have-a-decorating-tool-set excuse. ???? You can use the handle end of a small paintbrush or whatever. Next, beat it up. Give it some character. Make dents, make lines, make knots. And yes, there is powdered sugar all over the place… it keeps the fondant from sticking to the counter.
Then, mix vodka with brown food coloring paste to make “stain” to stain the wood. If you’re concerned about the alcoholic aspect, the alcohol evaporates. Plus, you don’t use much at all, so the teeny bit that would be on one piece of cake wouldn’t affect anyone if it wouldn’t evaporate. (Do NOT use water or you’ll have a mess on your hands because water becomes like glue when it touches fondant.) Get a clean paintbrush and brush the stain on. Wipe it off immediately with a clean cloth. And THAT is when the magic happens. It doesn’t look like much up to that point, in fact it looks like quite a mess. But as soon as you wipe the excess stain away, a beautiful realistic-looking-wood piece of fondant appears!
If the icing on the cake is a crusting kind, run a knife or something over it to un-crust it so the fondant will stick to it. Carefully pick up the fondant and place it around the cake. If you wait several minutes until the alcohol has evaporated, it doesn’t stick to your hands while you’re placing it on the cake and you can also loosely roll it up without it sticking together to transfer it to the cake.
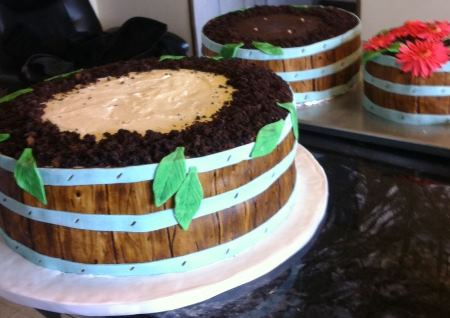
After all the wood was on, I made the bands. This beautiful blue was one of the wedding colors, which is why the bands were this color… if I’m making a basket case for just anyhow, I’d probably make the bands tan. This was simply coloring the fondant, rolling it out, cutting it into strips, wetting the back of the strips with water, and placing them around the cake. After putting each band on the cake, I did the staples. If I’d have waited to do the staples until all the bands on all the cakes were done, it wouldn’t have worked as well because the fondant on the first bands would’ve started drying out and it wouldn’t have been as easy to make an indentation. After making the indentations, I took a tiny paintbrush and painted brown food coloring inside them. Some of them got a little messy and I was sighing about it to Shannon and he said, “No, it’s great. It makes them just look rusty.” Ah, way to make lemonaide out of a lemon.
Next, I covered the visible part of the cake board with white fondant and put a white ribbon around the edge. Then, I crumbled up some leftover chocolate cake for the “dirt” and put it around the rims of the 2 lower baskets and over the top of the top basket. It looked good, but next time, I’d use Oreo crumbs… I think they’d look more like dirt, but I didn’t think of it at the time.
Then, it was time to add COLOR. Fondant daisies. Hot pink was the other wedding color, so that’s what the daisies were. Here are some of the daisies and leaves drying ahead of time. I put them on crumpled tin foil so they wouldn’t dry flat and boring.
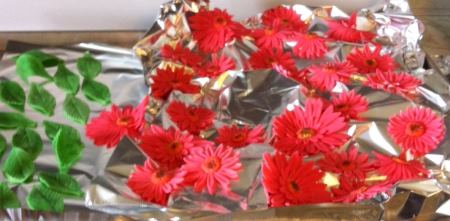
In case these look hard, they’re not. I have a flower/leaf cutter and impression set that I used… one of my happy purchases from Michaels with a 40% off coupon. I also added a bit of petal dust for a more realist look.
So, there you have it, a wooden basket daisy cake. It was challenging and a whole lot of FUN!
Comments
3 Responses to “Wooden Baskets with Daisies Cake”
Those flowers are gorgeous! I thought they were real.:) Amazing job!!!
It was good reading about the process of it! You have a talent. I hope that your dream of decorating cakes on a normal basis becomes a reality.
Wow! That is just gorgeous!