Recipes and Cooking Ideas for Homemakers and Amateur Cooks
 

It’s Valentines Day!

Posted on February 14, 2014
Filed Under For special occassions, Garnishing, Holiday cooking

Happy Valentines Day!

I’m actually not sure yet what I’m going to do for our meal tonight. Can you say “last minute”? I like to at least acknowledge Valentines Day each year with a meal, but for tonight I’m kind of thinking regular food with Valentine décor and dishes. I’m really in the mood for Parmesan Chicken and I don’t know how to make that heart-shaped without being too corny and chicken-wasting with a large cookie cutter and chicken breasts.

I’m not even sure why I said the corny part… that ship already sailed. Half of the stuff at Valentines is corny because we use our imaginations and anything goes as long as it involves hearts and red and love and “awwww”. I think you’ll see what I mean if you keep reading this post. ????

Today I’m posting a meal that I made on a previous Valentines Day. So, if you’re looking for some last minute ideas for tonight, here you go.

valentines meal

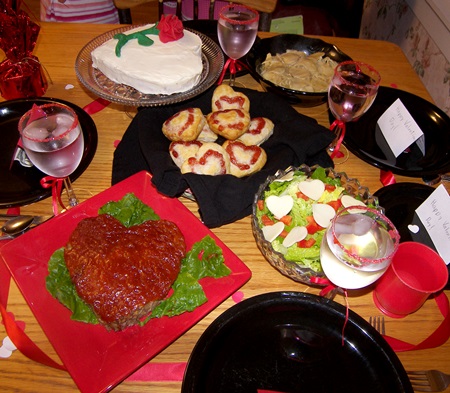
The menu was:
-Meatloaf
-Amish noodles
-Salad
-Biscuits
-Red velvet cake

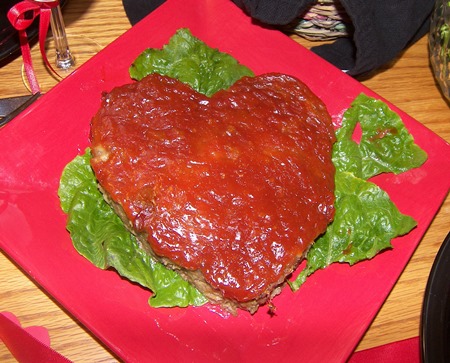
Meatloaf
I used this recipe because it’s THE *personal opinion alert* best meatloaf ever!! And I baked it in a heart-shaped pan. My mom used to always do that with meatloaf on Valentines Day.
valentines meatloaf

Amish Noodles
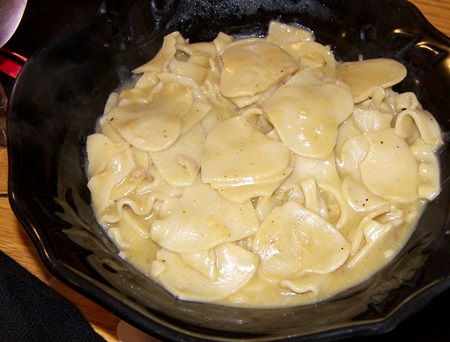
I made regular noodles and cooked a couple pieces of lasagna in with them. After it was cooked, I took a heart cutter and cut hearts out of the lasagna pieces and threw them back in with the noodles. When I dished it up, I pulled some of the hearts up to the top.
Here is the recipe for the noodles in case you’d like it:
1/4 c. butter
1 1/4qt. chicken broth
1 Tbsp. chicken base
1/2 tsp. Lawry’s
8oz. homemade egg noodles
1/3 of a can of cream of chicken soup
Brown the butter. Add the broth and seasonings. Bring to a boil. Add the noodles and cook for 10 minutes. Add the cream of chicken soup, stir, put on lid, and turn off the burner, and let set 20 minutes.
valentines noodles

Salad
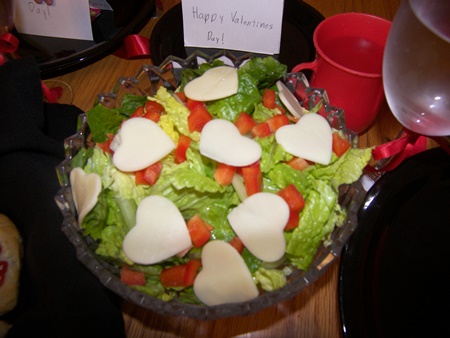
Another one from my childhood that Mom did… it’s simply lettuce salad with little heart-shaped cheese tossed in it.
valentines salad

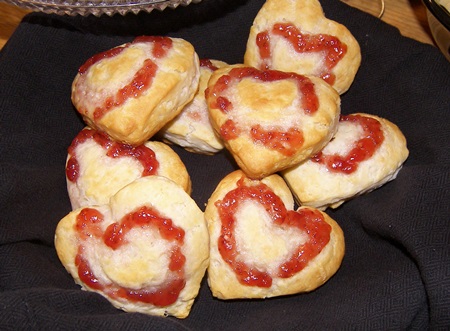
Biscuits with jam
I made regular biscuit and cut them out with a heart-shaped cookie cutter, and then just for extra color, piped a heart shape of jam on top before baking them (we ate more jam and butter with them at mealtime). The jam kind of got messed up in the baking process, but you could still tell what I was trying for.
valentines biscuits

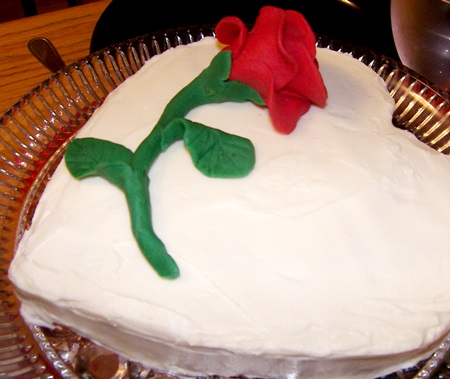
Red Velvet Cake with cream cheese frosting
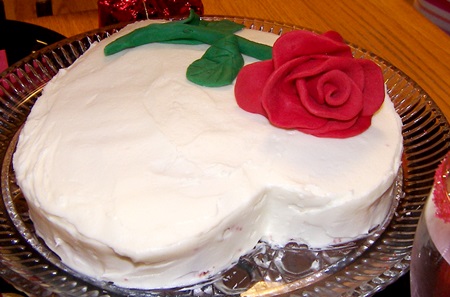
I used this recipe, made only a 1/2 recipe and 1 layer, and made it heart-shaped instead of round. The rose is red and green candy melts. The rose tutorial is here and then I just sorta winged it with the stem and leaves.
valentines rose cake

For the décor:
We put red ribbon around on the table and the girls used a heart punch to cut out hearts to sprinkle around.
We used goblets, dipped the tops into colored sugar, and tied red ribbon around the stems.
We had a red centerpiece (you can see the base of it on the first picture up there) that looked more or less like an explosion of spikes and hearts. Festive, but we didn’t end up using it because the table was too full.
Lexi sneakily made Valentines for each of us and put it on our plates.

I really wish I’d have seen this Valentine note that I made to myself earlier because now it’s too late because I don’t plan to (or feel like) going anywhere today, but here is an idea I had tucked away for this Valentines Day and just found a bit ago. I’ll put it on here though, because we’re in the Valentine mode.
Remember what I said up there about corny? Well, here’s a huge *corny alert*!
The idea was to put these on each plate:
For my husband: chocolate candy from our local bulk foods store that looks exactly like rocks, along with a note that says “You ROCK my world”
For Lexi (11): Starbursts and “I’m BURSTing with happiness that you’re my girl”
For Tiffany (7): Gummy bears with “I love you BEARy much”
For Megan: (3): Suckers or smarties or anything sweet with “You’re my little SWEETie”

Wishing all of you a wonderful Valentines Day, and thank God for all the ones you love!

valentines rose

Comments

3 Responses to “It’s Valentines Day!”
  1. Shannon on February 14th, 2014 10:29 pm

    You were created to be in the kitchen! This looks great.
    If I made a meal that looked like this my family would probably fall over. :)

  2. Jan on February 15th, 2014 5:48 pm

    We had good ol’ meatloaf, scalloped potatoes, and salad last night for supper. Nicoleta thought we should cut the lettuce out heart shaped, but I quickly vetoed that idea. Of course, the candles flickered and died partway through the meal, but the girls strongly resisted the idea of turning the lights on. We finally compromised with lights on in adjoining rooms and the oil lamp kept burning, so we made it through.

  3. Kay on February 18th, 2014 11:29 am

    Ha, Jan, I love the candle story… brings back memories of the guys lighting up their cell phone screens and propping them by their plates when we wouldn’t allow the lights on. :)

    Shannon, you are good in the kitchen too… 2 of our family fav recipes are from you (Raspberry Cream Cheese Cinn Rolls and Snickerdoodle Bars). Seriously, you’d fall over if you knew how often I make them… esp snickerdoodle bars!! Can’t believe I never featured them! Must. soon.

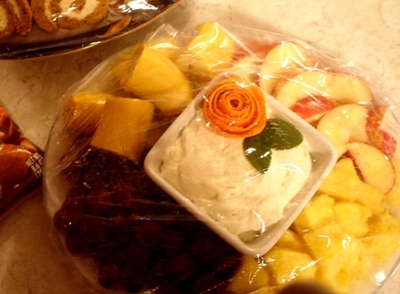
Drizzled Chocolate Fruit Kabobs, plus How to Keep Banana Slices from Browning

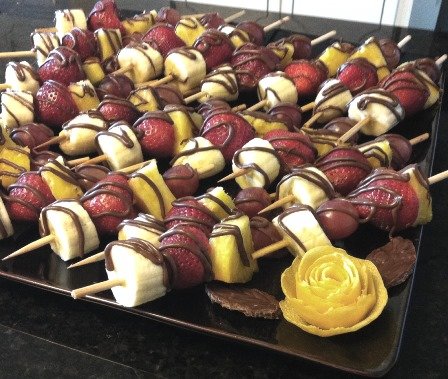
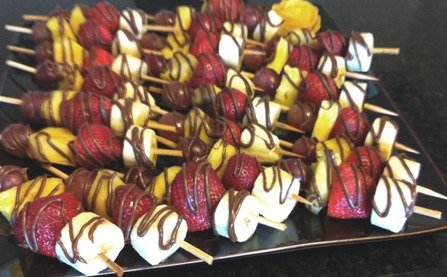
These fresh fruit kabobs drizzled with chocolate are the perfect item for adding a bit of beauty and pizzazz to the table without a lot of time-consuming work. You can’t beat that, right? So, keep it in mind next time you need to take food somewhere. It doesn’t even require a fork so it works for “bring finger food” occasions. These particular ones were made for my husband Shannon to take to a company potluck at his office at Keller Williams Real Estate.

chocolate drizzled fruit kabobs1

There is no recipe, just use any kind of fruit you want to… They all work great. Well, except apples. Apples sometimes split when you put them on the skewers. If you’re using apples, the thinner the skewer the better. Just for the record, apples and chocolate go together awesomely! Is awesomely a word? I figure as long as you know what a word means, it doesn’t really matter if it’s technically not a word. ????

Chunk up/slice all the fruit that gets chunked or sliced. Take stems off of fruit that gets de-stemmed. Toss fruits that get brown with lemon juice (more on that later).

In other words, before I start threading them on skewers, I like to have them all ready to go.
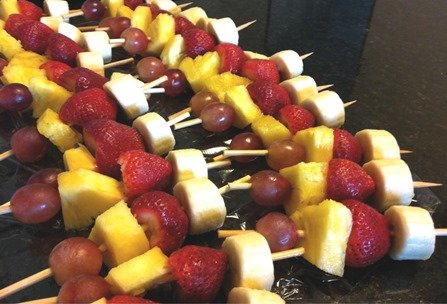
Then, start poking fruit on until: 1. Fruit is gone, 2. Skewers are gone, or 3. You have the desired amount.

fruit kabobs

After the fruit is all on the skewers, put about a half cup of chocolate chips or candy melts in a sandwich bag, but don’t seal shut. Put it in the microwave for 30 seconds. Flip it over and microwave it for 20 second. Work the bag with your hands and put them in for 10 seconds. Do this until all the chocolate feels smooth and no chunks are left.

I need to get back in my zone… that zone where I automatically remember to take pictures at each step! I was having too much fun and just kept rolling instead of stopping for pictures.

Now, you’re ready to drizzle. Put the kabobs all really close together so less drizzle lands on the table. Snip a little corner off of the bag and just scribble back and forth over the fruit. Then immediately separate them or else the chocolate will harden and pull drizzles off of its neighbor.

Put them on a plate. Garnish if you want to.
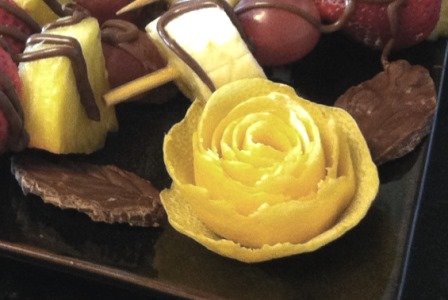
lemon rose chocolate leaves
Here are tutorials on the rose and leaves, in case you want to make some:
RoseChocolate leaves
The rose tutorial is actually for making a tomato rose, but it’s the same technique.

Now, about the bananas and keeping them from browning.

Lemon juice is the secret here. I did a little test where I checked them after 3 hours and after 6 hours. A little after the 6-hour mark, my girls came home from school and I let them eat my experiment for an after school snack… and then thought of it later that I should’ve tested the bananas longer, like 24 hours. But what I did learn is that lemon juice works its magic for at least 6 hours, and that was the info I needed because unless they have to set/freeze/marinate/etc, I rarely make things more than 6 hours ahead of time. Maybe that’s because I’m a procrastinator.

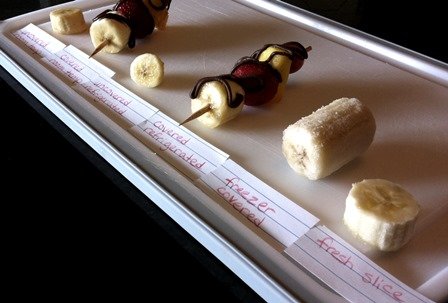
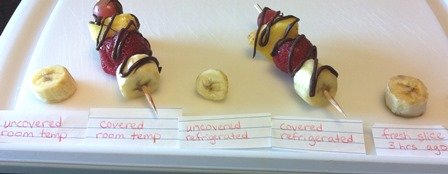
So here we go, the experiment. The pictures above were taken right after I made it, where even a fresh banana would still be looking good. The pictures below were taken 3 and 6 hours afterwards.

3 hours after being tossed with lemon juice:
banana slice browning2
From left to right: uncovered room temp, covered room temp, uncovered refrigerated, covered refrigerated, covered frozen, and a fresh slice.
The fresh slice is NOT 3 hours old, it’s just there for comparison. The frozen one is thrown in there for fun… it actually has no lemon juice on, it was peeled and put into the freezer right away and is probably more like 3 months old.

6 hours after being tossed with lemon juice:
banana slice browning3
The middles are starting to get a little brown, but are still fine.

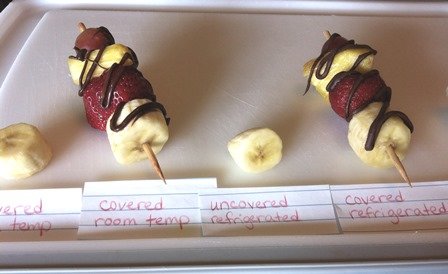
What I was surprised was that between all the lemon-juiced ones, there was pretty much no difference! I’m glad about this tidbit because it gives flexibility. Here is a closer up. They all stayed firm too, no mushiness.
banana slice browning1

chocolate drizzled fruit kabobs

Here come the Holidays… make some of these pretty things!  It’s a delicious, healthy snack to set out on the snack table (with the chocolate covered Ritz crackers, cookies, red-green-silver-foil-wrapped Hershey kisses, and party mix).

Comments

4 Responses to “Drizzled Chocolate Fruit Kabobs, plus How to Keep Banana Slices from Browning”

  1. Twila on November 22nd, 2013 11:30 pm

    These look yummy. I’m wondering where you found the short skewers, or did you cut skewers in half. If you cut them in half, what did you cut them with so the ends didn’t splinter?

  2. Kay on November 23rd, 2013 12:55 pm

    Twila, I get the short ones at Meijer, Hobby Lobby, JoAnns, or Michaels. Are you close to any of those stores? I was out of them at the moment, so for these I used the longer ones. I cut them with a wire cutter… makes a nice clean cut, no splinters. :)

  3. Shannon on December 5th, 2013 1:43 pm

    I miss your posts! :)

  4. Kathleen on September 17th, 2014 12:12 pm

    Can fruit kababs been frozen and them dipped. If so what is the shelf life in a freezer before the fruit gets mushy? Would it be ok to eliminate the lemon juice if the kababs were frozen?

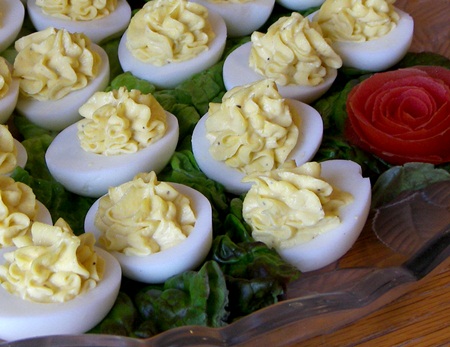
Chipotle Deviled Eggs

Posted on April 9, 2011
Filed Under Garnishing, Side dishes

Is this recipe made up, you wonder?
Yep, it is.
All because I fell in love with some chipotle mayo from Yutzy’s Farm Market and I use it on everything that I think it might possibly go with.

We had a fish fry last night. One of the couples from church (Jr. and Darla) go up to Lake Erie to fish every year. Then, they clean the fish. And then, they GENEROUSLY share them with us. I know. We’re privileged. And we realize it and are very grateful.

They and their kitchen helpers fry/bake the fish (there’s some of each) and make a big roasterful of scalloped potatoes and do pork chops for anyone who doesn’t like fish. Then, the rest of us bring salads and desserts. It’s quite a spread… the row of food tables is roughly the length of an airport runway (give or take a few hundred yards) and is lined down both sides with food food food. Good stuff! I’m wishing right now that I’d have taken my camera along to take a picture of it.

So, anyway, I was trying to decide what to make in the salad category. I just got a new Dessert Decorator, and it HAD to be something that I could use that for. The decorator was a just-for-anyhow gift from my husband, which are THE best kind of gifts.

So now, we’re only eating soft foods that can fit thro the decorator… but hey, at least we’re eating pretty stuff. ????

I made twice-baked potatoes a couple days ago and piped them into the shells with the decorator, but then I had a problem. I hadn’t thought of the cheese. So it was forfeit cheese and see the beauty or have potatoes with yummy melty cheese on top. The cheese won. Oh well. I still had fun doing it.

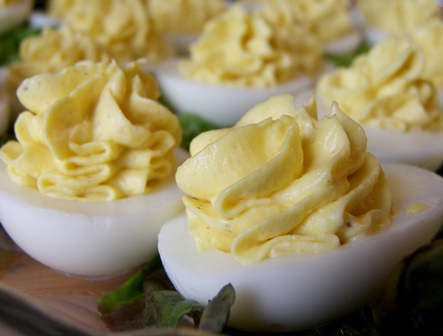
Anyway, back to what to take to the fish fry, I thought of Deviled Eggs.

deviled-eggs.jpg

And while I was getting the yolks out of the whites, I thought of my beloved Chipotle mayo and decided to throw some of that in there. Next time, I’d add more… it adds a little kick and I didn’t want to add too much kick for some unsuspecting person at a church fish fry who doesn’t like kick.

Chipotle Deviled Eggs

12 eggs
3/4 cup mayo (use less if you prefer a stronger egg yolk taste)
2 tsp. Dijon mustard
1 Tbsp. Roasted Chipotle Mayonnaise (more would be better ???? )
1/4 tsp. salt
1/2 tsp. pepper

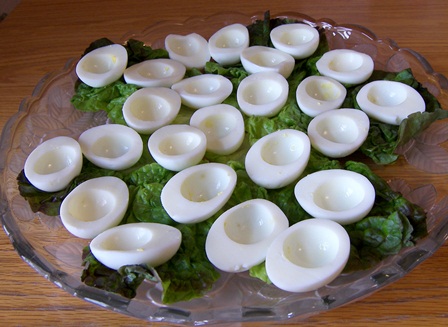
Hard boil the eggs. Peel and cut in half. Put yolks in a food processor; set whites on a serving tray.
dev-eggs1.jpg

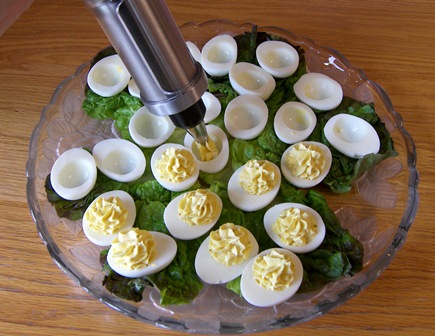
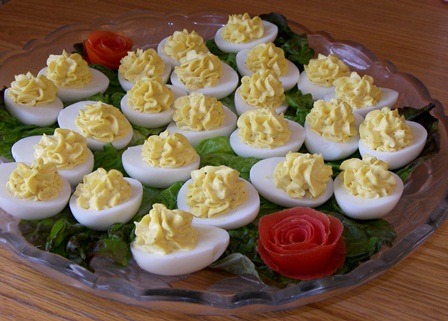
Running the yolks thro’ the food processor makes for a creamier filling. After there are no chunks left, add the rest of the ingredients. Pipe the filling into the egg white shells. (Side note: sometime, try piping egg filling into an egg white with one hand WHILE holding still enough to take a picture with the other hand :) )
dev-eggs2.jpg

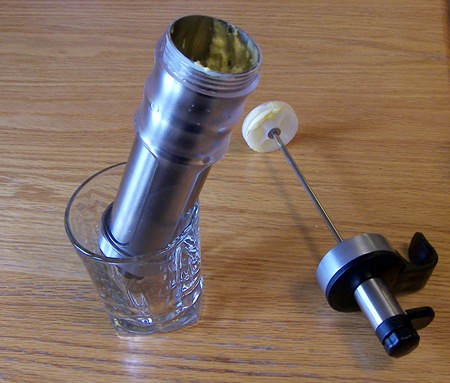
Here’s a little tip: when you’re getting the last of the filling out of the bowl, it’s nice to have one hand to hold the bowl and one hand to use the scraper, putting the filling right into the decorator as you’re scraping. This leaves no hand to hold the decorator so… prop it in a cup.
dev-eggs3.jpg

dev-eggs4.jpg

deviled-eggs5.jpg

If you want to garnish the tray with tomato roses, but don’t know how, this link is for you: How to Make Tomato Roses.

Coming up in the next few posts: Tiffany’s ladybug birthday cake, Fun play-with-your-food Spring-themed stuff, and Donut Muffins.

Comments

6 Responses to “Chipotle Deviled Eggs”

  1. Arla on April 9th, 2011 9:52 am

    Kay, I’m so glad you’re back here at your scrapbook!
    My family would be terribly awed if I were to follow in your footsteps and create in the kitchen. I have no clue! So you inspire me, thanks.

  2. Christy on April 9th, 2011 12:49 pm

    They look pretty and I really like the idea of adding the Chipotle kick!

  3. Ruthie on April 9th, 2011 2:28 pm

    Wow! They look so good! I’m going to have to try the processor next time, mine are always kind of lumpy. I would be the one that doesn’t want the kick. =) The tomatoes look lovely! Your whites are so white, no dark edges. Good looking dish!
    Do you ever sprinkle paprika over them?

  4. Celesta on April 9th, 2011 6:38 pm

    The eggs were lovely. I would surely have tasted them for the chipotle flavor, but there were none left when I got to go through the line! I admired the tomato roses. It has been too long since I made them. Love your blog!

  5. Judi on April 11th, 2011 12:19 pm

    The eggs look great, but I was amazed at how easy your directions are for the tomato roses. I’m definitely going to try those soon.

  6. Sheila on April 13th, 2011 9:50 am

    That second to last picture is so cool! My children love deviled eggs and beg me to make them. I hardly ever do, though, just for our family. But, lucky for them, there is a family from church that almost always brings them to snacks and carry-ins. I fill my eggs with a decorating tip, too. It’s a little more bother to transger the filling to a bag or decorating tool, but I think it goes faster when you get to filling them.

How to Make Chocolate Roses

Posted on February 11, 2009
Filed Under For special occassions, Garnishing, Holiday cooking

roses4.jpg

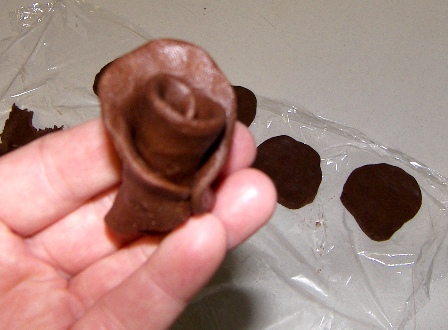
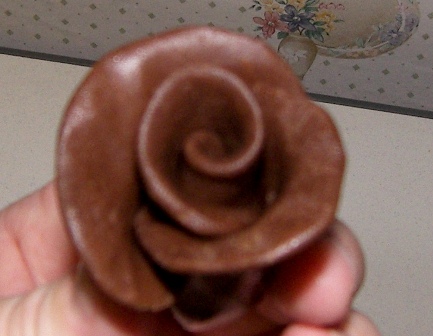
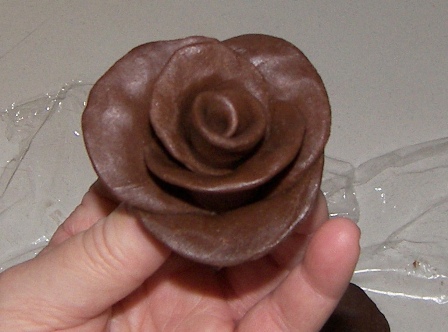
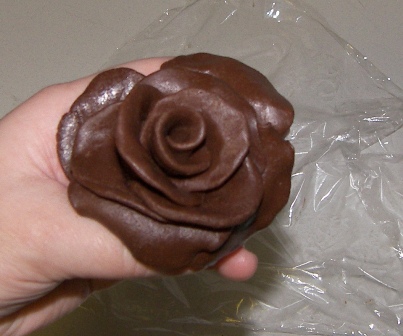
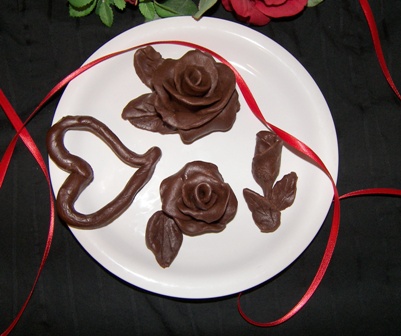
Valentines Day… Chocolate. Roses. What a perfect time to merge the two and make Chocolate Roses! Actually, it isn’t just a Valentines treat, it’s timeless decor for any table or dessert year-round.

I’ve been wanting to try these for awhile. But they always looked so complicated. But they still intrigued me. So, I finally made some…

roses6.jpg

This is all you do:

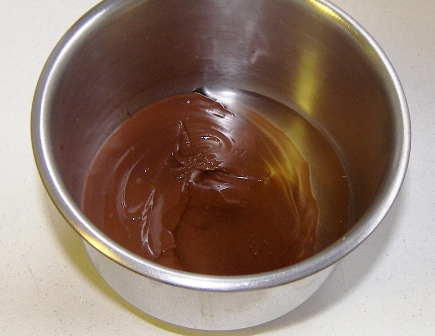
Take about 2/3 cup of chocolate chips and melt them. Add about 3 Tbsp. light corn syrup.
roses1.jpg

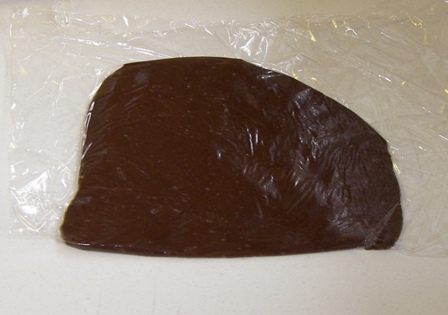
Stir until mixture starts pulling away from the sides of the bowl and starts balling up. It’ll be kinda like taffy. Dump it out onto a piece of plastic wrap and flatten. Cover with more plasic wrap and refrigerate for a half hour or so.
roses2.jpg

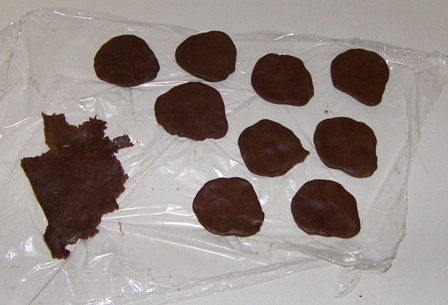
Get it out and pull a chunk off, about a tsp., and roll it around with your fingers till it’s a smooth ball, then flatten it into a petal. Make 6 -10 petals, depending on how big you want your rose.
roses7.jpg

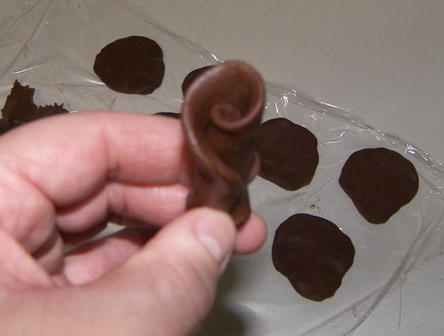
Take one of the petals and roll it up loosely. Use your finger to bend the top back just slightly.
roses8.jpg

Take the next petal and start it just behind where the first petal ended.
roses9.jpg

Continue like that until all the petals are used up, bending the tops back slightly as you go. When your rose is done, cut off the stem (which will have gotten quite chunky) so the rose can sit flat. Or, go ahead and try making it thin and having a long-stemmed rose! I might try that next time.
roses10.jpg

roses11.jpg

roses12.jpg

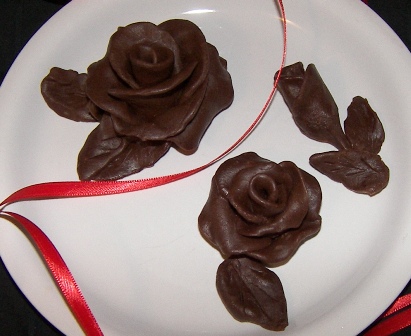
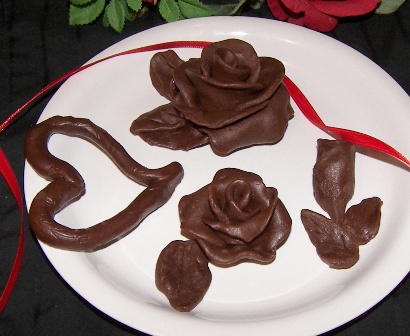
I tried a rosebud by using only 2 petals. After making 2 roses and 1 rosebud and the leaves, I had some chocolate left yet, so I just made a heart with it. So, what you see on this plate is how much 2/3 cup chocolate chips makes.

roses31.jpg

Now what I need is a nice dessert to put them on. ???? But, I don’t have one, so I’m just gonna keep them in the freezer and whip ’em out sometime when I need some quick dessert decor!

So, what do you think? You gonna try them? :)

Comments

11 Responses to “How to Make Chocolate Roses”

  1. Katie Mast on February 12th, 2009 6:17 pm

    Yes i will try them this week. They look so beautiful. I will let you know how they get for me. I used to make roses out of apples, much the same way you did here. Thanks for the cool idea

  2. Lori on February 12th, 2009 9:55 pm

    I made a flourless chocolate cake. It is a dense chocolate cake for chocolate lovers. I found the recipe at allrecipes.com. The roses would look great on my heart shaped cake!

  3. Elaine on February 13th, 2009 12:51 pm

    These would look great on my Chocolate Turtle Cheese Cake for our couples dinner tonight. Now let’s see if I can do it! :)

  4. karen on February 15th, 2009 6:30 pm

    Wow!!!!!!!!Thanks for the beautiful idea. It worked great and I used them on a fruit platter.

  5. katie mast on February 17th, 2009 7:13 pm

    I tryed them, they didnt look as pretty as yours. I thought mine melted so fast. did i do something wrong?

  6. Maria on March 25th, 2011 7:01 am

    Hi. Wow, it looks really amazing, and it looks like it’s not that hard to make. Looking forward to try making some roses, hope I’ll manage to make’em as pretty as yours :)

  7. jayne on May 5th, 2011 3:48 pm

    Hi Kay,
    Chanced upon your site as I am looking to make chocolate roses (I recon I will need around 80-100 for my daughters wedding cake. I can only find recipies with corn oil. Do you know what the equivalent of this is for us in the UK ? can we use a sunflower oil?
    Thanks
    Jayne

  8. Kay on May 10th, 2011 5:10 pm

    Jayne, use corn syrup instead of oil. Wow, 80-100, that sounds like work, but FUN work! :) That will be beautiful on the cake! And congratulations to your daughter!

  9. Kim on May 17th, 2011 3:44 pm

    Do you have to use chocolate chips? I would like to make red roses. Can I use red chocolate wafers?

  10. Kay on May 17th, 2011 3:54 pm

    Awesome idea, Kim! I don’t know if it will or won’t work, but I’m going to try it! :)

  11. UMM on June 6th, 2011 6:01 am

    HOW LONG DO THESE KEEP IN THE FREEZER AND HOW LONG TO THAW

Silk Chocolate Pie with Chocolate Curls

Posted on July 21, 2008
Filed Under Garnishing, How to…, Pies

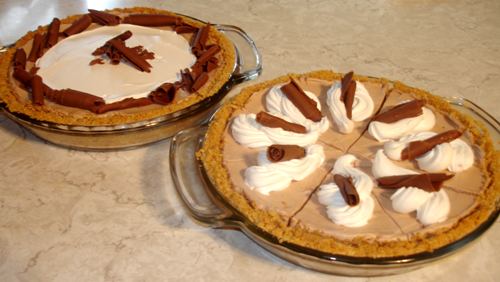
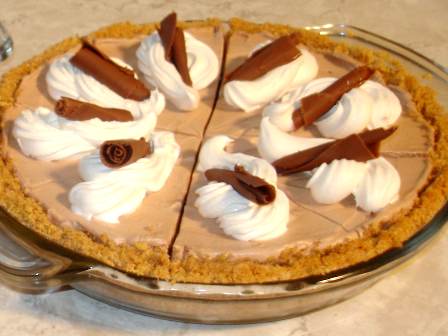
Silk is right. I wonder whoever came up with that term for pie. But it fits this one. Smooth as silk. And creamy and light. Light as in not heavy, not light as in diet. Far from it!

My grandma always said that she likes to make pies better than she likes to eat them. That doesn’t mean that she doesn’t like pie! Sometimes while I’m making pie, I wonder if I have reached that same status now. Then, I eat a piece and decide I’m not quite there yet. BUT, this pie may have been an exception. Not that the pie itself was so fun to make. The fun was in the garnishing… chocolate curls.

silk1.jpg

This recipe is taken from my newest cookbook… Simply with Taste. I got it about a week ago. I love it! Sometime, I’ll tell you more about it and its nice features. This silk chocolate pie is the first recipe I tried from it.

Silk Chocolate Pie

Printable recipe

1 pkg. (4 oz) Bakers German sweet chocolate
2 Tbsp. milk
6 oz. cream cheese, softened
1/4 cup milk
3 Tbsp. sugar
4 cups whipped topping
2 baked or graham cracker pie crusts

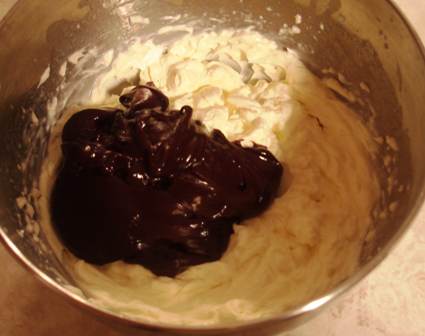
Microwave the chocolate along with the 2 Tbsp milk on high at 20-30 second intervals until chocolate is melted, stirring frequently. Beat the cream cheese, sugar, and 1/4 cup milk until smooth; add the chocolate
silk3.jpg
and mix until well blended.
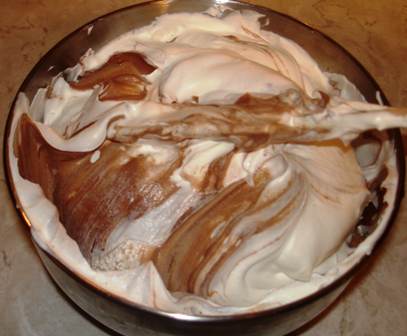
Refrigerate for 10 minutes. Fold in the whipped topping.
silk5.jpg

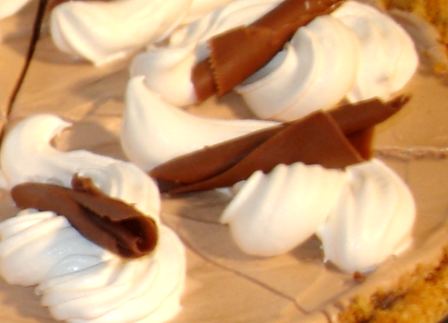
Spoon into the prepared crusts. May freeze if desired, or use within a day. Top with whipped topping and chocolate curls for garnish.
silk13.jpg

silk2.jpg

silk12.jpg

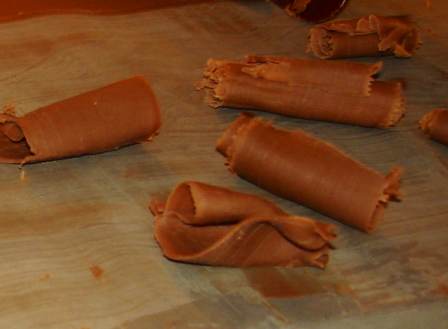
And now for the fun… How to Make Chocolate Curls

silk9.jpg

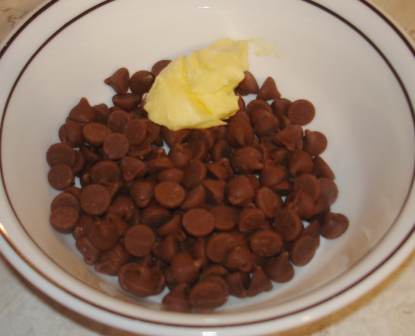
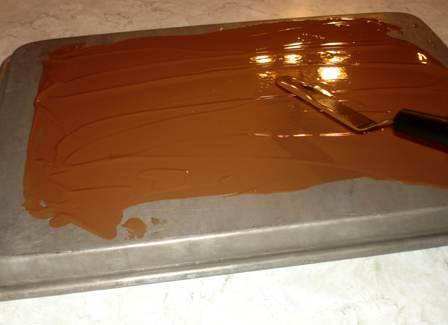
Melt about a 1/2 cup chocolate chips w about 1 Tbsp. of shortening.
silk7.jpg

Spread into a thin layer on the back of a metal cookie sheet.
silk8.jpg
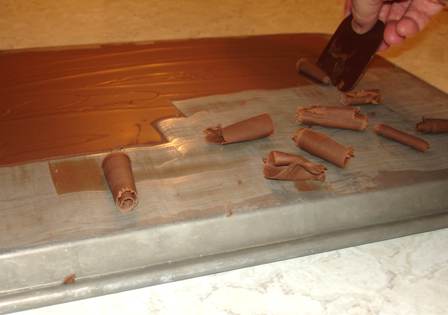
Put in the freezer for 3 minutes. Take it out of the freezer. Immediately, take a flat tool of some sort (I used my Pampered Chef little square scraper that’s actually for cleaning stoneware, I use that little thing for alot of stuff!) and hold it at about 45 degrees and push down and across the baking sheet. The chocolate should curl right up.
silk10.jpg

silk11.jpg

If it just breaks, wait a minute or 2 to let the chocolate soften, then try again. If it doesn’t curl, put it back in the freezer for another minute or so. Depending how long it takes to curl all the chocolate, you may have to put it back in the freezer to harden up again before you’re done. Use a toothpick or utensil of some sort to move the rolls to a plate and put them in the refrigerator. When they’re good and hard again, you can put them in a plastic bag and store in the refrigerator. Or you can just put them on the pies like I did.

Comments

5 Responses to “Silk Chocolate Pie w Chocolate Curls”

  1. Shannon on July 22nd, 2008 7:52 am

    Oh those look good even if I’m not sure I would eat them. :)

  2. Rosalyn on July 22nd, 2008 10:00 am

    This is making me really hungry right now! think I’ll have to make it for supper! ????

  3. Michelle on July 22nd, 2008 11:13 am

    Looks delicious!

  4. Katrina on July 22nd, 2008 5:47 pm

    YUM!

  5. Barb on July 23rd, 2008 9:50 am

    This pie looks really good, and the chocolate curls look fun to try.
    I don’t think I have ever tasted or made silk pie so I will have to try this.

    P.S. I finally updated my blog.

A rose by any other name…

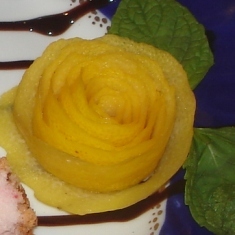
Featuring tomato roses, lemon roses, and orange roses

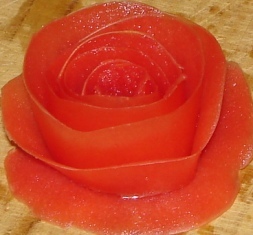
This is actually easier than it looks.
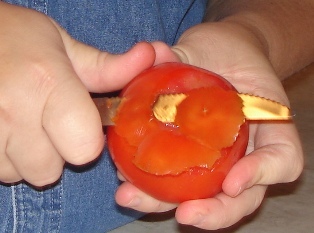
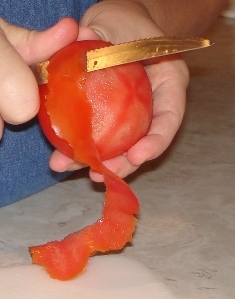
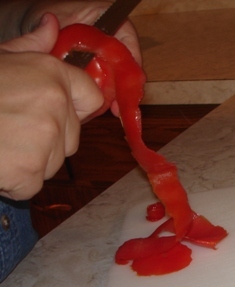
Starting at the end (whatever the opposite of the stem end is called), peel a tomato (or lemon or orange or whatever you feel like trying) in one long piece.
rose cut1 rose cut2
rose cut3 rose cut4
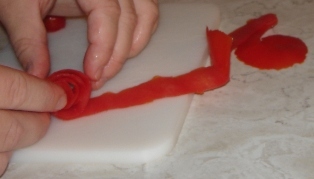
Lay the peeling out flat, skin side down. Now, as if you’re rolling up some left-over ribbon, start rolling it, starting at the end you cut last (the part closest to the stem). 
It’ll kind of slip around while you’re rolling it, so it’s helpful to keep a finger or 2 on each side. When you’re at the end, tuck the wide end underneath and set your rose down. If it looks weird, flip it over. If it still looks weird, unwrap it and try again.
rose3 rose cut5

A couple tips:
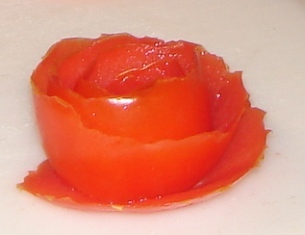
— Use firm tomatoes; they cut smoother and the skins don’t wrinkle as easily.  Note: The 2 roses above… the first one was a firmer tomato, the second one wasn’t and kinda wrinkled as I was cutting it, making the edges less smooth.
— The thinner you peel them, the easier they are to work with because they curl around easier.
— For oranges and lemons, I’ve found it’s easier to use a potato peeler than a knife… it gets it thin and doesn’t break off as easy.
— If a peeling breaks off before you’re done, just finish peeling, then overlap the pieces an inch or so when you roll it up.


Ideas:

Tomato roses
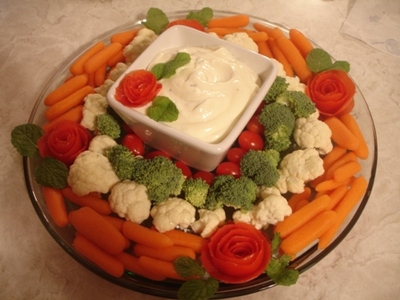
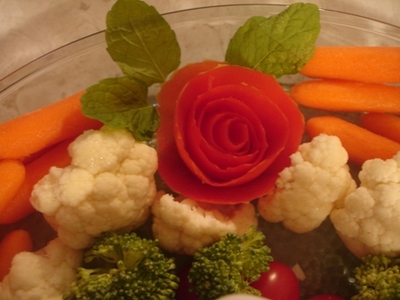
—Garnish a veggie tray
rose veggie tray 

rose veg tray close
—Set a rose or 2 on fresh herbs on a flat tray or board for a table decoration
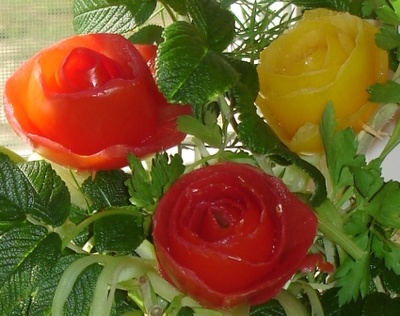
—Make a bouquet
rose bouquet1
rose bouquet        

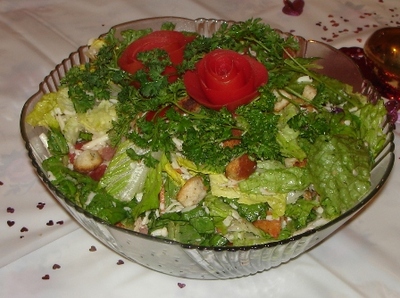
—Put on top of a salad (but you need to take them off before serving, or move them way over to the side)
rose on salad        

Lemon and orange roses
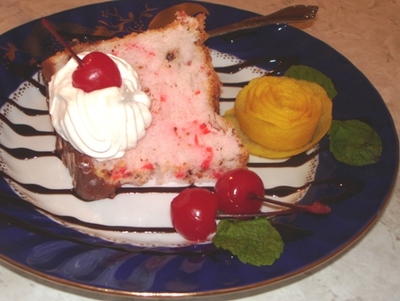
—Garnish a fruit tray
rose orange         

—Put on the side of a serving platter of meat or fish
—Dress up a serving of dessert
rose lemon

 rose lemon close

Chocolate roses and butter roses coming later… it’s a different technique to make them.

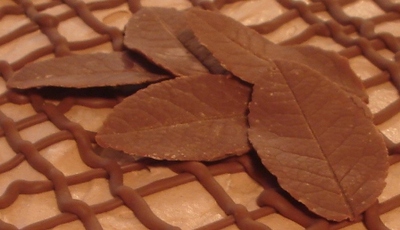
Let’s make some Chocolate Leaves!

chocleaves3

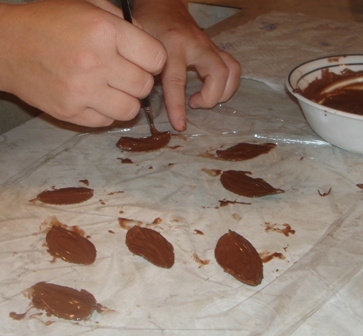
You’ll notice that I’m doing this because I get a kick out of it, not because I’m refined, elegant, and professional!   First of all, I should’ve got my husband to do the photography instead of someone less than 4′ tall. But, I picked on the one who was sitting on a barstool with her face within a foot of my project, asking questions and wanting to help. Can’t blame her… at 4 years old, I’d have been dying to be turned loose with a paintbrush, melted chocolate, and leaves… paint, lick, paint, paint, lick…

I’ve made chocolate leaves only once in my life… just last weekend. So, if you’ve made them twice, you’re more experienced than me.

I went out to my rosebush (if you  DON’T know me, you’re picturing something with beautiful pink roses hanging all over it, aren’t you? And if you  DO know me, you’re thinking, “Huh?! You have an ALIVE rosebush?!”, aren’t you?)… anyway, I went out to my rosebush and picked 8 leaves off, brought them in and washed them under running water, and patted them dry with a paper towel. Then I took a paintbrush (everything else that’s actually a kitchen tool looked too big and cumbersome) and spread melted chocolate on the bottom side of the leaf.
chocleaves1
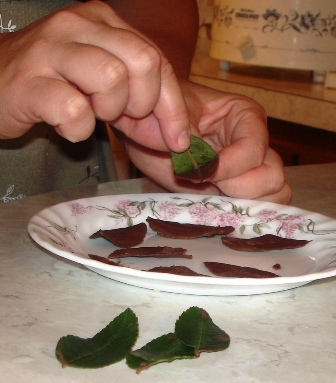
I just let them harden a little at room temp, then put another coat on and put them in the fridge to harden. Then, I got them out and peeled the leaves off…
chocleaves2
When they were done, we were awing over them and Lexi said, “Mom, they’re SO pretty! Can I eat them?” Um, let me think… “No!”
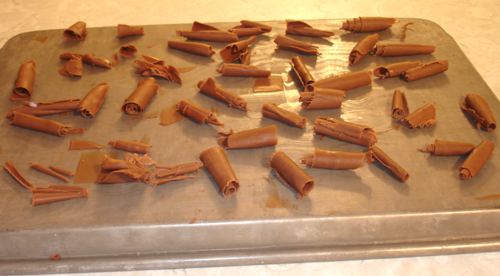
I put them back in the fridge till I was ready to use them.

Next time, I’d make them a bit thicker. It was kinda neat how thin and delicate they were, BUT I started with 8 leaves, had 3 casualties, and ended up with 5 because they broke when I was pulling the leaves off. It was fun and they looked so neat… I’ll definitely make them more often!

Have any of you made chocolate leaves before that you could give us all some more tips?

What I put the leaves on was a new recipe , so I’ll throw that in here too, while I’m at it.

German Chocolate Cream Pie …from the 2002 Quick Cooking Annual cookbook

1 pkg (4 oz) German sweet chocolate
1/3 cup milk
1 pkg (3 oz) cream cheese, softened
2 Tbsp sugar
1 carton (8 oz) frozen whipped topping, thawed
1 graham cracker crust (9 inches)
Whipped topping, frest mint and chocolate dessert decorations, optional

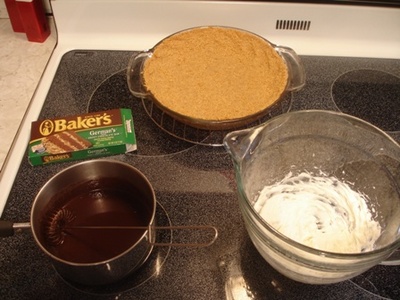
In a saucepan over low heat, cook the chocolate and milk until choc is melted; stir until smooth. In a mixing bowl, beat cream cheese and sugar until smooth.
chocleaves pie1
Stir in chocolate mixture. Fold in whipped topping. Spoon into crust. Freeze until firm. May be frozen for up to 3 months, just in case you could leave a chocolate pie alone for 3 months, knowing it’s right there in the freezer!
Remove from the freezer 10 minutes before serving. Garnish with whipped topping, mint and chocolate decorations if desired. Yield: 6-8 servings.
chocleaves pie2
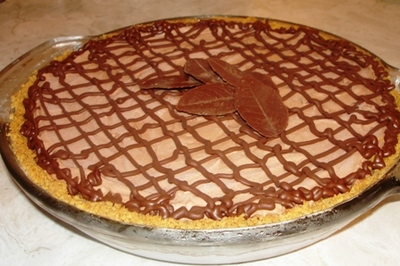
chocleaves pie3 I had a bunch of melted chocolate left over and no more Cool Whip, so I just drizzled the chocolate over… it does need garnish of some sort, looks very plain without!

It was really good, except that I’m a milk chocolate fan, not semi-sweet. To me, this German sweet chocolate tasted just like semi-sweet. I want to try it again sometime and substitute 4 oz (or more ) of milk chocolate chips instead of the German chocolate.