Posted on July 23, 2009
Filed Under Birthday cakes
I made a birthday cake last evening for my friend Renita’s 6-yr-old son, Jordan. His birthday is TODAY! The cake is a Lightning McQueen cake. I was thinking of updating as I make it, but decided not to this time. (That way, I don’t get icing all over my mouse and keyboard. ???? Just kidding, I have to wash my hands to handle my camera anyway.)
Here’s a list of what all I used:
–chocolate cake mix
–store-bought white fondant ($6 at Walmart)
–red, black, yellow, and blue food coloring paste
–buttercream icing (recipe featured in this post, you’ll need to scroll down a little)
–graham cracker crumbs
–small piece of thin cardboard
–small bamboo skewer
–2 toothpicks
–6 candles
It’s all very common/inexpensive things, no molds or anything, so I hope that after you see this cake being made, you can see how easy it is to do one yourself. 
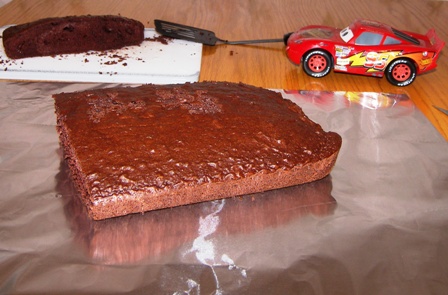
I started by baking a 9×13 chocolate cake, cooled it and froze it (easier to carve that way), then cut out a section about 11×7 and placed it on the cake board. By the way, the cake board is a piece of foam board cut in half, stacked, and covered with tin foil. Renita gave me that little car to look off of. Very helpful!!!!
It took awhile to get the fondant red. See that little can of red paste? It was brand new and I used at least 3/4 of it! This is when I was starting to mix it…
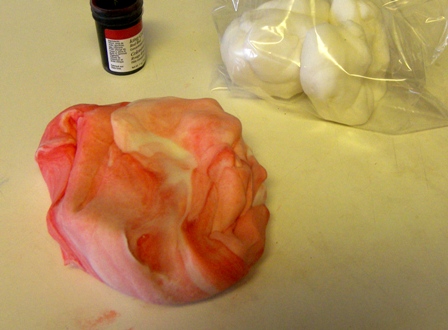
And then I never got a picture of it after it was red. *rolleyes* The way to mix it is to pull it, twist it, knead it, and whatever till it’s all uniformly colored. It’s easy to do swirly designs with fondant too!
Ok, now the carving starts. I took another smaller piece and stacked it on top for the cab. Is it called a cab when it’s a race car? I can’t think of what else to call it. Anyway, the part inside where you sit. This doesn’t look too promising so far, does it?
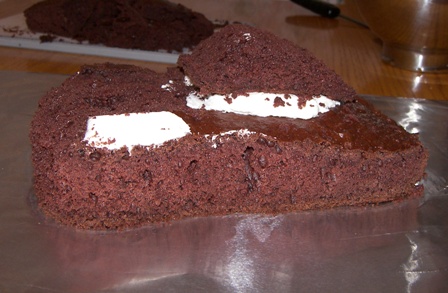
Ah, but frosting helps SO much and covers lots of imperfections! Not to imply that there are no imperfections here!!! But at least it looks like now it actually has a chance of becoming a race car.
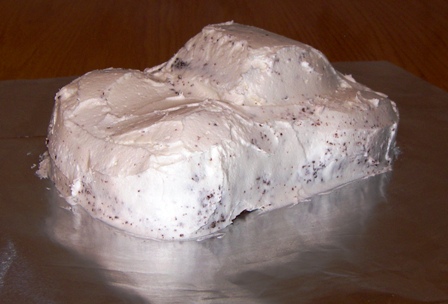
Now we roll out the red fondant. By the way, whenever you do cakes, please use concentrated paste, NOT liquid food coloring. Concentrated paste makes the end result such true vivid colors. Sprinkle the table with plenty of powdered sugar. Flatten the fondant a bit and sprinkle powdered sugar on it too, then simply roll it out like you would a pie crust.
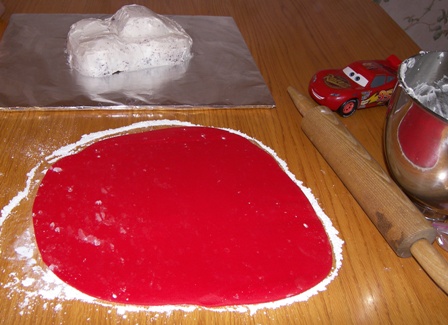
To pick up the fondant, I rolled it around the rolling pin, then unrolled it off of the rolling pin over the car.
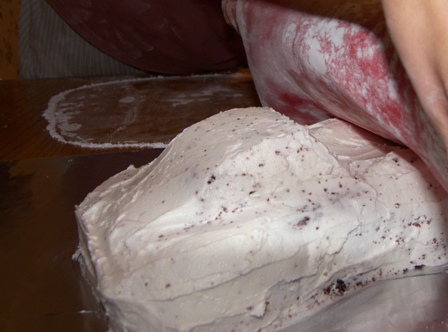
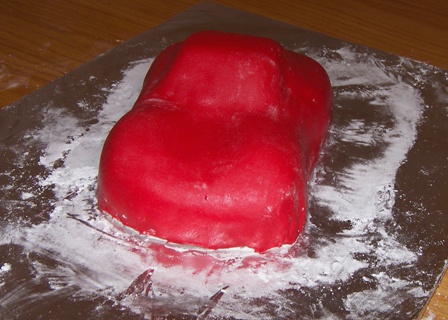
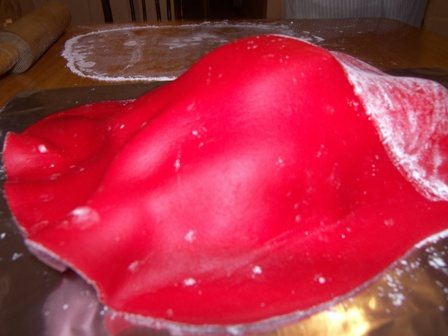 Kinda blurry, but you get the idea. There was a powdered sugar issue because it was really sugary on the bottom and then when I rolled it up onto the rolling pin, it got sugary on part of the top. I thought, “Oh no! Now what?!” because when I tried to brush it off, it didn’t want to come off!
By patting and tucking, fit the fondant to the shape of the cake. Then, trim off the excess.
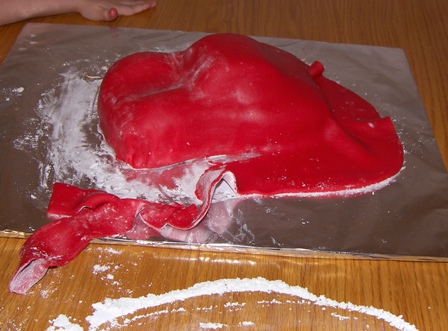
Roll out some white fondant and cut out the windows and the smile. To cut the fondant, I used either a sharp knife, a scissors, or a pastry cutter, whichever seemed like it would work the best for what I was cutting. Pieces of fondant don’t automatically stick… you need to wet the back with water a little bit first, then they’ll stick.
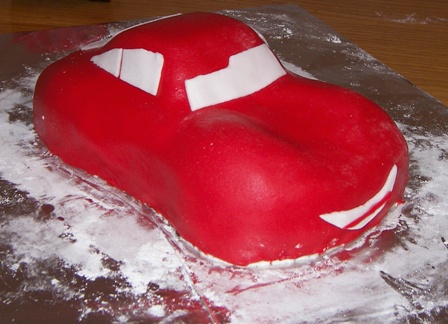
By the way, remember all that powdered sugar that was on the red when I first put the fondant over the car? The problem took care of itself… the sugar melted or something and dissolved into the fondant. I love when problems take care of themselves like that.
Now we’ve got eyes. I know, one is bigger than the other. Oh well. To make the eyes, I used a small (clean) painbrush and black and blue coloring paste and painted them on.
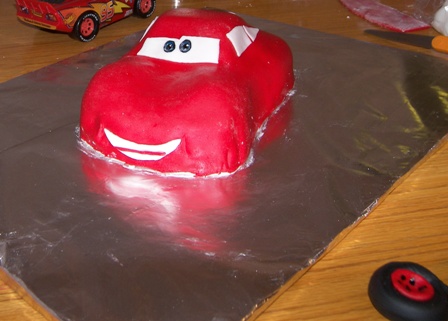
Now we’ve got wheels. They are made out of black and red fondant. To put them on, I cut into the fondant, icing, and cake, making a wheel-shaped hole, then tucked the wheels in. I thought it might add a little character to turn the front wheels to give it a ‘rarin-to-go’ look. ????
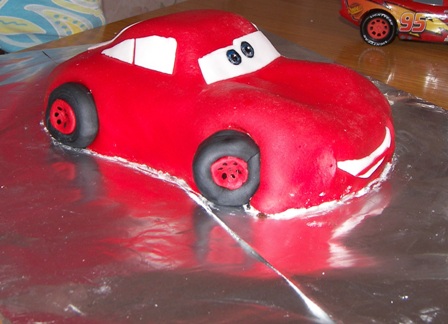
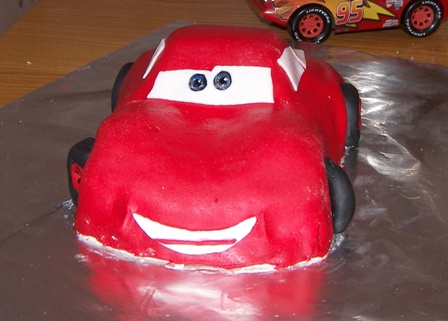
Now we have decals, ‘lettering’ on the tires, and headlights.
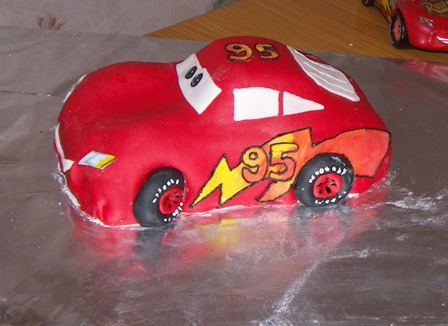
Now with the Rust-eze logo, the spoiler, a flag, and a racetrack, Lightning McQueen is DONE!
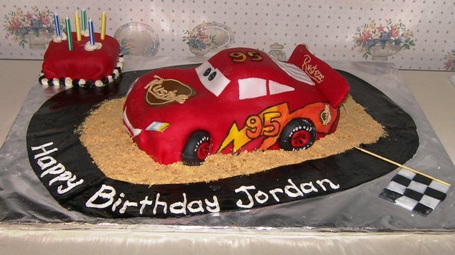
The track is rolled out black fondant. Everything here is completely edible except the bamboo skewer on the flag, a thin piece of cardboard inside the spoiler, the 2 toothpicks under the spoiler, and of course the candles. (The spoiler kept settling instead of staying at the proper angle, so I had to prop it up with toothpicks.)
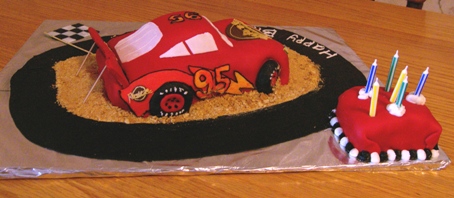

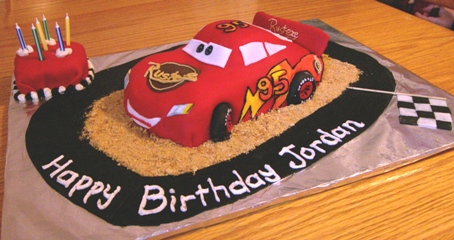
Happy birthday, Jordan! Have fun being 6!
Edited to add: Several readers have been inspired to use these instructions and make a Lightning McQueen cake themselves! See their cakes here: Lightning McQueen cakes that readers have made They all did an awesome job! If you want to do it, I’d love to see your cake!  Email it to kay@kitchenscrapbook.com and I’ll add it to that post!!
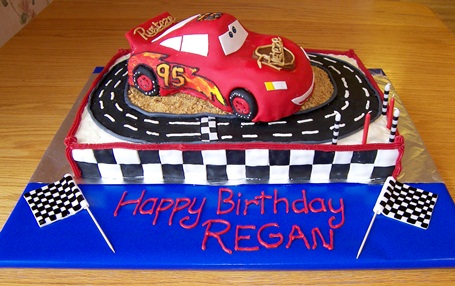
Edited April 25, 2011: I just made another Lightning McQueen birthday cake last week. It’s posted here: Regan’s Lightning McQueen birthday cake.
Comments
75 Responses to “Lightning McQueen Birthday Cake”

 Yum. They have cracks in them. I like when cookies have cracks like that. Makes them look soft and chewy.
You don`t know me but my parents went to church with Shannons parents years ago I often check out your recipes and this cake is too cute, my children loved it!! Cody, 7 yrs. wishes you would live close enough to make him one.
  i`m not that talented…keep up the good work!
You are totally amazing!! I will never cease to be amazed at your decorating skills. Tucker says- She should make me one like that. He LOVES anything Lightening McQueen. Good job, lady!
Great job! You are so talented. I bet Jordan was one happy little boy!
Wow Kay, this is beautiful! You do an unbelievable job. My girls are totally amazed going from one picture to the next!!! They say, “Did you read the instructions? Can you make one like this now?” Noooooooooooooo, your mama is not that talented. :)Good Job!!!
My sons are a bit envious of whoever gets this awesome cake……… WOOoooooW!!!
Shut UP!!! How cute is THAT??? I have got to show this to my friend who’s son is a CARS FREAK!!! Two thumbs up on this one girl!
Fabulous job, Kay. I just could not do that! You rock cake decorating!
Wow! awesome job on decorating the cake, looks great
Amazing! When looking at the picture on the link on xanga, I thought you set a car on top of a board! Wondering where the cake was… Too cute!
Great job, Kay! I’ve been playin with fondant a little and your instructions were helpful. I haven’t attempted anything like this but maybe I should for Cody’s 6th birthday in Dec. Is the lightning on the side more fondant or just painted?
Keep up the great work!
My son’s reaction, “Man, you should make one!” Love the graham cracker crumb idea for dirt. I’ve tried using nestle’s quik already and it melts soon. I’m guessing Jordan’s mom was happy, too!
Rosanne, the lightning is fondant… I made yellow and orange fondant, then pressed them together, twisted them to blend just in the very middle, then rolled it out. The 95’s are also cut out of that. Then, I colored regular icing black and piped around it all.
To all of you, seriously, if there’s a little boy in your life who’d like this, you really oughta try it! Just plan to take your time and keep tweaking it till it gets right (this took me a little over 4 hours, not counting baking and cooling the cake). And don’t say you couldn’t do it (unless you’ve tried it) because you’ll be surprised how forgiving and imperfection-hiding that the icing is! ????
…And when you try it, tell me about it and email me a picture!
Umm can you ship cakes to Haiti?? Landon is having a b-day Sept 2nd and he would love a Lightening Mcqueen cake!
  Good work!!
Well Kay, we had one very Very VERY happy birthday boy!!! First thing Jordan said was SWEET ~Lightning McQueen!!! He didn’t want to eat it right away.
Thanks SO much Kay for all your work and fitting it into your schedule! I definitely appreciate it and it’ll be one cake not ever forgotten. I think the other boys were just as excited and slightly jealous. They kept saying what they want for their b-days.
That is so-o-o-o-o impressive!! I made birthday cakes for my children through their 12th birthdays, but mine sure weren’t this nice. I’m sure Jordan was impressed with his mom!!
Wow, impressive! I know you say it’s not that hard, but it looks hard. I ought to try messing with fondant sometime. Never tried it. You’re going to have to start a business soon. Bet you’d be able to make some money that way. Well, until you start counting your time.
Woo-hoo, Kay- that’s awesome! Looks like you have the makings of a business here. =) I enjoy decorating cakes, but I prefer instructions! There’s no way I could have looked at that toy car and ended up with anything that looked like it! Great job!
Wow! another gorgeous cake!
That is just so cute. You are very talented. I could try what you did, and it would not look like that. Great job. (All of your cakes have been really neat.)
Carmen
You are amazing!
Love your web site!
WOW!! Good job on the cake! I’d love to make one like that for my little guy! What are the wheels made out of?
Okay, nevermind about the above question. I saw now that they’re made out of fonduant.
Wow! Kay, you are amazing and inspiring!!! Would love to watch you work. Great cake!
how cute, Kay!! i haven’t been on for awhile, so it was fun to catch up!!!!
Kay, you are simply amazing! I like coolest-birthdaycakes.com but they often said they used fondant and I never saw an explanation on how to use it til now. Looks like fun. I love visiti ng your site. Keep up the great work.
Hi Kay . . .what a great cake! You’ve inspired me to make this cake in a couple of days for my little guy’s b-day party. Everything looks pretty self-explanatory, but I wanted to know if you used brown fondant color for the “Rusteze” logo, or if it was icing? If it was brown fondant, is there any way to get the color brown by combining colors . . .or do I have to buy the Wilton’s brown? Thanks, and I’ll send a picture when it’s done (if it turns out)
Theresa
Go for it, Theresa! And yes, I’d love to see a picture of it when you’re done!
The Rusteze logo is both fondant and icing… The dark brown circle is rolled out dk brn fondant, then cut out in a circle with a cookie cutter. The tan letters and outline circle are piped on with icing, tinted with just a little bit of brown paste.
I bought brown, but I think if you combine equal amounts of blue, red, and yellow, it makes brown. OR you could add melted chocolate or cocoa powder to the icing/fondant to make it brown.
Thank you so much for the step by step. I have just made a version of this for my son’s birthday tomorrow and I am sure he is just going to love it. More than happy to email you a photo if you like.
That’s fun to hear, Yvonne! I’ll bet your son will be tickled with it. And… of COURSE I want to see a picture!
Ok, first terrific job. I think you did awesome. Second, your page was very helpful! My boyfriend and I have been trying for weeks to perfect a Lightning McQueen cake for my son (who’s turning 2 this Sunday)and it always seemed like we were missing something…I still have a questions though. How did u easily transfer the lightning mcqueen? Was it being that the cake had been previously frozen it was more sturdy or did you hide a board under the cake itself or what? We try to move our cake (which is bigger than your in size) and it bends like it wants to fall apart. Could you help???
Missie, that’s great that you made a Lightning McQueen cake! I’d love if you’d email me a picture!
Uh! Transferring it is the worst thing! I didn’t transfer this one… I did it right on the cake board. I have transferred plenty of my cakes though. It usually takes 2 people and 4 hands and a couple large pancake turners and LOTS of steadiness! I don’t have any secret techniques or anything, except grease the board/pancake turners/whatever tools you’re using to do the transfer. It’ll slide easier. And, if you get it transferred without having to do any touch-up, you’ll have done better than I ever have. ????
Hi Kay
Wow what a brillent cake. My son’s 7th birthday is coming up and my husband and I decided we would make him a Mcqueen car. Your site has given me the information I needed to make the cake. Chris my husband is the decorator so I will show him this site when he gets home. Thanks for showing how you made this.
Debbi
Hi Kay
Forgot to mention we live in England so I will be making the cake from scratch as cake mixes over here are not that good. We have made other cakes before so the chocolate cake is not a promblem we made a Treasure Chest last year for my son’s 6th birthday we had a pirate party. It was my husbands first time at decorating and he did a great job. I had hurt my leg so couldn’t stand so I was sitting in the kitchen giving him instuctions on how to bake the cake ( first time he had made a cake). Told him what the design needed to look like and left him to it. He enjoyed it so much that we hope to go into business ourselves in the next three years we prefer novelty cakes and have made a few for family and friends over the past year.
Debbi
Hi. I live in Brooklyn and have been desperately trying to find a baker that will bake a cake for my nephew’s 1st birthday party. Its on December 5, 2009. I would like it a bit bigger than the one you made.Is there a possibility that would be able to do so. What is the cost? Thank you
Ruth, I am not able to ship cakes… not sure how to do it without them getting damaged. I really hope you’ve found someone who can make one for you. Or is there anyone in the family who would be up for a challenge? Have him/her make one!
Debbi, how did your cake turn out?
Kay,
Thanks for such clear directions on this cake. I realize you did this one a while ago, but I was just doing a search for Lightning McQueen cakes for my son’s 4th birthday next week. We live in Russia, and I’ve never seen fondant sold here. I have found a recipe for marshmallow fondant that I’m willing to try (don’t really care for the taste of store-bought fondant anyway). Have you ever worked with MMF? I had never heard of it. The recipe said that it tastes good. If you have time in the next couple of days to respond, I’d love to try this! Can you put regular icing on fondant, or does it slip off? I was thinking of doing the red with the MMF, and then doing the other details with buttercream frosting. I thought that might be a little simpler for me.
Thanks for any advice!
You have helped me out so much! Thank you for your inspiration and guide! I look forard to making a lightning mcqueen cake!!!!
Hey!
I really want to try this Lightning Mcqueen for an upcoming birthday party. The event is on saturday and today is wednesday. If I carve the car and put icing on it…cover it with clingwrap and put it in the freezer…will it be ok for saturday?? thanks, maegan
cakecreationsbymaegan@yahoo.com
CristyLynn, Yes, it works great to use reg icing on fondant, but make sure it’s pretty stiff… if it’s too soft, the liquid seeps out (or that’s what it looks like happens anyway, the fondant looks wet around the base of the icing). It would sure be faster to pipe the details on! That was a bit tedious to cut all those little things out of fondant! I’ve never tried marshmallow fondant, but hey, if it allegedly tastes great, that would be a plus! I don’t like the taste of store-bought fondant either. When I eat a piece of fondant covered cake, I peel the fondant off.
Maegan, I’ve never tried that, but as long as you don’t put the fondant on, I’m pretty sure it would be fine! One thing I learned the hard way is that fondant and freezer don’t mix. ???? It’s fine until you get it out, then as it’s thawing, the colors start to run. Aaaack! I wonder if you should be sure to let the cake totally thaw before putting the fondant on because maybe it’s fondant and cold that don’t mix… I’ve never put it in the fridge to see if the colors run when it gets back to room temp. Let me know how it works for you. It’s a great idea, one that I’d probably use sometime because birthdays come around whether it’s a busy time or not and sometimes it would be handy to pull a partially finished cake out of the freezer and only have to decorate it!
Thank you so much! I made this cake for my son’s 3rd birthday and he absolutely loved it! So much that he stole the wheel and ate it before we made it to the party. LoL Here are the pics if interested.
http://i119.photobucket.com/albums/o141/shannonpfunk/013.jpg
I am planning to make this cake tonight. I have a question- for the Rust-eze logo which is brown, the Happy Birthday lettering and sme of the outlines, did you use the fondant or something else?
Thanks!
Hey, good for you, Kate! Let me know how it turns out!
The dark brown circle on the Rusteze logo is fondant, the light brown part of the logo is buttercream frosting piped on.
The happy birthday lettering, the black around the lightning, and the ‘lettering’ on the tires is also all piped on. To do piping, I just put the frosting in a plastic bag and snip a little bit of the corner off. Or you could use a round decorating tip too.
Good luck!
this is awesome I am making my first fondant cake ever for my sons bday – lightning mcqueen! and this is so helpful! you did a GREAT job!
Thanks for these photos. I am doing almost exactly the same thing, only I am using pound cake. A bit stiffer, and less crumbly, than sponge cake.
I didn’t read all of the comments, so someone may have already told you this. A quick trick I have found for getting the powdered sugar off of fondant (especially an issue on black fondant), use a spray bottle filled with vodka. The vodka soaks up the sugar, and then the alcohol evaporates. Since the vodka has little, to no, flavor other than the alcohol itself, it has no effect on the flavor of the cake. This works quite well. BUT, make sure you have gotten it all smoothed out, and all, before you spray. It will moisten the fondant, like water, and make it difficult (impossible) to smooth the fondant.
Love this cake!!!! You made it look so simple to actually do….the step by step pictures are great! My question….how do you get teh red fondant so red???? Do you use gloves when you are mixing it??? My hands are always colored for days….any tricls??
Darci, I used LOTS of food coloring paste to get the fondant so red. I’ve used gloves already, but most of the time, I just knead the color in there with my hands, then wash up right away with hot soapy water.
Gandygirl, I hope your cake turned out well!
Kay,
Thank you SO MUCH for posting this step by step with photos “how to” page! I’ve never done a fancy cake at all — I’ve never worked with fondant — but thanks to you, I’m going to give this a try next week for my son’s 3rd birthday.
Question: How much fondant did you use? To simplify my life, I’m thinking to get some pre-made red and it comes in 2 lb containers. Will one be enough, plus I’ll get a second one of white? Also, how did you make the black? Did you just mix all the colors?
Thanks!
-jen
Jen, I hope it goes good for you!
I’m glad you’re trying it!
I forget what the oz are in the size of package that I used, but I think it was 1 lb. There are often 2 sizes available at the store and I used the smallest size. I got white, then mixed all the colors with Wilton food coloring paste (not liquid food coloring), the paste comes in little cans about 1 1/2″ tall. They have all sorts of colors, including black… that’s what I used.
Not a bad idea to get pre-made red… I do NOT like mixing color into fondant! It takes a long time to get it evenly colored… something tye-dyed would take less time.
Kay,
Thank you! Your photos and instructions were great and made this much less intimidating, so we decided to try it. Our cake turned out fantastic and it was our first try working with fondant. Now we are ready to try another for my older son’s birthday and he wants Spongebob. Whew! At least Spongebob is square-lol. I can’t believe we were able to do this and it is thanks to your fantastic photos and tips. We found using the shortening to be much easier for us to work with the fondant and Wilton even has a coloring gel “Cars” kit now with all the necessary colors. I cheated and used a black Wilton gel frosting tube to write all the letters and outline the numbers etc., but at 3am it was helpful.
Lori
Hello Kay
Many thanks for posting this step by step guide. Your Cake is brilliant. My sister has asked me to make this cake for my nephew and your instructions are really going to help. I have only made 2 fancy cakes before and I normally cover them with Apricot Glaze. I see you have used a white frosting to cover the cake before the icing. what is that? Would it replace the glaze? Im still only a beginner and would love to hear from you.
Best wishes
Rachel
Your cake is amazing. I have never attempted anything like this before! My sons 4th birthday party is tomorrow night and he absolutely loves Lightning McQueen, so I’m going to attempt to make this beautiful cake! Here goes nothing!!
This cake is so creative and cute. I would love to try this out for my nephew’s 2nd birthday.
[…] . I finally ended up choosing this Lightning McQueen Birthday Car Cake… Many thanks for kitchenscrapbook for sharing this […]
Hi, your cake really inspired me to make one for my 2 year old who just loves Lightening Mcqueen. The cake came out pretty good too. Thanks a lot.
Wanted to share photos of my cake – how do I do that?
Thanks again
Sunehra
Hi Kay i am just admiring the mcqueen cake that you have done, Awesome really. It is my sons 4th Birthday on valentines day so i was going to give this cake a go, I was just going to ask for the spoiler would you be able to tape the cardboard on to 3 tooth picks & then press them into the cake so that it wont flop.I’ll still give it a go & send you some pics of it
Rachel, I’m late in replying here, but yes, I use regular buttercream icing instead of apricot glaze. I’ve only tried glaze once. It worked fine, but I like the icing better for taste and because it does better at hiding flaws. ????
Sunehra, I’d LOVE to see pictures of your cake! Email photos to kay@kitchenscrapbook.com I’d love to put them on my post of people who’ve made Lightning McQueen cakes!
Lisa, that idea sounds brilliant for the spoiler! Is that what you ended up doing? And did it work?
Hi Kay, Thank you so much for sharing this tutorial. I made one and followed your instructions. It turned out great! thanks! I will send you a photo of the cake I made.
THIS IS SO CUTE.AND I LOVE HOW U DID STEP BY STEP INSTRUCTIONS.IM GONNA TRY THIS MY SONS BIRTHDAY IS N JULY.
Thanks so much for great instructions and ideas! I used your basic idea and instructions – made a few changes because I am a chicken! – I don’t like working with fondant, so used regular icing and hot, wet knives to make it smooth, I cut the spoiler at the back out of cake and iced that too, changed the number and name to mean more to my girl!, made the tires out of oreos and just iced over the white cream filling with black, I did still do the windows and decals out of fondant, and painted the decals with a kids paintbrush and food colouring instead of trying to mix colour in. – It was a huge success – thank you for all your help in getting the shape right and giving me so many ideas! – am emailing you with photos!
I haven’t checked all the previous comments but if I make this the day before my son’s birthday and put it in the fridge will it be okay?
Dal, that should work great. I put a fondant-covered cake in the fridge for 3 days just recently and it was totally fine. When I got it out of the fridge, I put it in the coolest air-conditioned room to come to room temp. Don’t put it in the freezer though… I did that one time and when it came to room temp, the fondant got all shiny and wet and the colors started running!
Donna and Niccy, I got your pictures! So exciting! Thanks!!! Nice job!! I’ll add them to the Lightning McQueen Again post in the next day or so.
Tosha, go for it! And send me pics!
This cake is fabulous! I too am a SAHM who loves to bake and make all of my boy’s b-day cakes! It is very relaxing and the joy of the look on their faces are priceless! Thank you for the step by step instructions. I plan on making this cake for my son’s 3rd birthday in Aug. Can’t wait to get started!!!
[…] Racing for the Snacks Table: Awesome Party Food Ideas Gorgeous Cars cake by Kay of Kitchen Scrapbook […]
[…] .. Also I got some good tips from a good friend blogger on how to design the pixar car – https://kitchenscrapbook.com/2009/07/23/lightning-mcqueen-birthday-cake/ […]
my little nabers think that this cake is sooooooo cooollllll!you sould have sale there faces when they saw the cack
Hey, Im 16 and I had an assignment to do on a ‘catering buisness’. It was for Food Technology. We were also required to make a cake for this and my theme was ‘Cars’ for a boys 5th birthday. I stumbled upon this website and thought…”Wow, this lady is talented!” So i decided to follow your instructions, and guess what? My cake turned out absolutely fabulous and I got a top mark! I’m from Australia, by the way. I just wanted to thankyou sooooo much for this cake. The instructions were easy to understand and I ended up with a beatiful cake. xoxo Couldn’t have found a better site.thankyouuuu ????
I’ve been dreading making a lightning McQueen cake, but yours makes it seem like “It CAN BE DONE”. Thank you for your step by step guide! Wish me luck!
I don’t know if anybody else has given you this tip but to get fondant a nice bright red without having to use a whole container of dye is to replace some of the icing sugar with a package of jello crystals (strawberry, cherry, whatever). Not only does is give the fondant a nice flavour but it will give your fondant some color and then you can add your dye to get whatever intensity you are going for. Great cake btw!
Do ou recommend freezing the cake before carving?
This is gorgeous, and I am thinking of attempting this one soon! Just a quick question though…What did you use for the lightning at the sides, the orangey and yellow part? Is it fondant?
Thank you so much for taking the time to take pictures and do a step by step guide to building this cake. My son is turning 2 and is OBSESSED with lightening McQueen. I cant wait to tackle this cake and hope it looks at least HALF as good as yours!! :o)
[…] I relied on to make this cake. If you want to reproduce this cake in any way, I highly recommend this article, with excellent pictures to […]
Hi,
Just want to know where r u based. B’se I’m planning to order a lightining McQueen b’day cake for my son in April. Therefore would like to know. We live I’m Australia.
Regards
Presha
Presha, I live in Ohio. I’d suggest you’d check with Planet Cake… they are in Sydney and make AMAZING cakes!