Recipes and Cooking Ideas for Homemakers and Amateur Cooks
 

Chocolate-covered Ritz with Peanut Butter

Posted on December 18, 2010
Filed Under Candy, Holiday cooking
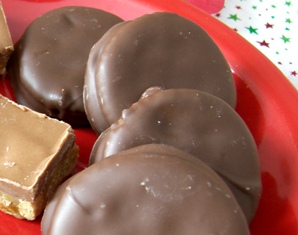
chocolate-ritz-peanut-butter-done.jpg

This is the first year that I’ve done so much chocolate dipping. Kinda fun. I was looking around for more stuff to dip… did you know mini marshmallows dipped in chocolate are good? And peanuts, of course.

I just wanted to put these dipped Ritz cracker things on here because I learned something with them.

First step is to put peanut butter on one side of a cracker. So, I got a knife, the pack of crackers, and the jar of peanut butter and went to work, spreading crackers with peanut butter. You wanna talk about tedious and hard to get the peanut butter even along the edges, plus not be messy with it!

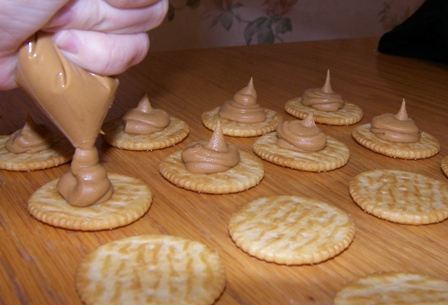
I was about to stop the project when a lightbulb went on… I could pipe it on! So, I got a plastic bag, filled a corner with peanut butter, snipped of a little corner and started coiling it on till the cracker was covered. It really worked, but it took too long.

Then, the lightbulb got brighter and I snipped the corner off bigger and made a pile in the middle of the cracker, got another cracker, and pressed it down on top till the peanut butter was evenly to the edge of the cookie. Fast. Easy. Fun.

So, I started mass producing… laid a bunch of crackers out on the table, squirted piles of peanut butter on them all, then went through and pressed all the top crackers on. The whole batch was done in no time. Maybe you all already do it like that, but just in case there’s someone out there going crazy, still spreading peanut butter with a knife and getting your hands messy, here you go.
ritz-peanut-butter-chocolate1.jpg

ritz-peanut-butter-chocolate.jpg

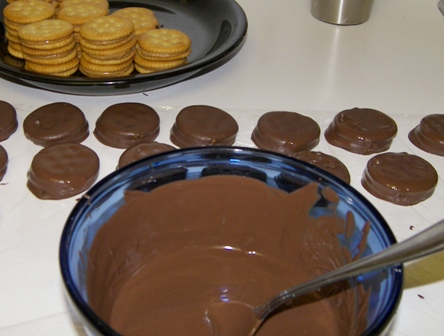
Before dipping, I put the filled crackers in the fridge because chocolate hardens faster when whatever it’s about to cover is chilled. I don’t know any secrets to dipping… I just dip them one at a time, dig them out with a spoon, shake of the excess, and put them on Saran wrap/wax paper to dry. I’ve thought of using a cooling rack and pouring melted chocolate over them, flipping them, and pouring more over, then catching what runs off and re-using it, but that just seems a bit too messy and I’d have to wash the rack and what if it wouldn’t cover the sides right.

I want to make one more thing yet, then I think my Christmas cookie/candy making is done for this year… the first part of next week, I want to make Chocolate Chip Craisin Cookies… half of the batch white chocolate and half milk chocolate, and compare them. ???? I decided to wait till after Christmas to post Lexi’s birthday cake because I’m kind of in Christmas food mode, and her birthday cake has nothing to do with Christmas.

Comments

11 Responses to “Chocolate-covered Ritz with Peanut Butter”
  1. Berneice on December 18th, 2010 1:49 pm

    This is something my mom has made for years (and of course I don’t like them=they have pb) but just recently they started making them with marshmallow cream too.

    oh and I am enjoying all these updates on your blog! Keep up the good work. Maybe it will inspire me to get cookin!

  2. Freida on December 18th, 2010 2:37 pm

    I was gonna say something along the same lines as Berneice. This is something we have always made.. for as long as I can remember. Never heard of adding marshmallow cream till I got married, but now that I tried that, I can.not.leave. them alone. So yummy!

  3. Christy on December 18th, 2010 9:07 pm

    Another idea for spreading the peanut butter is to give the job to your child. They think it’s cool. :) I love these things! We’ve already dipped Ritz Bitz, but there’s just something about real peanut butter crackers dipped in chocolate that’s hard to beat.

  4. Renita on December 18th, 2010 9:27 pm

    I do the pb ritz bits. I like that size. It’s a pop-in-the-mouth-one-right-after-the-other and there’s chocolate all the way around. I’m more for chocolate than pb.
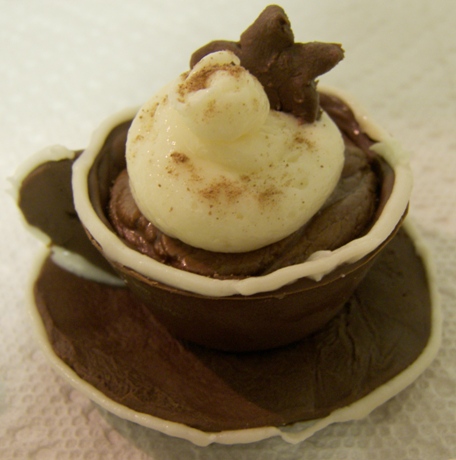
    The mini teacup chocolate is SO adorable. I just had some cappuccino mousse that would be perfect in the choc. cup. I was thinking the chocolate roses you’ve made already would be a perfect match!Thx for the “updates” I always enjoy em!

  5. Amber S on December 19th, 2010 8:59 pm

    Use a big fork to dig them out of the choc. It lets the excess drip through the tines. :)

  6. Beth on December 20th, 2010 1:16 pm

    Putting the pb into a bag seems like more mess to me than just using the knife. Hmm…maybe I should try it before I knock it?? :) My mom helped me this year, so that makes it go faster. lol As always…enjoyed the post & love how you show us new ways to do things!

  7. Kay on December 20th, 2010 1:47 pm

    Ok, Berneice and Freida, I’ve gotta try these things with marshmallow creme! But, man oh, if I thought peanut butter was a mess, I can’t imagine marshmallow creme!!!! Sounds worth the mess though. :)

    Renita and Christy, thanks for the Ritz bits idea… the pop-in-the-mouth size sounds delightful.

    Yeah, I should’ve got my girls to do it, Christy. And, Beth, yeah, a mom would be a nice feature in the candy-making process… would make anything better and faster! ????

    Amber, thanks for the FORK idea! Brilliant! I shall do that from now on!!!

  8. Cheryl Weaver on December 28th, 2010 12:56 pm

    I just need to share a non messy way to get that peanut butter in the bag if I’m able to put it into words. I just put the corner of my bag into a drinking glass (kinda short and squatty) then take the top of the bag and fold it down around the outside of the glass. Kinda like you are starting to turn the bag inside out. Then get your spoonful of p.b. or frosting or deviled egg filling or whatever you are putting in there and drop it in. Hope that isn’t too confusing. Just something that works for me.

  9. Dena Skrivseth on January 1st, 2011 8:34 am

    Was going to suggest the Ritz bits…someone beat me too it…and then the fork…was beat to that too. But when I am finished dipping…then I throw in the peanuts for clusters…it finishes up the choc quite nicely! Another thing I like to do is to buy those mini Oreo cookies, and cover them with white choc,(brown works too, but when you have both, you know which you are getting if they are white!) then throw in either raisins, peanuts, or mixed at the end to finish up the choc

  10. Katie Mast on January 4th, 2011 10:17 am

    i make these crackers all the time, but i never thought of the bag. I love it, thanks for that tip i will use it next year. We also add a third cracker with marshmellow cream. Love all your new recipes.

  11. Judi on January 28th, 2011 3:02 pm

    Okay, I was good with crackers and peanut butter… who needs anything else lol. But chocolate covered WOW and Marshmallow?? Oh my. How about if we mix peanut butter and marshmallow creme then dip them in chocolate? A little on the messy side, but hey, we’re already getting a little down and dirty. My daughter does Dove Chocolate home parties… she’s a chocolatier, so I have an endless supply of chocolate… yes, I still have to buy it, but it is delicious.

Mini Teacup-shaped Chocolates

Posted on December 17, 2010
Filed Under Candy, Holiday cooking

teacup-chocolates8.jpg

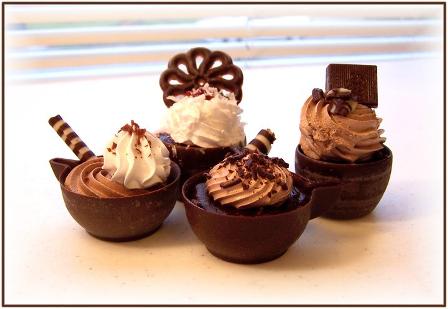
My sister-in-law Sheila had a birthday last month and her mom got her some teacup truffles from a local bakery. She was showing them off …notice I said SHOWING, not SHARING! ????
Here is a picture of them…
chocolate-teacup-truffles.jpg
Aren’t they adorable? As soon as I saw them, they went into my oughta-try-them-sometime cooking folder in my OneNote. By the way, Sheila took that picture. One of my Kitchen Scrapbook New Years Resolutions is to research food photography (lighting/props/angles/how to make it look good/etc) and practice and get to know my camera and aperture and focus and settings on it to up the photo quality a bit on here. I was planning to go online for that education, but it looks like I don’t need to go any farther than our family gathering over the holidays to get tips… I love this picture! Looks like it came out of a magazine. Of course, the truffles look like they came out of a magazine, too!

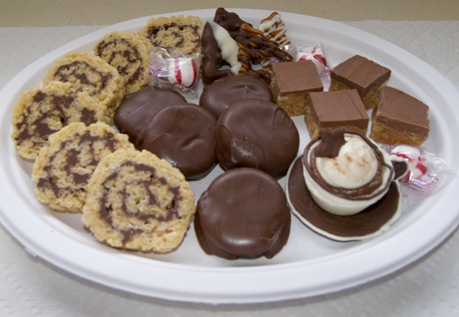
I was at a cookie exchange today and I took a plate of candy instead of a dozen cookies. WAY more fun to make and nobody seemed to mind. :) I decided this was my chance to try the teacups, thought it would be a cute touch to a candy plate.
teacup-chocolate-candy-plate.jpg
On the candy plate is:
Rice crispy rolls
— Chocolate-covered Ritz crackers filled with peanut butter (to be featured tomorrow)
— Misc chocolate-coated/drizzled tree-shaped pretzels
O’Henry bars
— Chocolate teacup
— Store-bought peppermint candies

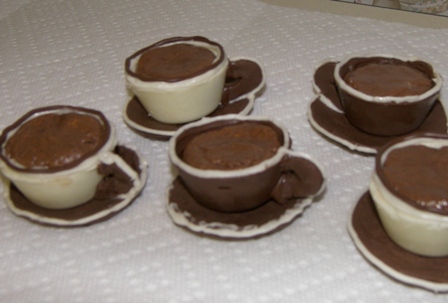
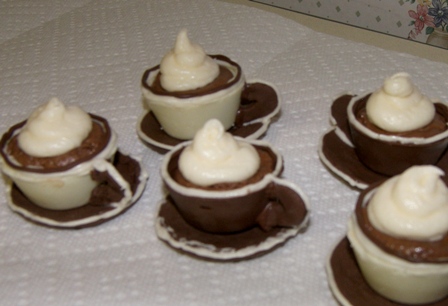
These teacups are not as hard and time-consuming as they may look. I want to make some more and next time, I’m not gonna go as crazy with piping trim on! Actually, I think I’ll skip the piping altogether. I wanted them all coordinating with white and brown chocolate and I think it ended up looking too busy or messy or something. I think next time, I’d make the cup and saucer both the same monotone color. So, minus all that piping, these teacups were done in 7 steps, mostly easy steps:
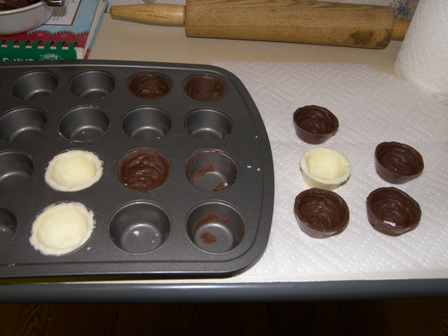
1. Line the cups  of a mini muffin pan with white or dark or milk chocolate to form the cup part.
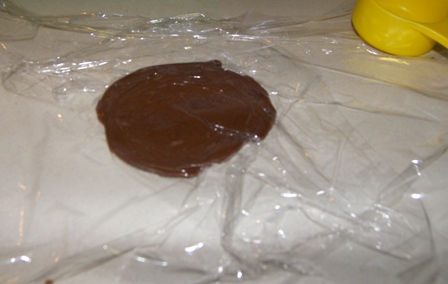
2. Make a saucer out of partially hardened chocolate.
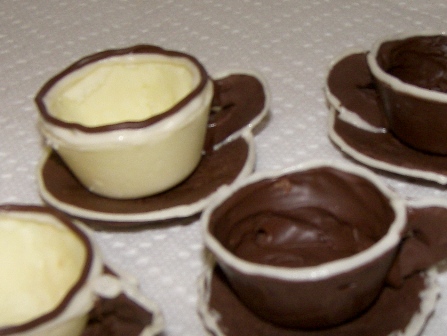
3. Form a handle out of partially hardened chocolate and ‘glue’ it on with melted chocolate.
4. Fill the cup with fudge (that’s what I did here) or truffles or mousse or whatever.
5. Pipe white frosting on top to look like whipped cream (remember that cup of frosting I had left over from the red velvet sandwich cookies? It came in handy here! ???? )
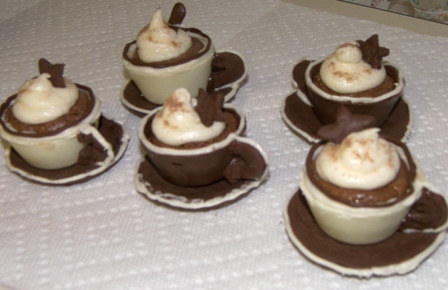
6. Sprinkle the whipped cream with a bit of Nestles Quik powder.
7. Form a little decoration out of partially hardened chocolate or make a chocolate curl or use some other decoration for garnish.

Here are pictures and “What I learned” tips with each step…

Step #1.
teacup-chocolates1.jpg
What I learned:
Grease the cups WELL.
The thicker the chocolate, the better… if it’s too thin, the cups might break as you get them out (see the one in the front right has a hole in the bottom).
Chill before getting them out.
Best way to get them out is to push against the inside of the cup and turn it, when it comes loose, pull it out.

Step #2:
teacup-chocolates2.jpg

teacup-chocolates3.jpg
What I learned:
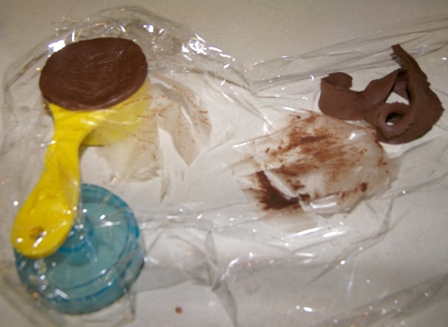
Use utensils/Saran wrap to do the work… using fingers melts the chocolate and creates a sticky mess.
Cut a perfect circle by using a round cutter… a drinking glass works great.
Lay the saucer on a measuring cup… it will sink down just a little in the middle to create a ‘saucer’ look.
The fridge was my friend. Chocolate hardens faster in the fridge. ????

Step #3:
chocolate-teacups4.jpg
What I learned:
If the cups are chilled before putting the handles on, they adhere faster.
You need to hold the handle against the cup until the melted chocolate between them has hardened… otherwise the handle might fall off when you set it down. *rolleyes*

The rest of the steps don’t have ‘what I learned’ tips because there were no issues/problems/lessons learned. That’s a good thing:)

Step #4:
teacup-chocolates5.jpg

Step #5:
teacup-chocolates6.jpg

Steps #6 & 7:
teacup-chocolates7.jpg
I made stars because, you know, Christmas. I thought stars would be easier than holly or trees or a wreath or a gift or a manger scene. ???? I just made a ball, then flattened it, then pinched it in 5 places, then perfected the points. Haha, perfected the points? Then why aren’t they perfect?! :p I guess I should’ve said I just made a ball, then flattened it, then pinched it in 5 places, then messed around with it till it looked more or less like a star. :) Oh, and the one doesn’t have a star, in case anyone noticed. It was the last one and REFUSED to turn out, so I ate it and just stuck in a random dripping from where I had drizzled the pretzels.

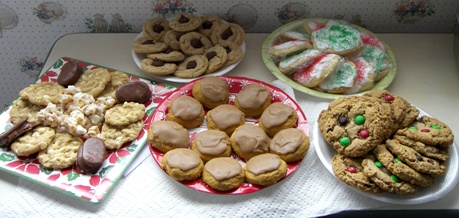
Oh, and here are the 5 plates of cookies that I came home with… Peanut Butter Kiss cookies from Rosalyn, Frosted Sugar cookies from Beth, Monster cookies from Sherri, Pumpkin cookies with caramel frosting from Rita, and White Chocolate Chip cookies and some coated party mix and chocolate-covered peanut butter crackers from Mary Esther. I love love love cookie exchanges!!! When else can you mass produce one thing and end up with a fun variety?!
cookie-exchange2.jpg

Comments

14 Responses to “Mini Teacup-shaped Chocolates”

  1. Shannon on December 17th, 2010 8:07 pm

    These little things are so cute. Waaay to much work for me tho! :)

  2. Ruth Hochstetler on December 17th, 2010 10:12 pm

    A very interesting project, and well done! I have one question on an ingredient. On the candy plate you mentioned ‘tree shaped pretzels.’ Years ago, that was one of the ingredients in my party mix, but I can’t find them anymore. Where do you get them? I like them because they are so dainty and thinner than most pretzels. They go well in a Christmas mix.

  3. Kay on December 17th, 2010 10:19 pm

    Ruth, yeah, I agree, they’d be perfect for Christmas party mix! I got the pretzels at our local bulk foods store. I don’t know if you have any in your area, but I’d check there. Good luck!

  4. Rosalyn on December 17th, 2010 10:35 pm

    I’m in Indiana wishing that I’d have my yummy cookies along instead of at home in my freezer. :) Can’t wait to inhale them!! :)

  5. Beth on December 18th, 2010 12:15 am

    Today was so fun!! I vote for you to make candy every year. Those things are so cute & I still didn’t eat mine…just waiting for the perfect moment. :) Also wanted to say I’m excited that you are doing this daily post!!

  6. Cheryl on December 18th, 2010 1:07 pm

    Cute!

  7. Loretta on December 20th, 2010 12:59 am

    Oh can’t wait to try these little teacups!!What a perfect idea for a little girls Birthday party!!!

  8. Sheila on December 20th, 2010 9:17 am

    Wow Kay! I should have known you would try these truffles. :-) They look good! Ha, don’t expect to learn many photo tips from me. I love taking pics of food, but so often am not happy with them. Getting the right lighting has been my main source of frustration. I’ve always wondered how much difference having a better camera would make. Well, Jared got a new camera recently, and then rented one of those huge zooms for a week to shoot pics at a wedding. We were at their place a couple of times while he had it and I had so much fun “playing” with it. I just walked around the kitchen taking pics of food preparations, and I couldn’t believe the difference! Honestly, they almost looked better on the camera than they did in real life. :-) Now, that was fun! So, the fact that a good camera really does make a difference could be encouraging or discouraging, if you know what I mean. :-/ BTW, I’ve seen some really nice food pics on this particular site, so don’t be too hard on yourself. :-)

  9. Jan on December 23rd, 2010 1:38 pm

    I am trying to make some of these for a Christmas present. How did you line the muffin tin with chocolate? I can’t get the things out no matter how much cooking spray I use or how chilled the stuff is.

  10. Jan on December 23rd, 2010 2:15 pm

    Problem solved! I lined the cups with foil and then when the chocolate was hardened, I lifted them out and peeled off the foil. Worked perfectly!

  11. Judi on January 28th, 2011 3:26 pm

    You amaze me. I buy the chocolate cups from my daughter :) Maybe it’s my age, but it’s just too much chocolate for me. Quick, someone call the DR. The chocolate mousse mix that she sells is also to die for. Usually by the time I’ve eaten the whipped topping and chocolate mousse I just am on sugar overload without even eating the cup. I do save it for later though :)

  12. Judi on January 28th, 2011 3:27 pm

    oops, now I remember what I was going to say. For the stars that you were trying to make… do you have any chocolate candy molds? I have some small molds that have lots of different shapes… even a star. You just mold the chocolate and pop it out… perfect every time.

  13. Margarita Brajak on March 13th, 2011 9:53 pm

    Where did you find the teacups with the halow handle, in the second picture? Please respond to mbrajak@hotmail.com Thank you. Margarita.

  14. Kay on April 30th, 2011 9:43 am

    Margarita, those little teacup truffles were being sold at a small bakery in WI.

    Judi, using candy molds… great idea! Thanks! :)

O’Henry Bars

Posted on December 16, 2010
Filed Under Candy

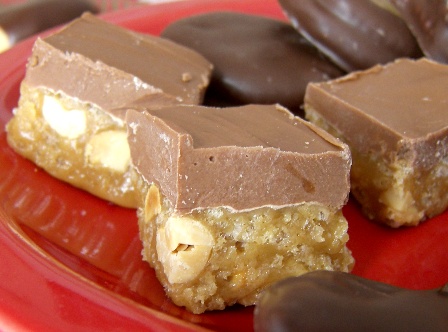
Every year, there are some cookies/candy that are a MUST, but I also like to find a couple of new recipes too. This is one of them. A few weeks ago, I was trying to catch up on my way-behind Google Reader (I won’t tell you how many unread items there are because Shannon gives me a hard enough time about it, I don’t need you all to, too ???? … I know he’s right when he says, “You oughta just mark them all ‘Read’ and start over!” but instead I say, “No! What if there’s a post or two in there that I FOR SURE don’t want to miss?!”) and anyway, I clicked on The Cutting Edge of Ordinary and Lisa had just posted these bars. I knew right then and there that they had to be on my new-things-to-try-this-Christmas list. And they didn’t disappoint me. They are just as good as they sound and look! And a few people that I gave some to let me know they were a hit at their house, too.

ohenry-bars.jpg

O’Henry Bars

1 cup Karo syrup
1 cup sugar
1 cup peanuts (unsalted, do not chop) I didn’t notice this before I got ingredients and I bought salted peanuts, oops, but they turned out great anyway!
1 cup peanut butter
3 cups rice krispies
12 oz package chocolate chips
12 oz package butterscotch chips

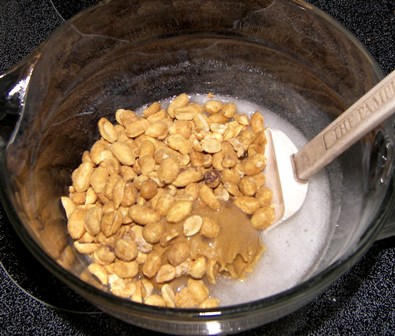
Stir together the syrup and the sugar. Microwave for 2 minutes. Add the peanuts and the peanut butter to the Karo mixture. Microwave again for 1 minute.
ohenry1.jpg

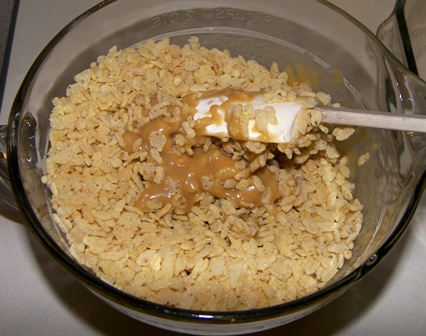
Add 3 cups of rice krispies.
ohenrys2.jpg

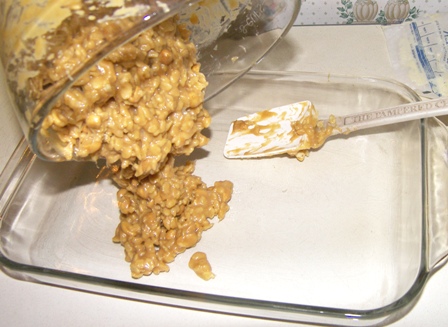
Spread into a greased 9×13 pan.
ohenrys3.jpg

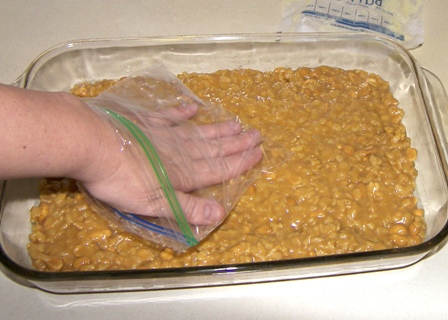
I pressed them into the pan with a buttered plastic bag.
ohenrys4.jpg

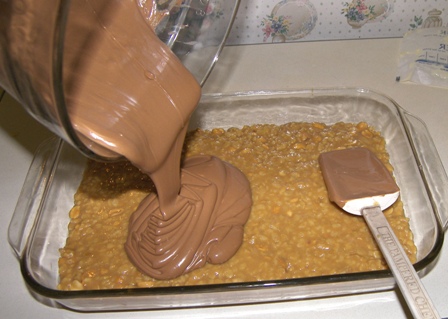
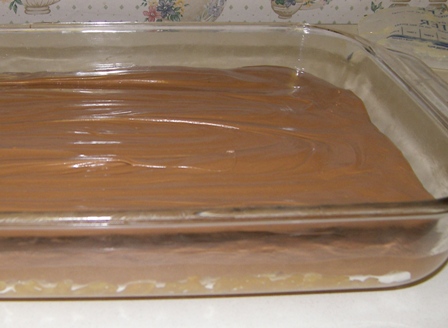
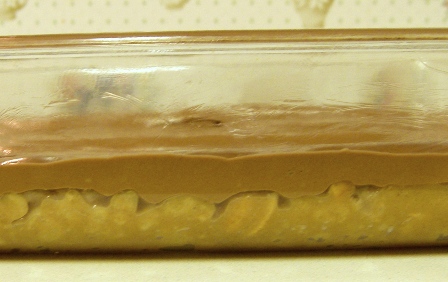
Combine the chips in a bowl and microwave for 2 minutes. Stir until smooth. Spread over the rice krispie mixture and cool in the fridge. Cut into 1 inch squares to serve.
ohenrys5.jpg

ohenrys7.jpg

ohenrys8.jpg

I should’ve taken a picture of them cut in the pan, but I think I cut them 6 across the short way and 10 the long way, so 60 little bars. What they lacked in size, they made up for in taste. :)

I think I might make some more of these and try something different… make the bottom part and cool it til it’s firm enough to handle, then shaped them into little logs, chill them, then melt the chips and dip them. Maybe twice. ???? The end result would be like a fun size candy bar!

Comments

3 Responses to “O’Henry Bars”

  1. Lisa@The Cutting Edge of Ordinary on December 16th, 2010 3:05 pm

    Fun sized candy bars…what a great idea! Thanks linking back to my blog. I love when I see people actually making something I posted. Glad you liked them. I’m still dreaming about those red velvet ones!

  2. Cheryl on December 16th, 2010 3:10 pm

    Yum! I bet they would be great with dark chocolate, too!

  3. Renita on December 16th, 2010 9:57 pm

    Kay- are you SURE you put some of these on my cookie plate? Oh yeah you probly did. There were 4 boys that somehow devoured ALL the candy fast!!! And I get the red velvet ones all to myself. Reckon I just have to make these myself now that I have the recipe. Thx again! I also want to make carmels and dip pb ritz bits in choc.

Red Velvet Sandwich Cookies

Posted on December 15, 2010
Filed Under Cookies and bars, Holiday cooking

cookie8red1.jpg

I was trying to picture a festive cookie plate to take to the cookie exchange. For awhile, I was waffling between White Chocolate Craisin Cookies and these. I ended up with these. I kinda got hung up on the white chocolate in the others, wondering if I wanted to ‘waste’ a couple batches of cookies on white chocolate… Shannon, maybe you should try them. :) (Side note: This might be confusing to some of you because I have 2 Shannons in my life (my husband and one of my friends), both of which I refer to on here hit n miss, but if you know there are 2, you can usually tell which one I mean by the context. ;)) Back to these craisin cookies, I am planning to make a batch, and add the chocolate last, dividing the dough in half and adding white to one half and milk choc to the other.

Wow, I just spent a whole paragraph writing about something that has nothing to do with what this post is about. Good grief.

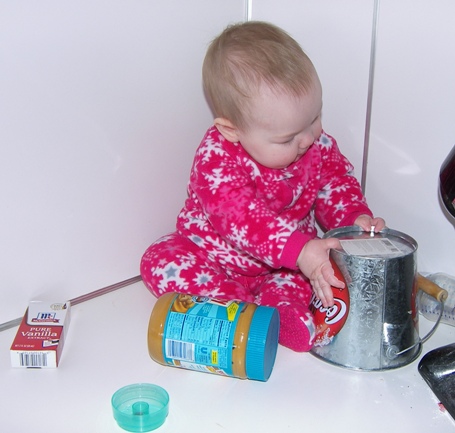
First, before the recipes, I’ll give amounts: I used 5 cake mixes, which made 9 1/2 dozen filled cookies, so I actually baked 19 dozen individual cookies. Me and baking 19 dozen cookies goes great together, I loved it… if it wouldn’t make me gain 100 pounds, I’d bake every day. On the other hand, Megan (my 6-month old) and baking 19 dozen cookies does NOT go great together. Let’s just say her naptime was blissful. Although, she thought it was bliss sitting back in a corner up on the counter playing with everything within reach (except toys). It’s amazing how far a 6-month-old can reach, I found out! Anyway, I made the frosting recipe 3 times and had about 1 cup left over. So, I’ll break this down for you to save you having to get out the calculator… 2 cake mixes would make approx 46 finished cookies (mine were anywhere from 2″ – 2 1/2″ across) and one batch of frosting would do approx 38 cookies… could become one of those deals where you make more frosting to use up the rest of the cookies, then you have too much, so you make more cookies to use up the rest of the frosting, then you have cookies left, so you make more frosting…… and so on. :)

Red Velvet Sandwich Cookies

1 red velvet cake mix
2/3 cup shortening
2 eggs

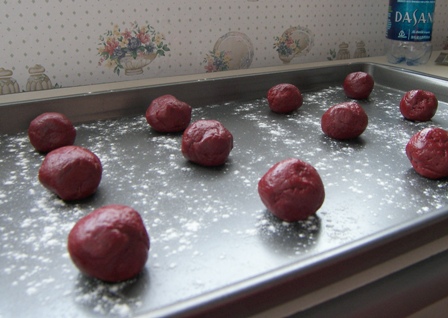
Mix. Shape into balls.
red-velvet-balls.jpg

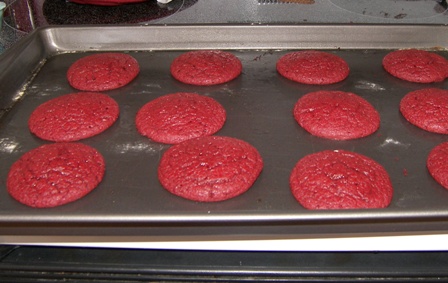
Bake at 375 for 7 minutes.
red-velvet-baked.jpg

Meanwhile, this was going on…
red-velvet-megan.jpg

Marshmallow Creme Filling

2 sticks (1 cup) butter
1 7oz. jar marshmallow creme
3 cups powdered sugar
1 tsp. vanilla

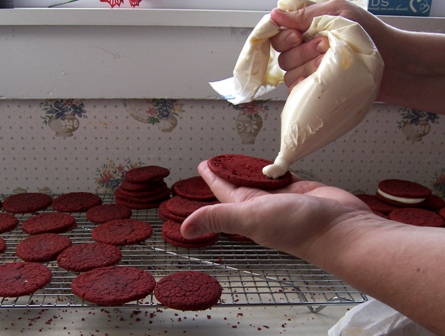
Beat til creamy. Spread it on however you want, but I put it in a bag and piped it on. Easy and less mess!
red-velvet-filling.jpg

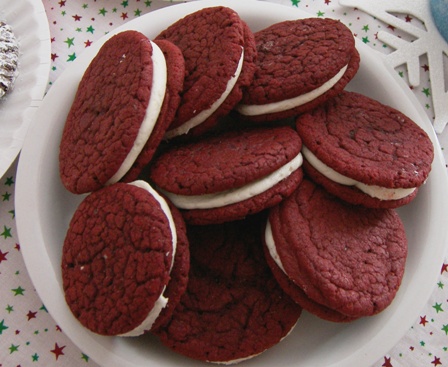
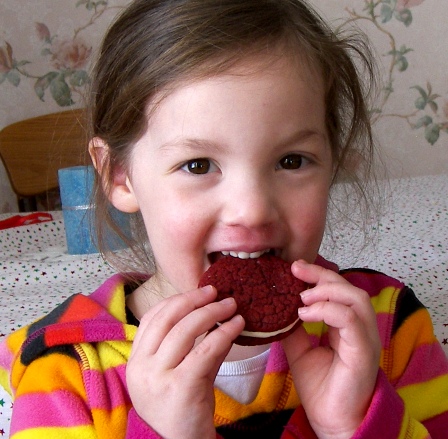
Put another cookie on top and you’ve got yourself a yummy little red velvet sandwich cookie!
red-velvet-tiffany.jpg

You know, I was just thinking, we could do all sorts of stuff with this because there are all sorts of cake mixes out there… use a white cake mix and put in green food coloring and have green sandwich cookies, make any kind of cake mix cookies and tint the frosting red or green, roll the assembled cookie in crushed red & white candy canes so it sticks to the frosting, dip half of a red velvet sandwich cookie in chocolate, mix up a white cake mix and a red velvet one and then fold them together til it’s red & white swirled… any other ideas?

Comments

6 Responses to “Red Velvet Sandwich Cookies”

  1. Shannon on December 15th, 2010 1:18 pm

    I’m the other Shannon and I have no ideas because I could barely get past the fact that you might not use all White Chocolate in those cookies. 8(

    That does sound like a cool and easy way to make cookies. Gonna have to think of what non chocolate kinds would be good. :)

  2. Berneice on December 15th, 2010 3:06 pm

    Hmm, these look good! I have some confetti cake mix here that someone gave us. We are not cake eaters, so they might become cookies! with red and green icing. Thanks! Oh and I can’t wait to hear about those Craisin cookies! I love craisins!!

  3. Lisa@The Cutting Edge of Ordinary on December 15th, 2010 3:33 pm

    Love these!! You are so right the possibilites are endless. I am so making these! Maybe for New Years cause my Christmas cookie baking is full-up!! Thanks!

  4. Liz on December 15th, 2010 5:35 pm

    What the world?! I thought you had a baby. I’m pretty sure that’s Megan up there and she just doesn’t look like the baby I remember.
    I used milk choc for some monster cookies I made recently. Thought you should be proud of me. :) But when I snitched the dough with a choc chip in it, it just didn’t taste as good as semi sweet. Grr. I guess maybe that would help me not to eat as much dough.

  5. Elvida on December 16th, 2010 10:11 am

    This looks really good and I have all the ingredients…just wondering if you meant crisco by shortening, or oil? Thanks!!

  6. Paul on December 16th, 2010 10:51 am

    Looks amazing!I love how simple you make it. Keep up the good work, looking forward to future posts!

Christmas Cookie Exchange 2010

Posted on December 14, 2010
Filed Under Cookies and bars, Holiday cooking

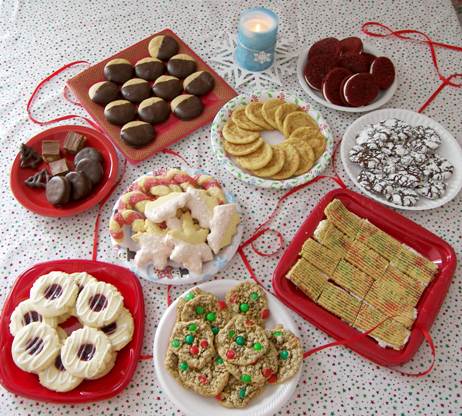
It’s that time of year when I need to unlock my extra reservoir of willpower. Here is what’s sitting on my table RIGHT NOW…
cookie8all.jpg

Seriously, the table these are on is 5′ away. I could stand up, take 3 steps, reach out and grab a handful. Or 2 handfuls (I have 2 hands). They are even all still uncovered from taking the picture. Thing is, I’m not even tempted. Nope. Huh-uh. Not me. Not at all. ????

I’m not even sure what they’re all called, so I’ll just make up a name for them if I don’t know. Oh, and hey, I’m really curious. What’s your favorite of all those cookies? If they were, say, sitting on a table 5′ away from you and you could only pick one, which one would you pick?

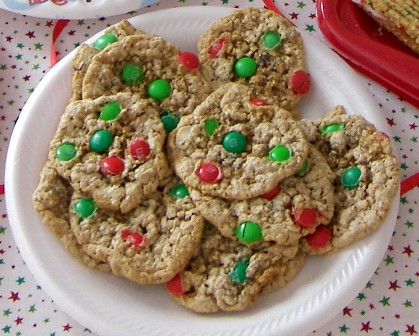
First, we have Monster Cookies made by Carla. Monster cookies are my all-time favorite… I’d better hide them, the others would never know. :)
cookie8monster.jpg

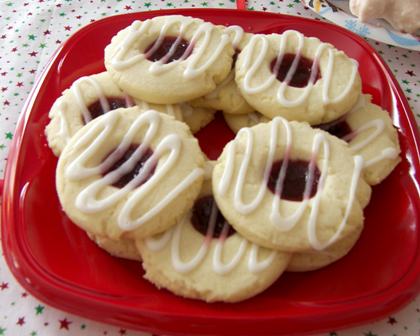
Next is Thumbprint Jam Cookies made by Julie. So pretty.
cookie8jam.jpg

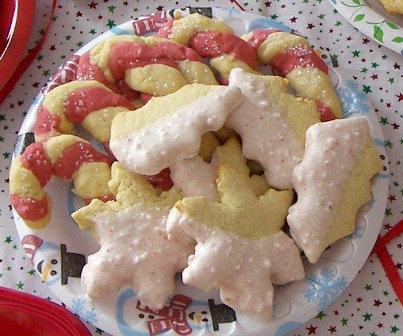
Here are Christmas Cutouts and Candy Cane Cookies made by Janae. Way too cute.
cookie8cutouts.jpg

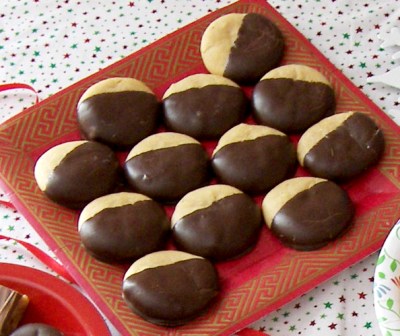
Then, we have Peanut Butter Cookies Dipped in Chocolate made by Linda. These call to me almost as loud as the monster cookies.
cookie8pbutter.jpg

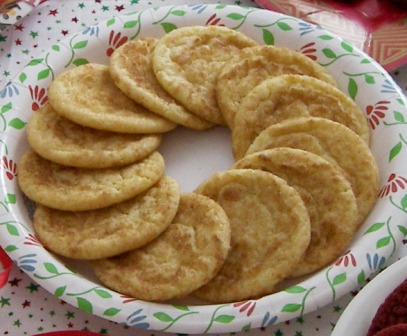
Next is Snickerdoodles made by Deb. Shannon will claim this plate.
cookie8snick.jpg

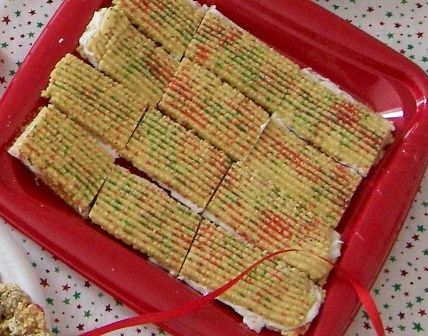
Here are Cream Wafers made by Renita. So beautifully Christmas-y.
cookie8wafer.jpg

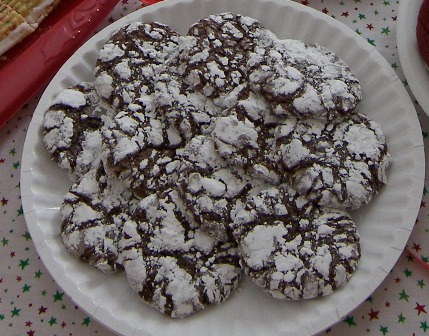
Next is Chocolate Crinkles made by Mary. Ohhhhh, yum!
cookie8crinkle.jpg

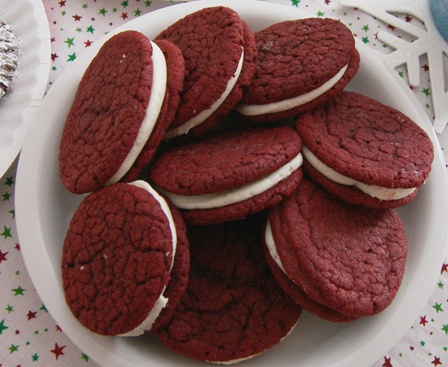
There are 2 plates left, one cookies and one candy. I made those. Here are Red Velvet Sandwich Cookies.
cookie8red.jpg

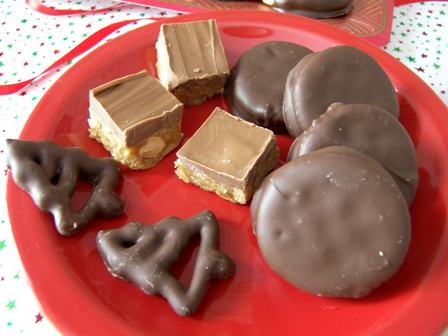
And this plate is Chocolate-covered Tree-shaped Pretzels, Chocolate-covered Ritz crackers filled with Peanut Butter, and O’Henry bars. The O’Henry bars recipe came from Lisa @ The Cutting Edge of Ordinary. Thanks, Lisa! They are awesome!!!
cookie8candy.jpg

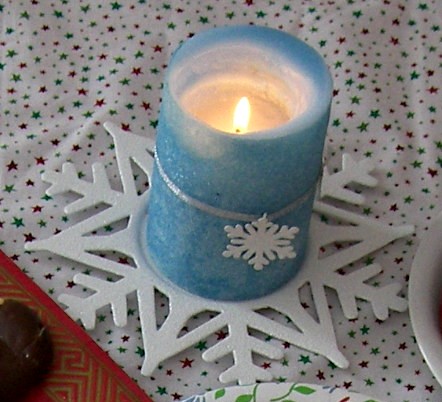
Oh, and I need to point out my candle and snowflake holder… don’t you just love it? Julie (the one up there who made the jam cookies) gave it to me for my birthday this year. I LOVE it!
cookie8candle.jpg

Ok, now I know I haven’t been posting on here very much and I don’t want anybody to faint, but I have some recipes to get in before Christmas, so I’m going to post one about every day for awhile. *thud* You fainted, didn’t you?! Here are the planned upcoming posts, not necessarily in this order:
— Red Velvet Sandwich Cookies
— O’Henry bars (I know, you can get the recipe on Lisa’s site, but I want it on mine, too :) )
— Teacup Chocolates (excited about this one, this one happened only in my head so far, so hopefully they’ll turn out!… I’m making them Thurs for another cookie/candy exchange on Friday)
— Chocolate-covered Ritz Filled with Peanut Butter (I know, you know how to do that already, just by the title, but I want to show you a trick that made the process faster and funner… more fun, whatever)
— Lexi’s 8th birthday cake (it was a snicker bar with a fondant wrapper)

Don’t forget to humor me with what kind of cookie up there you’d like best! :)

Comments

23 Responses to “Christmas Cookie Exchange 2010”

  1. Aug on December 14th, 2010 3:40 pm

    Oh, wow! Those look so good. And I totally believe you that you are not even tempted. (not)

    I would pick either the red velvet sandwich cookies or the monster cookies.

    But they sure all look pretty. Those wafers look like something I would want to try too.

  2. Lisa@The Cutting Edge of Ordinary on December 14th, 2010 3:43 pm

    So glad liked the O’Henrys! They are delicious! All the cookies you guys made are making my mouth water!!

  3. Liz on December 14th, 2010 3:58 pm

    Well, the monster cookies do look really good! Is one of each not an option? I would like try the O’Henry bars too.
    Maybe you SHOULD just eat all of them that way I wouldn’t have as many temptations when you come up. :) There will probably be enough stuff here.

  4. Cheryl Weaver on December 14th, 2010 3:58 pm

    The chocolate crinkles would be my favorite. Its the first thing I saw on your table. I MUST go make some. TODAY!!

  5. Arla on December 14th, 2010 4:13 pm

    Hi Kay,
    They all look very pretty and festive. I want one of the O’Henry Bars, please. I love the cookie part of Christmas. We did a few chocolate covered pretzels this year, too. They’re time consuming but they sure do make a plate look good. BTW, Kay, when you and Shannon are in our area in about two weeks or so; don’t you dare drive by and not stop in. Just come in for ten minutes, okay, please. If you come by in evening the guys will be playing with trains, or Catan, mostly likely.

  6. Karen B on December 14th, 2010 4:16 pm

    I think i’d pick the jam thumbprints or the red velvet sandwhich cookies..? or maybe grab 1 of each! =)

  7. Freida on December 14th, 2010 4:16 pm

    Oh yum. Those look so crazy good. It would be a hard choice and I would probably sneak more than one when you’re not looking. ???? One would be the Chocolate crinkles. I have been CRAVING those for the last several weeks! Those are on my favorite cookie list! I’ll be waiting for those recipes. :)

  8. Dawn Landis on December 14th, 2010 5:21 pm

    Wow… they all look so good! I think I would first try the Thumbprint or the Creme Wafers (never had them). Your Thumbprint cookies look so much nicer & yummier than mine… I had problems with mine last year… would love to have that recipe if you have it! Later this week I am making Christmas cookies with my Mom and sis-in-law… will be great to have a selection of cookes in the freezer again!

  9. Christy on December 14th, 2010 7:04 pm

    Peanut butter dipped in chocolate. Sounds like perfection!

  10. Beth on December 14th, 2010 7:12 pm

    I definitely fainted. :) The chocolate crinkles would call my name quite loudly, but that would then be followed with a few others. :( Can’t wait to taste your candy!

  11. Shannon on December 14th, 2010 7:37 pm

    Umm, not sure what to choose after coming up from a dead away faint. :) The Choc-peanut butter ones… snicker doodles or the cut outs, obviously I don’t go for the choc like most of you. Those O’Henry bars do look awesome. Should try them, but then again, I shouldn’t, because then I’d just eat them! :)

  12. Shannon on December 14th, 2010 7:38 pm

    Forgot to say, I’m gonna sit at the computer all day tomorrow waiting on your post. ????

  13. Cheryl on December 14th, 2010 7:42 pm

    I’ll take 3 of each!! Amazing, and what fun I bet! I need to have/attend a cookie exchange!

  14. cindy on December 14th, 2010 8:49 pm

    these look so yummy! i love Christmas cookie baking and will have to come back to check out your recipes!

  15. Rosalyn on December 14th, 2010 9:51 pm

    Those Monster cookies are waay too tempting! :( Good thing they’re at your house and not mine. I’d also like to try those peanut butter dipped in chocolate ones. And the O’Henry bars. :)

  16. Jan on December 14th, 2010 9:54 pm

    You can save me one of the peanut butter ones and also some of the O’Henry bars. I need to try the tree shaped pretzels, too. Where did you find them?

  17. Kay on December 14th, 2010 10:12 pm

    Arla, yeah, we’ll take you up on those 10 minutes… we’ve got lots to squeeze in while we’re up there, but we for sure want to see you guys! Will be in touch between C-mas & New Years sometime.

    Dawn, I emailed Julie about the thumbprint recipe. She or I will post it in the comments here sometime… IF it’s not a top secret recipe that she can share. :)

    Haha, Shannon, hopefully you’re not waiting till 11:59 p.m. :p

    Cheryl, yeah, you DO need to do this! It’s so fun!… you mass-produce a bunch of cookies and then bring home a beautiful assortment!

    Rosalyn, they’re not that far away! Stop in and I’ll let you have your pick! :)

    Jan, I got them at the local bulk foods store. We oughta dip some at New Years… Northwood Co Mkt might have some. Or really, any pretzel would work. :) I was wishing I’d have gotten sprinkles to put on them before the choc hardened, but while I was doing them was a poor time to think of that!

  18. Kay on December 15th, 2010 6:53 am

    Dawn,
    Here is the thumbprint cookie recipe, complete with helpful sidenotes, from Julie:

    Thumbprint Cookies

    2/3 cup sugar
    1 cup butter
    1/2 tsp. vanilla
    Combine and beat a couple min.
    Add: 2 cups flour
    Shape into balls. (I used a cookie scoop)
    (I flattened the balls a little with a glass that has a flat bottom before indenting them) Indent with thumb or round 1/2 tsp. Fill with 1/4 tsp. (heaping) Raspberry jam. Bake at 350* 14-18 min. just till brown; don’t overbake. Cool. Drizzle with glaze. (ziploc bag worked great)
    Double batch = approx. 3 1/2 dozen
    I baked them 14-15 min.
    Glaze: 1 cup powdered sugar
    1 1/2 tsp. vanilla
    2-3 tsp. water

    Let us know how they turn out! Mmmmm, I think I’ll go eat one of these for breakfast! :)

  19. Michelle on December 15th, 2010 7:45 am

    Oh yum! I want a chocolate crinkle or two. I’ve never made them but whenever I see them somewhere else I scarf up as many as I dare without being socially kicked out. :) And then after another cup of coffee, I’d like a peanut butter cookie dipped in chocolate.

  20. Lanita on December 15th, 2010 8:20 am

    Hard to choose between the red velvet sandwich cookies or the chocolate dipped pb cookies. They all look so yummy and festive.

  21. Sheila on December 16th, 2010 10:37 am

    I have to admit my mouth did fall open when I saw a post from kitchen scrapbook. :-) The timing is really good, too, because I have a bunch of Christmas cookies sitting out on my table, so I can go fulfill the cookie/candy craving that you just gave me. :-) Although, the ones on my table certainly aren’t as good looking as yours here. They all look so nice! I would have a hard time selecting just one, but maybe I’d go for the O’Henry bars. Maybe you’ll bring some along to WI? :-)

  22. Dawn Landis on December 16th, 2010 7:30 pm

    Thanks Kay for the speedy “delivery” of the Thumbprint recipe! I’m anxious to try it!

  23. Leah Anderson on January 15th, 2011 12:58 pm

    Wow these treats look awesome! Where on earth do you find the time? Ive been reading your blog for about a year & love it! Im originally from NW Ohio now living in NC. Love your blog!