Recipes and Cooking Ideas for Homemakers and Amateur Cooks
 

4th of July Flag Watermelon Bowl

Probably most of you fit into 2 categories: rolling your eyes at all the red, white, and blue food and having “just grill me a juicy brown cheeseburger!” type of thoughts OR looking for red, white, and blue food ideas because you’re hosting or taking food to a 4th of July party.
This post is for the latter category. ????
If you want a cheeseburger, read this post instead (hmmm, not a bad idea actually, after looking at it to put the link here, makes me kind of hungry for a cheeseburger now!).

I bought a watermelon the other day. Among a few other fruits. It’s summer. I think there’s a rule that you need to have fruit on hand at all times during the summer. Or maybe it’s just a personal preference.
With the 4th of July coming up, I was also trying to think of something 4th of July-ish to make, just because I like excuses to play with food… ha. I always think of raspberries or strawberries (red), bananas (white), and blueberries (blue) when I make patriotic food. I wanted something different, and that’s when I thought of my watermelon I had just got. Watermelon actually has 2 of those colors! So, anyway, I ended up making a flag in the rind and used the watermelon for a fruit salad bowl.
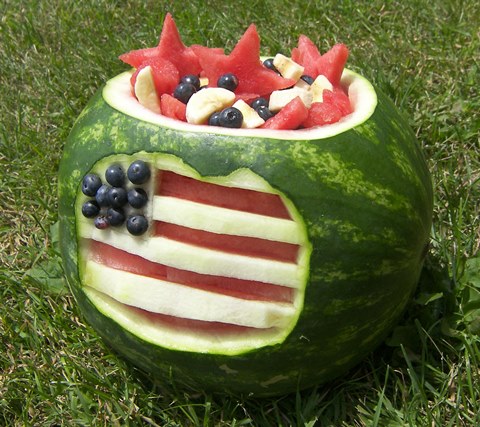
4th of July flag watermelon bowl

I’ll show you how I did it. I’m sure this has been done before and there might be a better way, but this way was easy and quick. It was quick because I’m not a perfectionist. ????

Slice off an area of green, the size you want your flag to be. Just a thin slice, you don’t want to go deep enough to see any red! Not to sound mom-ish or anything, but be careful with this step! The rind is tough and slippery and while I was doing it, my knife slipped aaaaaaaand… I’m currently sporting a cut on my thumb from it.

Next, section off a box in the upper left corner for the star section. Then cut stripes. Slice underneath the stripes. Where the red stripes will be, cut the ends and you’ll be able to lift the white rind out and tada! red stripe.
I know, I had to cut off a white stripe so I could get my knife in there, then I just secured it back on with toothpicks.
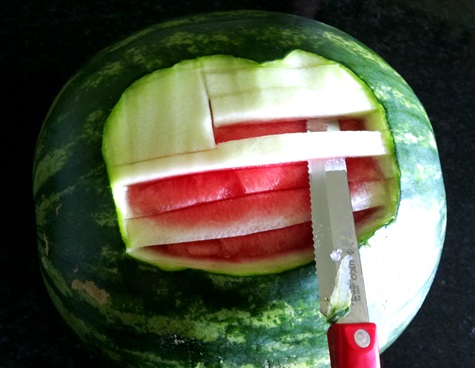
4th of july flag watermelon bowl1

For the star section, I cut divots with the end of a vegetable peeler and then stuck blueberries in… some of them tucked snugly in and some of them had to be pinned in with a toothpick.
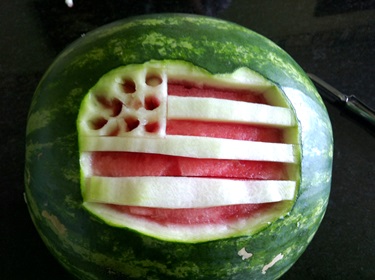
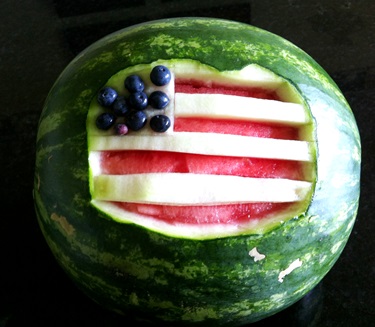
4th of july flag watermelon bowl2

4th of july flag watermelon bowl3

And there you go, a patriotic watermelon. :)

To make a bowl, cut a thin slice off of the bottom so it has a flat spot to sit on.
Scoop out the watermelon (but don’t get too close to the back of the flag, it needs to stay solid red there).
Now, fill your homemade festive American bowl with fruit salad.
It could be any fruit mixture… I just added blueberries and bananas to the watermelon to keep it red, white, and blue, and cut a few stars out of some watermelon just for fun.
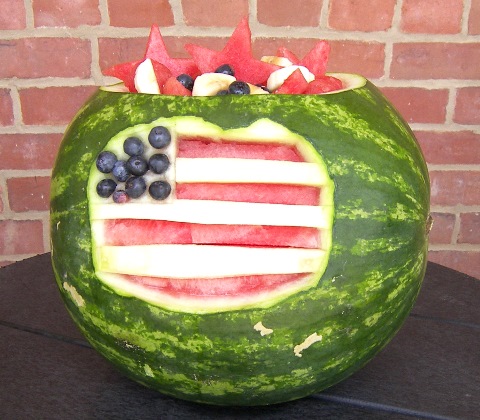
4th of july watermelon bowl

Comments

One Response to “4th of July Flag Watermelon Bowl”
  1. Jan on August 8th, 2014 4:25 pm

    That is so cool! I know I’m a month behind, but it’s still cool! I want to do that sometime when I get big! :-)

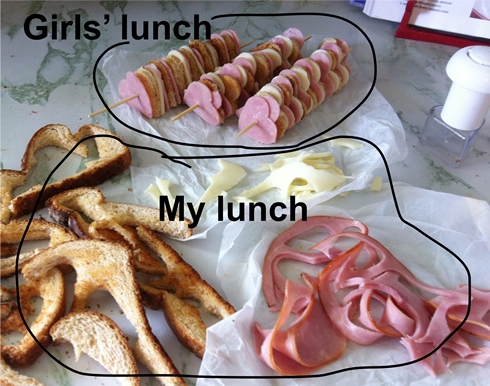
Because I’m too cheap to give it to the dog

This happens pretty often. I hope when they have kids they have to eat ugly food sometimes too. ????

girls lunch my lunch

Comments

3 Responses to “Because I’m too cheap to give it to the dog”

  1. Shannon on June 25th, 2014 10:15 pm

    lol. At least they loved theirs! :)

  2. Rosanne on June 26th, 2014 6:49 am

    Aww, what a sweet mom you are. They will rise up and call her blessed!

  3. Nonna on March 27th, 2015 3:12 pm

    So … take the scraps and make them into a savory bread pudding by chopping them all up and pouring egg mixed with milk over it then topping with more cheese if you want. Bake 20 minutes and yours is BETTER than theirs.

A Step-By-Step of How To Have Your 8-yr-Old Make Dinner

Posted on June 14, 2014
Filed Under Cooks in Training, Easy meals

It’s easier than you think. In fact, Tiffany did it because I had another project going. My project was in the kitchen, so I was right there the whole time and pretty much just talked dinner into existence. :) That’s a lot different than how it used to be. It used to be that I wouldn’t let them cook unless I had my schedule cleared and plenty of time. And then my main job was damage control and cleaning up messes as fast as they made them. So, I’m here to say that there. is. hope. for little cooks to get trained. :)

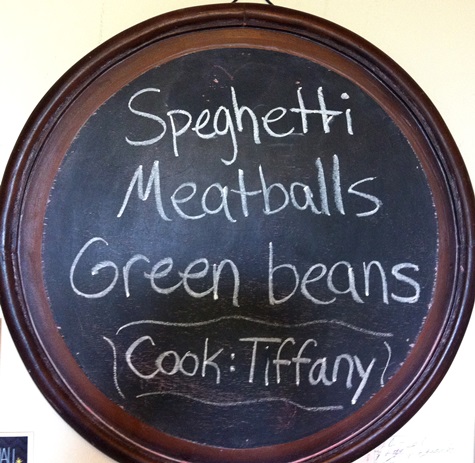
tiff meal menu

So, here we go, a spaghetti & meatballs meal. I only have 2 pictures because I was busy doing other stuff.

Step # 1. Lower your standards. This is going to be a simple meal. Nothing gets mixed into the meat, for example. And there’s no garlic bread. She did want to get all fancy shmancy with the Parmesan cheese, though.

Step 2. Have a little lesson on how to turn the correct burners on on the stove (I actually thought Tiffany would know this, but she didn’t! I guess either I did it for her before, or they’re not born knowing this stuff.) So, we had a little lesson on how the “map” under each control matches the stovetop layout.

3. Have her get everything out: Spaghetti, kettle, frying pan, lb of burger, jar of pasta sauce, salt, Italian seasoning, canned green beans, bowl for green beans. That’s it.

4. Tell her to fill the kettle half full of water, sprinkle in some salt, put it on the stove, and turn the burner on Hi.

5. Tell her to put the frying pan on the biggest burner, turn it to 5, then take the burger and shape little balls and put them in the pan.
I had her use the stovetop frying pan even though I like the electric better… here’s why: the electric one has legs and a bit higher of sides, so it’s several inches taller and I thought she’d have a hard time comfortably seeing into it.
And it’s always good when a cook is able to see into her frying pan.
I had her fry instead of bake them because she hasn’t mastered the thing of getting stuff in and out of the oven yet, without burning her arm somewhere between her wrist and her armpit. She wants a pair of mitten hot pads that go all the way up her arms. Seriously, she does.  

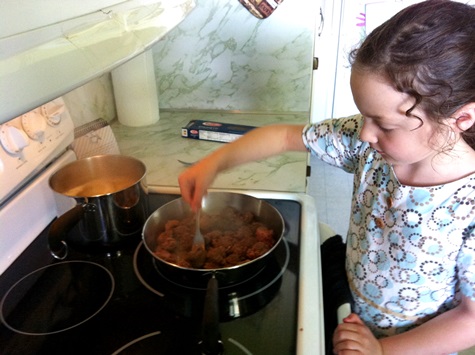
6. The water was boiling by the time she was done making the meatballs, so I told her to put the spaghetti in and stir it a bit. Then flip the meatballs and to just kind of keep flipping them until no more pink was showing.

tiff meal cooking

7. The meatballs and the pasta were done around the same time, so I told her to turn the burners off and I helped her drain the fat off the meatballs, and then she sprinkled them with salt and Italian seasoning, dumped the pasta sauce over them, and turned the burner to Low.

8. Time to dump the beans into the bowl and microwave them for 2 minutes.

9. So now the beans are heating, the spaghetti is holding, and the meat is simmering in spaghetti sauce. Time to set the table, including getting out her beloved Parmesan grater and a chunk of Parmesan, and pour water.

10. Now everything is done. She was able to drain the spaghetti herself by dumping it into the colander in the sink. Time to dish up. Aaaaand grate Parmesan over everything. And call everyone to the table.

Thank you for making dinner, Tiffany. It was good!!

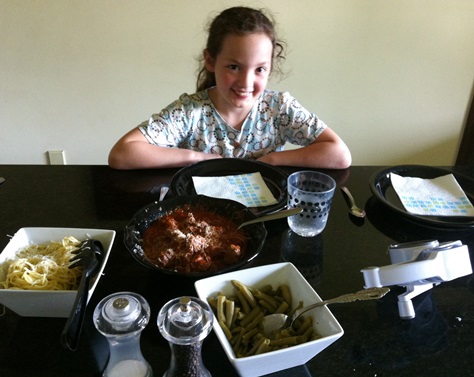
tiff meal done

She held the Parmesan grater hostage and the minute we dished food onto our plates, she was magically standing beside us saying, in what we call ‘the fancy lady voice’, “Would you like some Parmesan cheese?” and then we’d answer, with exaggerated politeness, “yes, I would, please” and she’d reach in and grate.

Comments

3 Responses to “A Step-By-Step of How To Have Your 8-yr-Old Make Dinner”

  1. Liz on June 14th, 2014 1:08 pm

    Kaitlyn thought this post was especially for me. :) Think she was trying to hint?

  2. Kay on June 14th, 2014 2:48 pm

    Ha, she’s so subtle. :)

  3. Shannon on June 14th, 2014 6:12 pm

    You go Tiffany! As soon as her cooking class is over I’ll be sending my girls down! :)